Office 365: Multi-Factor Authentication (MFA) setup for Users
MFA helps secure user sign-ins for cloud services beyond just a single password. With MFA for Office 365, users are required to acknowledge a phone call, text message, or app notification on their smart phones after correctly entering their passwords. They can sign in only after this second authentication factor has been satisfied.
To enable MFA for a User we need to complete a few steps:
Step 1: Sign-in to the Office 365 Portal as a Global Admin.
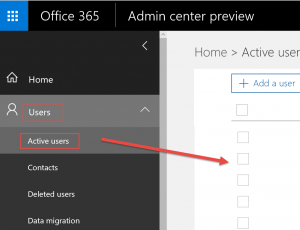
In the example we are using the Admin Center Preview, Click the drop-down arrow next to Users and then click on Active Users.
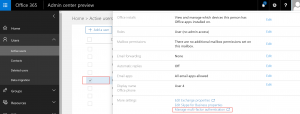
I chose User4 as my test, once you have selected the user the properties will come up, scroll down till you see the option to Manage Multi-Factor Authentication. Click on the link.
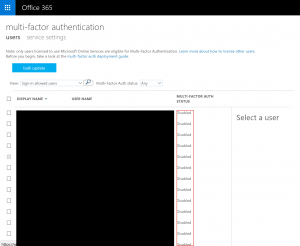
Once you click the link you will be taken to the multi-factor authentication screen as shown below:
As shown above, none of my users have this enabled by viewing the status highlighted in red.
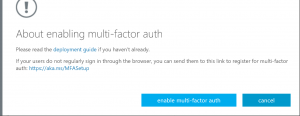
Once you select your user/s and under the quick steps option select the Enable button, you will be presented with the Window above. Click enable multi-factor auth.
You will get a window that it is in progress and then get presented with the final window of it being successful as shown above. You can click close.
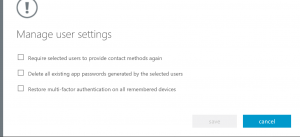
The status will now show enabled for User4, you can now click on Manage User Settings and can complete the following:
You can enable more than 1 user (Bulk Update) as well. Just take note that a Global Admin with this enabled rights seem to become limited when performing tasks on the Portal.
