Xamarin Forms Grid Container
In this article we’ll learn about Grid in Xamarin Forms. Basically grid is used for arranging views into rows and columns. Although StackLayout is good enough but when we want to create some complex layout then it’s better to use Grid. If you ever see a graph paper then it’s easy for you to learn the Grid in xamarin forms.
So before going into detail you’ve to learn three more important things that’s RowDefinitions and ColumnDefinitions and Height and Width of these two.
After creating the grid we first define its rows and latter define the height of rows after this we’ll need to define a column and width of this column.
Let’s look at the following code.
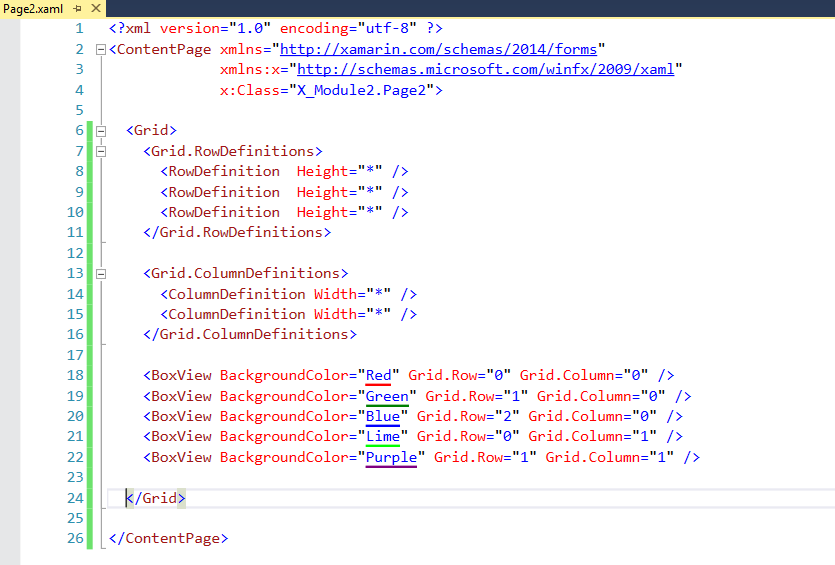
<Grid>
<Grid.RowDefinitions>
<RowDefinition Height="*" />
<RowDefinition Height="*" />
<RowDefinition Height="*" />
</Grid.RowDefinitions>
<Grid.ColumnDefinitions>
<ColumnDefinition Width="*" />
<ColumnDefinition Width="*" />
</Grid.ColumnDefinitions>
</Grid>
The important point here is that you’ll see a Height="*" and Width="*" .Don’t confuse with these asterisk (*).It means specifying one row or a column with Height="*" or Width="*" will cause it to fill the available space.
Now let’s add four different BoxView controls in xaml page and give the reference of these Grid.Row and Grid.Columns.The important point to remember is that we’ll set Grid.Row = 0 and Grid. Column = 0 for first row and first column .In precise Rows and Columns starts with 0 not 1 just like arrays.
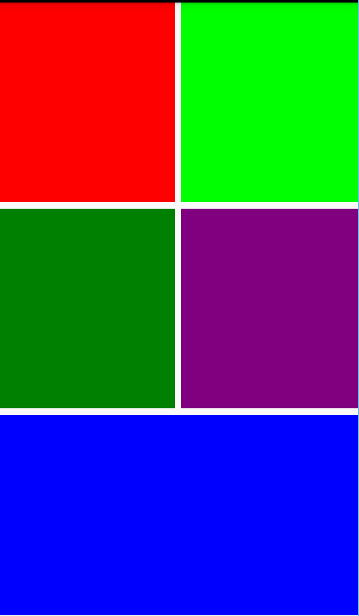
Let’s try to run it and see what’s happening on the device screen. I’ll test it on Android Device. The result will be the same on iOS as well as Windows Device family.
It makes sense but we’ve space left for one BoxView .What if we want to expand the Blue BoxView then we’ll add Grid.ColumnSpan="2" and it will expand it to two Columns the same concept applies with Rows.
Hope it’ll makes sense. Let’s run it one more time and try to figure out what’s actually happening.


