Azure SQL Database: Getting Started
In this article, we will go step by step to create SQL Server and database on Microsoft Azure. Microsoft Azure SQL Database (formerly SQL Azure, SQL Server Data Services, SQL Services, Windows Azure SQL Database) is a cloud-based service from Microsoft offering data-storage capabilities. The aim is for users to just communicate with a T-SQL endpoint rather than managing database storage, files, and high availability. Current versions of Azure SQL Database share a common code base with Microsoft SQL Server. This database engine allows users to make relational queries against stored data, which can either be structured or semi-structured and unstructured documents. SQL Database features querying data, search, data analysis and data synchronization.
High availability is provided by storing multiple copies of databases, business continuity and disaster recovery with backups and geo-replication, elastic scale and rapid provisioning. It has built-in data protection and security features.
Prerequisites
- Microsoft Azure Subscription (MSDN subscribers or sign up for one month free trial)
You will Learn
- How to create a SQL Server
- How to create a SQL Database
Getting Started – SQL Database
Step 1: Navigate to Azure Portal and sign in with Microsoft Azure Credentials
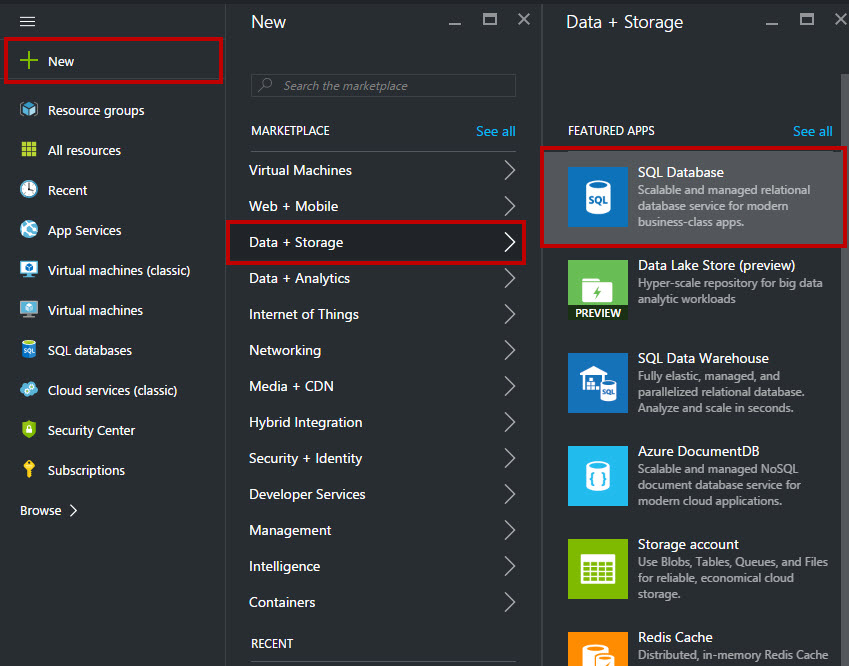
Step 2: Click +New -> Data + Storage -> SQL Database
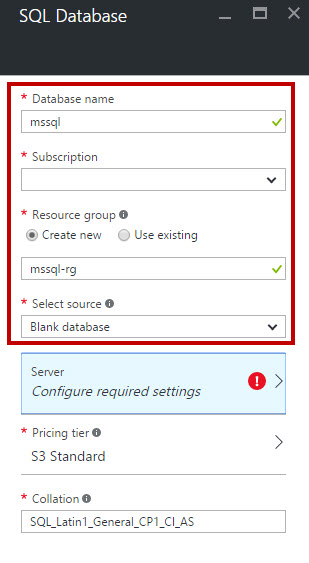
Step 3: Enter SQL Database Name, choose Subscription, Resource Group: Create New or Use Existing
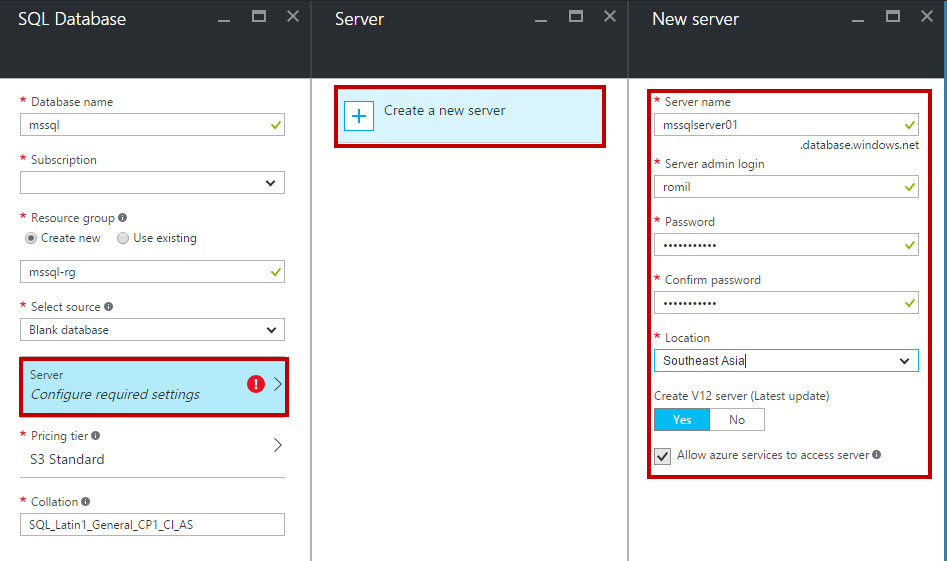
Step 4: Now time to create Server for a database. Click create a new server option. Again Enter Server Name, Server Admin, Password, Location.
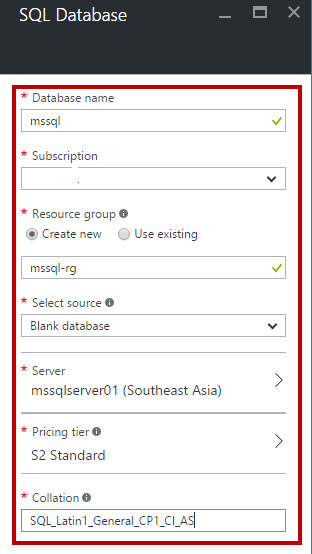
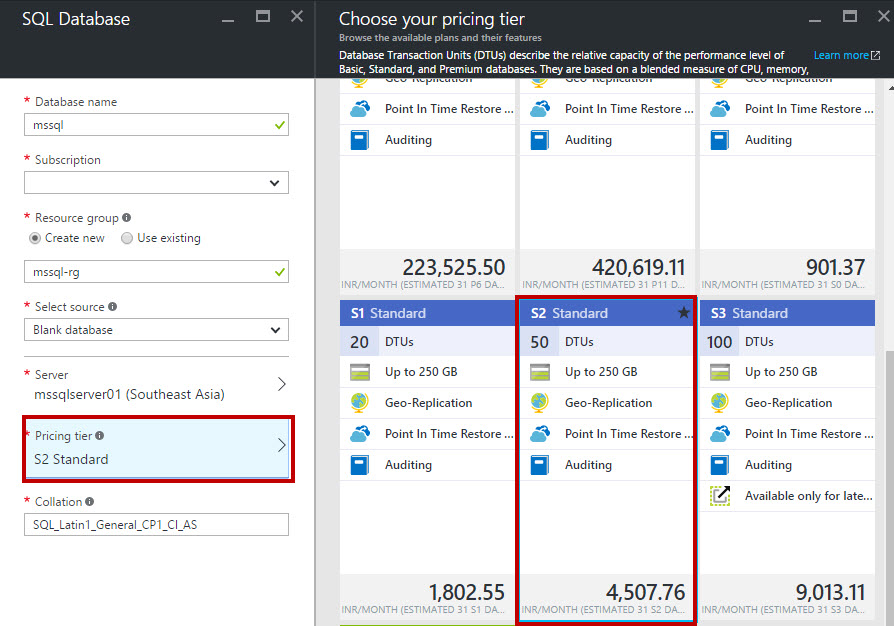
Step 5: Choose Pricing Tier from Basic, Standard or Premium
**
Step 6:** Summary of SQL Database options available below:
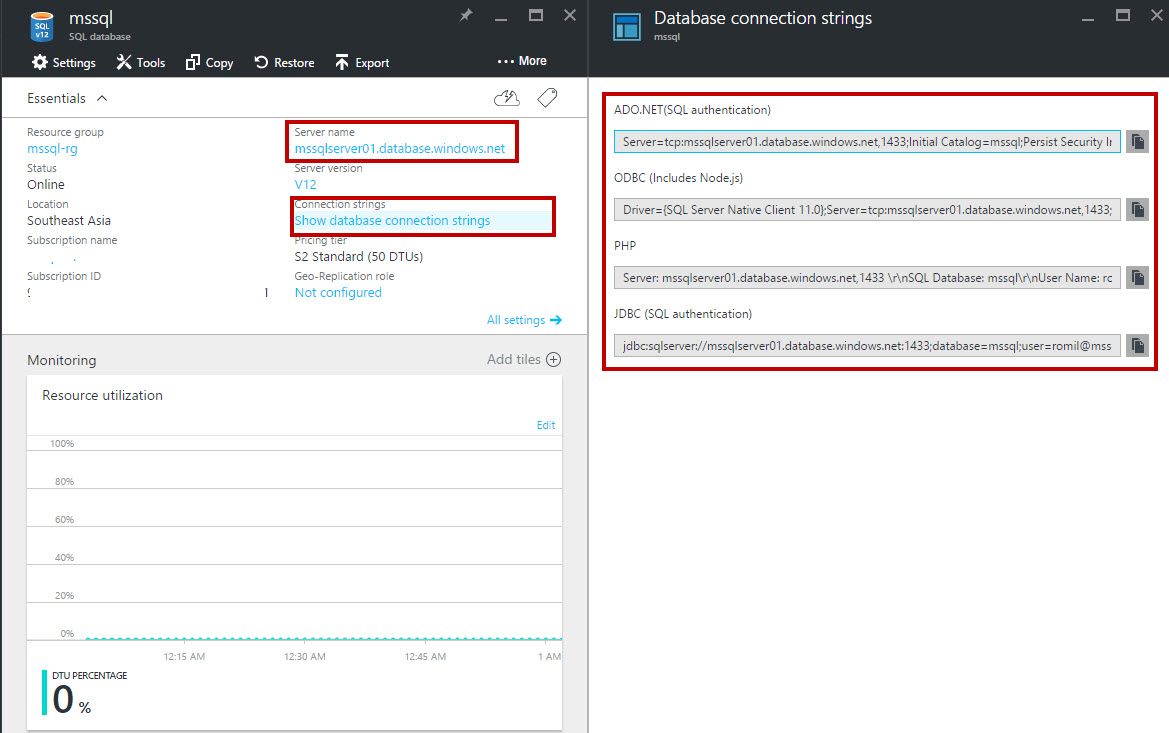
Step 7: Wait a few seconds to create SQL Database on Azure. To use SQL Database in an application it requires a connection string. All other database connection string are available such as ADO.NET, ODBC, PHP, JDBC.
Congratulations you have successfully learned how to get started with SQL Database on Microsoft Azure!
