Microsoft Azure: Deploying Windows Server 2016 Nano Server
1. Introduction
In this article, we will demonstrate how to utilize Azure Resource Manager (AzureRM) PowerShell module to deploy a Windows Server 2016 Nano Server in a new AzureRM Resource Group environment.
2. Deployment Requirements using PowerShell
In order to begin the deployment using PowerShell, we will requires the followings:
- Possess a Microsoft Azure Subscription
- PackageManagement PowerShell Modules Preview
- NuGet Provider from NuGet
- AzureRM PowerShell Module from PowerShell Gallery
3. Getting Started on Microsoft Azure with AzureRM PowerShell
In this section, we will demonstrate on how to prepare for a deployment of an Azure virtual machine in to Microsoft Azure using Azure Resource Manager (AzureRM) PowerShell.
3.1. Installing PackageManagement
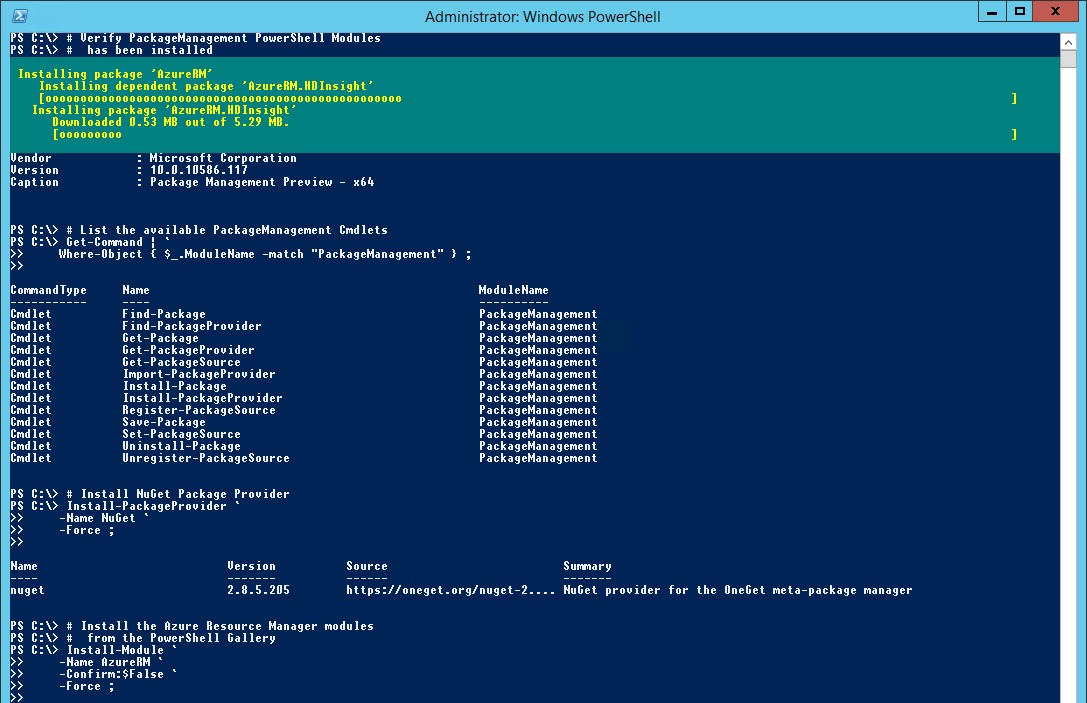
In this section, we will demonstrate on how to download and install the PackageManagement on a Windows Server 2012 R2 management server that we will be using for the deployment to Microsoft Azure.
# Get Operating System Version(Get-WmiObject ` -Class Win32_OperatingSystem).Caption ;
# Get PowerShell Version$PSVersionTable ;
# Create a Temp folderNew-Item ` -Path "C:\Temp" ` -Type directory ;
# Download PackageManagement PowerShell Modules# to C:\Temp folderInvoke-WebRequest ` -Uri "https://download.microsoft.com/download/C/4/1/C41378D4-7F41-4BBE-9D0D-0E4F98585C61/PackageManagement_x64.msi" ` -OutFile "C:\Temp\PackageManagement_x64.msi" ;
# Install PackageManagement PowerShell ModulesStart-Process ` -FilePath "C:\Windows\System32\msiexec.exe" ` -ArgumentList "/i C:\Temp\PackageManagement_x64.msi /qn /l* C:\Temp\PackageManagement_x64_installation.log" ` -PassThru ` -Wait ;
# Verify PackageManagement PowerShell Modules # has been installedGet-WmiObject ` -Class Win32_Product | ` Where-Object { $_.Name -match "Package Management Preview - x64" } ;
# List the available PackageManagement CmdletsGet-Command | ` Where-Object { $_.ModuleName -match "PackageManagement" } ;
3.2. Installing NuGet Package Provider
In order to for Windows Server 2012 R2 PowerShell 4.0 to obtain a rich content of packages from NuGet, we will demonstrate how to actually obtain the NuGet provider and get the Install-Module Cmdlet from Windows PowerShellGet Module.
# Install NuGet Package ProviderInstall-PackageProvider ` -Name NuGet ` -Force ;
3.3. Installing AzureRM PowerShell Module
Once we have Windows PowerShellGet Module installed, we can use the Install-Module Cmdlet to automatically download and install the AzureRM PowerShell Module.
# Install the Azure Resource Manager modules# from the PowerShell GalleryInstall-Module ` -Name AzureRM ` -Confirm:$False ` -Force ;
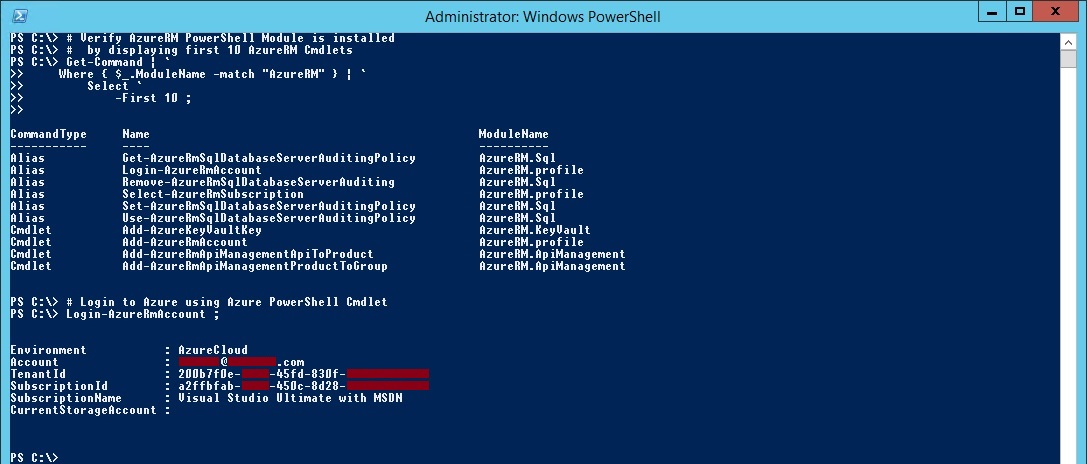
# Verify AzureRM PowerShell Module is installed# by displaying first 10 AzureRM CmdletsGet-Command | ` Where-Object { $_.ModuleName -match "AzureRM" } | ` Select-Object ` -First 10 ;
4. Getting Started on deploying Nano Server using AzureRM PowerShell
With AzureRM PowerShell module installed, we can now create a new Resource Group, Virtual Network and our first Nano Server virtual machine using the Nano Server image in Microsoft Azure.
4.1. Logging into Microsoft Azure using AzureRM PowerShell
Firstly, we will have to login to Microsoft Azure using AzureRM PowerShell.
# Login to Azure using Azure PowerShell Cmdlet Login-AzureRmAccount ;
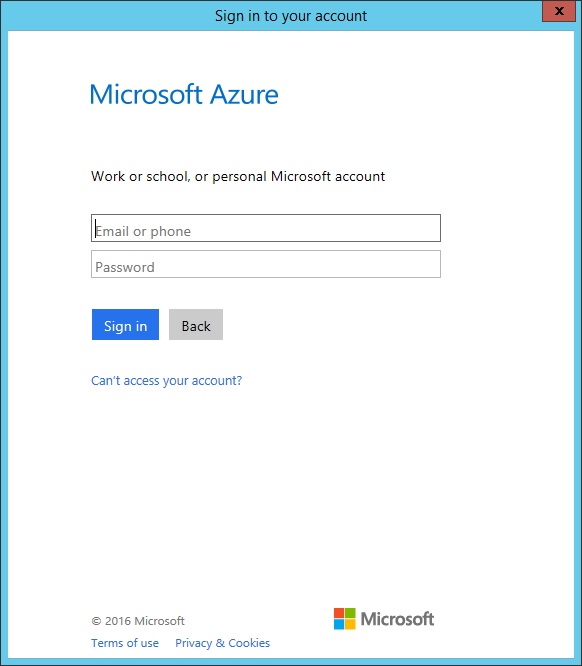
Once you hit the return key, a "Sign in to your Account" for Microsoft Azure dialog box will prompt you to input your Microsoft Azure credential and you will have to input a valid Microsoft Azure credential to login to Microsoft Azure using AzureRM PowerShell.
4.2. Selecting a Microsoft Azure Subscription using AzureRM PowerShell
After you have successfully login to Microsoft Azure, you will have to select a Microsoft Subscription that you will like to work on. If you only have one Microsoft Azure Subscription, you can skip this and carry on.
# Get a list of Azure Subscriptions Get-AzureRmSubscription ;
# Select a Azure Subscription to use Select-AzureRmSubscription ` -Subscriptionid "GUID of subscription" ;
4.3. Creating a new Resource Group using AzureRM PowerShell
Once we selected the Microsoft Subscription that we want to work on, we can now create a Resource Group to contain all the related resources together and make our management of the Azure resources a lot easier.
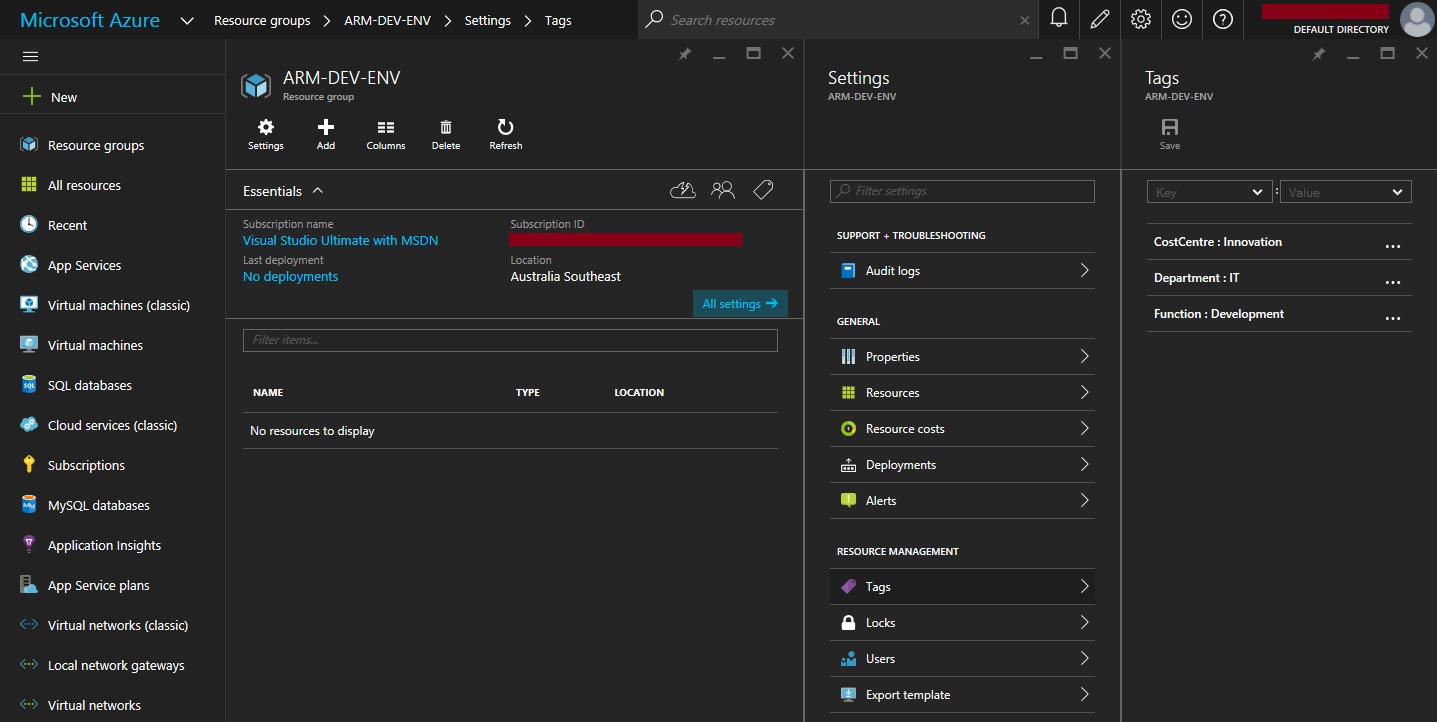
# Create a new Azure Resource Manager Resource Group New-AzureRmResourceGroup ` -Name "ARM-DEV-ENV" ` -Location "Australia Southeast" ` -Tag @{ ` "Department"="IT" ; ` "CostCentre"="Innovation" ; ` "Function"="Development" ; ` } ;
Once the command execution has completed, you can view it from the Azure Portal too.
4.4. Creating a Virtual Network using AzureRM PowerShell
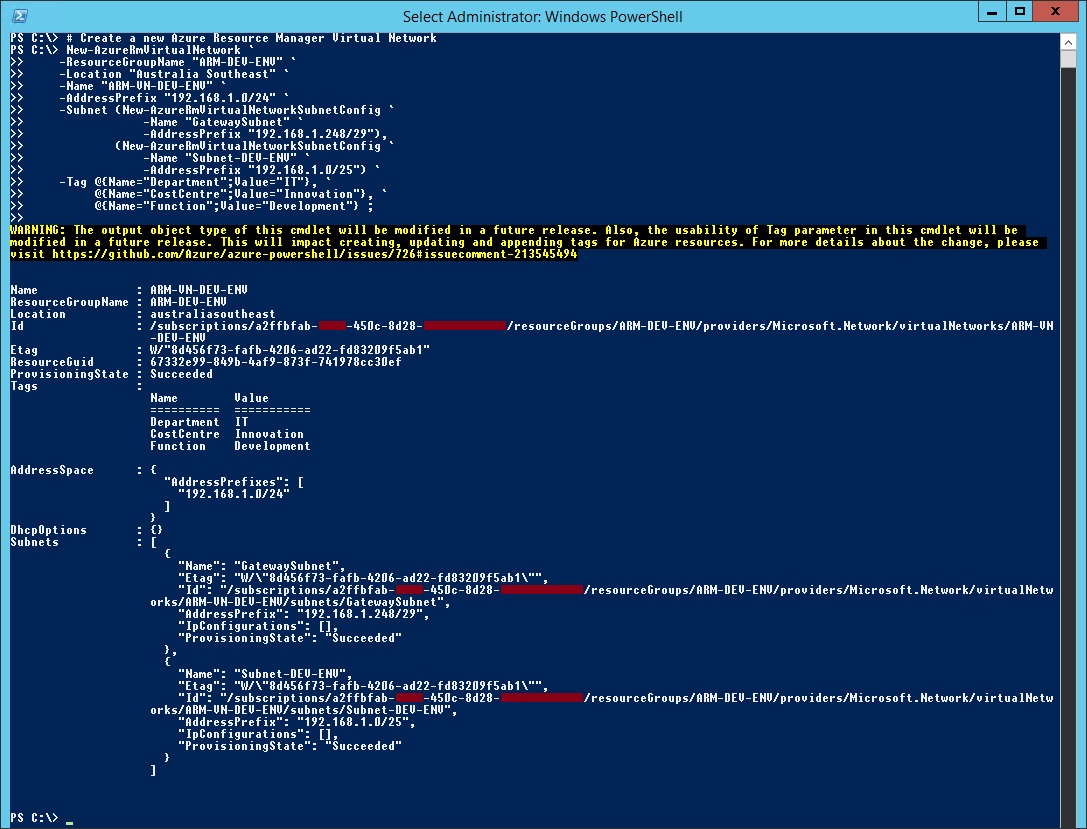
After the Resource Group has been created, we will have to create a virtual network for the resource group in order for our virtual machine to have network connectivity.
# Create a new Azure Resource Manager Virtual NetworkNew-AzureRmVirtualNetwork ` -ResourceGroupName "ARM-DEV-ENV" ` -Location "Australia Southeast" ` -Name "ARM-VN-DEV-ENV" ` -AddressPrefix "192.168.1.0/24" ` -Subnet (New-AzureRmVirtualNetworkSubnetConfig ` -Name "GatewaySubnet" ` -AddressPrefix "192.168.1.248/29"), (New-AzureRmVirtualNetworkSubnetConfig ` -Name "Subnet-DEV-ENV" ` -AddressPrefix "192.168.1.0/25") ` -Tag @{ ` "Department"="IT" ; ` "CostCentre"="Innovation" ; ` "Function"="Development" ; ` } ;
With the command execution completed, you can view it from the Virtual Network in Azure Portal too.
4.5. Requesting a Dynamic Public IP Address using AzureRM PowerShell
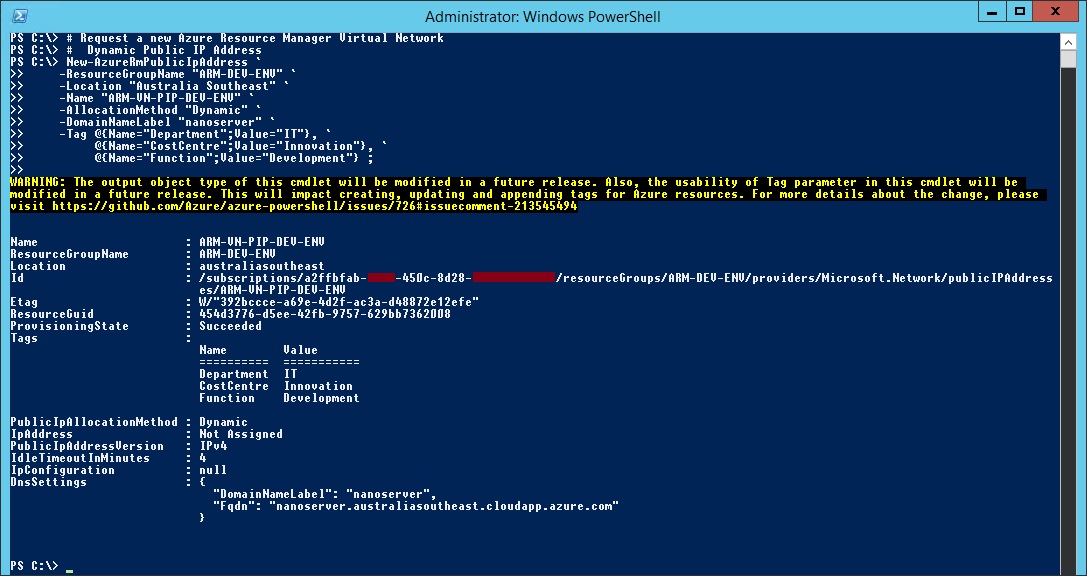
Now, we will request a Dynamic Public IP Address for the Virtual Network.
# Request a new Azure Resource Manager Virtual Network # Dynamic Public IP AddressNew-AzureRmPublicIpAddress ` -ResourceGroupName "ARM-DEV-ENV" ` -Location "Australia Southeast" ` -Name "ARM-VN-PIP-DEV-ENV" ` -AllocationMethod "Dynamic" ` -DomainNameLabel "nanoserver" ` -Tag @{ ` "Department"="IT" ; ` "CostCentre"="Innovation" ; ` "Function"="Development" ; ` } ;
With the command execution completed, you can view it from the Resource Group in Azure Portal.
4.6. Getting a list of available images in Microsoft Azure
In this section, we will demonstrate how we list the amount of available images from the rich image content library in Microsoft Azure before we deploy a virtual machine.
4.6.1. Getting a list of Azure Publisher Name using AzureRM PowerShell
In this example, we can get a list of Azure Publisher Names using AzureRM PowerShell.
# Get a list of Azure Publisher Name that relates# to Microsoft Windows ServerGet-AzureRmVMImagePublisher ` -Location "Australia SouthEast" | ` Where-Object { $_.PublisherName -like "MicrosoftWindowsServer*" } ;
4.6.2. Getting a list of Offering from Publisher using AzureRM PowerShell
In this example, we can get a list of Azure Offerings from the particular Publisher using AzureRM PowerShell.
# Get a list of Microsoft Windows Server offeringGet-AzureRmVMImageOffer ` -Location "Australia SouthEast" ` -PublisherName "MicrosoftWindowsServer" ;
4.6.3. Getting a list of SKUs from Offering using AzureRM PowerShell
In this example, we can get a list of SKUs in the selected Azure Offering from the particular Publisher using AzureRM PowerShell.
# Get a list of Microsoft Windows Server Technical Preview SKUsGet-AzureRmVMImageSku ` -Location "Australia SouthEast" ` -PublisherName "MicrosoftWindowsServer" ` -Offer "WindowsServer" | ` Where-Object { $_.Skus -like "*Technical-Preview*" } ;
With the General Avilability (GA) release of Windows Server 2016, you can list the official Nano Server SKU as below.
Get-AzureRmVMImageSku ` -Location "Australia SouthEast" ` -PublisherName "MicrosoftWindowsServer" ` -Offer "WindowsServer" | ` Where-Object { $_.Skus -like "*Nano-Server" } ;
4.6.4. Getting a list of Versions from the SKU using AzureRM PowerShell
In this example, we can get a list of multiple different versions from the SKU in the selected Azure Offering of the particular Publisher using AzureRM PowerShell.
# Get a list of Microsoft Windows Server 2016 Nano Server# Technical Preview VersionsGet-AzureRMVMImage ` -Location "Australia SouthEast" ` -PublisherName "MicrosoftWindowsServer" ` -Skus "2016-Nano-Server-Technical-Preview" ` -Offer "WindowsServer" ;
With the General Avilability (GA) release of Windows Server 2016, you can list the official Nano Server SKU as below.
# Get a list of Microsoft Windows Server 2016 Nano Server# VersionsGet-AzureRMVMImage ` -Location "Australia SouthEast" ` -PublisherName "MicrosoftWindowsServer" ` -Skus "2016-Nano-Server" ` -Offer "WindowsServer" ;
4.7. Creating a Nano Server Virtual Machine using AzureRM PowerShell
In this section, we will demonstrate two examples on how we deploy a Nano Server virtual machine into Microsoft Azure using AzureRM PowerShell. Example A will be using a break down approach so that we can understand what is required in order to deploy a virtual machine into Microsoft Azure and Example B will be a single line AzureRM PowerShell command using pipeline to deploy a virtual machine into Microsoft Azure.
4.7.1. EXAMPLE A - Create a Virtual Machine configuration
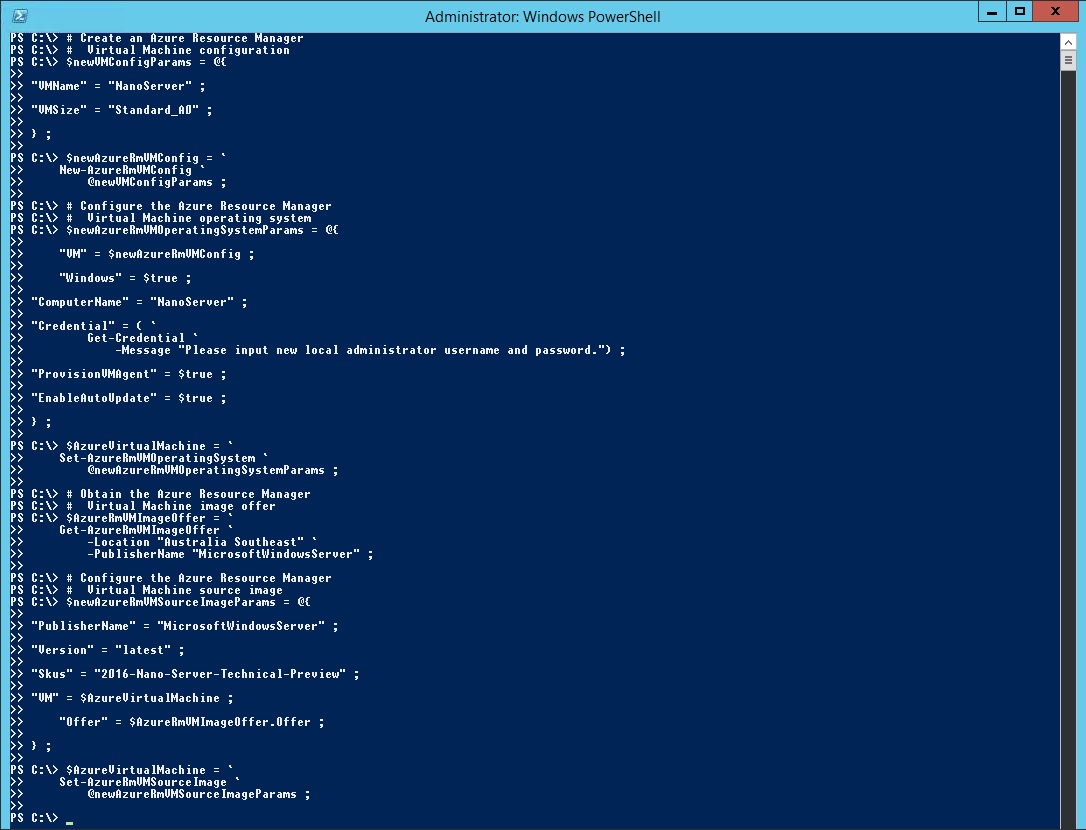
Firstly in EXAMPLE A, we start off to create a virtual machine configuration by defining the virtual machine name and virtual machine size.
# Create an Azure Resource Manager# Virtual Machine configuration$newVMConfigParams = @{ "VMName" = "NanoServer" ; "VMSize" = "Standard_A0" ; } ; $newAzureRmVMConfig = ` New-AzureRmVMConfig ` @newVMConfigParams ;
4.7.2. EXAMPLE A - Set Virtual Machine operating system configuration
Once we defined the basic, we need to define the virtual machine operating system configuration such as whether it is a Windows virtual machine, the computer name, the local administrator username, password and etc.
# Configure the Azure Resource Manager# Virtual Machine operating system$newAzureRmVMOperatingSystemParams = @{ "VM" = $newAzureRmVMConfig ; "Windows" = $true ; "ComputerName" = "NanoServer" ; "Credential" = ( ` Get-Credential ` -Message "Please input new local administrator username and password.") ; "ProvisionVMAgent" = $true ; "EnableAutoUpdate" = $true ; } ; $AzureVirtualMachine = ` Set-AzureRmVMOperatingSystem ` @newAzureRmVMOperatingSystemParams ;
4.7.3. EXAMPLE A - Set Virtual Machine source image configuration
Next, we need to obtain the Azure virtual machine image offering that we will be using for the virtual machine deployment.
# Obtain the Azure Resource Manager# Virtual Machine image offer$AzureRmVMImageOffer = ` Get-AzureRmVMImageOffer ` -Location "Australia Southeast" ` -PublisherName "MicrosoftWindowsServer" ;
After obtaining the virtual machine image offering details, we will configure the virtual machine with image source information and the offering details.
# Configure the Azure Resource Manager# Virtual Machine source image$newAzureRmVMSourceImageParams = @{ "PublisherName" = "MicrosoftWindowsServer" ; "Version" = "latest" ; "Skus" = "2016-Nano-Server-Technical-Preview" ; "VM" = $AzureVirtualMachine ; "Offer" = $AzureRmVMImageOffer.Offer ; } ; $AzureVirtualMachine = ` Set-AzureRmVMSourceImage ` @newAzureRmVMSourceImageParams ;
With the General Avilability (GA) release of Windows Server 2016, you can obtain the official Nano Server image as below.
# Configure the Azure Resource Manager# Virtual Machine source image$newAzureRmVMSourceImageParams = @{ "PublisherName" = "MicrosoftWindowsServer" ; "Version" = "latest" ; "Skus" = "2016-Nano-Server" ; "VM" = $AzureVirtualMachine ; "Offer" = $AzureRmVMImageOffer.Offer ; } ; $AzureVirtualMachine = ` Set-AzureRmVMSourceImage ` @newAzureRmVMSourceImageParams ;
4.7.4. EXAMPLE A - Create Network Interface for Virtual Machine
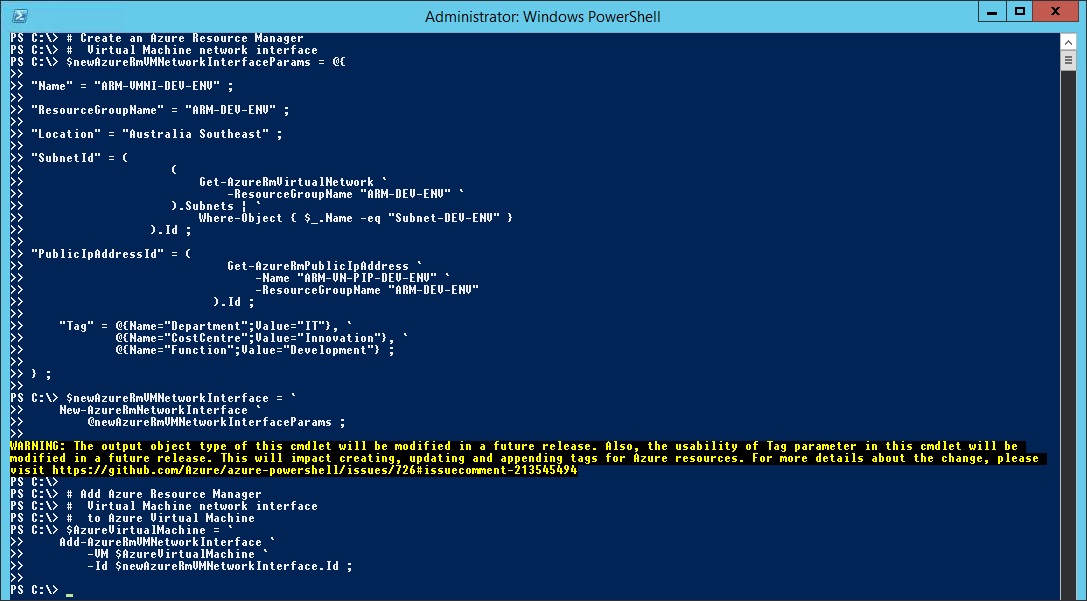
After we have defined the virtual machine operating system configurations, we will have to create a network interface for the virtual machine to be able to communicate within a subnet in the virtual network.
# Create an Azure Resource Manager# Virtual Machine network interface$newAzureRmVMNetworkInterfaceParams = @{ "Name" = "ARM-VMNI-DEV-ENV" ; "ResourceGroupName" = "ARM-DEV-ENV" ; "Location" = "Australia Southeast" ; "SubnetId" = ( ( Get-AzureRmVirtualNetwork ` -ResourceGroupName "ARM-DEV-ENV" ` ).Subnets | ` Where-Object { $_.Name -eq "Subnet-DEV-ENV" } ).Id ; "PublicIpAddressId" = ( Get-AzureRmPublicIpAddress ` -Name "ARM-VN-PIP-DEV-ENV" ` -ResourceGroupName "ARM-DEV-ENV" ).Id ; "Tag" = @{ ` "Department"="IT" ; ` "CostCentre"="Innovation" ; ` "Function"="Development" ; ` } ; } ; $newAzureRmVMNetworkInterface = ` New-AzureRmNetworkInterface ` @newAzureRmVMNetworkInterfaceParams ;
4.7.5. EXAMPLE A - Set Network Interface to Virtual Machine
With the virtual machine network interface for the virtual network created, we will configure the network interface to the virtual machine configuration.
# Add Azure Resource Manager# Virtual Machine network interface # to Azure Virtual Machine$AzureVirtualMachine = ` Add-AzureRmVMNetworkInterface ` -VM $AzureVirtualMachine ` -Id $newAzureRmVMNetworkInterface.Id ;
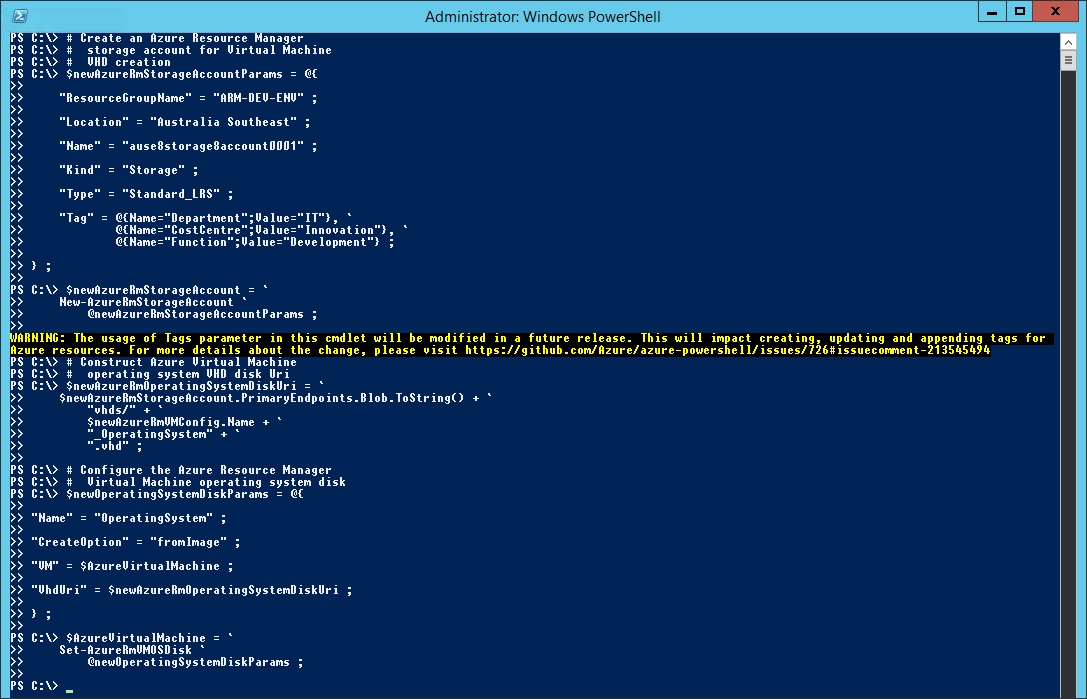
4.7.6. EXAMPLE A - Create a Storage Account for Azure Storage
Before we start defining the virtual machine operating system disk configuration, we will need to create an Azure storage account where virtual machine VHD disk will be stored.
# Create an Azure Resource Manager# storage account for Virtual Machine# VHD creation$newAzureRmStorageAccountParams = @{ "ResourceGroupName" = "ARM-DEV-ENV" ; "Location" = "Australia Southeast" ; "Name" = "ause8storage8account0001" ; "Kind" = "Storage" ; "Type" = "Standard_LRS" ; "Tag" = @{ "Department"="IT" ; ` "CostCentre"="Innovation" ; ` "Function"="Development" ; ` } ; } ; $newAzureRmStorageAccount = ` New-AzureRmStorageAccount ` @newAzureRmStorageAccountParams ;
4.7.7. EXAMPLE A - Construct Virtual Machine VHD URI for Azure Storage
With the Azure storage account created, we will use the storage account information to construct the VHD URI string based on how we want the virtual machine VHD disk be stored or named within the Azure Storage.
# Construct Azure Virtual Machine# operating system VHD disk Uri$newAzureRmOperatingSystemDiskUri = ` $newAzureRmStorageAccount.PrimaryEndpoints.Blob.ToString() + ` "vhds/" + ` $newAzureRmVMConfig.Name + ` "_OperatingSystem" + ` ".vhd" ;
4.7.8. EXAMPLE A - Set Virtual Machine operating system disk configuration
After we constructed the VHD URI string, we will define the virtual machine operating system disk configuration with the VHD URI and configure into the virtual machine configuration.
# Configure the Azure Resource Manager# Virtual Machine operating system disk$newOperatingSystemDiskParams = @{ "Name" = "OperatingSystem" ; "CreateOption" = "fromImage" ; "VM" = $AzureVirtualMachine ; "VhdUri" = $newAzureRmOperatingSystemDiskUri ; } ; $AzureVirtualMachine = ` Set-AzureRmVMOSDisk ` @newOperatingSystemDiskParams ;
4.7.9. EXAMPLE A - Create the Virtual Machine with all the configuration
Now that we have the virtual machine configuration prepared, it is time for us to use the virtual machine configuration to create the virtual machine into Azure.
# Create an Azure Resource Manager# Virtual Machine now$newAzureRmVirtualMachineParams = @{ "ResourceGroupName" = "ARM-DEV-ENV" ; "Location" = "Australia Southeast" ; "VM" = $AzureVirtualMachine ; "Tag" = @{ ` "Department"="IT" ; ` "CostCentre"="Innovation" ; ` "Function"="Development" ; ` } ; } ; New-AzureRmVM ` @newAzureRmVirtualMachineParams ;
4.7.10. EXAMPLE B - Create the Virtual Machine using pipeline
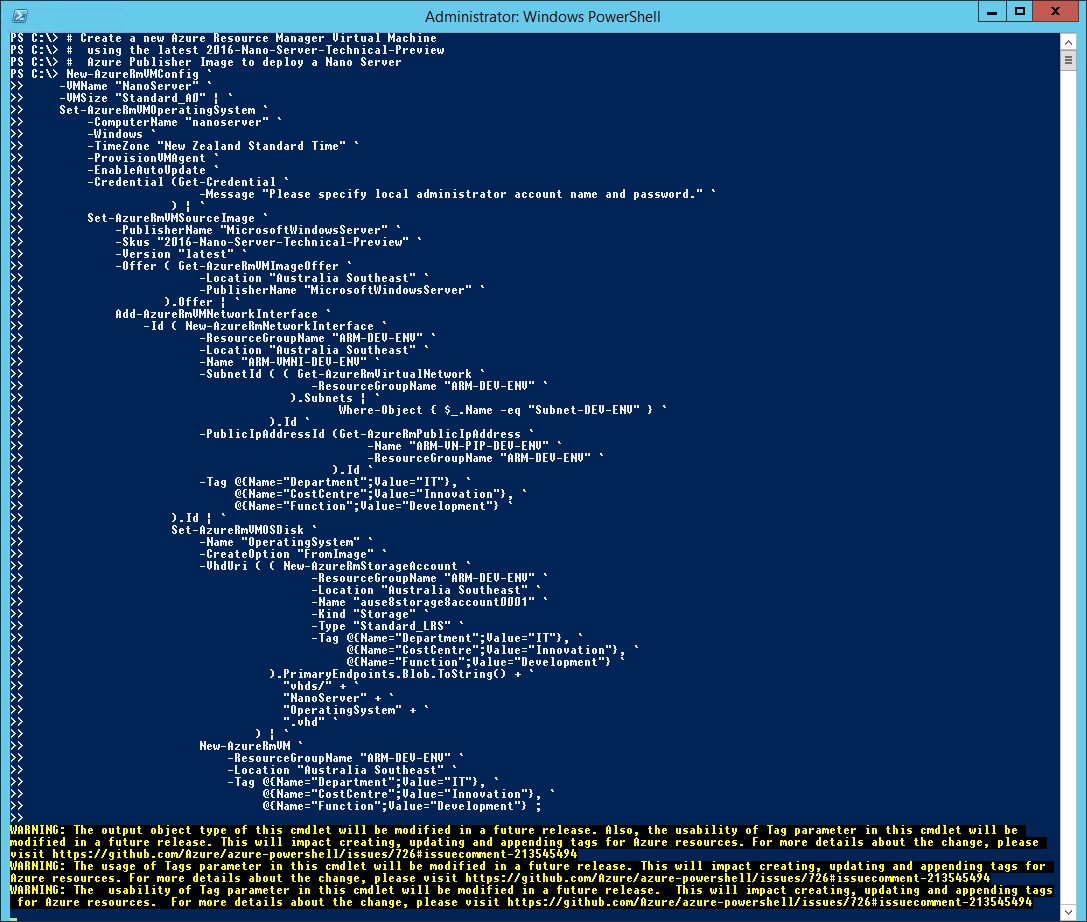
With EXAMPLE B, we will demonstrate how you can use pipeline to create a single line of command to create a virtual machine in Azure.
# Create a new Azure Resource Manager Virtual Machine# using the latest 2016-Nano-Server-Technical-Preview # Azure Publisher Image to deploy a Nano ServerNew-AzureRmVMConfig ` -VMName "NanoServer" ` -VMSize "Standard_A0" | ` Set-AzureRmVMOperatingSystem ` -ComputerName "nanoserver" ` -Windows ` -TimeZone "New Zealand Standard Time" ` -ProvisionVMAgent ` -EnableAutoUpdate ` -Credential (Get-Credential ` -Message "Please specify local administrator account name and password." ` ) | ` Set-AzureRmVMSourceImage ` -PublisherName "MicrosoftWindowsServer" ` -Skus "2016-Nano-Server-Technical-Preview" ` -Version "latest" ` -Offer ( Get-AzureRmVMImageOffer ` -Location "Australia Southeast" ` -PublisherName "MicrosoftWindowsServer" ` ).Offer | ` Add-AzureRmVMNetworkInterface ` -Id ( New-AzureRmNetworkInterface ` -ResourceGroupName "ARM-DEV-ENV" ` -Location "Australia Southeast" ` -Name "ARM-VMNI-DEV-ENV" ` -SubnetId ( ( Get-AzureRmVirtualNetwork ` -ResourceGroupName "ARM-DEV-ENV" ` ).Subnets | ` Where-Object { $_.Name -eq "Subnet-DEV-ENV" } ` ).Id ` -PublicIpAddressId (Get-AzureRmPublicIpAddress ` -Name "ARM-VN-PIP-DEV-ENV" ` -ResourceGroupName "ARM-DEV-ENV" ` ).Id ` -Tag @{ ` "Department"="IT" ; ` "CostCentre"="Innovation" ; ` "Function"="Development" ; ` } ` ).Id | ` Set-AzureRmVMOSDisk ` -Name "OperatingSystem" ` -CreateOption "FromImage" ` -VhdUri ( ( New-AzureRmStorageAccount ` -ResourceGroupName "ARM-DEV-ENV" ` -Location "Australia Southeast" ` -Name "ause8storage8account0001" ` -Kind "Storage" ` -Type "Standard_LRS" ` -Tag @{ ` "Department"="IT" ; ` "CostCentre"="Innovation" ; ` "Function"="Development" ; ` } ` ).PrimaryEndpoints.Blob.ToString() + ` "vhds/" + ` "NanoServer" + ` "OperatingSystem" + ` ".vhd" ` ) | ` New-AzureRmVM ` -ResourceGroupName "ARM-DEV-ENV" ` -Location "Australia Southeast" ` -Tag @{ ` "Department"="IT" ; ` "CostCentre"="Innovation" ; ` "Function"="Development" ; ` } ;
Once the Nano Server has been deployed into Azure, you will be able to see the boot screen as below and we are pretty done with the deployment.
4.8 Creating a Network Security Group using AzureRM PowerShell
In this section with the Nano Server deployment completed, we will demonstrate on how to create a Network Security Group with HTTP TCP 5985 and HTTP TCP 5986 Inbound rules for WS-Management to allow you to perform PowerShell remoting to the Nano Server in Azure.
4.8.1. Create a WS-Management HTTP 5985 Network Security Rule configuration
In this section, we demonstrate how we will create an inbound WS-Management HTTP 5985 Network Security Rule configuration prior to create the Network Security Group in Azure.
# Create an Azure Resource Manager# Network Security Rule configuration# for WS-Management HTTP/5985$newAzureRmNetworkSecurityRuleConfigParams = @{ "Name" = "WSMAN-HTTP-Inbound-Rule" ; "Description" = "Allow Inbound WS-Management HTTP/5985" ; "Access" = "Allow" ; "Protocol" = "Tcp" ; "Direction" = "Inbound" ; "Priority" = "100" ; "SourceAddressPrefix" = "Internet" ; "SourcePortRange" = "*" ; "DestinationAddressPrefix" = "*" ; "DestinationPortRange" = "5985" ; } ; $WSMAN5985Rule = New-AzureRmNetworkSecurityRuleConfig ` @newAzureRmNetworkSecurityRuleConfigParams ;
4.8.2. Create a WS-Management HTTPS 5986 Network Security Rule configuration
In this section, we demonstrate how we will create an inbound WS-Management HTTPS 5986 Network Security Rule configuration prior to create the Network Security Group in Azure.
# Create an Azure Resource Manager# Network Security Rule configuration# for WS-Management HTTPS/5986$newAzureRmNetworkSecurityRuleConfigParams = @{ "Name" = "WSMAN-HTTPS-Inbound-Rule" ; "Description" = "Allow Inbound WS-Management HTTPS/5986" ; "Access" = "Allow" ; "Protocol" = "Tcp" ; "Direction" = "Inbound" ; "Priority" = "101" ; "SourceAddressPrefix" = "Internet" ; "SourcePortRange" = "*" ; "DestinationAddressPrefix" = "*" ; "DestinationPortRange" = "5986" ; } ; $WSMAN5986Rule = New-AzureRmNetworkSecurityRuleConfig ` @newAzureRmNetworkSecurityRuleConfigParams ;
4.8.3. Create a Network Security Group with the Rules configuration
With the network rules configuration prepared, we will create the Network Security Group with those network security rules to allow inbound WS-Management traffic to theResource Group environment.
# Create an Azure Resource Manager# Network Security Group with all # the rules configuration$newAzureRmNetworkSecurityGroup = @{ "ResourceGroupName" = "ARM-DEV-ENV" ; "Location" = "Australia Southeast" ; "Name" = "ARM-DEV-ENV-NSG" ; "SecurityRules" = $WSMAN5985Rule,$WSMAN5986Rule ; "Tag" = @{ ` "Department"="IT" ; ` "CostCentre"="Innovation" ; ` "Function"="Development"; ` } ; } ; New-AzureRmNetworkSecurityGroup ` @newAzureRmNetworkSecurityGroup ;
With the command execution completed, you can view it from the Network Security Group in Azure Portal.
4.8.4. Associate the Network Interface with Network Security Group
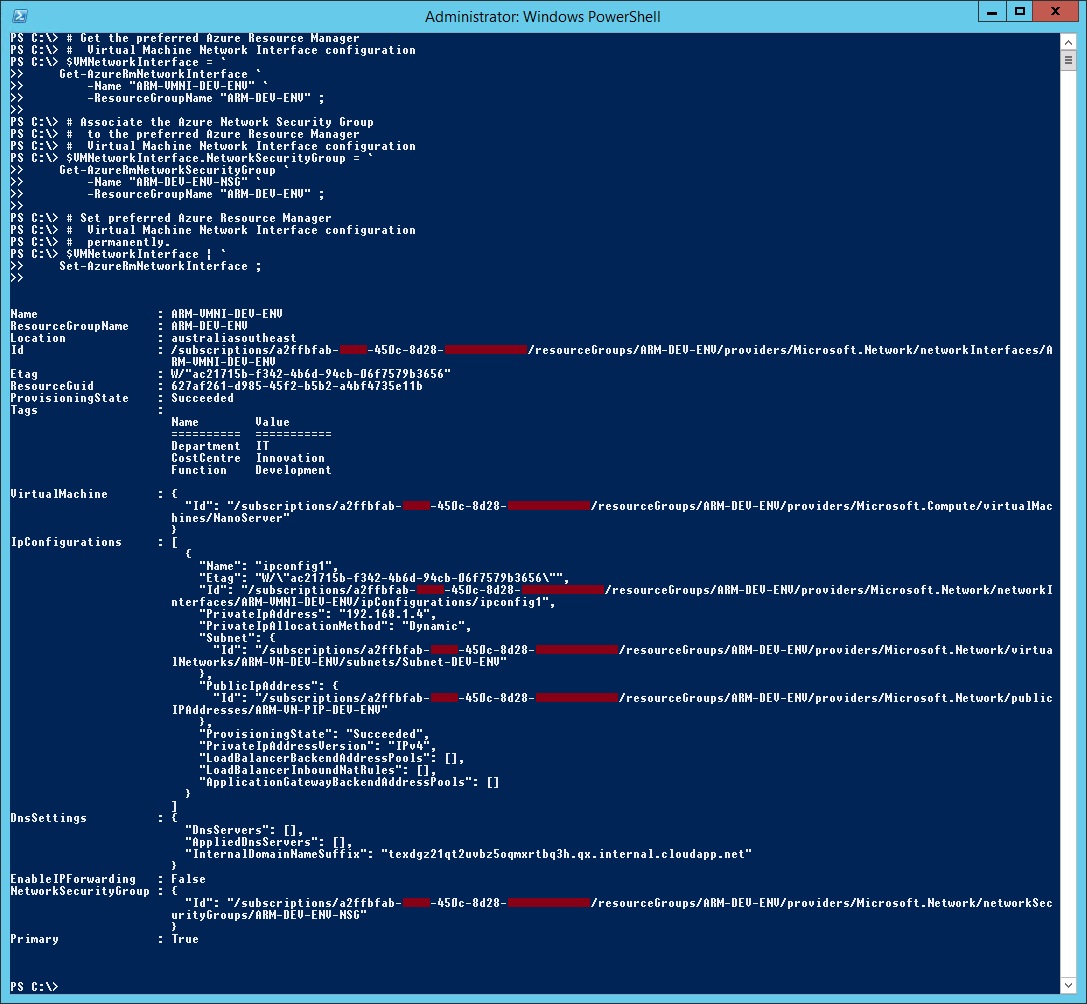
In this section, we will demonstrate on how to associate the Nano Server network interface with the newly created Network Security Group.
# Get the preferred Azure Resource Manager # Virtual Machine Network Interface configuration$VMNetworkInterface = ` Get-AzureRmNetworkInterface ` -Name "ARM-VMNI-DEV-ENV" ` -ResourceGroupName "ARM-DEV-ENV" ;
# Associate the Azure Network Security Group# to the preferred Azure Resource Manager # Virtual Machine Network Interface configuration$VMNetworkInterface.NetworkSecurityGroup = ` Get-AzureRmNetworkSecurityGroup ` -Name "ARM-DEV-ENV-NSG" ` -ResourceGroupName "ARM-DEV-ENV" ;
# Set preferred Azure Resource Manager# Virtual Machine Network Interface configuration# permanently.$VMNetworkInterface | ` Set-AzureRmNetworkInterface ;
With the command execution completed, you can view it from the Network Interface on Network Security Group in Azure Portal.
5. Conclusion
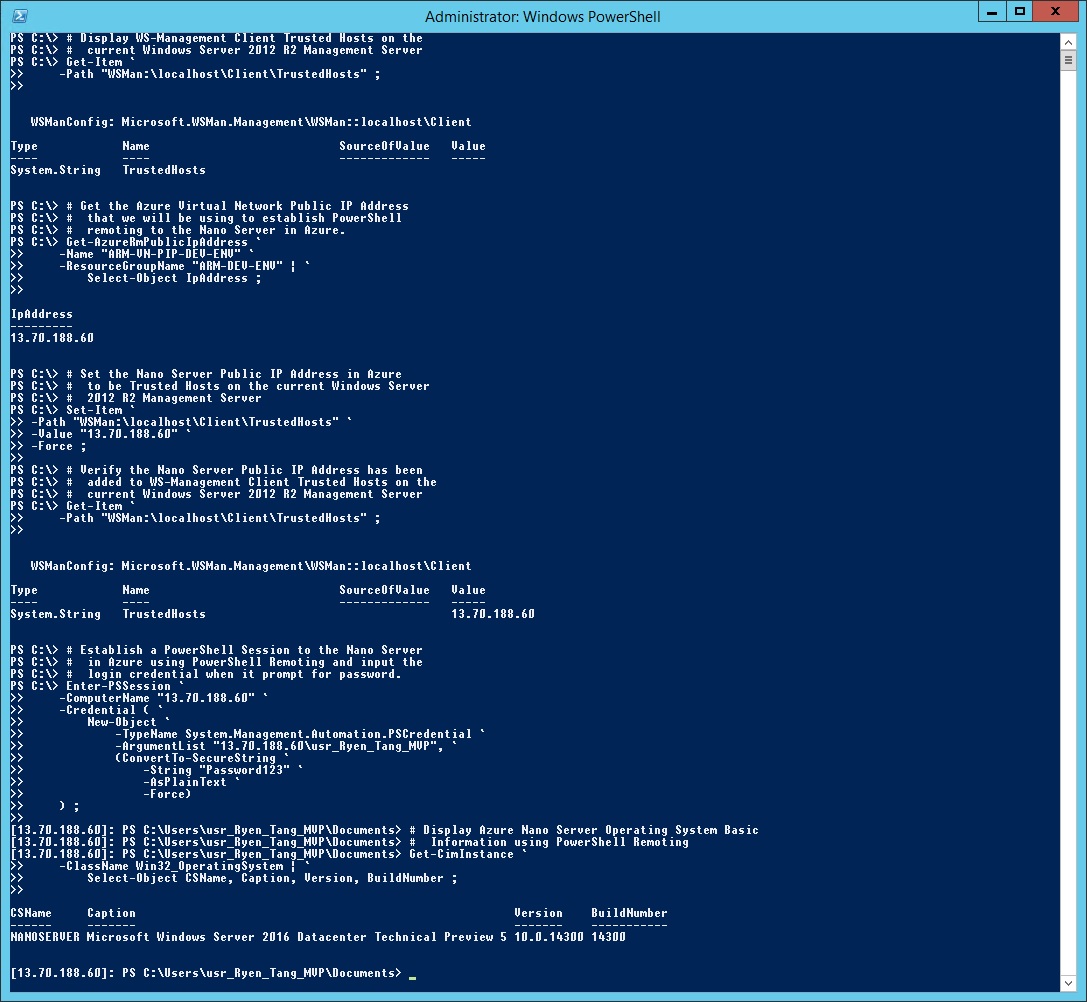
There you have it. You will be able to use PowerShell Remoting to establish a PowerShell Session to the Nano Server in Azure and use the Nano Server that is an operating system born in the cloud for any born in the cloud applications.
# Display WS-Management Client Trusted Hosts on the# current Windows Server 2012 R2 Management ServerGet-Item ` -Path "WSMan:\localhost\Client\TrustedHosts" ;
# Get the Azure Virtual Network Public IP Address# that we will be using to establish PowerShell# remoting to the Nano Server in Azure.Get-AzureRmPublicIpAddress ` -Name "ARM-VN-PIP-DEV-ENV" ` -ResourceGroupName "ARM-DEV-ENV" | ` Select-Object IpAddress ;
# Set the Nano Server Public IP Address in Azure# to be Trusted Hosts on the current Windows Server# 2012 R2 Management ServerSet-Item ` -Path "WSMan:\localhost\Client\TrustedHosts" ` -Value "13.70.188.60" ` -Force ;
# Verify the Nano Server Public IP Address has been# added to WS-Management Client Trusted Hosts on the# current Windows Server 2012 R2 Management ServerGet-Item ` -Path "WSMan:\localhost\Client\TrustedHosts" ;
# Establish a PowerShell Session to the Nano Server# in Azure using PowerShell Remoting and input the # login credential when it prompt for password.Enter-PSSession ` -ComputerName "13.70.188.60" ` -Credential ( ` New-Object ` -TypeName System.Management.Automation.PSCredential ` -ArgumentList "13.70.188.60\usr_Ryen_Tang_MVP", ` (ConvertTo-SecureString ` -String "Password123" ` -AsPlainText ` -Force) ) ;
# Display Azure Nano Server Operating System Basic # Information using PowerShell RemotingGet-CimInstance ` -ClassName Win32_OperatingSystem | ` Select-Object CSName, Caption, Version, BuildNumber ;
6. Reference
- Microsoft Blogs - Introducing PackageManagement in Windows 10 by Xumins
- PowerShell Gallery - Get Started with the PowerShell Gallery
- Microsoft Azure Documentation - Create a Windows VM using Resource Manager and PowerShell by David Murray
- Microsoft Azure Documentation - How to install and configure Azure PowerShell by Corey Plett
- Microsoft Azure Documentation - Using Azure PowerShell with Azure Resource Manager by Tom FitzMacken
- Microsoft TechNet - Install-PackageProvider
- Microsoft TechNet - Install-Module
- Microsoft TechNet - Get-Command
- Microsoft TechNet - Enter-PSSession
- Microsoft TechNet - Get-CimInstance
- Microsoft TechNet - Get-Item
- Microsoft TechNet - Set-Item
- Microsoft MSDN - Azure Resource Manager Cmdlets
- Microsoft MSDN - Get-AzureRmSubscription
- Microsoft MSDN - Select-AzureSubscription
- Microsoft MSDN - New-AzureRmResourceGroup
- Microsoft MSDN - New-AzureRmVirtualNetwork
- Microsoft MSDN - Get-AzureRmVirtualNetwork
- Microsoft MSDN - New-AzureRmVirtualNetworkSubnetConfig
- Microsoft MSDN - New-AzureRmPublicIpAddress
- Microsoft MSDN - Get-AzureRmPublicIpAddress
- Microsoft MSDN - Get-AzureRmVMImagePublisher
- Microsoft MSDN - Get-AzureRmVMImageOffer
- Microsoft MSDN - Get-AzureRmVMImageSku
- Microsoft MSDN - Get-AzureRmVMImage
- Microsoft MSDN - New-AzureRmVMConfig
- Microsoft MSDN - Set-AzureRmVMOperatingSystem
- Microsoft MSDN - Set-AzureRmVMSourceImage
- Microsoft MSDN - New-AzureRmNetworkInterface
- Microsoft MSDN - Get-AzureRmNetworkInterface
- Microsoft MSDN - Set-AzureRmNetworkInterface
- Microsoft MSDN - Add-AzureRmVMNetworkInterface
- Microsoft MSDN - New-AzureRmStorageAccount
- Microsoft MSDN - Set-AzureRmVMOSDisk
- Microsoft MSDN - New-AzureRmVM
- Microsoft MSDN - New-AzureRmNetworkSecurityRuleConfig
- Microsoft MSDN - New-AzureRmNetworkSecurityGroup
- Microsoft MSDN - Get-AzureRmNetworkSecurityGroup
7. See Also
- Nano Server Survival Guide by Ryen Tang
- Microsoft Azure: Managing Nano Server with Server Management Tools by Ryen Tang
- Windows Nano Server: Virtualization with VMware vSphere by Ryen Tang
- Nano Server: Getting Started with Image Builder by Ryen Tang
- Nano Server: Using New-NanoServerImage with Show-Command to deploy Nano Server by Ryen Tang
- Nano Server: Viewing Application, Security and System Event Logs using WMI by Ryen Tang
- Nano Server: Deploying an Internet Information Services (IIS) Web Server by Ryen Tang
- Nano Server: Deploying ASP.NET 5 site on Internet Information Services (IIS) Web Server by Ryen Tang
- Nano Server: Deploying PHP 7.0.6 on Internet Information Services (IIS) Web Server by Ryen Tang
- Nano Server: Deploying MySQL Database Server by Ryen Tang
- Nano Server: Deploying Python 3.x interpreter by Ryen Tang
- Nano Server: Getting Started in Container with Docker by Ryen Tang

