SharePoint 2013: Develop Remote Event Receivers for List And List Items
Introduction
In this third post on Remote Event Receivers, we are going to explore the mechanics revolving around Remote Event Receivers on List/List Item Events.
The previous two posts in this series can be reached out at:
- SharePoint 2013: Remote Event Receivers
- SharePoint 2013: How to develop Remote Event Receivers for App Events
Development approach
In order to show case this scenario we need to start with a Provider Hosted App as highlighted in the following steps:
- Select “App for SharePoint” Project Template
https://howtodowithsharepoint.files.wordpress.com/2015/08/110.png?w=450&h=311
- Specify the URL of Host Web and select “Provider-Hosted” as Hosting Model.
https://howtodowithsharepoint.files.wordpress.com/2015/08/23.png?w=450&h=324
- Select “ASP.Net Web Forms Application” as Project Template for Hosting the Remote Web
https://howtodowithsharepoint.files.wordpress.com/2015/08/31.png?w=450&h=324
- Specify the Security Certificate details based on SharePoint Provider Hosted App Development Environment configuration
https://howtodowithsharepoint.files.wordpress.com/2015/08/41.png?w=450&h=324
Click Finish to complete the Visual Studio Solution Wizard.
Now next thing is to add the required items to the SharePoint App Project:
- Select App Project => New Item => Add
https://howtodowithsharepoint.files.wordpress.com/2015/08/51.png?w=450&h=323
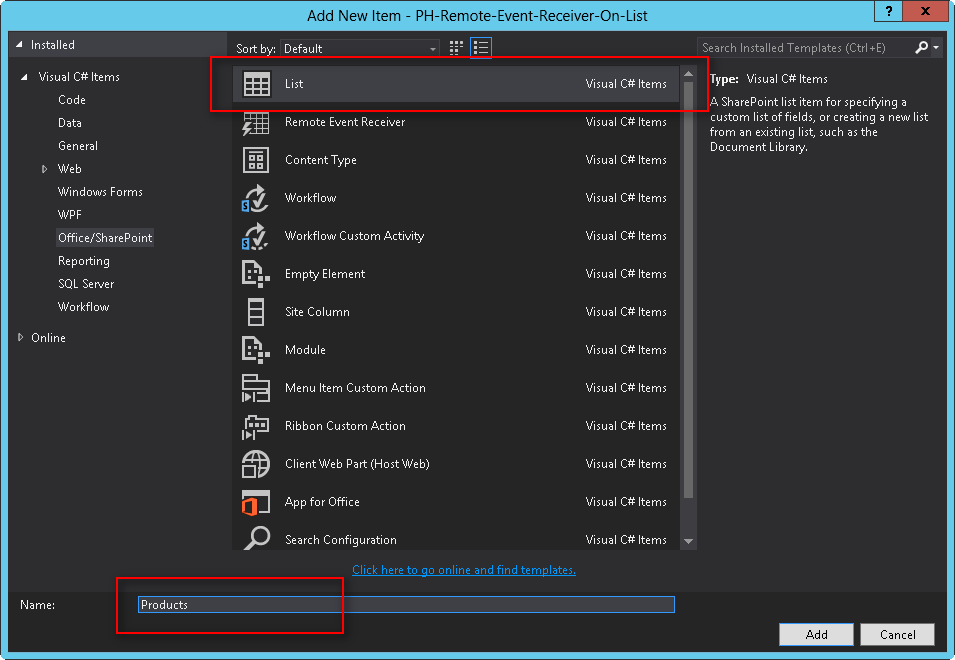
- Select “List” as Project Item Template and the list as “Products”
This List will act as the Source of Events which will be delegated to the Remote Event Receiver
https://howtodowithsharepoint.files.wordpress.com/2015/08/61.png?w=450&h=311
On List Settings Page:
- Select a Display Name for the List
- Choose Template for List Instance as “Custom List”
https://howtodowithsharepoint.files.wordpress.com/2015/08/71.png?w=450&h=329
In List Designer:
- On Columns Tab, specify the Columns/Fields you need to add to the list
Took ProductName and Price as two fields to be added for Products List
https://howtodowithsharepoint.files.wordpress.com/2015/08/81.png?w=450&h=317
- On the List Tab, verify the Site Relative URL of List
https://howtodowithsharepoint.files.wordpress.com/2015/08/91.png?w=450&h=260
Once we got our list created and configured, it is time to add a new SharePoint Item to the project.
The Remote Event Receiver.
- Select App Project => New Item => Add
https://howtodowithsharepoint.files.wordpress.com/2015/08/101.png?w=450&h=323
- Select “Remote Event Receiver” as Project Item Template
https://howtodowithsharepoint.files.wordpress.com/2015/08/111.png?w=450&h=287
- Select Type of Event Receiver as “List Item Events”
https://howtodowithsharepoint.files.wordpress.com/2015/08/121.png?w=450&h=287
- Select Event Source as “Products” List
- Choose what all events you want to let handle by this Remote Event Receiver. For now we're choosing “Item Added”, “Item Updated” and “Item Deleted” events
https://howtodowithsharepoint.files.wordpress.com/2015/08/131.png?w=450&h=329
As soon as the List is added to the Project a Feature scoped to the App Web gets also added.
Once we are done with the configuration steps as shown above, we can see following artifacts added to the Project as highlighted below:
- Products List
- List Instance of the Products List
- Remote Event Receiver
https://howtodowithsharepoint.files.wordpress.com/2015/08/141.png?w=450&h=335
If we notice Remote Web Project which is nothing but an ASP.NET Application, we can see the following artifacts added already to it:
- Service Class [Product-Remote-Event-Receiver]: That represent the Remote Event Handler Code Base
- TokenHelper.cs & SharePointContext.cs: These helper classes are added to VS2013 to execute all the heavy lifting related to Authorization and Authentication algorithms easily between Remote Web Server(SPWeb Host) & SharePoint Server(Front-end Server).
https://howtodowithsharepoint.files.wordpress.com/2015/08/151.png?w=450&h=374
We will revisit the Service Class Code in a short while to understand its internal plumbing.
But for now, let’s build the Solution and Run it.
https://howtodowithsharepoint.files.wordpress.com/2015/08/161.png?w=450&h=156
Trust the App with all needed permissions when prompted.
https://howtodowithsharepoint.files.wordpress.com/2015/08/171.png?w=450&h=255
As soon as we Grant the App with all of the required permissions, the App Launcher redirects the User to the Start Page for the App, which is residing in the Remote Web for this case as highlighted below
https://howtodowithsharepoint.files.wordpress.com/2015/08/181.png?w=450&h=156
We can see the App Launcher added to the Site Contents of the Host Web as shown below
https://howtodowithsharepoint.files.wordpress.com/2015/08/191.png?w=450&h=228
We can ensure the presence of App Web by using SharePoint Manager and inspects Products List that has been provisioned to the App Web during the App Deployment
https://howtodowithsharepoint.files.wordpress.com/2015/08/201.png?w=450&h=209
We can browse the App Web from Browser also as shown below
https://howtodowithsharepoint.files.wordpress.com/2015/08/211.png?w=450&h=182
Now in order to test the Event Receiver, let’s create a test item in Products List as shown below
https://howtodowithsharepoint.files.wordpress.com/2015/08/221.png?w=450&h=144
Specify Product Name and Price. Click Save button
https://howtodowithsharepoint.files.wordpress.com/2015/08/231.png?w=450&h=224
As soon as Item gets added, it triggers “ItemAdded” event which is delegated to Remote Event Receiver by SharePoint.
In Remote Event Receiver, we have two methods “ProcessEvent” and “ProcessOneWayEvent”.
For more details on these methods, you can revisit the earlier post SharePoint 2013: Remote Event Receivers
On Item added we can see Breakpoint hit in “ProcessEvent” Method as shown below
https://howtodowithsharepoint.files.wordpress.com/2015/08/24.png?w=450&h=296
Similarly, we can see Break Point hit every time the Item gets updated as highlighted in below steps
https://howtodowithsharepoint.files.wordpress.com/2015/08/25.png?w=450&h=377
https://howtodowithsharepoint.files.wordpress.com/2015/08/26.png?w=450&h=167
https://howtodowithsharepoint.files.wordpress.com/2015/08/27.png?w=450&h=290
Likewise, we can see Break Point hit when Item gets deleted as highlighted in below steps
https://howtodowithsharepoint.files.wordpress.com/2015/08/28.png?w=450&h=323
https://howtodowithsharepoint.files.wordpress.com/2015/08/29.png?w=450&h=294
Since we registered the Event Receivers to handle “ItemAdded”, “ItemUpdated”, “ItemDeleted” only so none of the other Events would be delegated to Remote Event Receiver by SharePoint.
In case if any more Events need to be handled we need to add <Receiver> Elements in the Element.xml file associated with Remote Event Receiver as and when needed.
SPRemoteEventProperties Object is your real friend:
“ProcessEvent” method of Remote Event Receiver provides an object called as “properties” that exposes a lot of useful properties that can help us to perform any desired operation on the Web or List or List Item.
Following are the important properties that are exposed by “properties” object:
- Event Type: Returns the type of Event-Triggered by SharePoint Source Object
- Item Event Properties: If the Event Type is of “List Item Type”, then “ItemEventProperties” collection is returned with data entered by user in each field of the List Item
- List Properties: Returns the List specific properties like List Name, List ID and so on
- Login User Properties: Return User specific properties like User ID, Login Name and so on
- Source Web Properties: Return Web-specific properties like Web Url
https://howtodowithsharepoint.files.wordpress.com/2015/08/30.png?w=450&h=191
This post is more focused on the mechanics offered by SharePoint around Remote Event Receivers for List/List Item Events.
We will meet in another post where it will be more focused on to the implementation details on Event Receivers dancing around some valid Business Use Cases.
Hope you find this post helpful.