Office 365 Planner: How to Guide
Planner lets your teams to work more effectively and collaboratively in colourful, fun and interactive way. It also gives you ways to visually organize and track your teams work progress.
Let us see how we can use planner to help us organize our teams.
As an example let me take a Pre Sales team .
In Pre Sales, we do so many things ranging from conducting customer trainings, designing complex architecture solutions, implementing POC environments and all these needs to be carried out under strict time frames. So how do we quickly keep track of our resources and how do we assign tasks for these people to keep track of what they do and how effectively they do it?
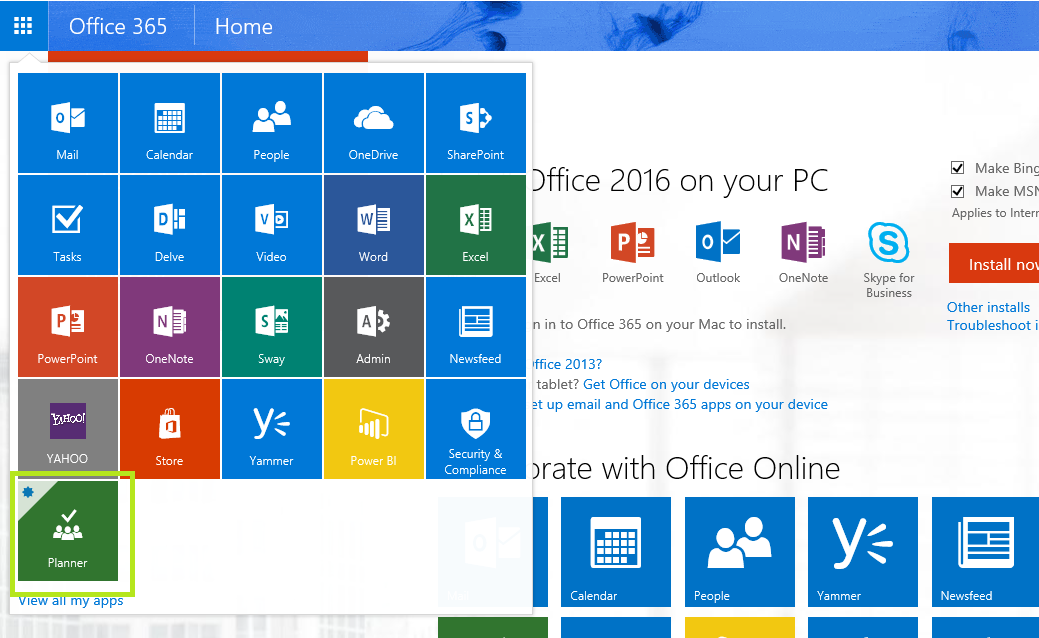
First, log in to your Office 365 Portal using your Username and the Password. Then on the app launcher as shown below in Fig 1, select or click on Planner.
Fig1
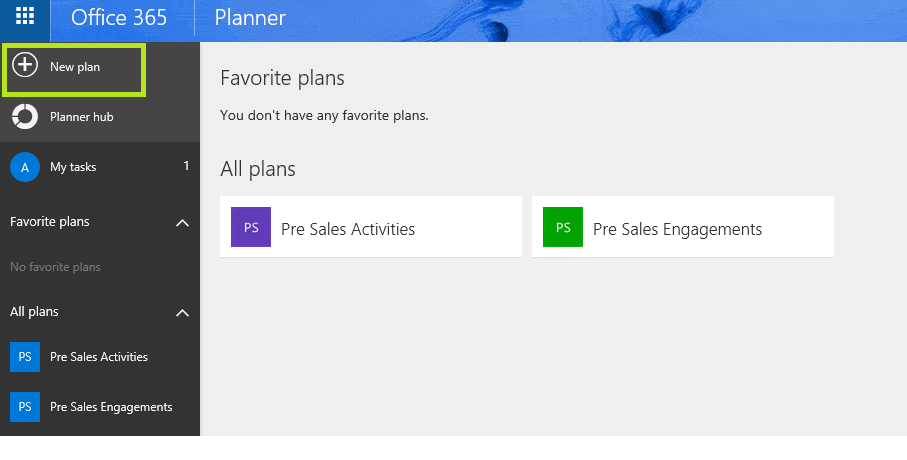
This will load up the Planner Hub, which will be the main workspace for the planner. Once you are in the planner hub, click on “New Plan” as shown on Fig 2 as you are going to create a new plan for your team to track and plan activities for them.
Fig 2
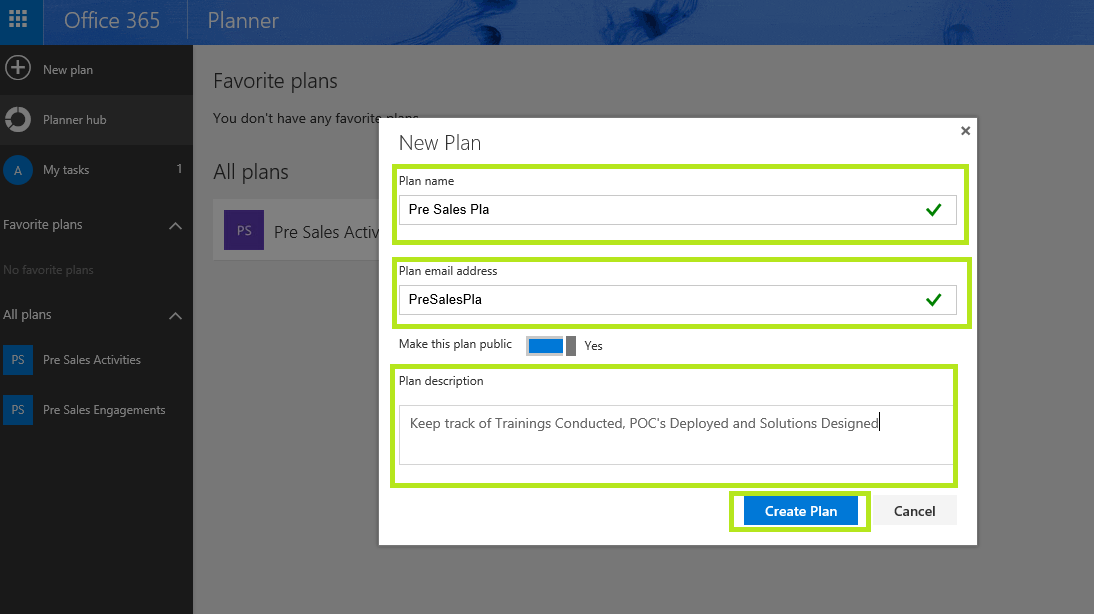
Then you will be prompted with the Dialog Box to key in the details of the New Plan that you want to create as below in Fig 3.
Fig 3
Under the New Plan Box, Give a name to your Plan. In my case I am going to name it “Pre Sales Plan”. Under the plan Email Address, it will provision and email automatically based on the name you give on the “Plan Name” field. Then you have the option of making the plan available to the public or make it private so only you can add members to it. For the purposes of this article I will leave it as default which is “Public”. Then, under the “Plan Description” please provide a friendly description as to what this plan is about. In my case, I have provided a description related to Pre Sales Team's activities.
Once done, click on “Create Plan” and this will create the new plan on your Planner Hub. Please note that this will take some time to provision and appear on the hub since it needs to provision an email address for the purpose of collaboration among the members of the Plan that we just created.
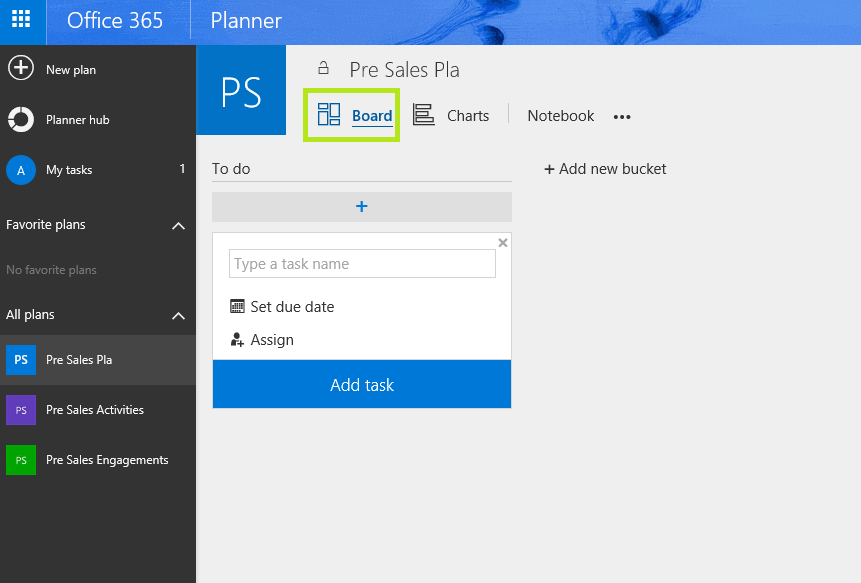
Once the plan has been provisioned it will appear as below under the “All Plans” in the Planner Hub as shown in Fig 4.
Fig 4
Under the Plan, you will see some options, namely “Board”, “Charts”, “Notebook” & an “Elipses”.
Let us look at these one by one.
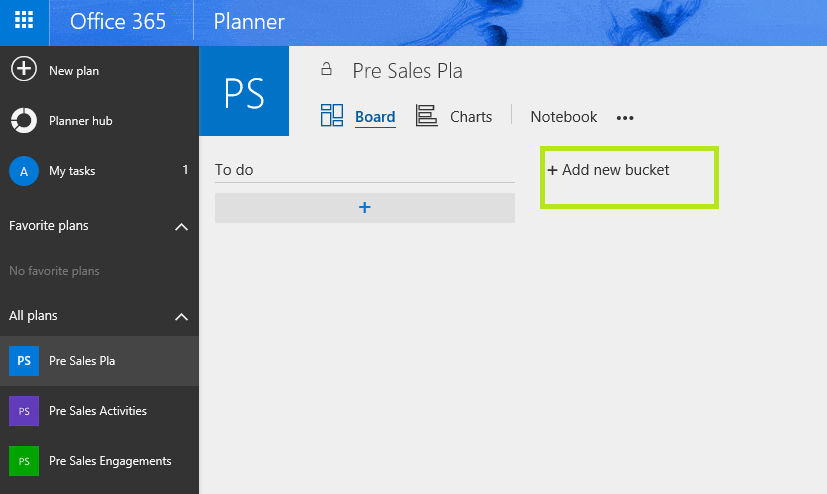
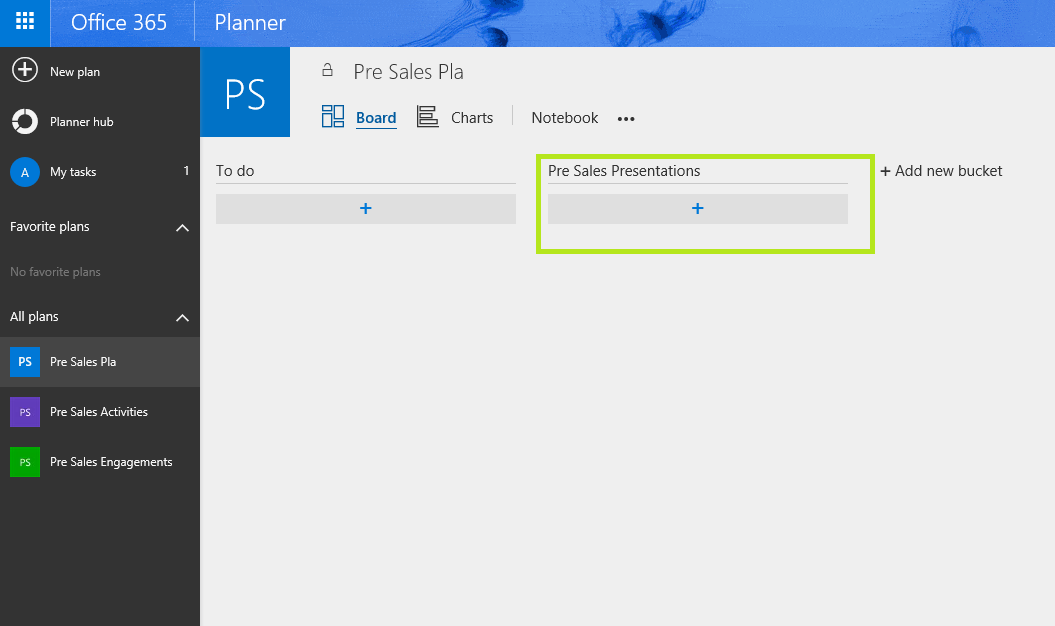
Under “Board” you get to add tasks or add new buckets with different task category and assign tasks related to that category. For an example, let say I have a general task category in my department for Presales presentations. Here I can create a new bucket with the name pre sales presentation and assign task under the bucket to members in my pre sales team by simply clicking “Add New Bucket”. Refer the below Fig 5 & 6.
Fig 5
Fig 6
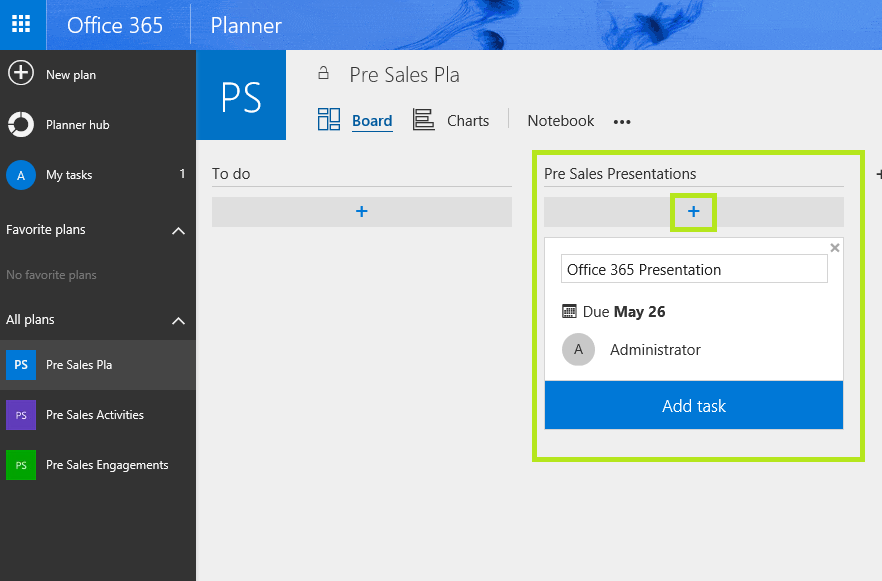
Now we need to create a task and assign it to a member in the presales team. For that we simply click on “+” and create the Task, assign a Date and assign the Resource and click on “Add Task” as shown in Fig 7.
Fig 7
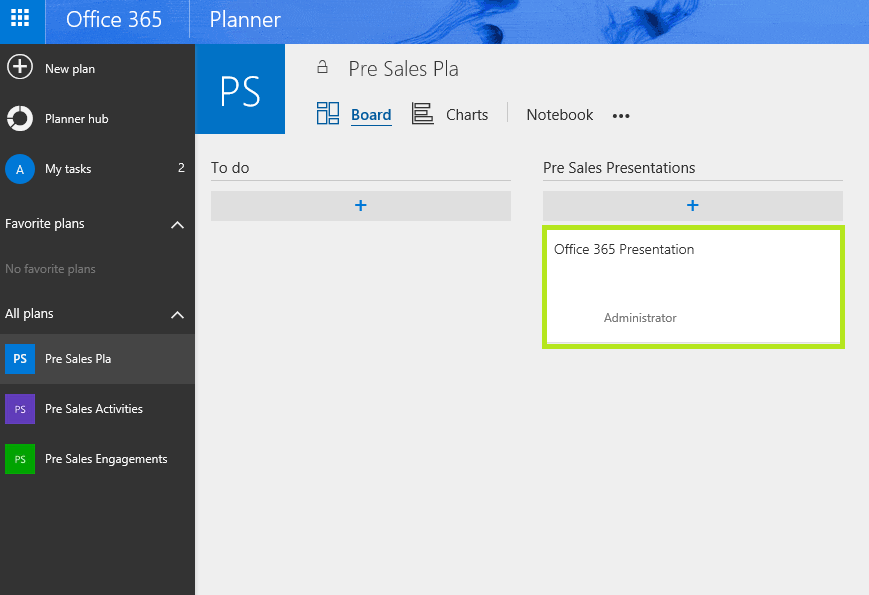
Once the task has been created, it will appear under the bucket as shown below in Fig 8
Fig 8
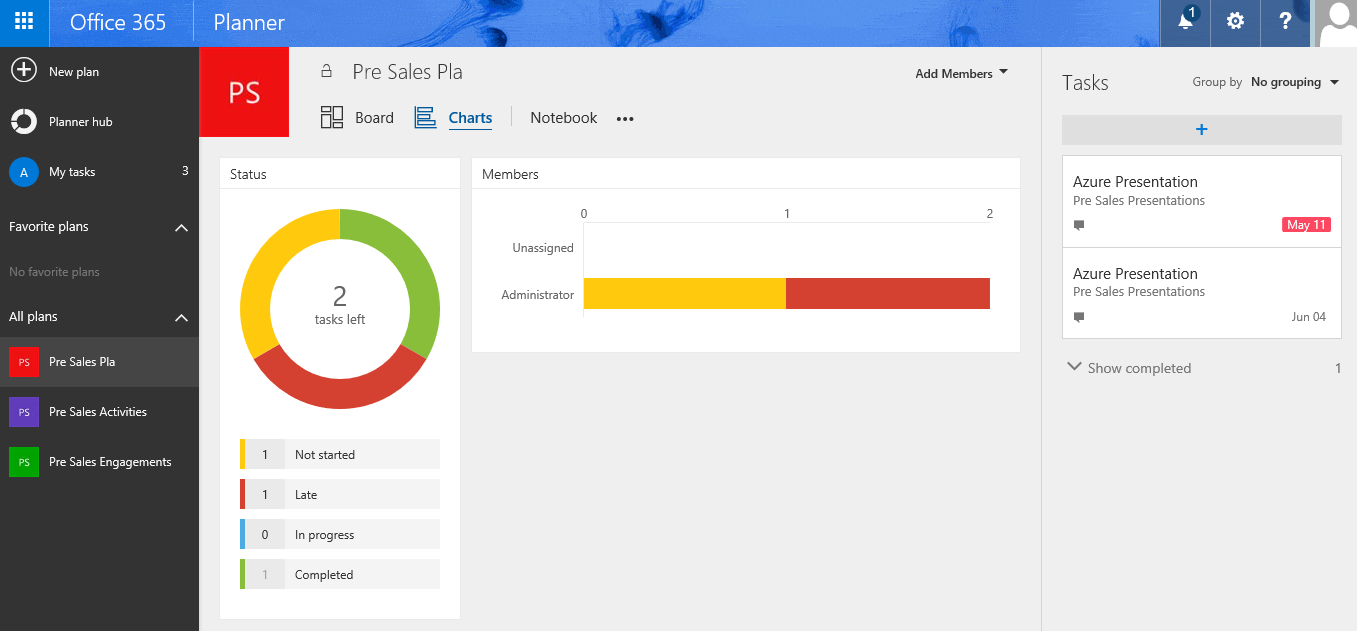
Simple, that’s how to allocate a task. Now let us see how we can have a graphical interpretation as to how we can track task progress. We need to select “Charts” for that matter as shown in Fig 9.
Fig 9
This will give you a graphical representation of the Tasks that are not started, late, in progress as well as tasks which are completed. You can also see the members and see the tasks that they have left to complete, completed and tasks which are late. In the above Fig 9, it shows that the member administrator has one task pending (This is shown in Yellow) and one task which is late (Shown in red).
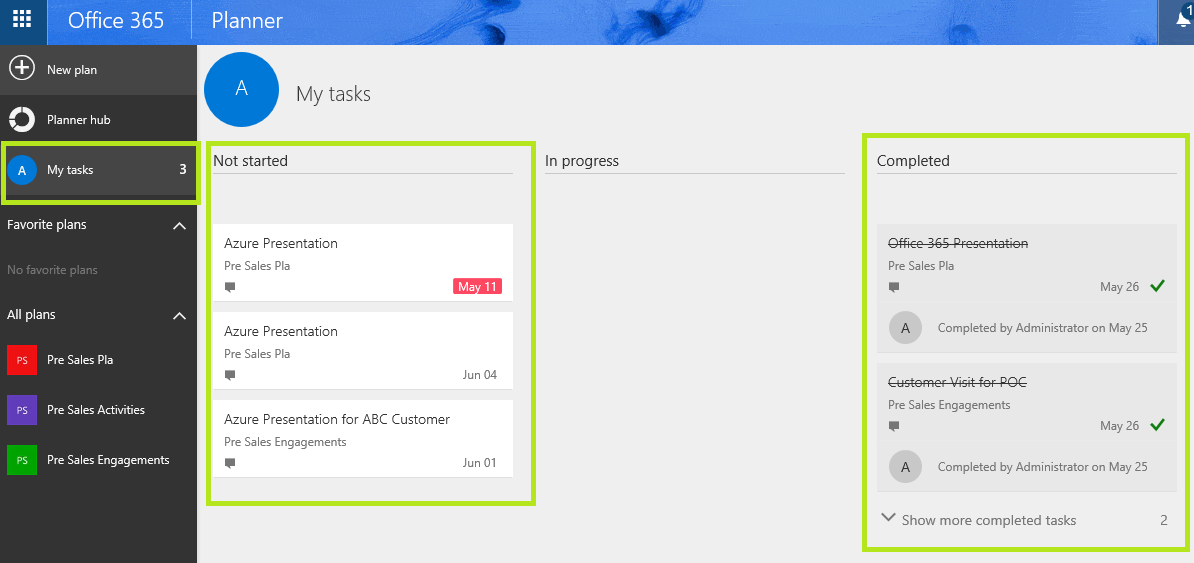
This is simply so cool to keep track of your team member’s activities and each member of the team will have their own view of tasks assigned to them under “My Tasks” shown in Fig 10. This means that your supervisor can create a Plan and assign you tasks which will appear under “My Tasks” in your planner.
Fig 10
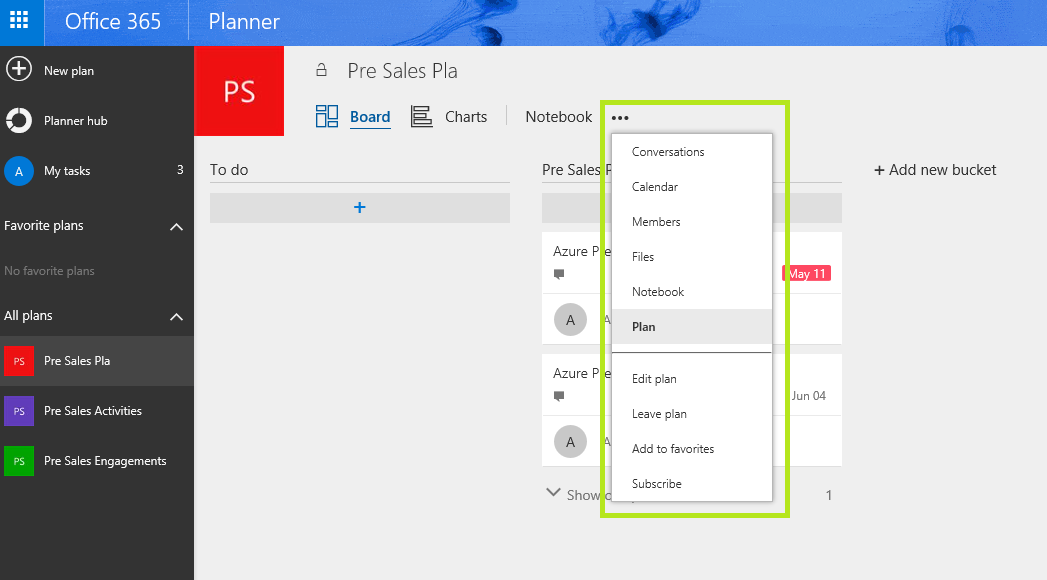
In addition to the above features, you can click on the “Eclipses” as shown below in Fig 11 to bring up some additional options.
Fig 11
Conversations: This will be where all your conversations will appear with your colleagues and conversations related to the Bucket that we created earlier. All the tasks assigned to you will get emailed to this conversation box.
Calendar: This will be the Calendar associated to the bucket that we created earlier. So all the members in this bucket or plan will have a shared calendar to update their activities.
Members: This will list all the members in the Bucket or the plan.
Files: This is a shared location where members can store their files related to this bucket or the plan.
Notebook: Notebook is a one note notebook which is associated with this bucket or the plan.
