Office 365 Journaling Workaround - How to Guide
Is there a Journaling facility in Office 365? The answer to this is Yes as well as No. The reason being Office 365 does not allow you to designate a mailbox which is hosted on Office 365 as a journaling mailbox.
The only option we have as techies is to designate a mailbox which is located in an On-Prem Exchange server or a third party journaling solutions provider.
So how can this issue be addressed since many businesses are reluctant to buy a subscription from a third party provider for journaling purposes?
In Office 365, a workaround can be used to get this done by using Mail Flow Rules in Exchange Online. Below steps provide guidance to implement it.
First, log into the Office 365 Portal using the Admin credentials.
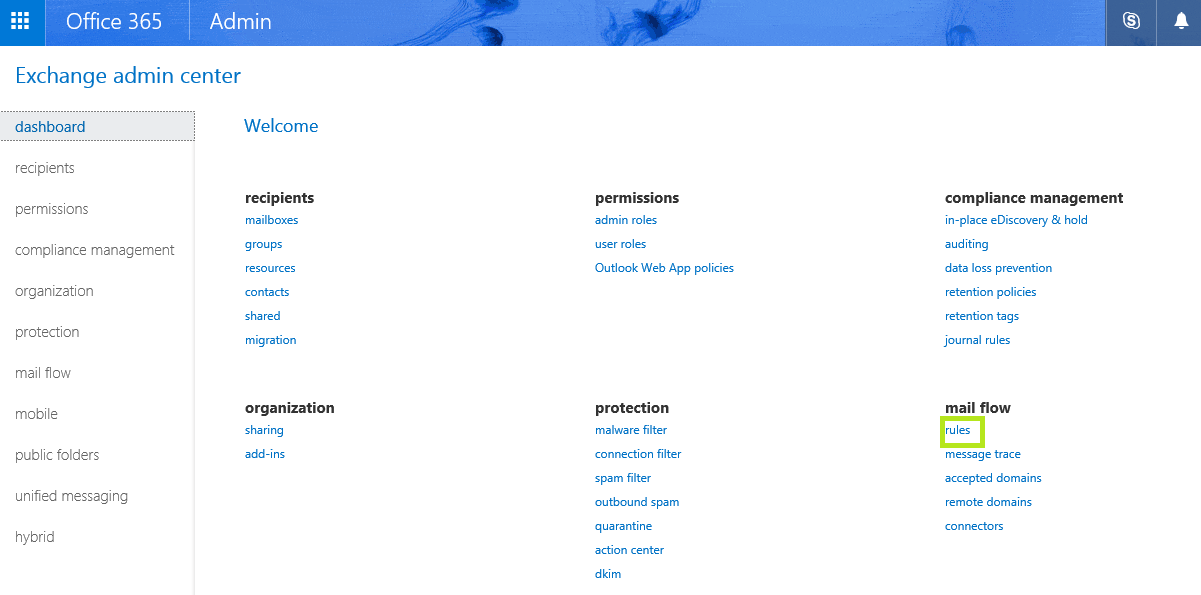
Then go to Exchange Online Admin Center as shown below in Fig1 and under the Mail Flow section, select “Rules”.
**
**
Fig1
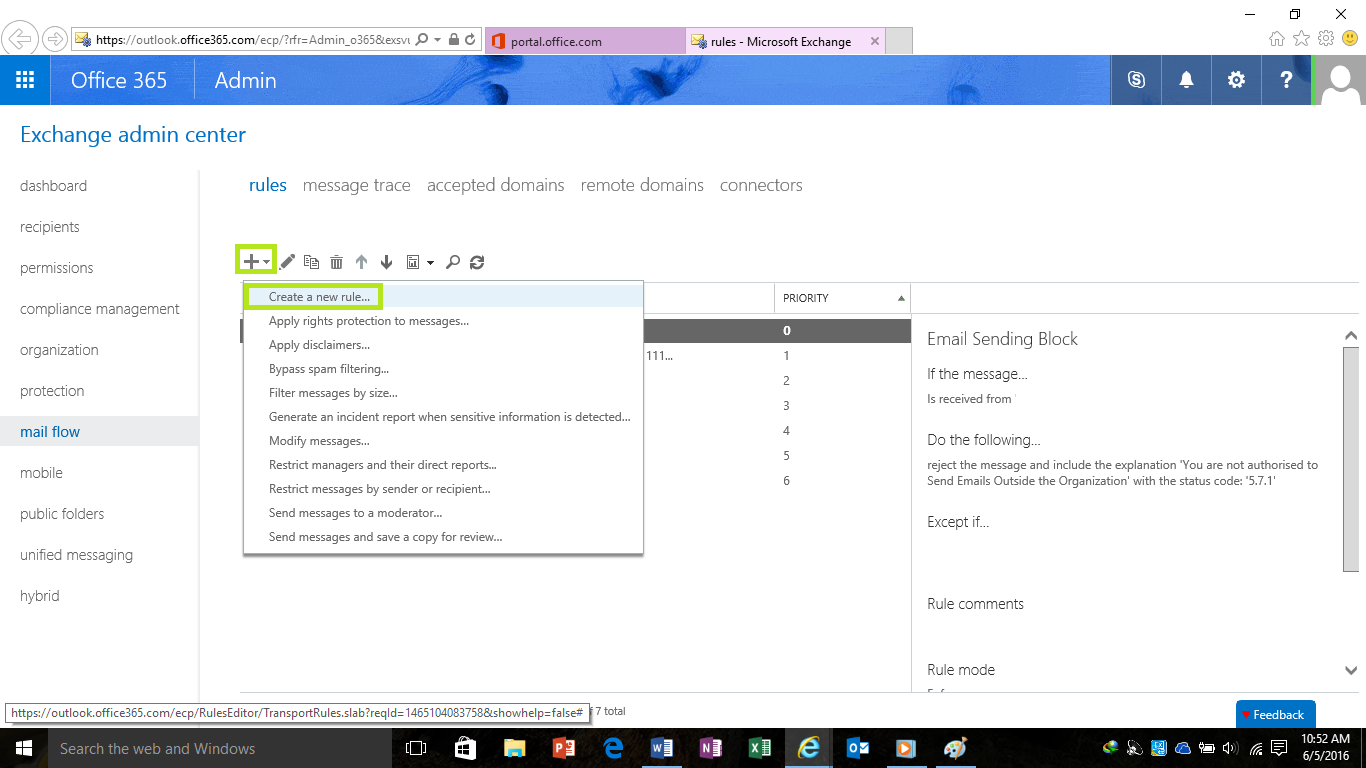
Once inside the Mail Flow rules section, click on the “+” sign and select “Create a new rule” as shown below in Fig2.
Fig2
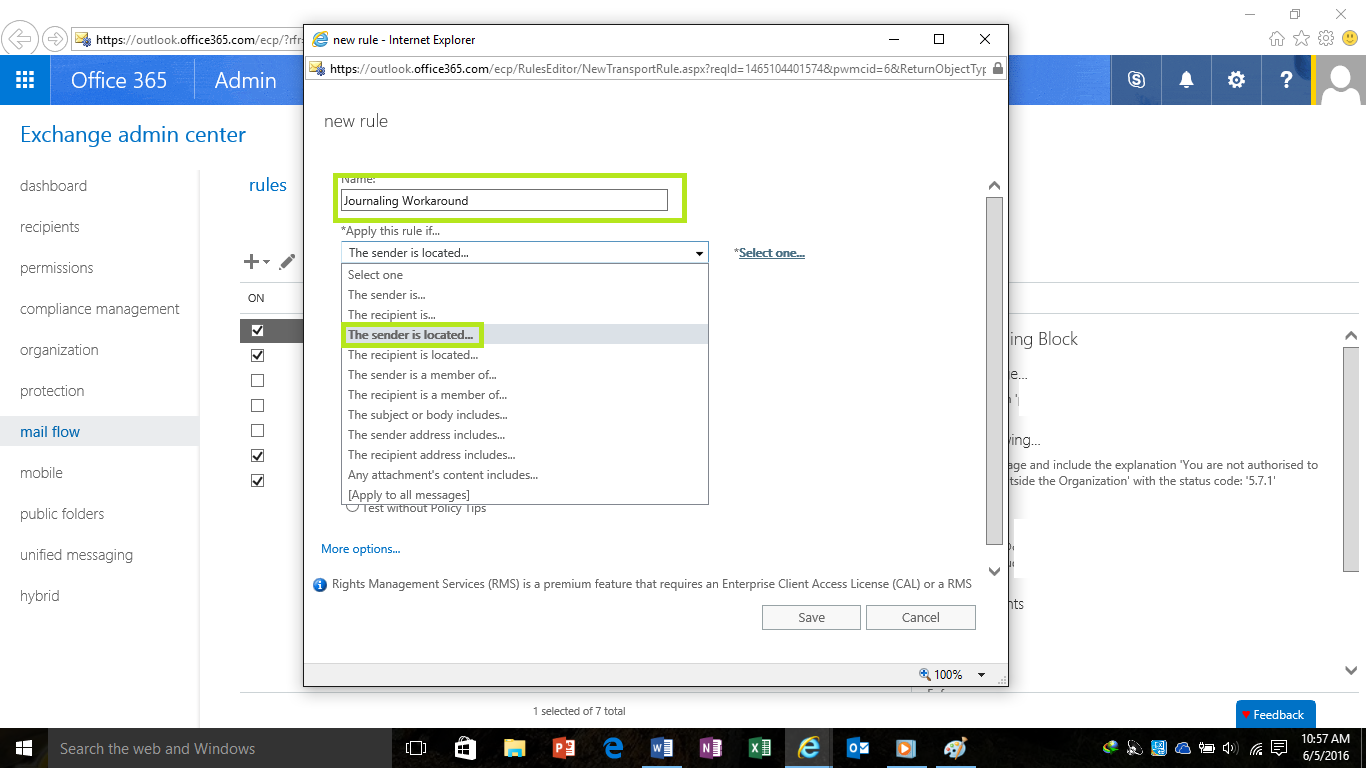
Once clicked on “Create a new rule”, the new rule dialog box will pop up where we will have to configure the settings for the new rule.
Under the Name section of the new rule, give a name which can be easily identifiable to the action you want the rule to do. In this case, name it as “Journaling Workaround”. Then click on “Apply this rule if” section to get a list of drop-down options from which we are going to select “the sender is located” option since we want to have all the emails from senders within the organization to be recorded as shown in Fig3.
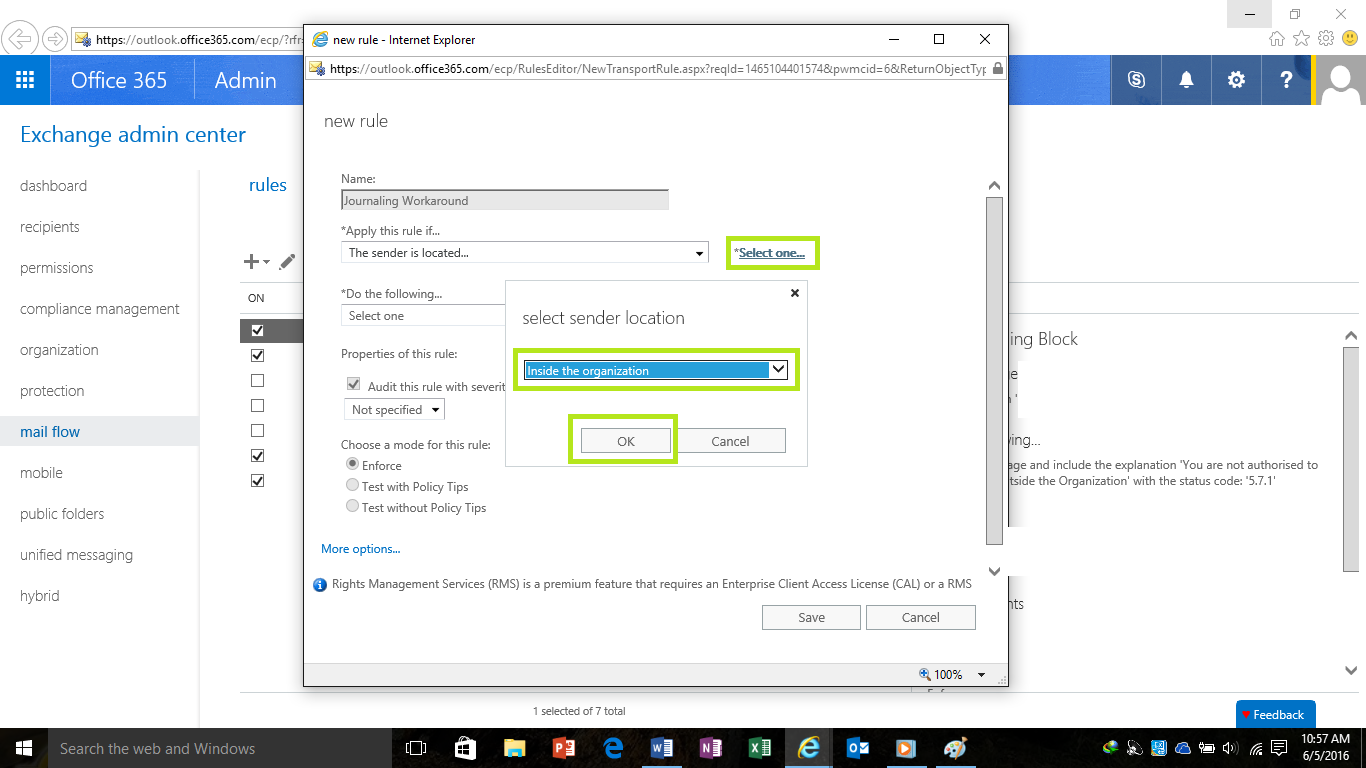
Once that is selected, click on “Select One” on the left-hand side as shown in the below diagram Fig4 to bring up the “Select Sender Location” option box. Since we want the senders located inside our organization's emails to be tracked, select “Inside the organization” option from the drop-down menu.
Once done, click on “OK”.
Fig4
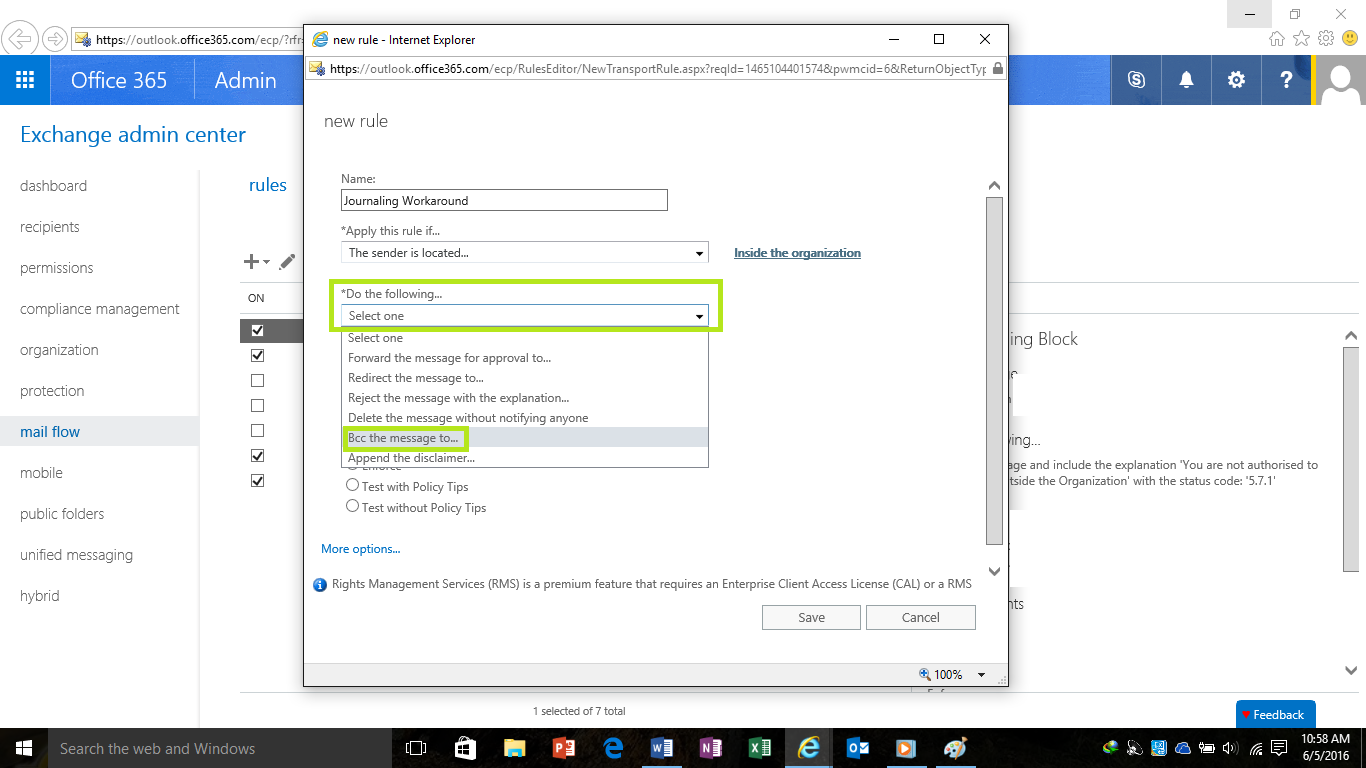
Once that is done, we have to now tell the rule what needs to be done. For that, we need to go to the “Do the following” section and select “Bcc the message to” option from the drop-down menu as shown below in Fig5.
Fig5
Once selected, it will prompt to select the mailbox that we need to Bcc all the messages which are sent by the sender of the organization. In this case, select the mailbox created for the journaling purpose named journaling@cloudarcs.net as shown below in Fig6 and select “OK”. We also need to add this rule when we're using a 3rd party Journaling solution and would like to Journal all Internal to Internal emails of mailboxes hosted on Office 365.
Fig6
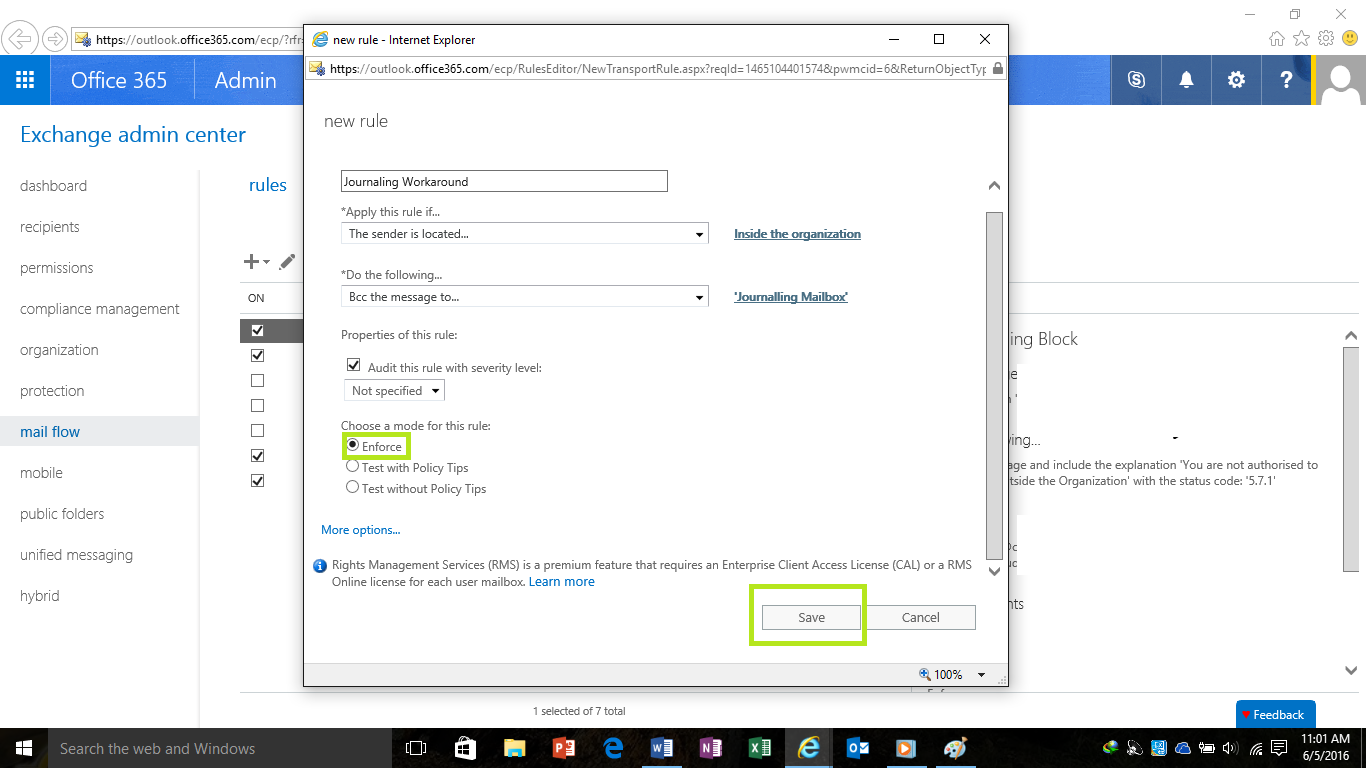
Once all the above is done, make sure to select “Enforce” to enforce the rule immediately. By default, this is enabled and makes sure to leave it as is too and click on “Save” as shown below in Fig7.
Fig7
That’s it. Now the organization should be getting messages Bcc’ed to the mailbox admin provided when users in the organization send any email out. Likewise, if there is a need to record all the emails which come into the organization, simply create another mail rule selecting “If the sender is located” and set the value to “Outside the organization”.
