Nano Server: Using New-NanoServerImage with Show-Command to deploy Nano Server
1. Introduction
With the release of Windows Server 2016 Technical Preview 5, building a new Nano Server has been made easier with the Show-Command cmdlet from PowerShell 5.0 and this Wiki article is to demonstrate how you can get the command generated for those who are new to PowerShell.
2. Getting Started with New-NanoServerImage cmdlet
Have you ever find yourself struggling with PowerShell? In this Wiki article, we will use Show-Command to show you how easy it is to use New-NanoServerImage cmdlet to deploy your NanoServer easily. Let us get started with New-NanoServerImage cmdlet in Windows Server 2016 Technical Preview 5.
2.1. Copying Nano Server content from Media
Firstly, we will need to copy the NanoServer folder content to local disk.
# Copy NanoServer folder from Windows Server 2016
# Technical Preview 5 Media to Local Disk
Copy-Item `
-Path D:\NanoServer\ `
-Destination C:\NanoServer `
-Recurse ;
2.2. Importing Nano Server Image Generator PowerShell Module
Secondly, we will need to import the Nano Server Image Generator PowerShell Module.
# Import Nano Server Image Generator PowerShell Module
Import-Module `
-Global C:\NanoServer\NanoServerImageGenerator\NanoServerImageGenerator.psm1 ;
2.3. Launching New-NanoServerImage Graphical User Interface with Show-Command
Thirdly, we will use the Show-Command from PowerShell 5.0 to launch the New-NanoServerImage graphical user interface.
# Show Command Graphical User Interface (GUI)
Show-Command `
-Name New-NanoServerImage ;
3. New-NanoServerImage graphical user interface
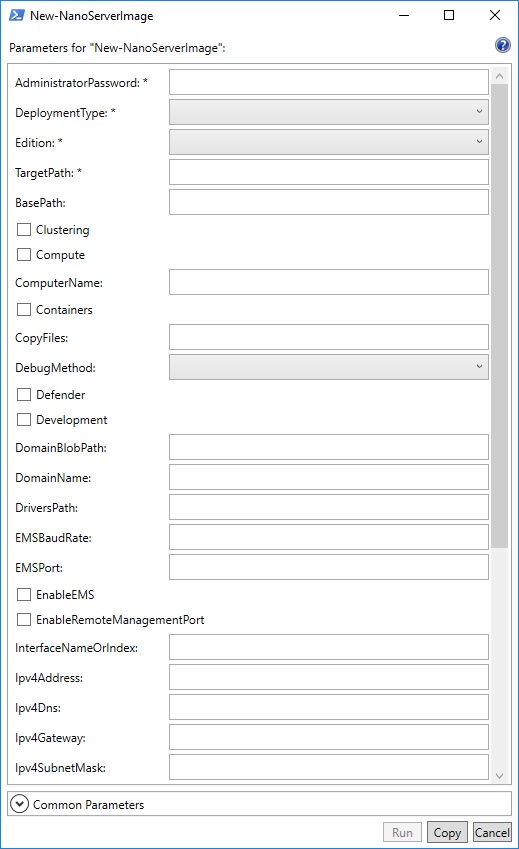
With Show-Command from PowerShell 5.0, the New-NanoServerImage command will launch a graphical user interface with all the available parameters. It will display a parameter name with a textfield for string or secure-string input, checkbox for true or false switch parameter input and dropbox for defined parameter input.
3.1. Understanding the parameter input type
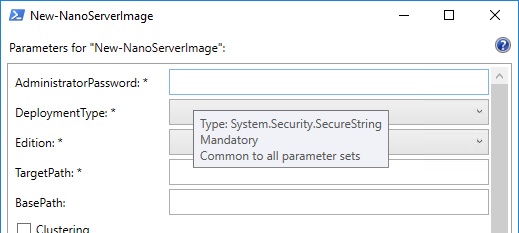
For textfield parameter input, it will accept string and secure string type and how do you find out? Simply, hover your mouse pointer over the textfield and the graphical user interface will prompt the acceptable type for the textfield.
3.2. Demonstrating an example of deploying a Nano Web Server
In the below screenshot, it is an example of how to input all the required and desired parameter for the New-NanoServerImage graphical user interface prompted from Show-Command.
3.3. Copying the New-NanoServerImage command with inputted parameter
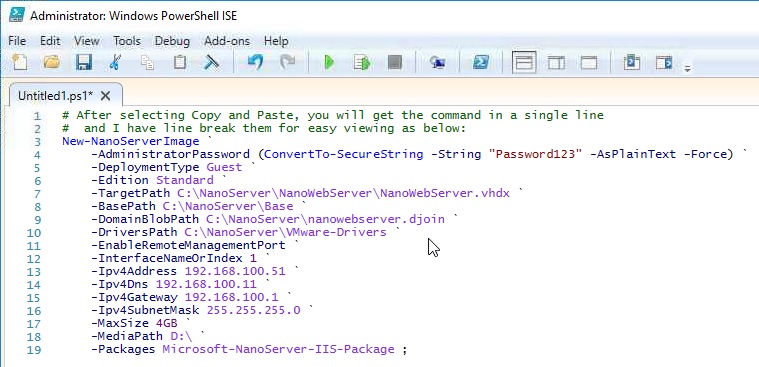
Once you have completed desired parameter inputs on the New-NanoServerImage graphical user interface displayed from using Show-Command, you have the option to choose run or copy button. The copy button is extremely useful for PowerShell beginner or just wanting to keep the command for repeatable task. Below is an extract of the using copy and pasted on the PowerShell ISE.
3.4. Running the New-NanoServerImage command with inputted parameter
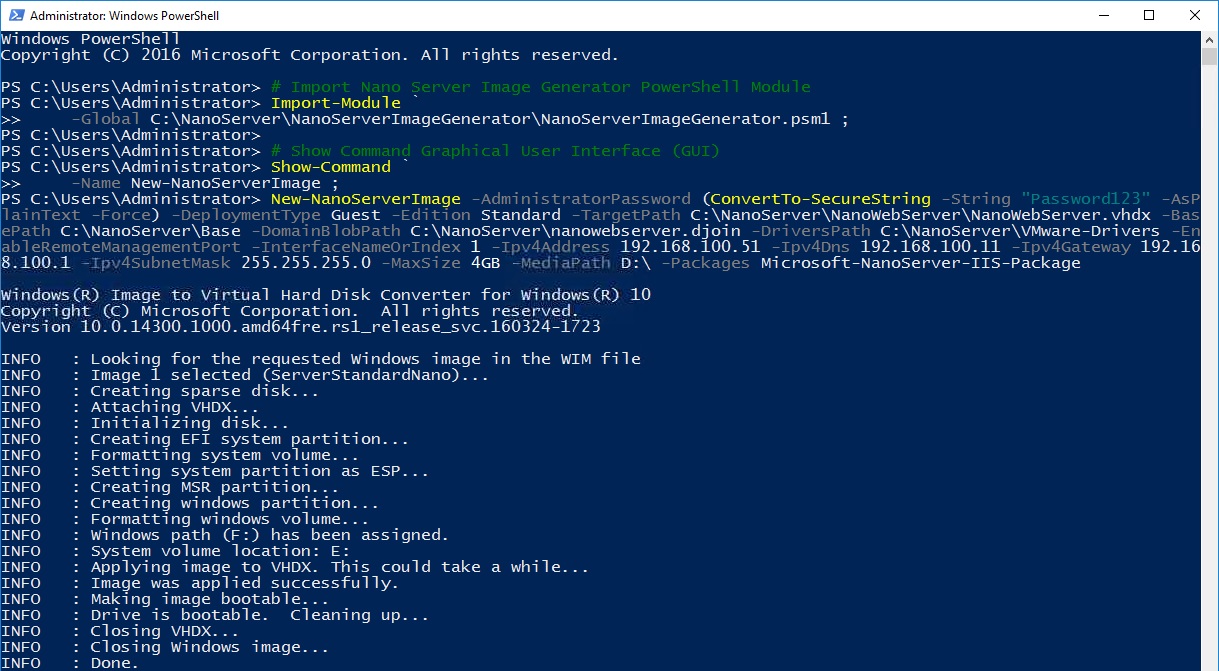
After you have copied the command and kept it safe somewhere, you can choose the run button and it will exit the graphical user interface to return you back to the PowerShell console with the command ready for you to hit the Enter keyboard button.
4. Conclusion
The Show-Command has elevated the New-NanoServerImage command to be more user friendly for beginners to start deploying NanoServer and that is the reason it deserves a Wiki article about it. It does has some flaws such as unable to inform you that you have used 2 or 3 parameters that are conflicting each other or provides you a help button on each parameter to prompt help on the specific parameter. But overall, it is still the best way to help PowerShell beginners and definitely more improvement will come. With this example, everyone will be able to deploy their own NanoServer pretty quickly.
5. References
- Microsoft TechNet - Show-Command
- Microsoft Blog - Step by step deploying nano server found in Windows Server 2016 TP5 by Sean Kearney
- Microsoft TechNet - Getting Started with Nano Server
6. See Also
- Nano Server Survival Guide by Ryen Tang
- Microsoft Azure: Managing Nano Server with Server Management Tools by Ryen Tang
- Microsoft Azure: Deploying Windows Server 2016 Nano Server by Ryen Tang
- Windows Nano Server: Virtualization with VMware vSphere by Ryen Tang
- Nano Server: Getting Started with Image Builder by Ryen Tang
- Nano Server: Viewing Application, Security and System Event Logs using WMI by Ryen Tang
- Nano Server: Deploying an Internet Information Services (IIS) Web Server by Ryen Tang
- Nano Server: Deploying ASP.NET 5 site on Internet Information Services (IIS) Web Server by Ryen Tang
- Nano Server: Deploying PHP 7.0.6 on Internet Information Services (IIS) Web Server by Ryen Tang
- Nano Server: Deploying MySQL Database Server by Ryen Tang
- Nano Server: Deploying Python 3.x interpreter by Ryen Tang
- Nano Server: Getting Started in Container with Docker by Ryen Tang


