Note
Access to this page requires authorization. You can try signing in or changing directories.
Access to this page requires authorization. You can try changing directories.
Description
In this article we are going to learn, how to interact with CRM Online entities, using C# Console Application, BizTalk server 2013.
- Part 1 mainly focuses on CRM solution understanding Entities, Fields etc, Configuration, Interact using C# Console.
- Part 2 mainly focuses on BizTalk Integration.
In this article demo series, we are going to explore the below Operations (CRUD) in detailed using 2 Different styles.
- Create
- Retrieve Multiple
- Update
- Delete
Style 1: CRUD Operations Using C# Console Application. Because this allows you to get knowledge on how Organization Service is defined, parameters, properties, Typed Classes, Method Overloading etc.
Style 2: CRUD Operations Using BizTalk Application with typed schemas. This helps you to know how to work with Organization Service schemas to invoke all the exposed operations using WCF Service.
For better demonstration have created sample CRM solution with two entities having few fields with different data types.
I will be using the below described CRM Online solution for upcoming articles as well for demonstrations.
Prerequisites to Run the Sample Demo’s
Dynamics CRM Online account subscription.
BizTalk WCF Behavior referred from this article.
- Download the CRM Online SDK to Run the sample C# Console application to learn CRUD operations.
- Microsoft Dynamics CRM 2015 Software Development Kit (SDK): https://www.microsoft.com/en-in/download/details.aspx?id=44567
- Microsoft Dynamics CRM Software Development Kit (SDK) for CRM Online and on-premises CRM 2016: https://www.microsoft.com/en-us/download/details.aspx?id=50032
Deployment Steps to Import CRM Online Solution
To work with this example, you need to Import the CRM Online Solution, you can get the CRM solution / Package from MSDN Code Gallery.
Follow the below steps to import the CRM Online Demo Sample Solution.
- Follow the steps in a sequence, through CRM browser window once you log in.
- Steps: Go to - Main - Settings - Solutions - Import - Browse – Select Solution Zip file – Next – Import – Publish All Customizations – Close.
- Once: Right - click Refresh List
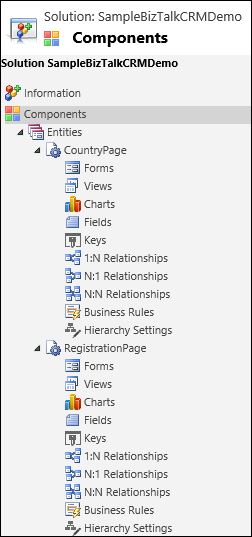
- Click-on SampleBizTalkCRMDemo under the Display Name – Opens you the CRM Entities in New browser window.

Fig - CRM Online SampleBizTalkCRMDemo Solution
Fig - CRM Online SampleBizTalkCRMDemo Entities
CRM Online Supports the below Data Types
- CRM online / On-premise supports the below data types, the same will be used in BizTalk as well to communicate.
- Check Types of fields from the below link for more details on every data types. https://technet.microsoft.com/en-us/library/dn531187.aspx

Fig - CRM Online Data Types
Introduction to CRM Online Demo Application Usage, Entities, Fields, Attributes
- Have created the below two entities to demonstrate the demo.
- I will be using the below CRM Online Solution for upcoming articles as well for demonstrations.
- CRM Online Entities: General Logical Tables.
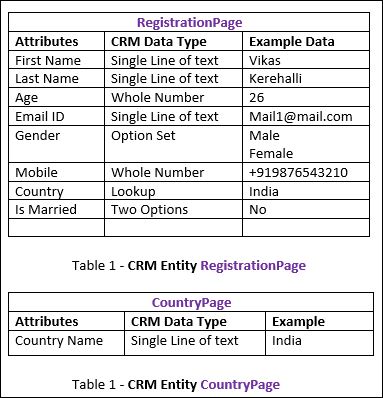
- CRM Entities, Fields, Attributes for the above logical Tables.

Fig – CRM RegistrationPage Entity Fields / Attributes details.

Fig – CRM CountryPage Entity Fields / Attributes details.
Demo: Using CRM Browser
- Once you import the solution successfully, try the below operation, get familiar with the entity attributes, fields, lookups.
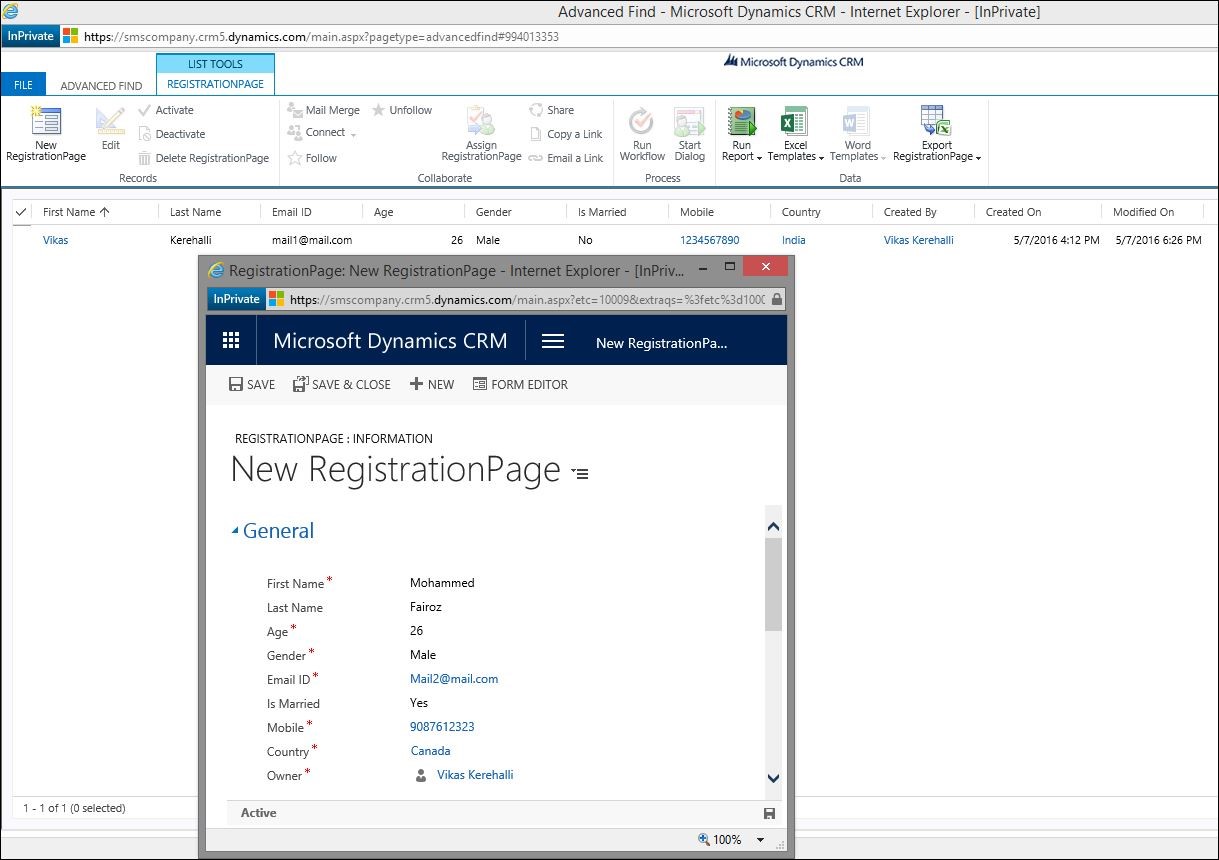
- Create New Records for the below Entities
Entity: RegistrationPage
- The Email ID Value cannot be duplicate, have added a sms_emailid field to Primary Key list like shown below.
Fig – RegistrationPage Entity with Primary Key as sms_emailid Field.
Fig – Creation of new Record, Saving for the RegistrationPage Entity.
Fig – Email ID duplicate record error on RegistrationPage Entity.
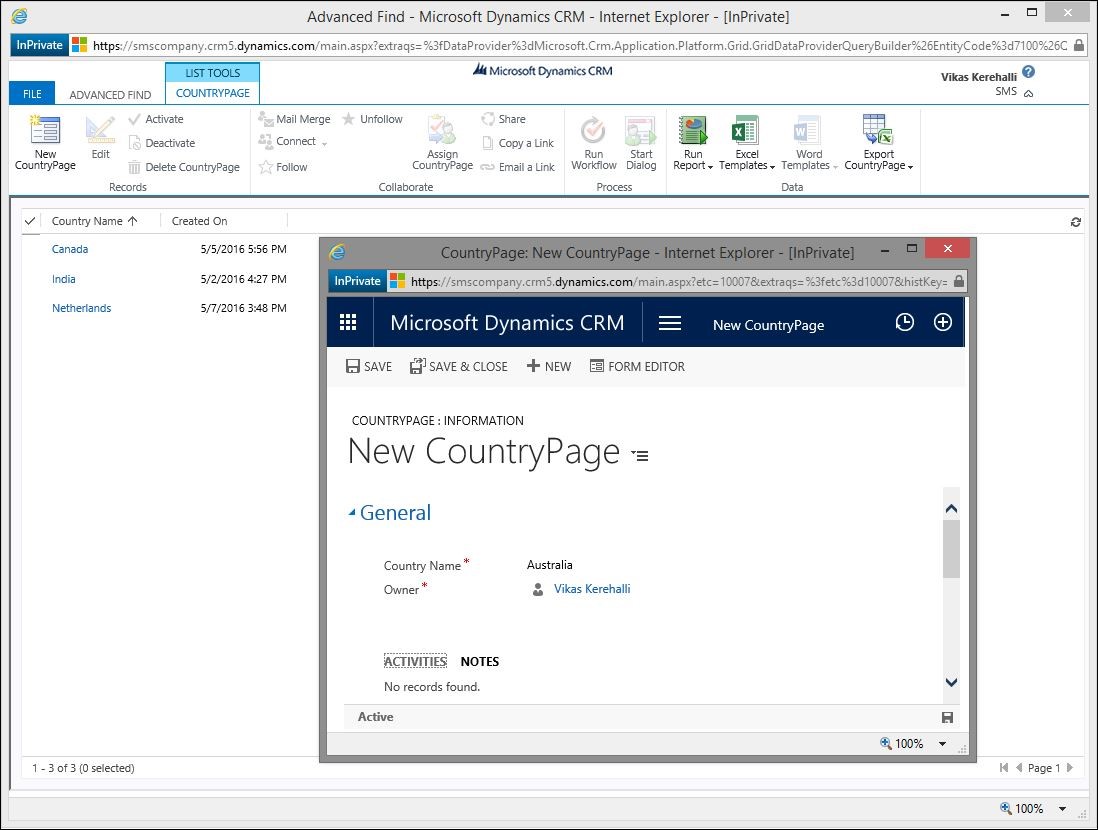
Entity: CountryPage
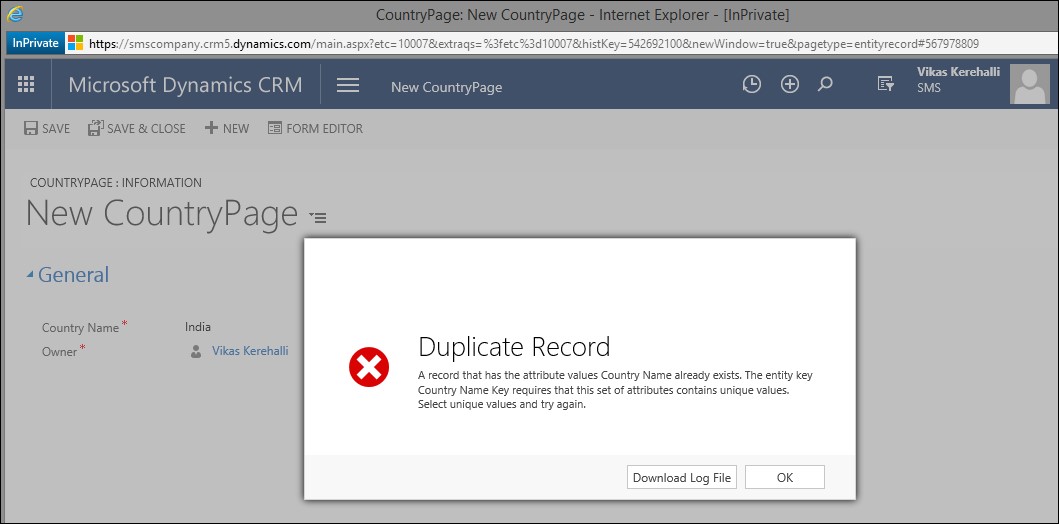
- The Country Name Value cannot be duplicate, have added sms_countryname field to Primary Key list like shown below.
Fig – CountryPage Entity with Primary Key as sms_countryname Field.
Fig – Creation of Record and Saving for the CountryPage Entity.
Fig – Email ID duplicate record error on CountryPage Entity.
- Update some fields and save the records.
- Finally, Delete the records.
Demo: Using C# Console Application
- Download, Extract the CRM SDK from the above link.
- Open the solution BizTalk.CRMOnline.CRUD.ConsoleApplication.
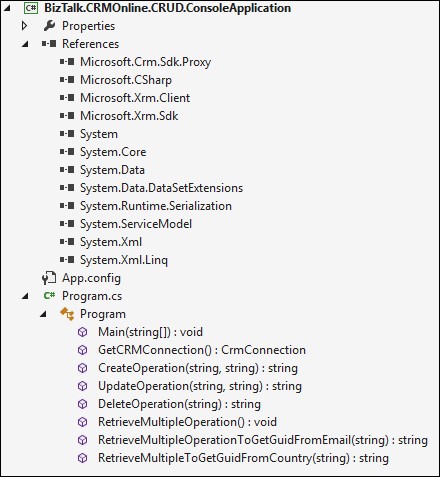
- Refer the below DLL’s from the CRM SDK, that you extracted, Build.
Fig – Referencing assemblies from CRM SDK Kit.
- Set Console application to Set as StartUp Project using right-click on the application properties.
- Follow the menu from a console application.
Step 0: Configure
- Go to the method GetCRMConnection () in the console application.
- Refer below code snippet.
- Update the Username, Password, CRM Service URL.
- Save Changes, Build.
#region CRMConnection

/// <summary>
/// Gets the CRM Connection for the details supplied below.
/// </summary>
/// <returns>System CRMConnection.</returns>
public static  CrmConnection GetCRMConnection()
{
 string connectionString = "Url=https://smscompany1.crm8.dynamics.com/XRMServices/2011/Organization.svc; Username=smsvikask@smscompany1.onmicrosoft.com; Password=;";
 return CrmConnection.Parse(connectionString);
}

#endregion
Step 1: Create Operation
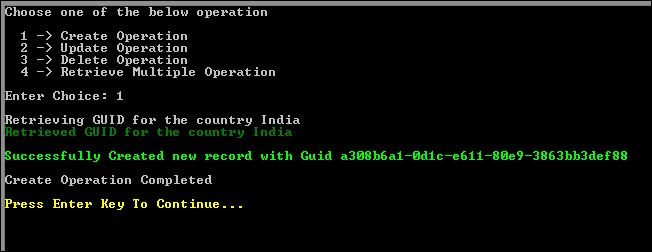
- Default values are hard coded in Create Operation method.
- Result: Verify the record in CRM for the entity RegistrationPage Entity.
Fig - C# Create Operation.
Fig - Newly Created Record in CRM.
Step 2: Update Operation
- In this snap only country name is updated, you could you all columns.
- Result: Verify the records in CRM, the Country Name is updated to Canada as part of update operation for the same email Id you passed in console application variable.
Fig - C# Update Operation using Email ID Filed.
Fig – Updating Record in CRM for the Country field using Email ID field.
Step 3: Delete Operation
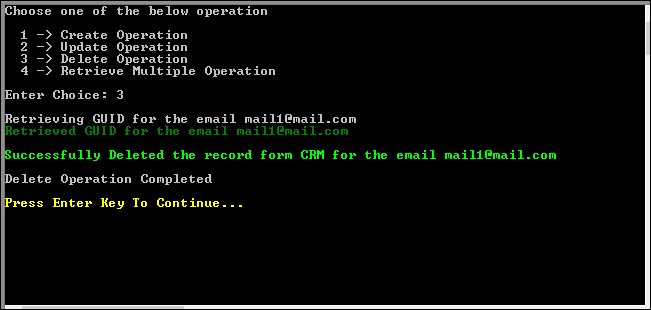
- Result: Verify the records in CRM, the record would be deleted for the same email Id you passed in console application variable.
Fig – C# Delete Operation using Email ID field.
Fig – When you refresh CRM after deleting from the console using Email ID field.
Fig – Delete Operation using Email ID field - No records available in CRM, when you try to delete.
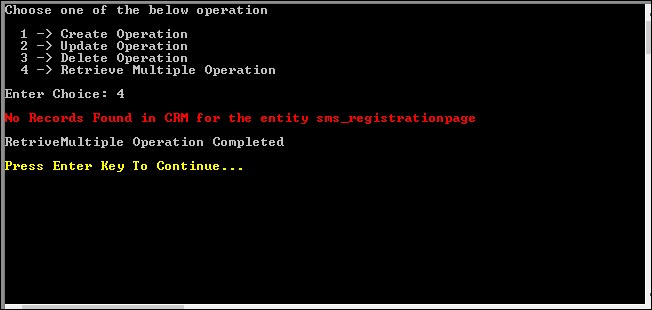
Step 4: RetrieveMultiple Operation
- Result: All the records will be displayed on the console.
Fig – Available record for the entity RegistrationPage.
Fig - RetrieveMultiple Records from the entity RegistrationPage.
Conclusions
- This article helps you in understanding the CRUD operations using C# Console application.
- You should observe all the Classes, Properties, Method Overloads of every operation, that helps you to invoke the same in BizTalk as well.
- In my Next article, I will be explaining CRM CRUD Operation using BizTalk Application.
Continuation from here
- This article has a continuation from here Part 2.
- BizTalk Server 2013 R2 Dynamics CRM Online / On Premise CRUD Operations (Part 2)
See Also
- Integration Between Microsoft BizTalk Server 2013 & Microsoft Dynamics CRM Online 2016
- Another important place to find a huge amount of BizTalk related articles is the TechNet Wiki itself. The best entry point is BizTalk Server Resources on the TechNet Wiki.

