SQL Server 2016 Step-by-Step: Installing a Free Evaluation - Part 9 -Browse the Services
To Return to parent article** -** Installing a Free Evaluation of SQL Server 2016 Step by Step Installation.
Steps
Pin the most frequently used icons to the start
1. Click on the Windows icon, then on “New apps installed” within your virtual server

2. Pin the following icons to start; -
![]()
2.2 SQL Server Management Studio
![]()
2.3 SQL Server Reporting Services Configuration Manager
![]()
2.4 SQL Server Configuration Manager

3. Resulting in; -
[
Make sure all the services are running
4. Make sure all the services are running by launching SQL Server Configuration Manager by clicking on; -
](resources/0247.StartMenu.png)
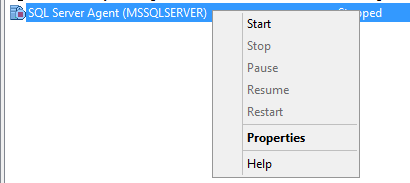
- To start a service right click your mouse on the service icon.
Select Start Mode "Automatic".
Click the "Apply" button.
Right click the service again and select "Start"

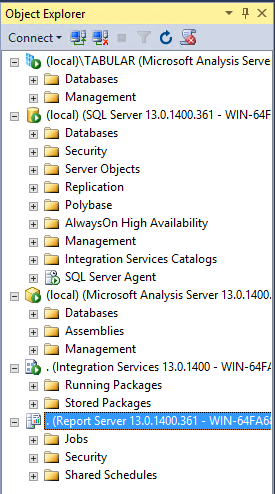
Browse the Services within SQL Server Management StudioLaunch SSMS by clicking on the following icon to connect to all the installed service instances:

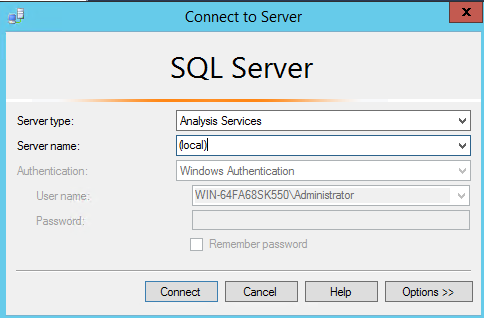
Click on the "Connect" button on near top left hand side of the screen, to choose which service you need to connect to:

Connect to the Database Engine by entering (local) as the service name and clicking on the "Connect" button.
- Connect to the Analysis Services Multidimensional service by entering (local) as the service name and clicking on the "Connect" button.
- Connect to the Analysis Services Tabular service by entering (local)\TABULAR as the service name and clicking on the "Connect" button.
Connect to Integration Services by entering . as the service name and clicking on the "Connect" button.

Connect to Reporting Services by entering . as the service name and clicking on the "Connect" button.

See Also
To Return to parent article** -** Installing a Free Evaluation of SQL Server 2016 Step by Step Installation.


