Create Ubuntu Virtual Machine – Azure Portal
In this article, we will go step by step to create an Ubuntu 14.04 LTS server using two different deployments: Classic & Resource Manager.
Ubuntu Server is the world's most popular Linux for cloud environments. Ubuntu Server is the perfect virtual machine (VM) platform for all workloads from web applications to NoSQL databases and Hadoop.
Deployment Models:
Classic: This model is supported by most existing Azure resources today. New resources added to Azure will not support this model.
Resource Manager: This is the newest deployment model for Azure resources. Most newer resources already support this deployment model and eventually, all resources will.
Prerequisites
- Microsoft Azure Subscription (MSDN subscribers or sign up for one-month free trial)
- PuTTY – free SSH or telnet client. Click here for setup
You will learn
- How to create an Ubuntu Server
- Deployment Models: Classic & Resource Manager
- How to establish a connection with Ubuntu Server
Create Ubuntu Virtual Machine
**Step 1: **Navigate to Azure Portal and sign in using Azure Subscription credentials.
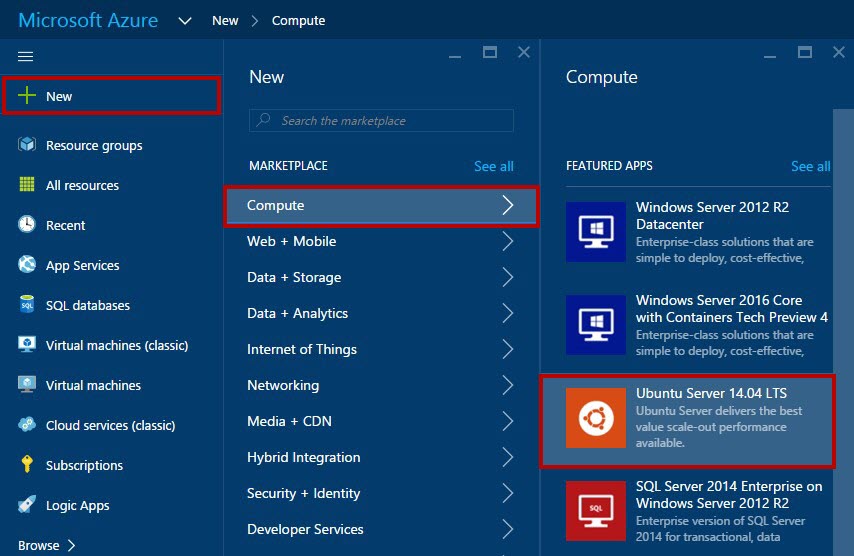
Step 2: Click New -> Compute -> Ubuntu Server 14.04 LTS
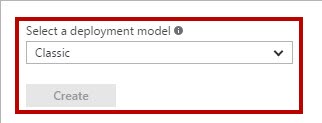
Deployment Model: Classic
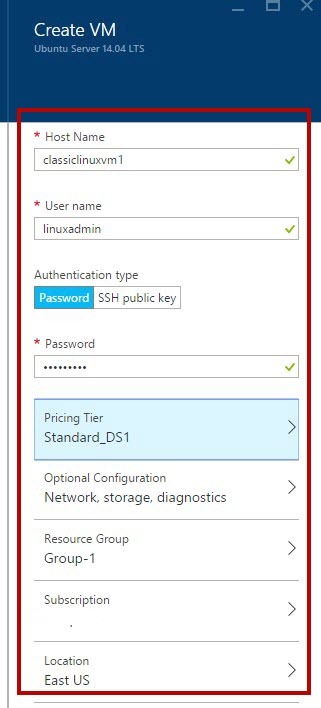
Enter Hostname, Username and Password
Also select Pricing Tier, Optional Configuration, Resource Group, Subscription and Location
Linux VM settings
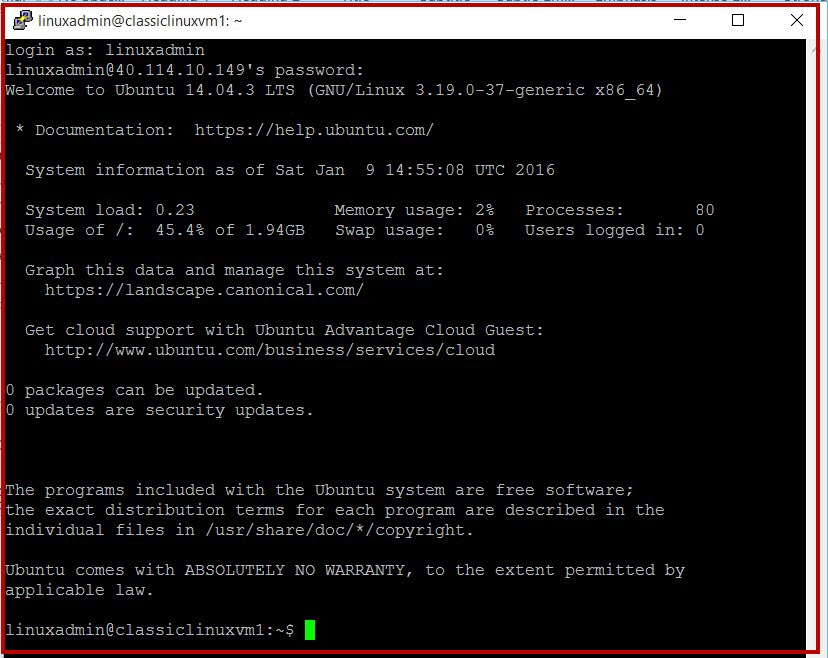
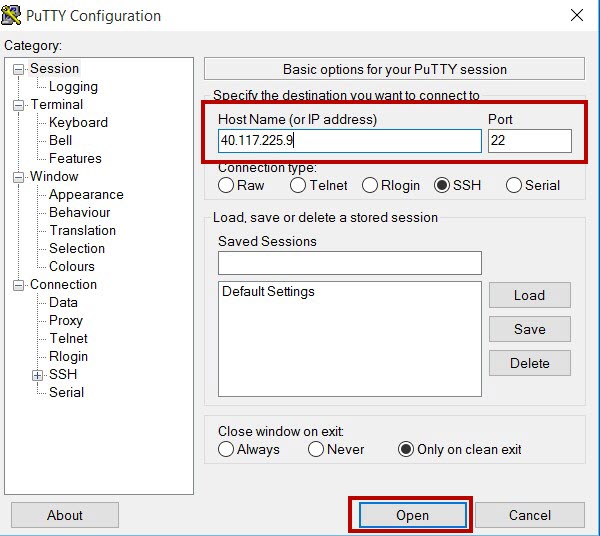
To connect with Linux VM you need to install any SSH Client. Here we are using PuTTY.
Enter Virtual IP address available on settings blade
Enter VM login username and password
**
Deployment Model: Resource Manager**
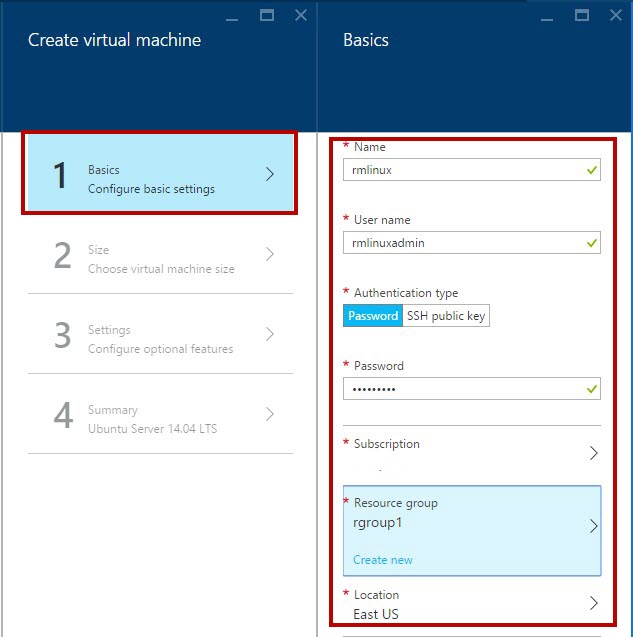
- Basics – VM Name, Username, Password, Subscription. Create new or choose existing Resource Group, Location
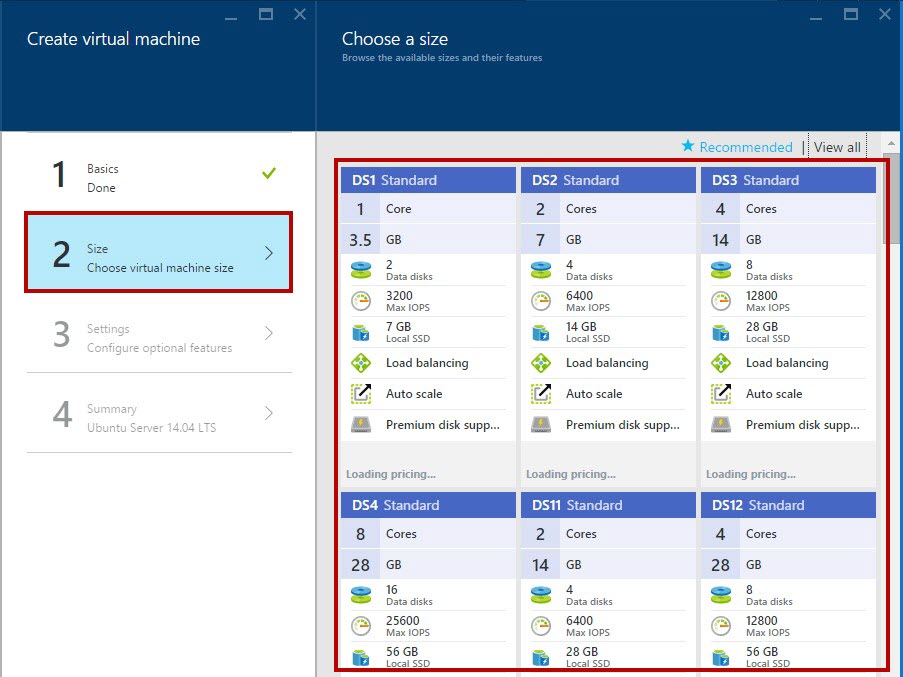
2. Size – Basic or Standard
Select Pricing Tier according to requirement. Two Tiers available: Basic tier and Standard tier. Also Virtual Machine's series available: A, D, D_V2, DS, G, GS.
**
By Tier**
- **Basic Tier: **An economical option for development workloads, test servers and other applications that do not require load balancing, auto-scaling or memory intensive virtual machines
- **Standard Tier: **Supports all virtual machine configurations and features. It offers the most flexibility.
By Series
- A-Series: The Normal virtual machine with basic and standard tier
- D-Series: Virtual machine features solid state drives (SSDs) and faster processors than A Series. It is ideal for applications that demand faster CPUs, better local disk performance or higher memories.
- D_V2 Series: Instances are the next generation of D-Series instance which can be used as Virtual Machines or Cloud Services. It is average 35% faster than D-Series.
- DS-Series: It is specifically targeted for Premium Storage.
- G-Series: The "Godzilla" Virtual Machine with a large allocation of RAM, more SSDs. It will provide unparalleled computational performance than any current VM size in a public cloud.
- GS-Series: It is specifically targeted for Premium Storage. Pricing for GS-Series is the same as G-Series.
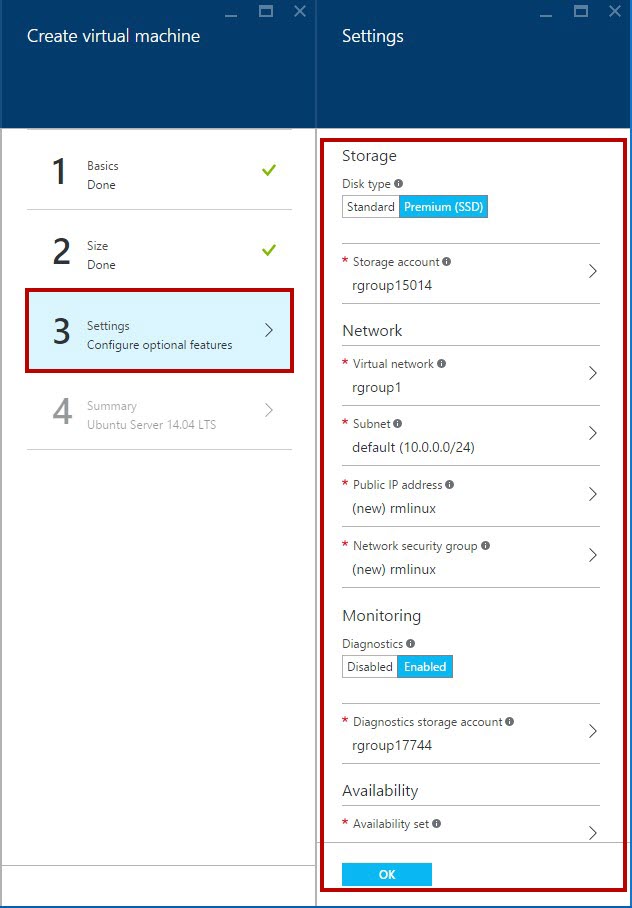
3. Settings - Disk type, Storage account, Network, Subnet, IP address, etc.
- Summary blade – VM summary
To connect with Linux VM you need to install any SSH Client. Here we are using PuTTY - free SSH client.
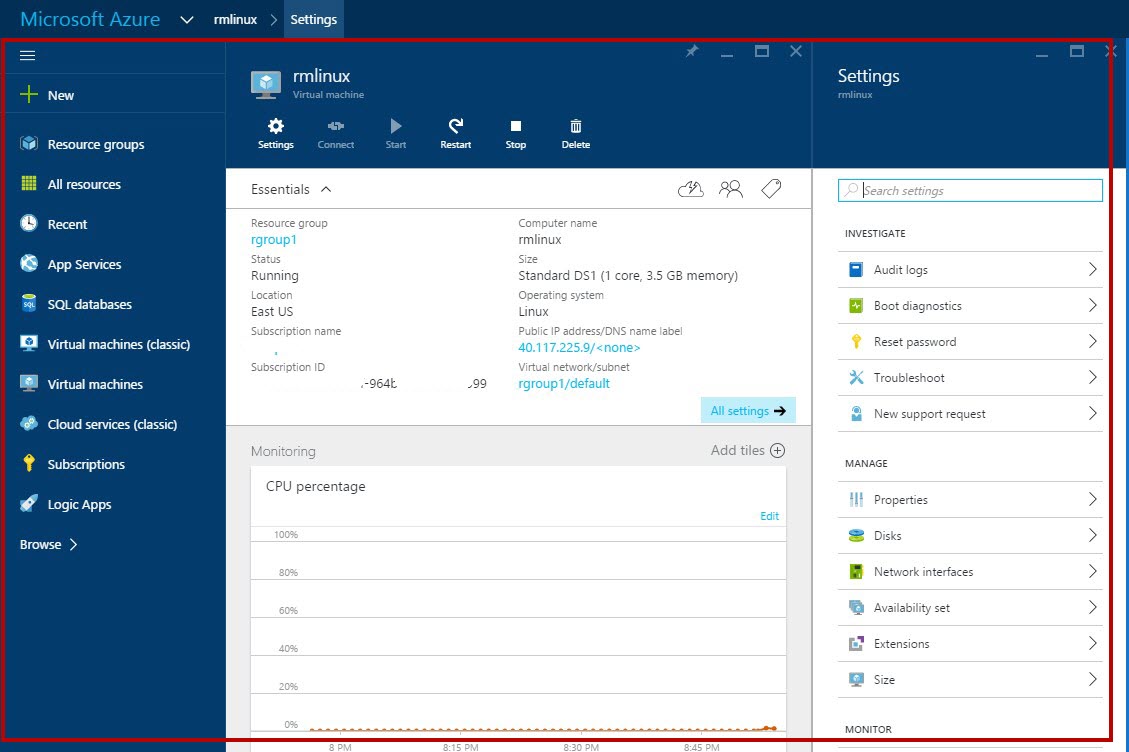
Enter Virtual IP address available on settings blade
Enter VM username and password
Congratulations you have successfully created an Ubuntu Server Virtual Machine on Microsoft Azure!
