Azure: Create WordPress Blog using Web App
In this article, we will go step by step to create WordPress Blog using Azure Web App in Azure Portal. Web App is a part of Azure App Service. WordPress on Azure is very cost effective, easy to install, scalable. All WordPress plugins are available and secure. By default, it is using MySQL as a database. Also, we can use SQL for the database.
Prerequisites
- Microsoft Azure Subscription (MSDN subscribers or sign up for one month trial )
How to Install WordPress on Azure
Step 1: Navigate to Azure Portal and sign in using Azure Subscription credentials.
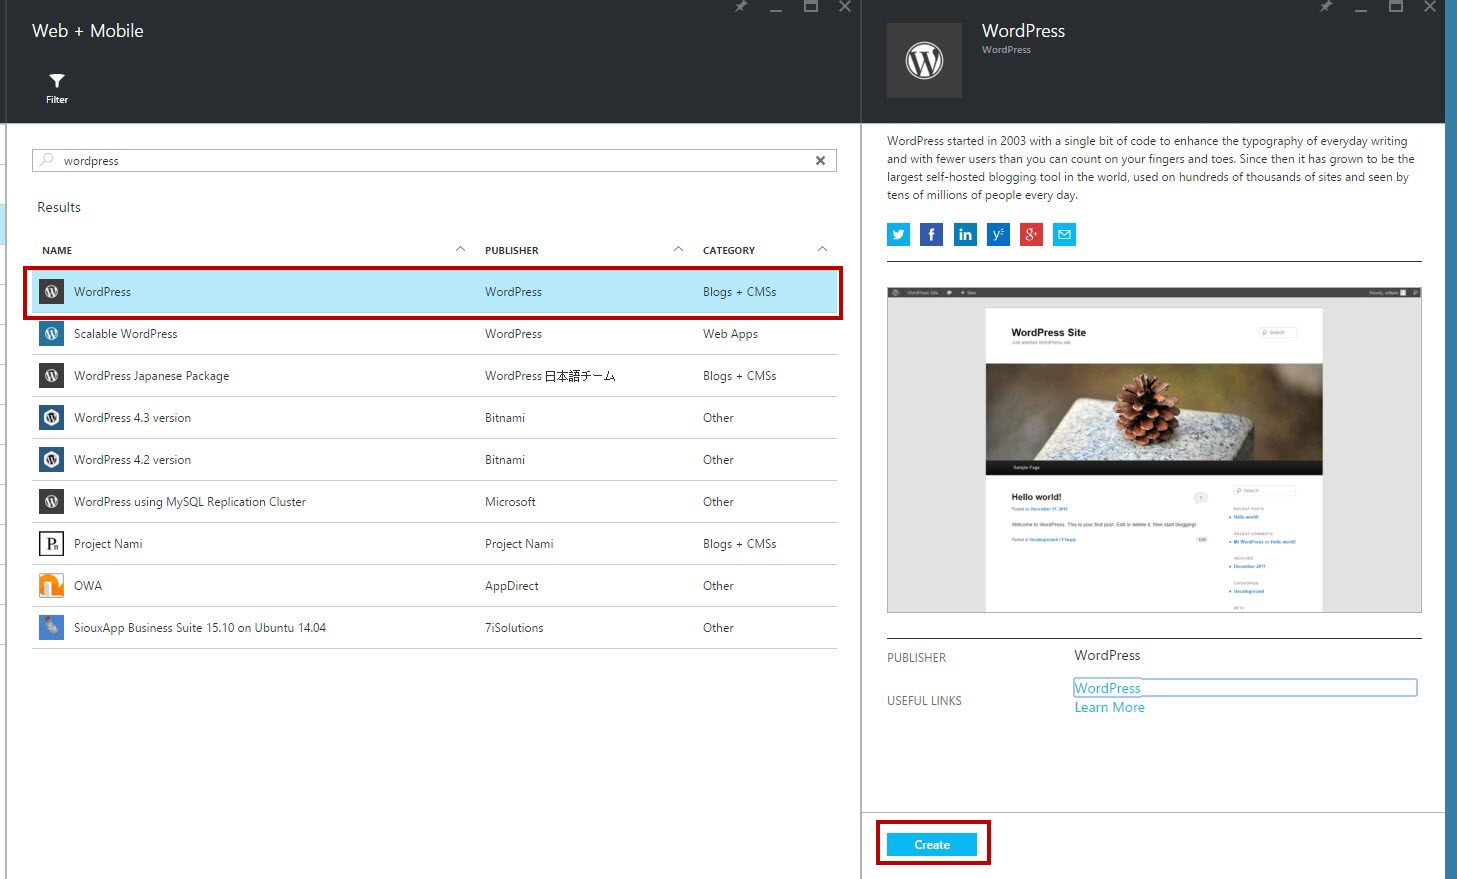
Step 2: Click +New -> Web + Mobile -> "See all" option (top-right side of Web+Mobile blade)
Step 3: Filter blade will open and search for "WordPress" template
Step 4: Click the result "WordPress". Further WordPress installation blade will open
Step 5: Enter App Service Name and Subscription
Step 6: Create New Resource Group or use existing from the list. For more information about Resource Group please click here
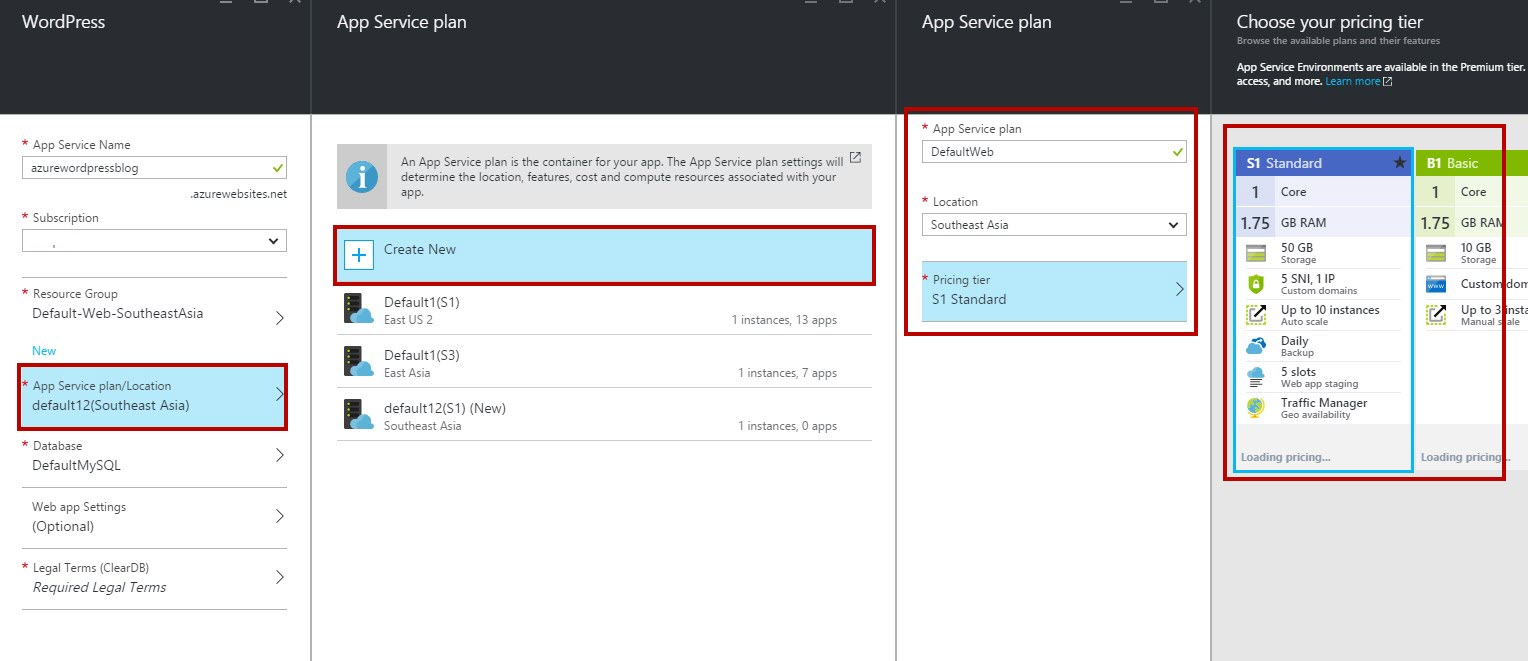
Step 7: App Service Plan/Location - existing available plans
or
Step 7: App Service Plan/Location - create New App Service Plan depending on pricing tier and location
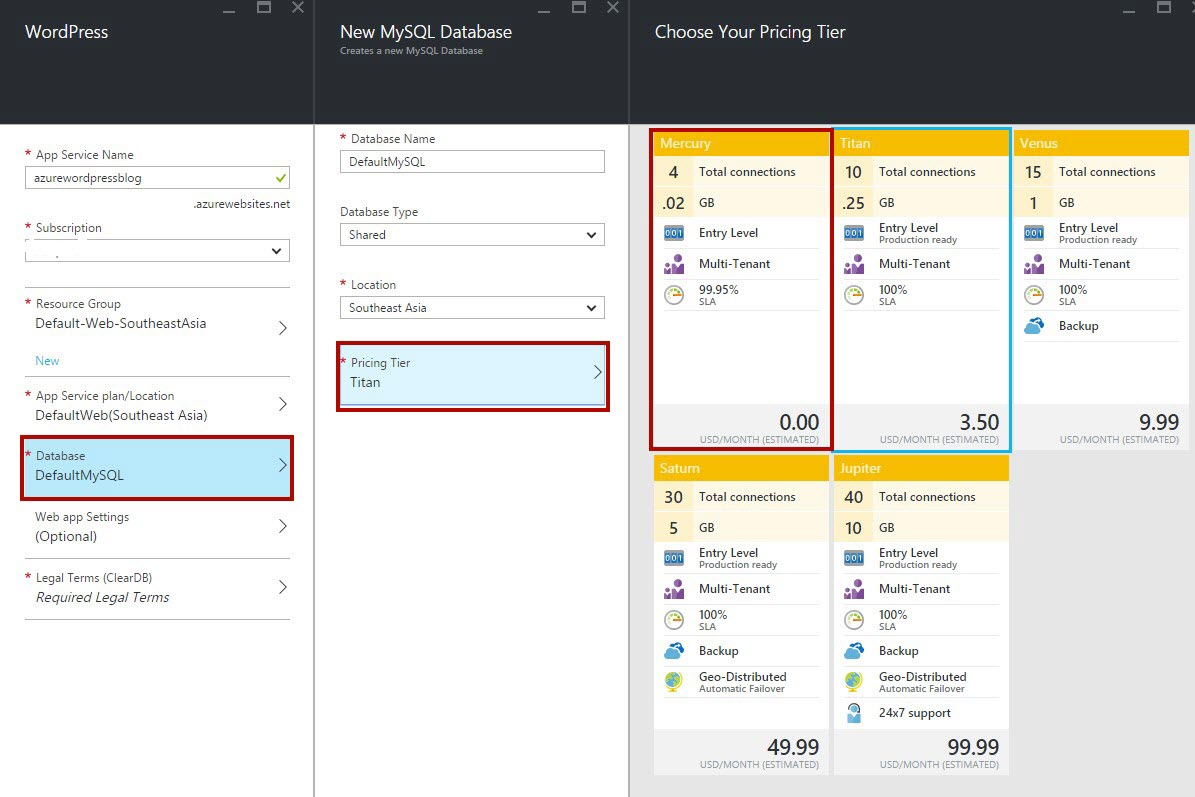
Step 8: Select Database option because when we are creating a WordPress blog in backend MySQL will be created by default
Step 9: Web App Settings - leave default settings
Step 10: Last option is "Legal Terms(ClearDB)". Click "OK" button
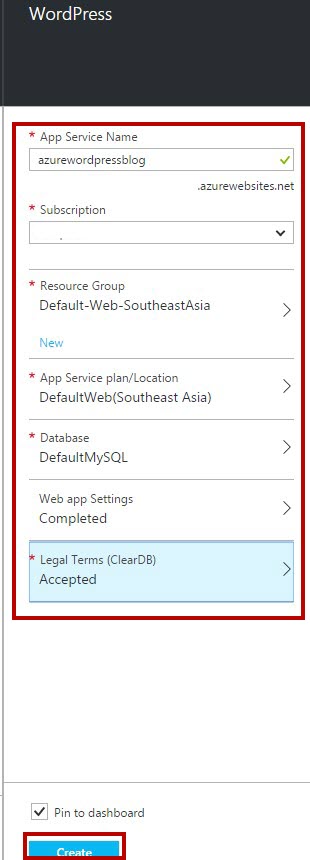
Full settings of WordPress Blog
Step 11: Run the WordPress blog URL in browser
Choose Preferred Language
Step 12: Enter Site Title, Admin Username. Password. Email id (for recovery admin password). Then click "Install WordPress" button
Step 13: Click "Login" button. Enter WordPress admin Username and Password
WordPress blog Dashboard
Now type WordPress blog URL into another browser eg. http://wordpressblog.azurewebsites.net
Also, it is responsive so it will adjust according to the mobile screen
Congratulations, your WordPress Blog is ready using Web App with the help of Azure Portal on Microsoft Azure!


