SharePoint Server 2016: Build a Reference Image (Sysprep)
In this article we will see how to build a standardized image for deploying SharePoint Server 2016.
This will allow developers or system administrators some guidance to deploy SharePoint Server 2016 Farm. No deployment major changes since SharePoint Server 2013 and lots of these instructions refers to building a Windows Server image.
Note: this guide will not cover the PSConfig Wizard Configuration
SharePoint Server 2016 Overview
- New and improved features in SharePoint Server 2016
- SharePoint 2016 RTM and the Future of SharePoint event
- SharePoint 2016 - Technet landing page
- Hardware and software requirements for SharePoint Server 2016
Supported Scenarios
| Scenario | SharePoint 2016 | Usage |
| Multi-Server Farm | Roles per Server (MinRole) | Production |
| Single Server Farm | All-In-One SharePoint Role | Tests, Development and Demo |
| SharePoint Foundation | Not available | > SharePoint 2013 Foundation |
| Standalone Deployment | Manual Only | Deprecated |
As per this blog post, here is a resume of supported platforms:
| Win Std or Datacenter | Supported |
| Workgroup Deployment | Unsupported |
| Domain Controller | Developer Installation |
| Client OS | Unsupported |
| Hyper-V Dynamic Memory | Unsupported |
| Windows “Web” edition | Unsupported |
Build Versions
| SharePoint | Operating System | .NET Framework | Database Server |
| Production | WinServer 2012 R2 9600 | .NET Framework 4.5.2 | SQL Server 2014 SP1 |
| Test | WinServer 2016 TP(4) 10.0.10586 | .NET Framework 4.6 | SQL Server 2016 (RC) |
| 16.0.4351.1000 |
1. Build the Windows Server Image
Depending of your deployment method, these steps may varies. This guide is based on a Hyper-V setup. Some of these settings can be set differently if you are using deployment software or Group Policy.
Install a Windows Server 2012R2
Start with a fresh installation, as we going to sysprep, the Rearm count should at maximum (3). If you want to use an exiting template, be sure to check the Rearm remaining count with : slmgr.vbs /dlv.
Note: if you’re using an evaluation copy of Windows Server 2012R2, the rearm count will be set to (5)
Steps:
Create a Hyper-V Virtual machine (Gen1 or Gen2)
Attach two virtual disk (80GB)
Disable Dynamic Memory
Set RAM and Processor (16) (4)
Attach an 2012R2 ISO (preferred 9600.17050)
Start and install the virtual machine as usual
Define Administrator password
-
- This will not be copied during the sysprep phase in this guide
Patch to the latest version available
Steps: :
- Enable Automatic Update
- Check for update
- Install all updates
- Reboot
- Start again
Note: with 9600.17050 you will restart two times for completely patch (end-March 2016)
Note: Update process will continue after installing pre-requisites for SharePoint.
Configure Disk Settings
With a default recommendation for SharePoint Server 2016:
- 80 GB for system drive
- 80 GB for second drive
Steps:
- Create second disk partition
- If you want change default letter to D:\
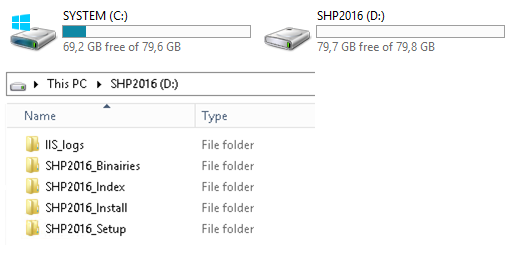
- Create File Structure for SharePoint
MD D:\SHP2016_Binairies
MD D:\SHP2016_Setup
MD D:\SHP2016_Install
MD D:\SHP2016_Index
MD D:\IIS_logs
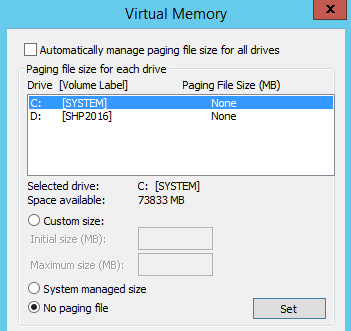
Particular attention should be the pagesys. (virtual memory) used for SharePoint Server. You can read about here. It’s recommended to use 1.5 times the RAM size and if you can, move the pagesys file to another disk partition for performances tuning. For reducing the base image size footprint we will disable it:
Steps:
- Disable PageSys
- Remember to turn it on after your image deployment
Configure Performance Settings
This step is optional, but the default settings is “let windows choose”.
- For SharePoint deployment, using “adjust for best performance” should be set
- Also check(default) than the processor scheduling is set to “Background Service”
Configure Power Option
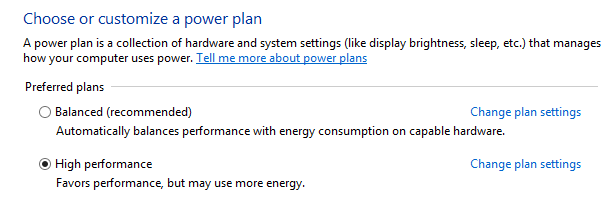
One very important steps is to setup Power Plan to “High Performance”. The default settings when you install a Windows Server is balanced mode. For highly used servers (like SharePoint, Database or RDS) this settings must be configured.
- You can setup Power plan with: powercfg.exe
 Powercfg –l
Existing Power Schemes (* Active)
-----------------------------------
Power Scheme GUID: 381b4222-f694-41f0-9685-ff5bb260df2e (Balanced) *
Power Scheme GUID: 8c5e7fda-e8bf-4a96-9a85-a6e23a8c635c (High performance)
Power Scheme GUID: a1841308-3541-4fab-bc81-f71556f20b4a (Power saver)
Powercfg –s 8c5e7fda-e8bf-4a96-9a85-a6e23a8c635c
Recommended:
- To avoid misconfiguration, you should have a Group Policy Object for controlling this option in your environment.
Install your software (utilities, antivirus, custom)
If you plan to install custom software or antivirus, please refers to your software vendor for implementing software into a base image.
- Useful : ULSViewer, Notepad++, Sysinternals
Others options :
Server Manager and IE Enhanced Mode
You can give the template some additional configuration. These steps are mandatory if you control these settings in another place.
Hide Server Manager At Logon
By disabling Server Manager we can save precious seconds at each logon. With a less impacting footprint when you need to logon locally on the server.
Disable ServerManager through the “Server Manager Properties”
Or by using gpedit.msc ( local group policy )
Computer Configuration\Administrative Templates\System\Server Manager
-
- Do not display Server Manager automatically at logon
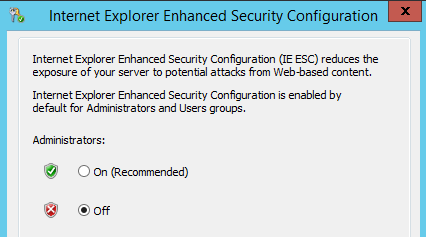
Turn Off IE Enhanced Security for Administrator
If you don’t want to include this settings in your image for security purpose, please note than running the installation of a new SharePoint farm will disable this settings for you.
On the previous part on this guide, we have setup a default Windows Server Image ready to install a fresh copy of SharePoint Server. In this part, we will install the binaries and base configuration for SharePoint and generalize the image for deployment.
2. Install SharePoint Server Binaries
Prepare source and answer file
Grab a SharePoint Server 2016 version. At this state, you will need to have proper key for SharePoint Server 2016 licensing. Remember than you can’t change the product key after the installation. Only upgrade version Standard upgraded to Enterprise (like SharePoint 2013).
In this guide we will use the TRIAL key : NQGJR-63HC8-XCRQH-MYVCH-3J3QR
As the trial key is an Enterprise version, DO NOT USE this key for building your image. The complete re-installation of SharePoint farm should be made if you use this key.
- Copy Share Point Server 2016 source to your Server
- Mount the image to the drive you want
- Copy or edit the configuration files:
- Save-it to D:\SHP2016_Setup\Config.xml
- Sample config.xml
 <Configuration>
<Package Id="sts">
<Setting Id="LAUNCHEDFROMSETUPSTS" Value="Yes"/>
</Package>
<Package Id="spswfe">
<Setting Id="SETUPCALLED" Value="1"/>
</Package>
<Logging Type="verbose" Path="D:\SHP2016_Setup" Template="SharePoint Server Setup(*).log"/>
<PIDKEY Value="NQGJR-63HC8-XCRQH-MYVCH-3J3QR" /> <!-- CHANGE THIS-->
<Setting Id="SERVERROLE" Value="SINGLESERVER"/>
<Setting Id="USINGUIINSTALLMODE" Value="1"/>
<Setting Id="SETUPTYPE" Value="CLEAN_INSTALL"/>
<Setting Id="SETUP_REBOOT" Value="Never"/>
<INSTALLLOCATION Value="D:\SHP2016_Install" /> <!-- CHANGE THIS-->
<DATADIR Value="D:\SHP2016_Index" /> <!-- CHANGE THIS-->
</Configuration>
Pre-requisites : SharePoint Server 2016
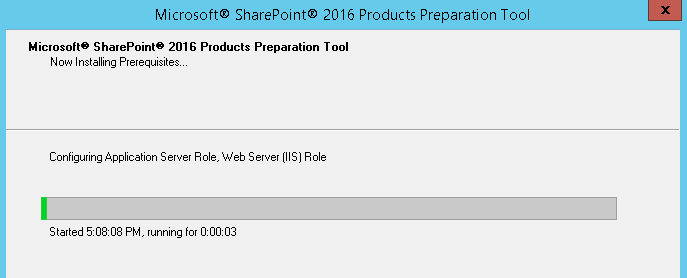
The first step is to run the prerequisitesinstaller.exe.
- Required Roles and Features ( .NET, IIS )
- Required software for SharePoint 2016
You can run this wizard by cmdline or in GUI
Steps:
- Start CMD as administrator
- Execute
D:\SHP2016_Binairies\prerequisiteinstaller.exe /unattended
- Once the installation is complete, reboot.
The Pre-requisites installer will do the following in the background:
1. Add-WindowsFeature
Add-WindowsFeature Application-Server,Web-Server,windows-identity-foundation,NET-Framework-45-ASPNET,Web-Mgmt-Console,Web-Mgmt-Compat,Web-Metabase,Web-Lgcy-Mgmt-Console,Web-Lgcy-Scripting,Web-Mgmt-Tools,Web-WMI,AS-Web-Support,Web-Common-HTTP,NET-HTTP-Activation,NET-Non-HTTP-Activ,NET-WCF-HTTP-Activation45 –verbose
2. Download and install the following software with arguments:
(This table can be useful if your server has no access to internet for downloading the files)
| Prerequisite Name – Download Link | Arguments |
| Microsoft SQL Server 2012 Native Client | ADDLOCAL=SQL_SNAC_CORE,SQL_SNAC_SDK IACCEPTSQLNCLILICENSETERMS=YES /quiet /norestart |
| Microsoft ODBC Driver 11 for SQL Server | IACCEPTMSODBCSQLLICENSETERMS=YES /quiet /norestart |
| Microsoft Sync Framework Runtime v1.0 SP1 (x64) | /quiet /norestart |
| Windows Server AppFabric | /i CacheClient,CachingService,CacheAdmin /gac |
| Microsoft Identity Extensions | /quiet /norestart |
| Microsoft Information Protection and Control Client v2.1 | /quiet /norestart |
| Microsoft WCF Data Services 5.6. | /quiet GacRuntime=1 |
| Microsoft .NET Framework 4.6 | /q /norestart |
| Cumulative Update Package 7 for Microsoft AppFabric 1.1 | /quiet |
| Visual C++ Redistributable Package for VS 2012 | /q /norestart |
| Visual C++ Redistributable Package for Visual Studio 2015 | /q /norestart |
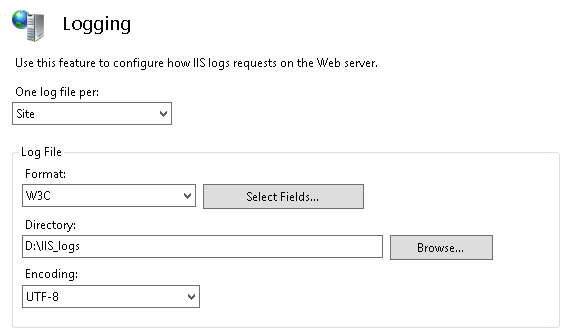
Configure IIS Logging Path
For moving IIS logs to another partition in your base image, open IIS Management console and at the Server Level, change the “Logging” path to the one created earlier.
Run Windows Update Again
As we just added some news features to Windows, you must launch Windows Update again:
- Check for update
- Install Recommended Update
- Reboot
Install SharePoint Server 2016 with setup.exe
This one is the last step that will install SharePoint to the desired location:
- Be sure to have the answer file prepared in the previous step
- Run setup.exe with the following arguments
D:\SHP2016_Binairies\setup.exe /config D:\SHP2016_Setup\Config.xml
If you have used the provided config.xml sample, the wizard will run and ask you to confirm:
- EULA
- Installation Path
- Data Path
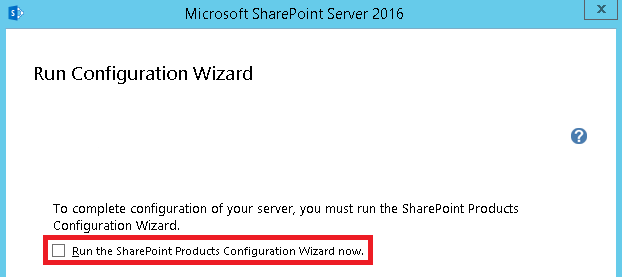
At the end of the installation, DO NOT RUN the SharePoint Products Configuration Wizard. Untick the box and close the wizard.
- If you want to run completely unattended, use the following parameters:
<Display Level="none" CompletionNotice="Yes" />
<Setting Id="USINGUIINSTALLMODE" Value="0"/>
An example can be found in the installation media:
- \files\setupsilent\config.xml
Apply Languages Pack
At this point you can apply language pack to your image.
You can download language pack here.
- Do not run PSCONFIG Wizard after applying the language pack.
Cumulative Updates
- Do not run PSCONFIG Wizard after applying the cumulative update
3. Cleanup, Sysprep and Deploy
Before sysprep'ing the image, some cleanup:
- Empty %temp% logs ( it should be empty already )
- Delete locally copied SharePoint source (as you prefer)
- Set Windows Update to “Check for Updates but let me choose”
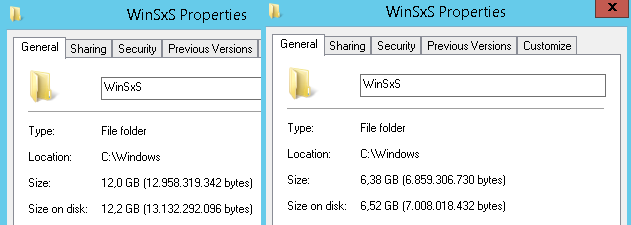
- Run StartCompentCleanup /ResetBase
This step is particularly useful for reducing the image size. It will clean the WinSxS folder for superseded updates. If you execute this cmd, you will not be able to revert update or service pack. If you’re not sure about this, don't do.
dism /online /Cleanup-Image /StartComponentCleanup /ResetBase
- Reboot
After reboot, the WinSxS folder will be reduced.
Imaging Process
Since your image is ready, we can now sysprep-it for future deployments.
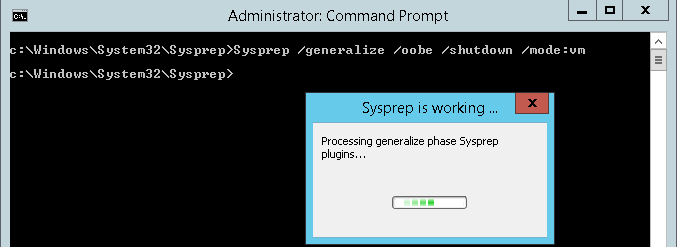
- Execute as administrator in C:\Windows\system32\Sysprep
sysprep.exe /generalize /oobe /shutdown /mode:vm
- /mode:VM is mandatory
- The Virtual Machine will shutdown and be ready for deployment
Note : the /mode:vm is designed to be run in a virtual machine. This will be useful if you’re planning to run the template in the same POSE as the imaging process. It will skip the device drivers phase when launching the virtual machine for the first time. If you do not set /mode:VM in your template, the following screen will appear.
Compact Virtual Disk in Hyper-V
- When the virtual machine is off, compact VHD using the Hyper-V Manager
Export-VM as template
- Use your preferred method for exporting the virtual image
If you have used Hyper-V, you can Export the VM with both disk using the Hyper-V Manager or with Export-VM cmdlet.
Deploy and Domain Join
- Use your preferred deployment software for the template and the domain join
If you have used Hyper-V, you can Import the VM with both disk using the Hyper-V Manager or with Import-VM cmdlet.
Be sure to :
- Rename Disk ( as Hyper-V Manager will export them with the same Name
- use the –Copy -GenerateNewId parameters
Join the server to new or existing farm
- Once the newly deployed SharePoint Server is in a domain
- CHECK to re-enable Virtual Memory (PageSys) disabled in the imaging process
- Start the PSConfig Wizard
Other Resources
- SharePoint Sysprep - Blog MSDN
- Using Sysprep to create SharePoint 2010 images for use in Microsoft Azure Virtual Machines
- Sysprep (Generalize) a Windows installation
