Windows Backup: Process of Mounting a System Image
Scenario
It was only 2 days back when a user had posted about exercising the use of a built-in creation tools for the system image in Microsoft Win 7 Operating System version as well as the newer Microsoft Windows 8version for the purpose of creating the backups of his computer system every time he ever planned for upgrading it.
Problem Encountered
Now, if anything goes terribly wrong with his system, he could simply boot to the system repair disk, following which, he could easily restore the system image, and he is again back with that to the place from where he had initiated. However, let us assume that the process of installation went fine, but he found that there was file that he needed to get from that backup, but he did not wish to restore the entire data from the backup; only he needed that particular file.
A Good Thing to Note Here
The best part about this is that one can perform this task very easily, and this is because, this system image is actually stored as a .VHD file (or .VHDX file in case of Microsoft Windows 8 version). And also, the Windows 8 OS version can easily mount a VHD as a drive, thus, making it easily possible for accessing the files from that backup.
The Process
One needs to simply plug in his external drive that he used to use for his backup, and then find the folder “WindowsImageBackup” (must be at the drive’s root), and then, inside it, find the folder that matches with the name of the system that he took the backup of. Now, inside that, there would be a folder starting with “Backup” and then mentions the backup date. And eventually, inside that folder for the backup, there is a .vhd file (or the .vhdx file) that contains the system backup (one can even view multiple .vhd(x) files, and if this is so, one must see the one that is the largest). If the user right-clicks that particular file and then selects the option for “Mount”, then his Windows will actually mount that VHD file for him, and then, will assign a drive letter to it.
Error Encountered Often
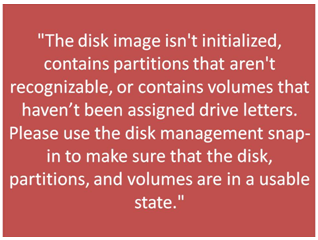
Some users face the problem where they get this error message, mentioned below, and then, a drive letter was not at all assigned.
Solution
For some of these users facing this issue, it is quite easy and comfortable to directly go inside the utility of “Disk Management”, locate the drive, and then finally, assign a letter to it, and this can all work perfectly from then on. Also, once the user has got his VHD well-mounted, it will appear to be simply like some other drive; therefore, he can easily copy any of the files that he might need and do away with the problem.
Note
The user might need updating of the permissions on certain folders if however his accounts on his current machine do not match with those, under which, that system image was initially formed.
Solution, in case a User Gets Stuck at the Step of “Could not Mount File” with Tough Luck, or Sometimes, with No Luck
Here, in this case, if the user is stuck at the step where he cannot mount the file and is facing issues with the same, then he has to open the tool for “Disk Management” (search for the “Create and format hard disk drive partitions” in the Start menu or the Start screen), and then, look for the drive, which does not have any letter assigned to it, and after that, he must simply right-mouse-click on that drive, and then, select the option for “Change Drive Letter and Paths…” and finally, give some drive letter, which is available, to it. Following this process would allow the user to mount that VHD.
A third party shareware product is available that provides freedom to recover data from Windows image backup files. Through Windows backup recovery software users can recover important data from corrupted (damaged) files by following few simple steps.
