Blend for Visual Studio: Tips & Tricks
Microsoft Blend for Visual Studio (formerly Microsoft Expression Blend) is a user interface design tool for XAML based application i.e. UWP, WPF or Silverlight.
Hint: This article is intended for beginners who are familiar with the interface and basic operations of Blend for Visual Studio and looking to explore more about it.
This article will simply discuss some easy steps to do basic data binding. We'll bind property of one element to property of another element. Those who aren't familiar with the concept of Data Binding can see this article.
Steps
After creating a new project i.e. Blank App (Universal Windows), follow these steps.
1. Textbox in designer
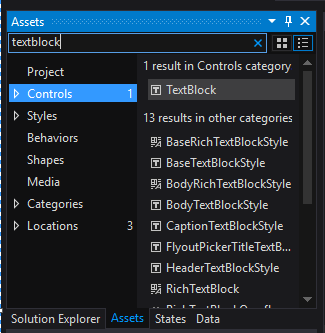
Type textblock in Search Assets bar, textblock will appear right below it. Drag and drop it on your designer (MainPage.xaml). Similarly, also put a slider on your designer.
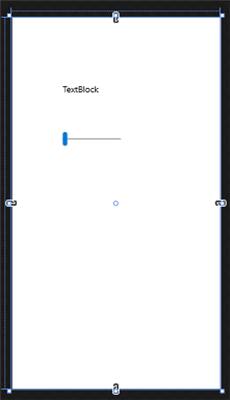
After completing the first step, it should look something like in the image below:
2. Binding
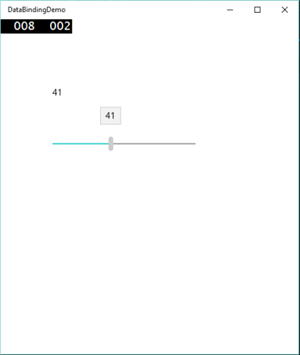
Now start some binding stuff. We'll bind text property of textblock to slider's value property. It means, text written in textblock will be same as the value of the slider. In a real-world scenario, you can use this for displaying volume in your apps or games. Makes sense? Great! Scroll down and complete remaining steps.
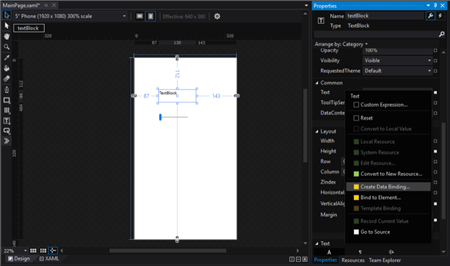
Click your textblock and look for text property in properties panel on the right side. You'll see a box right in front of it, click it and select create data binding.
3. Slider
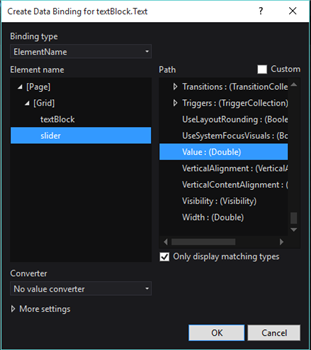
After clicking create data binding, a new window will open up. You just need to do three things in that. Select ElementName/strong> under Binding type, slider under Element name and Value: (Double) under path. Click OK.
4. Running Application
You can run your application and see the text changing according to the value of the slider.
Conclusion
Data Binding is one of the key concepts in windows apps. You can try out this trick with some other properties too. Microsoft Blend has made it quite easier. If you've got any suggestion or question, don't hesitate to comment below. Cheers!