Nano Server: Virtualization with VMware vSphere
This TechNet Wiki article provides an overview on how to deploy Windows Server 2016 Nano Server as a Virtual Machine in VMware vSphere virtualization platform. This page focuses on Windows Server 2016 Technical Previews and General Availability (GA) Nano Server deployment preparation in VMware virtualization environment.
1. Introduction
Have you heard of the new awesome Microsoft Windows Nano Server? Most of the built articles are revolving on physical hardware, Hyper-V and not forget, Azure. If your hypervisor environment is using VMware vSphere, those may just slightly miss the bandwagon to test Nano Server in their environment. Well, this article is going to change the game play a bit because we want you to test it out on vSphere 6.0 and we just cannot let the Hyper-V hypervisor enthusiasts have all the fun.
Other Hypervisor Articles;
So this article will handle integration of Windows Server 2016 Nano Server guest on VMware hypervisor host. Let us begin the journey with;
- Windows Server 2016 Technical Preview 3
- Windows Server 2016 Technical Preview 4
- Windows Server 2016 Technical Preview 5
- Windows Server 2016 General Availability (GA)
2. Preparation for Nano Server Image
At the time of creating this article, we will be focusing on Windows Server 2016 Technical Preview 3 and VMware vSphere 6.0. The technique on this article will not contribute huge differences between VMware vSphere ESXi hypervisor versions. Older version of VMware vSphere ESXi hypervisor may not support Windows Technical Preview as the Guest Operating System when creating a new Virtual Machine.
With the release of Windows Server 2016 Technical Preview 4 on 20/11/2015, Technical Preview 5 on 28/04/2016 and General Availability (GA) on 26/09/2016, we have updated this article with the same concept and proof the technique is still achievable with minor changes on some commands that also shows the progressive improvements between each preview to the release to market edition.
2.1. Where is the NanoServer content?
The NanoServer folder reside in the Windows Server 2016 Technical Preview / General Availability (GA) DVD Media.
2.2. Where do I start?
Copy the NanoServer folder from the media to the local drive using PowerShell.
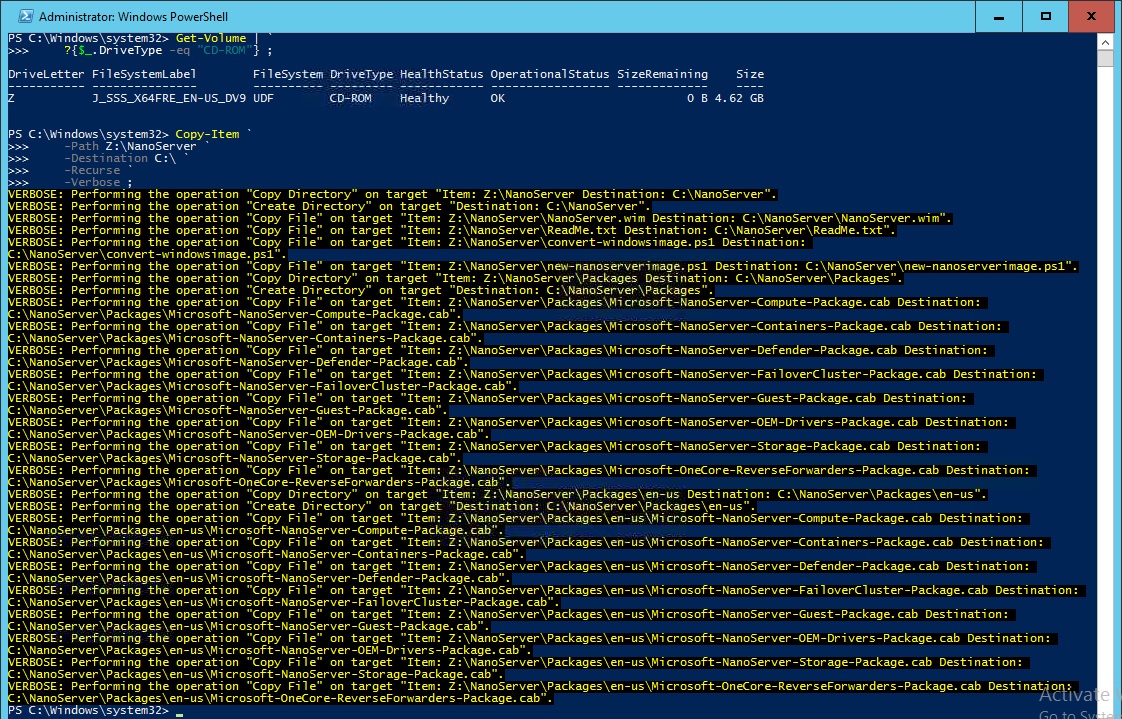
Firstly, find out the CD/DVD-ROM drive letter.
# Find out the CD-ROM Drive Letter
Get-Volume | `
?{$_.DriveType -eq "CD-ROM"} ;
Next, copy the Nano Server content from the Windows Server 2016 Technical Preview X / General Availability (GA) media to the local drive.
# Copy the NanoServer folder from the Windows Server 2016
# Technical Preview 3 DVD media
Copy-Item `
-Path Z:\NanoServer `
-Destination C:\ `
-Recurse `
-Verbose ;
2.3. Planning Nano Server image format for the environment
Which Nano Server image format should I choose? VHD, VHDX or WIM format? This really depends on your environment and your infrastructure planning for the future.
VHD Format
- Recommended Nano Server image format for Windows Server 2008 R2 HyperV host in Production environment.
- Plausible to use VHD format and manually mount the VHDX into a new VM in VMware ESXi host but recommends for Development or Test environment because servicing the disk capacity takes a little more effort.
- Plausible to take advantage of multiple boot of different Nano Server VHD image loaded within a single VMDK file for Development or Testing purposes.
- Plausible to copy the VHD file out of VMDK file and mount it into Windows Server 2008 R2 HyperV host instantly.
VHDX Format
- Recommended Nano Server image format for Windows Server 2012 R2 or higher HyperV host in Production environment.
- Plausible to use VHDX format and manually mount the VHDX into a new VM in VMware ESXi host but recommends for Development or Test environment because servicing the disk capacity takes a little more effort.
- Plausible to take advantage of multiple boot of different Nano Server VHDX image loaded within a single VMDK file for Development or Testing purposes.
- Plausible to copy the VHDX file out of VMDK file and mount it into Windows 10 workstation, Windows Server 2012 R2 or higher HyperV host instantly.
WIM Format
- Recommended Nano Server image format for physical hardware, PXE deployment or VMware ESXi host in Production environment.
- Extracting WIM file structure on VMDK allows Nano Server to take advantage of VMware ESXi host hypervisor & VMFS technology directly.
- Plausible to use WIM format and manually extract the file structure into a new VM in Windows Server 2008 R2 or higher HyperV Host but it takes a little more effort.
3. Preparation for VMware Tools Drivers
This section focuses on extracting VMware Tools in preparation to slipstream the mandatory drivers. If you are struggling with this, you may want to collaborate with your VMware evangelist and work together.
3.1. Where is the VMware Tools for Windows media located?
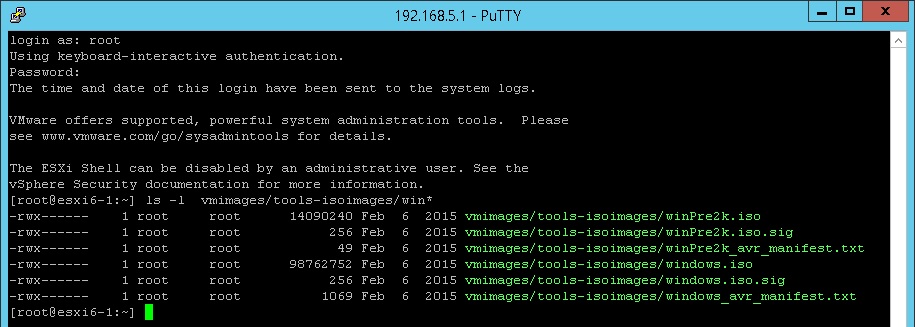
SSH to VMware vSphere ESXi 6.0 Host using PuTTY.
ls -l vmimages/tools-isoimages/win*
Download the vmimages/tools-isoimages/windows.iso file using WinSCP to the machine for content extraction
If your machine is also a VMware virtual machine, you can manually mount the ISO by following the article below;
3.2. How do I extract VMware Tools content from the ISO media file?
This is how to extract the VMware Tools content using the ISO Media with VMware Tools Installation Wizard to the destination folder below using PowerShell.
Firstly, we create an extracted folder to store all the VMware Tools content.
# Create a VMware_Tools_Extracted folder for extracting
# VMware Tools installation content
New-Item `
-Path C:\NanoServer\VMware_Tools_Extracted `
-Type directory ;
Next, we mount the VMware Tools for Windows ISO image.
# Mount the Windows VMware Tools ISO
Mount-DiskImage `
-ImagePath C:\windows.iso ;
Once it is mounted, we need to know the drive letter of the mounted image.
# Find the mounted Windows VMware Tools ISO Drive Letter
(Get-DiskImage -ImagePath C:\windows.iso | Get-Volume).DriveLetter
With the drive letter identified, we can manually execute the command to extract the VMware Tools installation to the destination folder.
# Execute VMware Tools Setup64.exe and extract the content to
# C:\NanoServer\VMware_Tools_Extracted folder using the
# Installation Wizard
<# Drive Letter #>:\setup64.exe /a /p C:\NanoServer\VMware_Tools_Extracted
# Eg. d:\setup64.exe /a /p C:\NanoServer\VMware_Tools_Extracted
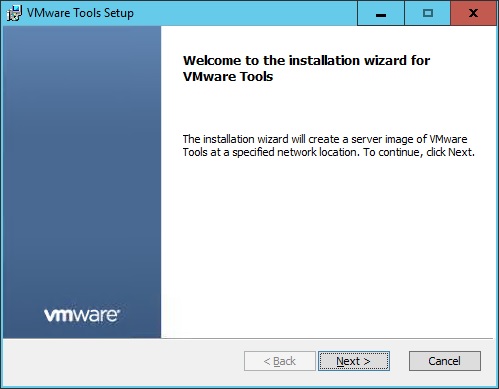
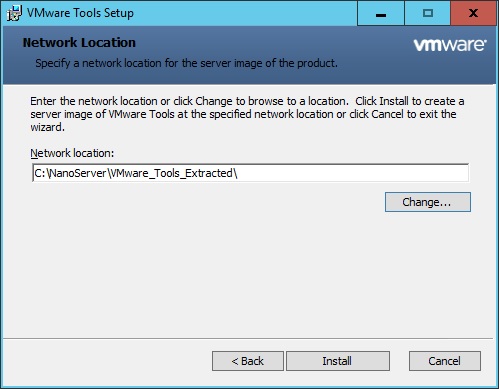
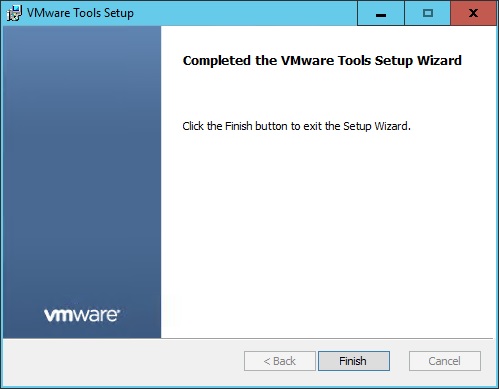
Unfortunately, the VMware Tools command will prompt the VMware Tools Installation Wizard graphical user interface and therefore it cannot be scripted. User intervention on the graphical user interface is required to complete the extraction to the destination folder as shown on the screenshots below;
Once the VMware Tools Installation Wizard has completed the extraction to the destination folder, remember to dismount the VMware Tools ISO media using the PowerShell.
# Dismount the Windows VMware Tools ISO
Dismount-DiskImage `
-ImagePath C:\windows.iso ;
3.3. How do I extract VMware Tools content from manually mounted ISO image?
Create a folder to contain the extracted VMware Tools content using PowerShell.
# Create a VMware_Tools_Extracted folder for extracting
# VMware Tools installation content
New-Item `
-Path C:\NanoServer\VMware_Tools_Extracted `
-Type directory ;
If your machine is also a VMware virtual machine and you have already mounted the VMware Tools ISO image, you can extract the VMware Tools content by following the article below;
Extract the content into the destination folder using the VMware Tools Installation Wizard graphical user interface and unmount the ISO image.
3.4. What VMware Tools drivers should I include in NanoServer?
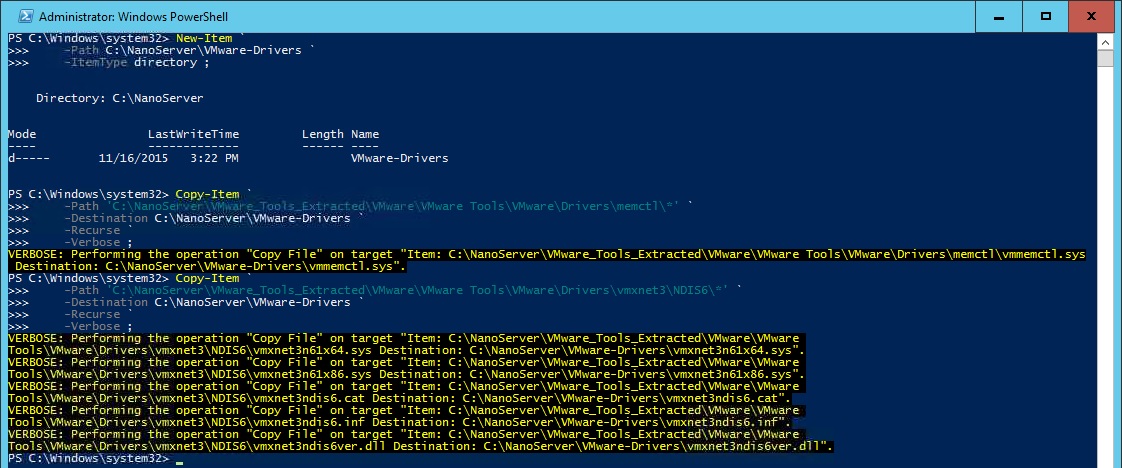
Before we prepare the VMware Tools drivers to be included in NanoServer, I like to be a bit tidy in containing what I need in a separate folder so that I don't get confuse. Create a VMware Drivers folder within the parent NanoServer folder using PowerShell.
# Create a VMware Drivers folder
New-Item `
-Path C:\NanoServer\VMware-Drivers `
-ItemType directory ;
Selecting the VMware drivers required for NanoServer as a guest virtual machine is very important. In order to understand what are those from the documentation link below;
# Copy VMware Tools Memory Control Driver - This driver is Mandatory
Copy-Item `
-Path 'C:\NanoServer\VMware_Tools_Extracted\VMware\VMware Tools\VMware\Drivers\memctl\' `
-Destination C:\NanoServer\VMware-Drivers `
-Recurse `
-Verbose ;
# Copy VMware Tools Paravirtual SCSI (PVSCSI) Drivers - Optional
Copy-Item `
-Path 'C:\NanoServer\VMware_Tools_Extracted\VMware\VMware Tools\VMware\Drivers\pvscsi\' `
-Destination C:\NanoServer\VMware-Drivers `
-Recurse `
-Verbose ;
# Copy VMware Tools SVGA 3D Video (SVGA) Drivers - Optional
Copy-Item `
-Path 'C:\NanoServer\VMware_Tools_Extracted\VMware\VMware Tools\VMware\Drivers\video_wddm\' `
-Destination C:\NanoServer\VMware-Drivers `
-Recurse `
-Verbose ;
# Copy VMware Tools Virtual Machine Communication Interface (VMCI)
# Drivers - Optional
Copy-Item `
-Path 'C:\NanoServer\VMware_Tools_Extracted\VMware\VMware Tools\VMware\Drivers\vmci\device\' `
-Destination C:\NanoServer\VMware-Drivers `
-Recurse `
-Verbose ;
# Copy VMware Tools VMXNet NIC (VMXNET3) Drivers - This
# driver is Mandatory for using VMXNET3 Network Interface.
Copy-Item `
-Path 'C:\NanoServer\VMware_Tools_Extracted\VMware\VMware Tools\VMware\Drivers\vmxnet3\NDIS6\' `
-Destination C:\NanoServer\VMware-Drivers `
-Recurse `
-Verbose ;
4. Getting Started with Nano Server Creation
With Windows Server 2016 Technical Preview 3, Microsoft has simplified the Nano Server creation with 2 PowerShell scripts that we have copied across to the local drive during the preparation for Nano Server image and we will use them in the example below.
Firstly, we need to ensure that we are at the working folder where the New-NanoServerImage PowerShell script is located. The reason is that if you are not in that working folder, you may encounter errors when the script is going to invoke the Convert-WindowsImage PowerShell script written by Pronichkin.
# Ensure you are at C:\NanoServer working folder
Set-Location `
-Path C:\NanoServer ;
Secondly, we will have to import the New-NanoServerImage PowerShell script module using PowerShell.
4.1. How to import New-NanoServerImage PowerShell module for Technical Preview 3?
# Import New-NanoServerImage PowerShell Module for Technical Preview 3
Import-Module `
-Global C:\NanoServer\new-nanoserverimage.ps1 ;
4.2. How to import New-NanoServerImage PowerShell module for Technical Preview 4?
You will notice that Microsoft had made some improvement changes to the PowerShell module and renamed the file to NanoServerImageGenerator.psm1.
# Import New-NanoServerImage PowerShell Module for Technical Preview 4
Import-Module `
-Global C:\NanoServer\NanoServerImageGenerator.psm1 ;
4.3. How to import New-NanoServerImage PowerShell module for Technical Preview X or GA?
With Technical Preview 5 and General Availability (GA), you will notice that Microsoft had made some improvement changes to the PowerShell module and moved the file NanoServerImageGenerator.psm1 to a NanoServerImageGenerator folder.
# Import New-NanoServerImage PowerShell Module for Technical Preview 5
Import-Module `
-Global C:\NanoServer\NanoServerImageGenerator\NanoServerImageGenerator.psm1 ;
Next, we will create a basic NanoServer image with no role or feature except for the basic necessities. For a more detail documentation of how to create a NanoServer, you can read up more from the link below;
With Technical Preview 4 or older, we need to ensure that -GuestDrivers parameter is included to allow you to have keyboard functionality when you launch the remote console using VMware vSphere 6.0 Web Client.
Remember the VMware Tools drivers that we have extracted and copied to another destination folder just now? We will need to include the -DriversPath parameter and specify the copied VMware drivers folder path.
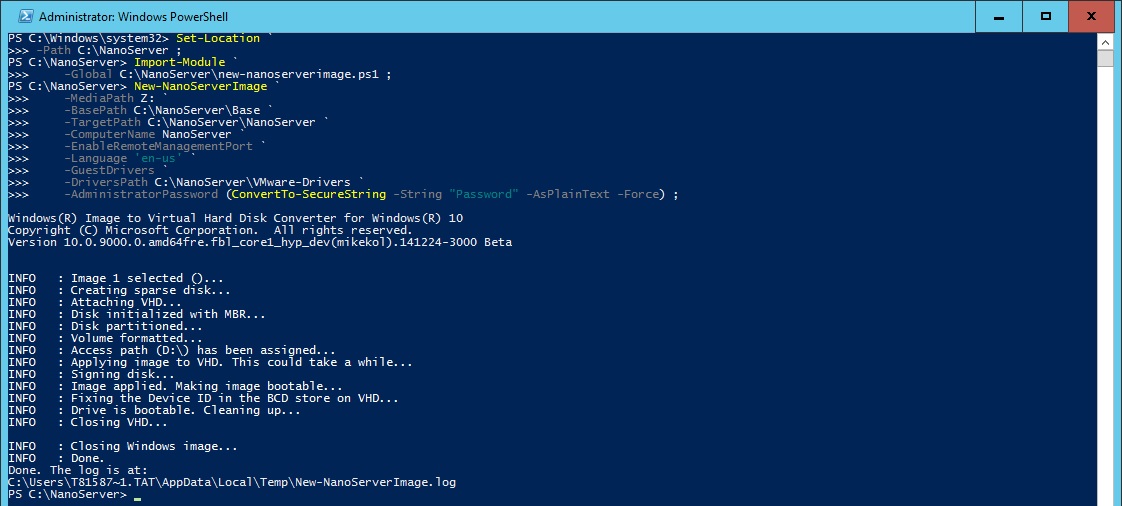
Using the PowerShell command, we will concatenate those parameters into a single command to initiate the creation of a new basic Nano Server.
4.4. How to create your first Nano Server image for Technical Preview 3?
# Create New Basic NanoServer Image for Technical Preview 3
New-NanoServerImage `
-MediaPath Z: `
-BasePath C:\NanoServer\Base `
-TargetPath C:\NanoServer\NanoServer `
-ComputerName NanoServer `
-EnableRemoteManagementPort `
-Language 'en-us' `
-GuestDrivers `
-DriversPath C:\NanoServer\VMware-Drivers `
-AdministratorPassword (ConvertTo-SecureString -String "Password" -AsPlainText -Force) ;
4.5. How to create your first Nano Server image for Technical Preview 4?
Since there are improvement changes on the PowerShell module, we need to include the filename of the VHD file type in the -TargetPath parameter now that also mean that you can change the filename of the VHD file type to be different from the computer name.
# Create New Basic NanoServer Image for Technical Preview 4
New-NanoServerImage `
-MediaPath Z: `
-BasePath C:\NanoServer\Base `
-TargetPath C:\NanoServer\NanoServer\NanoServer.vhd `
-ComputerName NanoServer `
-EnableRemoteManagementPort `
-Language 'en-us' `
-GuestDrivers `
-DriversPath C:\NanoServer\VMware-Drivers `
-AdministratorPassword (ConvertTo-SecureString -String "Password" -AsPlainText -Force) ;
Done. We have a Nano Server created on a Generation 1 VHD virtual disk that can be mounted and boot up on a Hyper-V host. If you have included the VMware Paravirtual SCSI (PVSCSI) Drivers, you definitely can boot it up on your VMware vSphere ESXi 6.0 host provided that your virtual machine is using PVSCSI controller for the VMDK disk. But. Firstly, we generally prefer LSI SAS controller for Windows. Secondly, how do you get it running in vSphere?
4.6. How to create your first Nano Server image for General Availability (GA)?
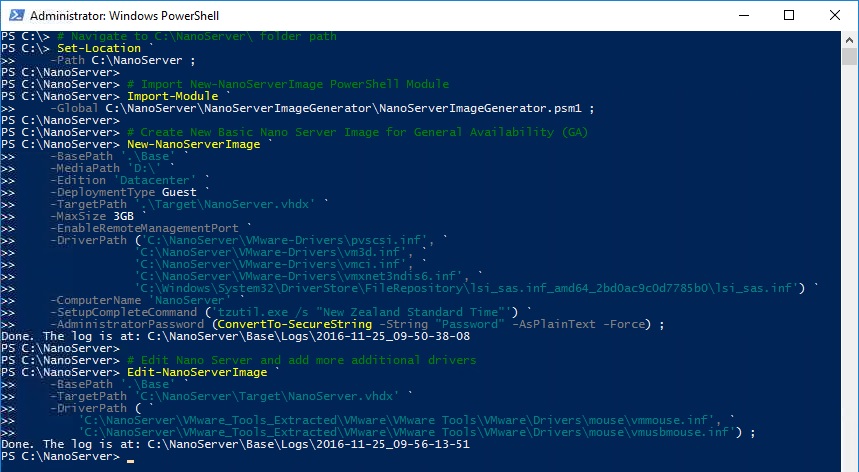
With Technical Preview 5 and General Availability (GA), we can use the the New-NanoServerImage cmdlet to slipstream all the required drivers during the build process and simplify the Nano Server deployment. In the first example, we will demonstrate how to create a Nano Server image in VHD/VHDX format for development environment where it is possible to mount multiple different Nano Server VHD/VHDX to the boot manager within a single VMDK file for development or user acceptance testing.
# Create New Basic NanoServer Image for General Availability (GA)
New-NanoServerImage `
-MediaPath 'D:\ `
-Edition 'Datacenter' `
-DeploymentType Guest `
-TargetPath 'C:\NanoServer\NanoServer.vhdx' `
-MaxSize 3GB `
-EnableRemoteManagementPort `
-DriverPath ('C:\NanoServer\VMware-Drivers\pvscsi.inf', `
'C:\NanoServer\VMware-Drivers\vm3d.inf', `
'C:\NanoServer\VMware-Drivers\vmci.inf', `
'C:\NanoServer\VMware-Drivers\vmxnet3ndis6.inf', `
'C:\Windows\System32\DriverStore\FileRepository\lsi_sas.inf_amd64_2bd0ac9c0d7785b0' `
-ComputerName 'NanoServer' `
-SetupCompleteCommand ('tzutil.exe /s "New Zealand Standard Time"') `
-AdministratorPassword (ConvertTo-SecureString -String "Password" -AsPlainText -Force) ;
In the second example, we will demonstrate how to create a Nano Server image in WIM format for production environment where the operating system is stored in a single volume within the VMDK file.
# Create New Basic NanoServer Image for General Availability (GA)
New-NanoServerImage `
-MediaPath 'D:\ `
-Edition 'Datacenter' `
-DeploymentType Guest `
-TargetPath 'C:\NanoServer\NanoServer.wim' `
-MaxSize 3GB `
-EnableRemoteManagementPort `
-DriverPath ('C:\NanoServer\VMware-Drivers\pvscsi.inf', `
'C:\NanoServer\VMware-Drivers\vm3d.inf', `
'C:\NanoServer\VMware-Drivers\vmci.inf', `
'C:\NanoServer\VMware-Drivers\vmxnet3ndis6.inf', `
'C:\Windows\System32\DriverStore\FileRepository\lsi_sas.inf_amd64_2bd0ac9c0d7785b0' `
-ComputerName 'NanoServer' `
-SetupCompleteCommand ('tzutil.exe /s "New Zealand Standard Time"') `
-AdministratorPassword (ConvertTo-SecureString -String "Password" -AsPlainText -Force) ;
4.7. How to manually inject additional driver into an existing Nano Server image?
In this example, it will demonstrates how we can manually inject the LSI SAS storage controller driver to an existing Nano Server image that does not contain the lsi_sas.sys driver. This step is totally optional if you have already defined the lsi_sas.sys driver when you are creating a new Nano Server image.
This example is to provide the concept on how you can incorporate any other additional drivers into an existing Nano Server image and servicing the Nano Server image with any new driver requirement due to changes in production environment.
In order to get started with this example demonstration, we will need to find the LSI SAS storage controller driver folder path within a Windows Operating System since it is a Microsoft driver. Make sure that you are injecting the driver that comes from the same operating system version or release that your Nano Server image is generated. This is to ensure that the Nano Server will be able to load the LSI SAS storage controller driver that has the compatible or verified driver digital signature.
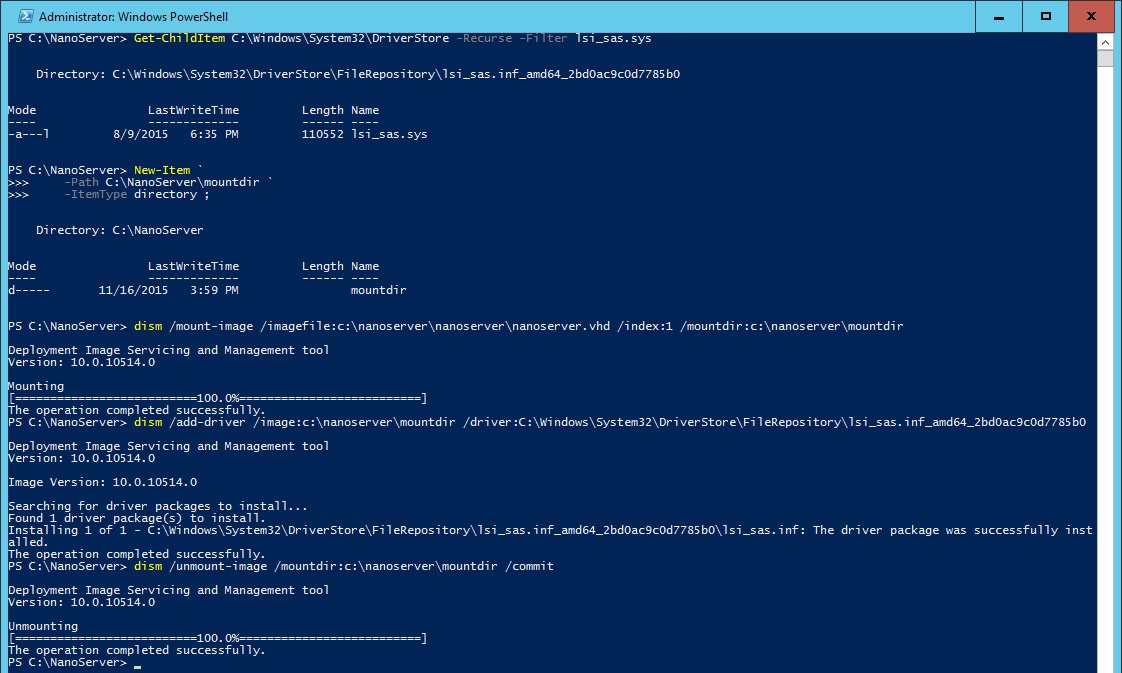
# Find lsi_sas.sys Storage Driver
Get-ChildItem `
-Path C:\Windows\System32\DriverStore `
-Filter lsi_sas.sys `
-Recurse ;
Next, we need to create an empty mountdir folder for DISM to mount the VHD.
# Create a MountDir folder for Deployment Image Servicing and Management (DISM)
New-Item `
-Path C:\NanoServer\mountdir `
-ItemType directory ;
Next, we use DISM to mount the NanoServer in VHD format into the mountdir folder.
# Mount NanoServer.vhd vDisk on C:\MountDir folder
dism /mount-image /imagefile:c:\nanoserver\nanoserver\nanoserver.vhd /index:1 /mountdir:c:\nanoserver\mountdir
If your Nano Server image is in VHDX format, follow the command below:
# Mount NanoServer.vhdx vDisk on C:\MountDir folder
dism /mount-image /imagefile:c:\nanoserver\nanoserver\nanoserver.vhdx /index:1 /mountdir:c:\nanoserver\mountdir
If your Nano Server image is in WIM format, follow the command below:
# Mount NanoServer.wim vDisk on C:\MountDir folder
dism /mount-image /imagefile:c:\nanoserver\nanoserver\nanoserver.wim /index:1 /mountdir:c:\nanoserver\mountdir
Once we done that, we can inject the LSI SAS storage controller driver by specifying the folder path.
# Add the lsi_sas.sys storage controller driver into C:\MountDir folder
dism /add-driver /image:c:\nanoserver\mountdir /driver:C:\Windows\System32\DriverStore\FileRepository\lsi_sas.inf_amd64_2bd0ac9c0d7785b0
After that, we dismount the mountdir folder.
# Unmount NanoServer.vhd vDisk from C:\MountDir folder
dism /unmount-image /mountdir:c:\nanoserver\mountdir /commit
Once this is performed, the Nano Server will be able to boot up on LSI SAS storage controller with VMDK disk attached. We can also safely regard this NanoServer.vhd is the new base image for your VMware environment although I haven't shown you how to get it into the vSphere 6.0 yet.
With the General Availability (GA) release of Windows Server 2016, you can also use the Edit-NanoServerImage cmdlet from the NanoServerImageGenerator PowerShell module to easily and quickly add additional drivers or other configuration changes to the image with ease.
In this example below, it will demonstrate how to inject additional vmmouse.sys and vmusbmouse.sys VMware drivers into an existing Nano Server image by using Edit-NanoServerImage cmdlet.
# Edit Nano Server and add more additional drivers
Edit-NanoServerImage `
-BasePath '.\Base' `
-TargetPath 'C:\NanoServer\Target\NanoServer.vhdx' `
-DriverPath ( `
'C:\NanoServer\VMware_Tools_Extracted\VMware\VMware Tools\VMware\Drivers\mouse\vmmouse.inf', `
'C:\NanoServer\VMware_Tools_Extracted\VMware\VMware Tools\VMware\Drivers\mouse\vmusbmouse.inf') ;
4.8. Adding role or feature over the existing Nano Server VHD
Alright, a Nano Server without any role or feature will not be of any use to anyone. Since we currently have a proper NanoServer.vhd base image, we can use the new base image to recreate another Nano Server VHD with roles or feature.
Let's find out the full path of our base image that we created just now.
# Verify the existing NanoServer VHD Path
Get-ChildItem `
-Path C:\NanoServer\NanoServer\ | `
Select `
FullName, `
Length ;
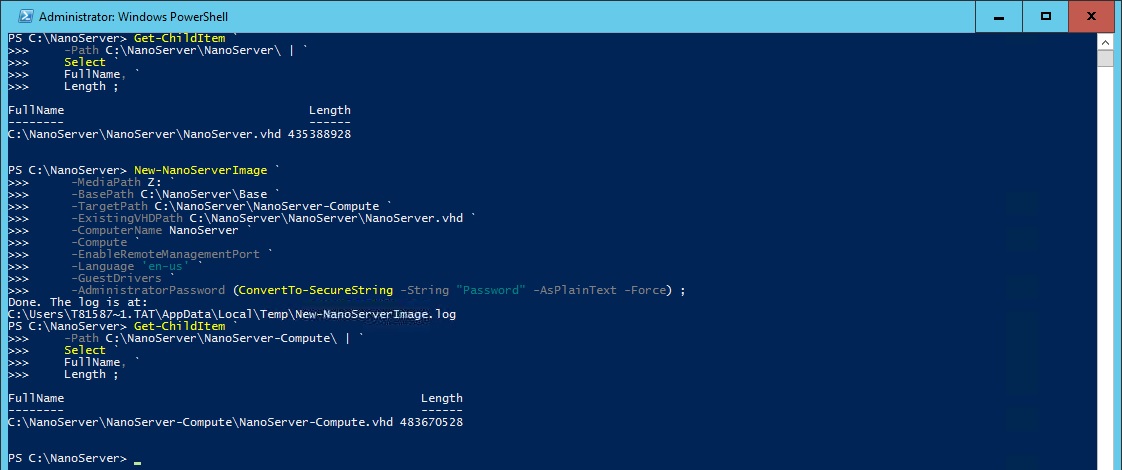
In this process of adding a Hyper-V role, we included the -Compute parameter on the PowerShell command. This will instruct it to include the Microsoft-NanoServer-Compute-Package.cab file during repackaging. We also need to include the -ExistingVHDPath parameter and specify our existing base image full path.
For a full reference of the available Nano Server role and feature included in Windows Server 2016 Technical Preview 3, you can find them in the link of the documentation below;
# Create a New NanoServer with Hyper-V role
# using existing NanoServer Base Image with Technical Preview 3
New-NanoServerImage `
-MediaPath Z: `
-BasePath C:\NanoServer\Base `
-TargetPath C:\NanoServer\NanoServer-Compute `
-ExistingVHDPath C:\NanoServer\NanoServer\NanoServer.vhd `
-ComputerName NanoServer `
-Compute `
-EnableRemoteManagementPort `
-Language 'en-us' `
-GuestDrivers `
-AdministratorPassword (ConvertTo-SecureString -String "Password" -AsPlainText -Force) ;
Once this is completed, you will notice that the new NanoServer-Compute.vhd has a different file length size now. It is slightly bigger than the base image.
# Verify the new NanoServer with Hyper-V role VHD Path
Get-ChildItem `
-Path C:\NanoServer\NanoServer-Compute\ | `
Select `
FullName, `
Length ;
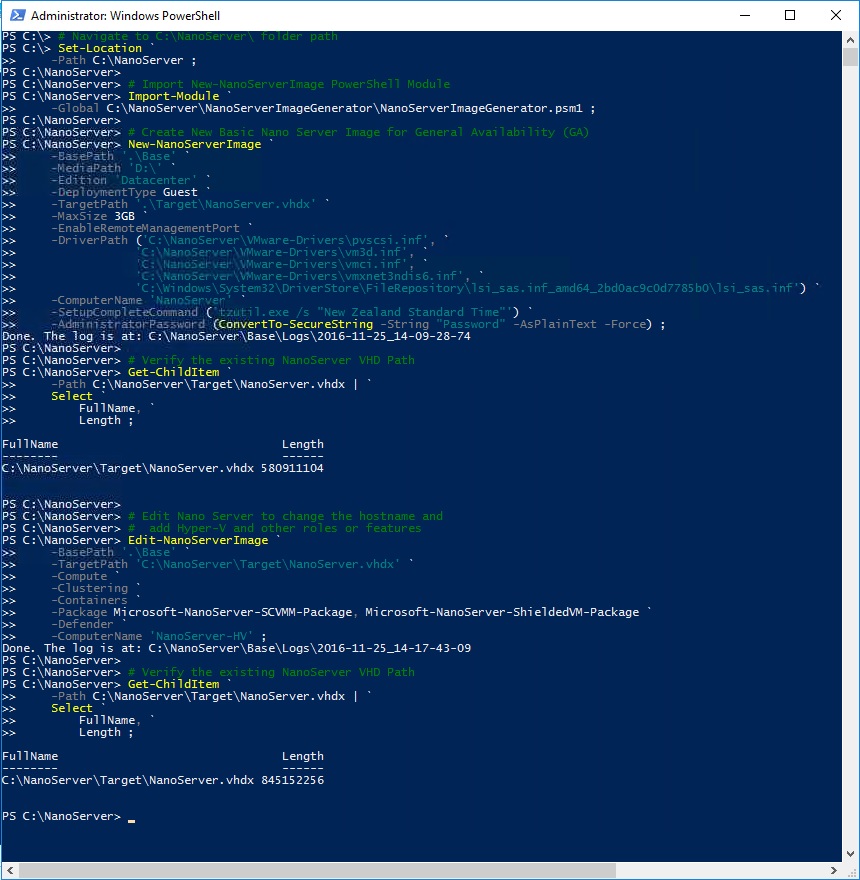
Unfortunately with Windows Server 2016 Technical Preview 4 or higher, the -ExistingVHDPath parameter is deprecated and is no longer available. Therefore you will need to repeat the process of Getting Started with Nano Server Creation to recreate a new Nano Server image with all the required role or feature from the beginning. Alternatively, you can make a copy of the original NanoServer VHD image, use the Edit-NanoServerImage cmdlet to edit the copied VHD image and rename the copied VHD image as version 2.
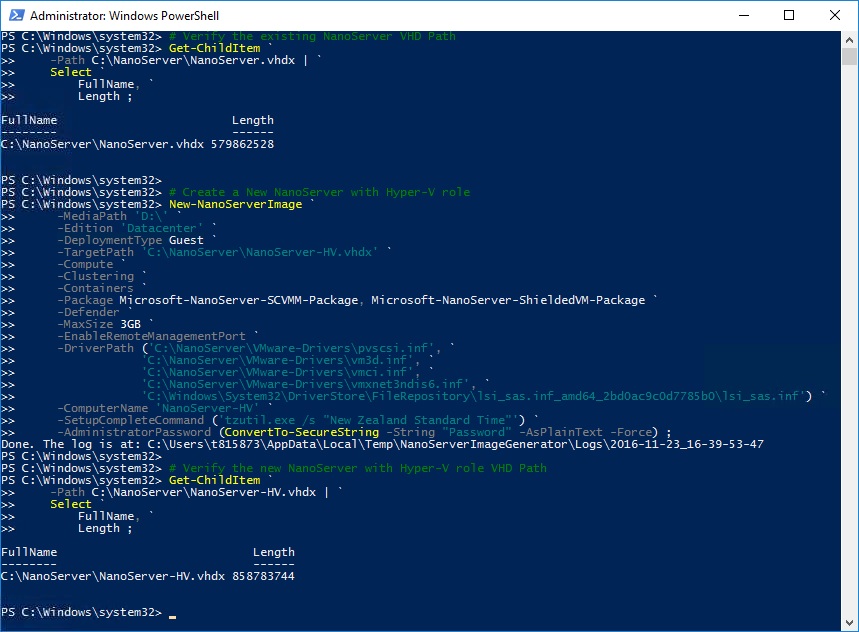
With General Availability (GA) release of Windows Server 2016, the example below will demonstrate on how to create a Nano Server with Hyper-V, Containers and Clustering roles with Defender and ShieldedVM features including SCVMM agent to the image as an example.
# Create a New NanoServer with Hyper-V role
New-NanoServerImage `
-MediaPath 'D:\ `
-Edition 'Datacenter' `
-DeploymentType Guest `
-TargetPath 'C:\NanoServer\NanoServer-HV.vhdx' `
-Compute `
-Clustering `
-Containers `
-Package Microsoft-NanoServer-SCVMM-Package, Microsoft-NanoServer-ShieldedVM-Package `
-Defender `
-MaxSize 3GB `
-EnableRemoteManagementPort `
-DriverPath ('C:\NanoServer\VMware-Drivers\pvscsi.inf', `
'C:\NanoServer\VMware-Drivers\vm3d.inf', `
'C:\NanoServer\VMware-Drivers\vmci.inf', `
'C:\NanoServer\VMware-Drivers\vmxnet3ndis6.inf', `
'C:\Windows\System32\DriverStore\FileRepository\lsi_sas.inf_amd64_2bd0ac9c0d7785b0\lsi_sas.inf') `
-ComputerName 'NanoServer-HV' `
-SetupCompleteCommand ('tzutil.exe /s "New Zealand Standard Time"') `
-AdministratorPassword (ConvertTo-SecureString -String "Password" -AsPlainText -Force) ;
In this example, it will demonstrate on using Edit-NanoServerImage cmdlet to add the required roles and features on an existing Nano Server image instead of recreating a new Nano Server image with the required roles and features. This alternate method will overwrite your existing Nano Server image and therefore you may want to make a copy of the original Nano Server image.
# Edit Nano Server to change the hostname and
# add Hyper-V and other roles or features
Edit-NanoServerImage `
-BasePath '.\Base' `
-TargetPath 'C:\NanoServer\Target\NanoServer.vhdx' `
-Compute `
-Clustering `
-Containers `
-Package Microsoft-NanoServer-SCVMM-Package, Microsoft-NanoServer-ShieldedVM-Package `
-Defender `
-ComputerName 'NanoServer-HV' ;
5. Getting Started with Nano Server Disk Footprint
Since we have found out that adding a role or feature increases the NanoServer-Compute.vhd file size, we need to find out the actual size of our VHD because it represent the hard disk size of the Nano Server operating system volume. This section on reducing the Nano Server disk footprint is absolutely optional but it is a great knowledge for anyone who wish to obtain a leaner Nano Server disk or reclaiming disk consumption.
# Get the NanoServer-Compute.vhd current default disk size information
Get-VHD `
-Path C:\NanoServer\NanoServer-Compute\NanoServer-Compute.vhd | `
Select `
@{L='Path';E={$_.Path}}, `
VhdFormat, `
VhdType, `
@{L='FileSize in Byte';E={$_.FileSize}},`
@{L='FileSize in KB';E={$_.FileSize/1KB}}, `
@{L='FileSize in MB';E={$_.FileSize/1MB}}, `
@{L='FileSize in GB';E={$_.FileSize/1GB}}, `
@{L='Size in Byte';E={$_.Size}}, `
@{L='Size in GB';E={$_.Size/1GB}}, `
@{L='MinimumSize in Byte';E={$_.MinimumSize}}, `
@{L='MinimumSize in GB';E={$_.MinimumSize/1GB}}, `
FragmentationPercentage ;
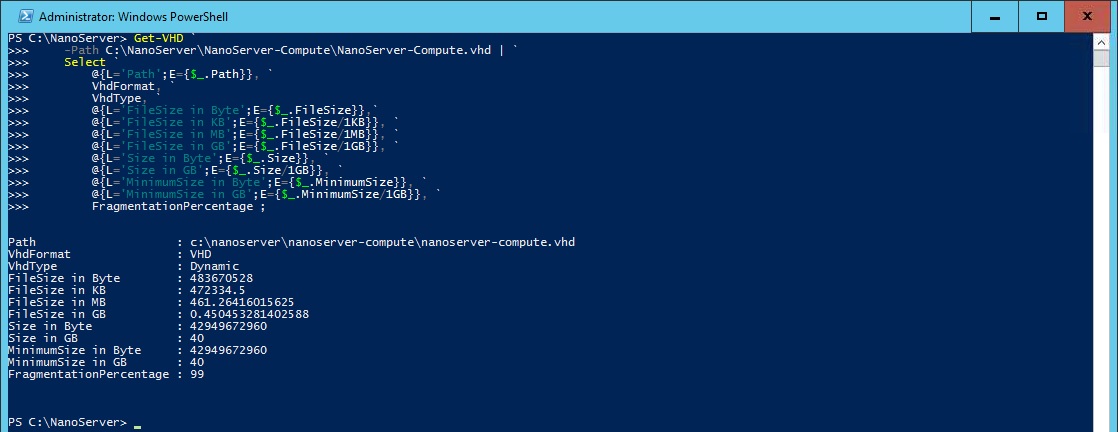
By default using New-NanoServerImage command in Windows Server 2016 Technical Preview 3, the Nano Server will be created with Generation 1 VHD in Dynamic VHD Type with 40GB disk partition containing about ~461MB of files. For VMware enthusiasts, it means 40GB Thin Provisioned Disk with about ~461MB consumed space for files.
5.1. How to reduce Nano Server 40GB VHD to 4GB VHD?
True, Nano Server is indeed very small and it can be less than 1GB depending on how many drivers, roles or features has been included in the built. But do we really need 40GB Dynamic VHD? I do not have an answer for it. But the process below demonstrates on how to reduce the disk from 40GB to less than 4GB to fit into a 4GB VMDK.
Firstly, we need to convert the Nano Server Generation 1 VHD to a Generation 2 VHD. If your Nano Server image is already a Generation 2 VHD, you can skip the conversion.
# Convert the NanoServer-Compute.vhd Generation 1 VHD to
# NanoServer-Compute.vhdx Generation 2 VHDX format
Convert-VHD `
-Path C:\NanoServer\NanoServer-Compute\NanoServer-Compute.vhd `
-DestinationPath C:\NanoServer\NanoServer-Compute\NanoServer-Compute.vhdx `
-VHDType Dynamic `
-DeleteSource ;
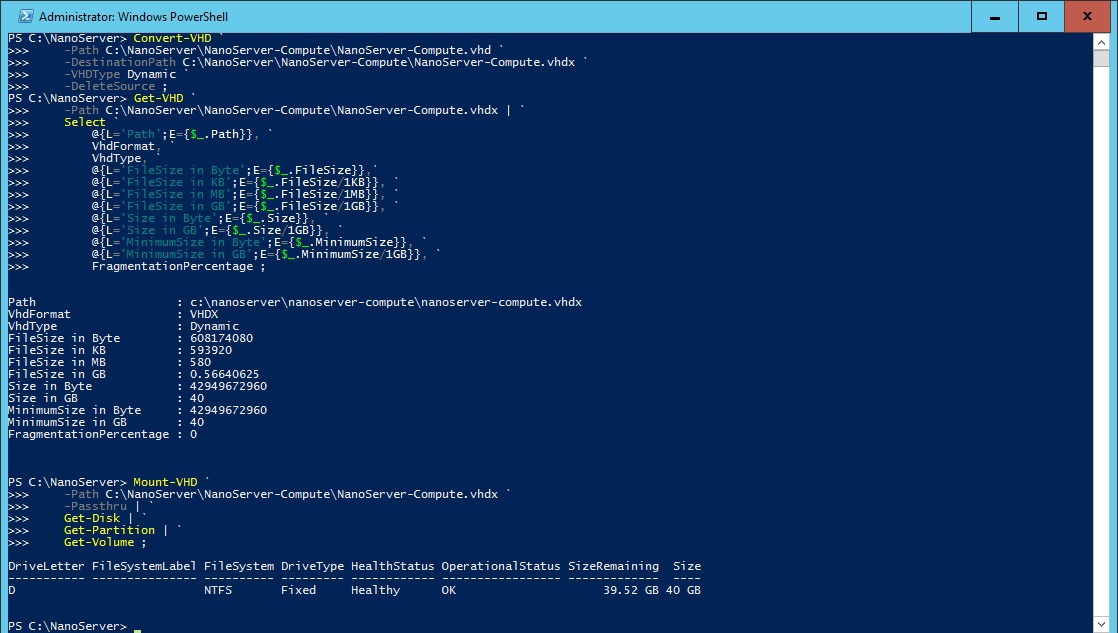
Prior to resizing, we will get the current disk information of the VHDX to prove that the resizing has performed accordingly to plan.
# Get the new NanoServer-Compute.vhdx current default disk size
# information
Get-VHD `
-Path C:\NanoServer\NanoServer-Compute\NanoServer-Compute.vhdx | `
Select `
@{L='Path';E={$_.Path}}, `
VhdFormat, `
VhdType, `
@{L='FileSize in Byte';E={$_.FileSize}},`
@{L='FileSize in KB';E={$_.FileSize/1KB}}, `
@{L='FileSize in MB';E={$_.FileSize/1MB}}, `
@{L='FileSize in GB';E={$_.FileSize/1GB}}, `
@{L='Size in Byte';E={$_.Size}}, `
@{L='Size in GB';E={$_.Size/1GB}}, `
@{L='MinimumSize in Byte';E={$_.MinimumSize}}, `
@{L='MinimumSize in GB';E={$_.MinimumSize/1GB}}, `
FragmentationPercentage ;
Next, we mount the VHDX locally and get the virtual disk internal volume information to verify the volume structure is correct as stated before any manipulation made.
# Mount the NanoServer-Compute.vhdx and get the NanoServer
# system drive partition volume size
Mount-VHD `
-Path C:\NanoServer\NanoServer-Compute\NanoServer-Compute.vhdx `
-Passthru | `
Get-Disk | `
Get-Partition | `
Get-Volume ;
By default, the New-NanoServerImage.ps1 PowerShell Module utilise the Convert-WindowsImage.ps1 PowerShell Module to create the VHD vDisk with the default size value of 40GB and the default size of 40GB may not fit into a USB Flash Thumb Drive if your solution implementation required although it is a Dynamic VHD Type.
With the VHD being mounted, we can start resizing the VHD virtual disk internal partition.
# Resize the Partition inside Generation 2 VHD
Resize-Partition `
-DriveLetter D `
-Size (((4GB - ((512KB * 2) + (512KB * 2))) - 300MB ) - 600MB) ;
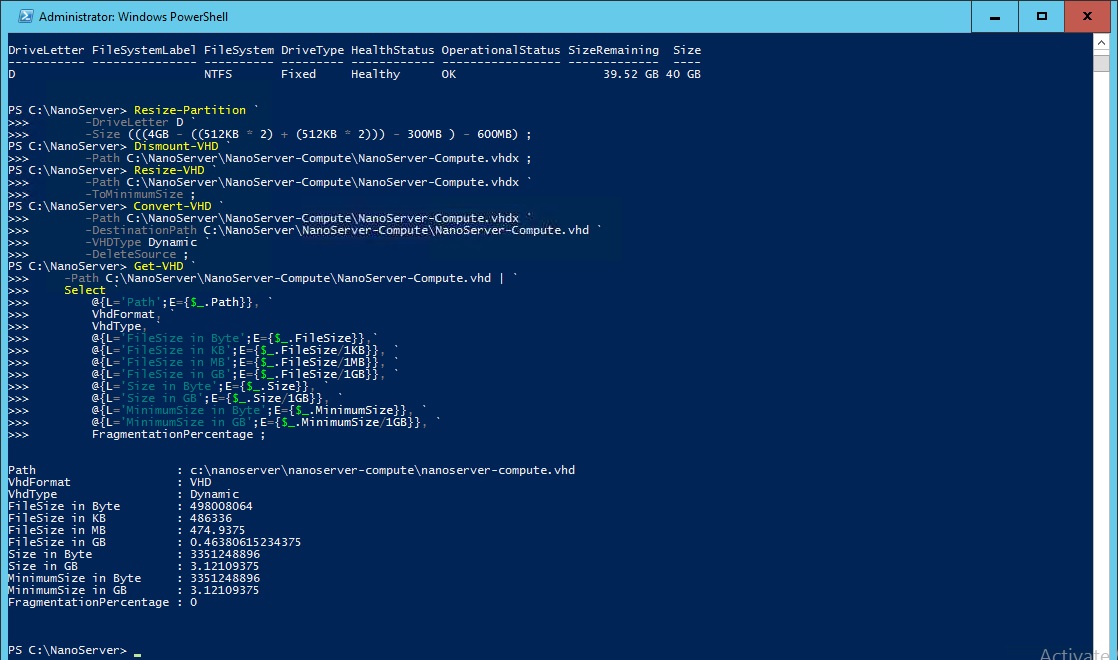
Well, it is arguable that the Disk Size in GB is going to be far less than 4GB and that is because;
- We reduced 1024KB for VHD Header and 1024KB VHD Footer to align the space to fit into 4GB VMDK
- We reduced 300MB for System Reserved partition for Boot Manager code and Boot Configuration Database
- We reduced 600MB from the Partition and VHD to provide free working space on the VMDK for the expansion of the attached VHD vDisk during boot up.
Next, we dismount the VHD vDisk from the local machine to resize the VHD.
# Dismount the NanoServer-Compute.vhdx Generation 2 VHD
Dismount-VHD `
-Path C:\NanoServer\NanoServer-Compute\NanoServer-Compute.vhdx ;
Once the VHD has been dismounted, the VHD file will not be locked and we can start resizing the VHD.
# Resize the NanoServer-Compute.vhdx Generation 2 VHD
Resize-VHD `
-Path C:\NanoServer\NanoServer-Compute\NanoServer-Compute.vhdx `
-ToMinimumSize ;
After the VHD has been resized, we can start converting the Generation 2 VHD back to Generation 1 VHD to keep consistent file type with the script output.
# Convert the NanoServer-Compute.vhdx Generation 2 VHD back
# to NanoServer-Compute.vhd Generation 1 VHD format
Convert-VHD `
-Path C:\NanoServer\NanoServer-Compute\NanoServer-Compute.vhdx `
-DestinationPath C:\NanoServer\NanoServer-Compute\NanoServer-Compute.vhd `
-VHDType Dynamic `
-DeleteSource ;
Now the moment of truth, we will obtain the VHD information and verify it has been reduced in size.
# Get the new NanoServer.vhd current default disk size information
Get-VHD `
-Path C:\NanoServer\NanoServer-Compute\NanoServer-Compute.vhd | `
Select `
@{L='Path';E={$_.Path}}, `
VhdFormat, `
VhdType, `
@{L='FileSize in Byte';E={$_.FileSize}},`
@{L='FileSize in KB';E={$_.FileSize/1KB}}, `
@{L='FileSize in MB';E={$_.FileSize/1MB}}, `
@{L='FileSize in GB';E={$_.FileSize/1GB}}, `
@{L='Size in Byte';E={$_.Size}}, `
@{L='Size in GB';E={$_.Size/1GB}}, `
@{L='MinimumSize in Byte';E={$_.MinimumSize}}, `
@{L='MinimumSize in GB';E={$_.MinimumSize/1GB}}, `
FragmentationPercentage ;
Now we have Nano Server with Hyper-V role that is less than 4GB in VHD which can fit into a 4GB VMDK, but it is still in a VHD format for Hyper-V Host and we need to get it hosted within a vSphere ESXi host.
6. Getting Started with Nano Server deployment in vSphere ESXi
Before we start, we will have to ensure that have created a Virtual Machine on vSphere ESXi host with the correct virtual hardware specification where the Nano Server image will boot up from. We will also requires a Windows Preinstallation Environment (WinPE) to boot up and perform some system preparation configuration on the Virtual Machine.
6.1. What is the requirement?
We will need to download and install the Windows Assessment and Deployment Kit (ADK) for Windows 10 and install the Windows Preinstallation Environment (Windows PE) feature to allows us to create a Windows PE image.
To obtain Windows Assessment and Deployment Kit (ADK) for Windows 10, you can download it from the here.
6.2. Preparing Nano Server VHD using Windows PE for vSphere ESXi
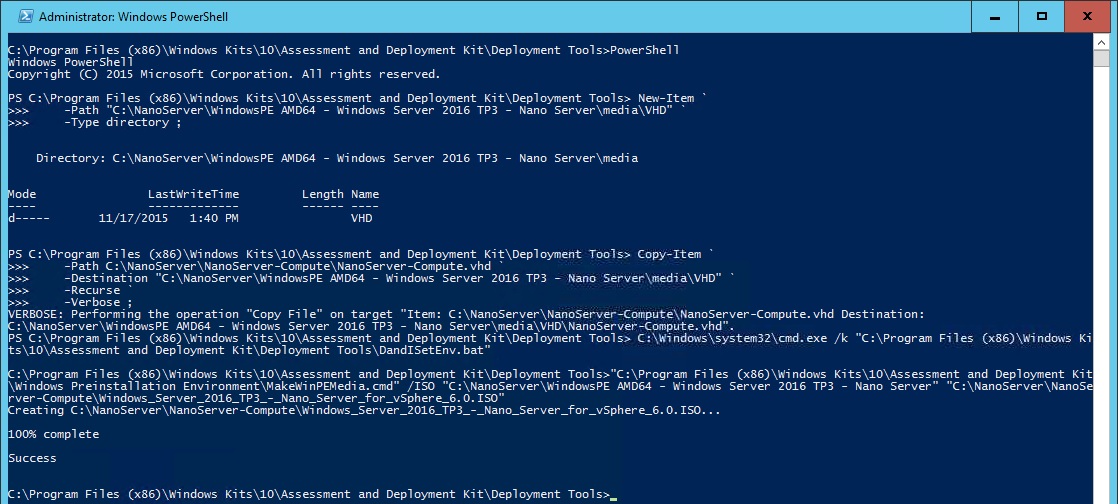
With all the preparation of the Nano Server VHD completed, we will need to prepare a media to boot into Windows Preinstallation Environment with our Nano Server VHD file. This is because we cannot mount the VHD file type into the Guest Virtual Machine on ESXI using vSphere 6.0 Web Client.
Let's jump into the Windows Assessment and Deployment environment now.
| 001
002 003 |
# Enter into the Windows Assessment and Deployment
# Kit (ADK) environment from PowerShell console C:\Windows\system32\cmd.exe /k "C:\Program Files (x86)\Windows Kits\10\Assessment and Deployment Kit\Deployment Tools\DandISetEnv.bat" |
Use the command script provided in that environment to copy the Windows PE media content.
6.2.1. Example of creating a Windows PE media content for Technical Preview 3
This is how we will using the CopyPE command script to create a WIndows PE media content folders with all the required files.
| 001
002 003004 |
# Copy the Windows Preinstallation Environment (WinPE)
# media content for amd64 into your working folder # for Technical Preview 3 "C:\Program Files (x86)\Windows Kits\10\Assessment and Deployment Kit\Windows Preinstallation Environment\copype.cmd" amd64 "C:\NanoServer\WindowsPE AMD64 - Windows Server 2016 TP3 - Nano Server" |
6.2.2. Example of creating a Windows PE media content for Technical Preview X or GA
There is no difference in term of the command between Technical Preview 3, Technical Preview 4, Technical Preview 5 or GA except for the destination path.
| 001
002 003004 |
# Copy the Windows Preinstallation Environment (WinPE)
# media content for amd64 into your working folder # for Technical Preview 4 "C:\Program Files (x86)\Windows Kits\10\Assessment and Deployment Kit\Windows Preinstallation Environment\copype.cmd" amd64 "C:\NanoServer\WindowsPE AMD64 - Windows Server 2016 TP4 - Nano Server" |
Let's exit the ADK environment into PowerShell environment.
| 001
002 |
# Return back to PowerShell Console
PowerShell |
We will have to manually create an empty VHD folder within the Windows PE media folder to keep our Nano Server VHD file.
6.2.3. Example on creating the VHD folder in the Windows PE media content folder for Technical Preview 3
| 001
002 003004 005 |
# Create a VHD folder in Windows PE Media Folder
# for Technical Preview 3 New-Item ` -Path "C:\NanoServer\WindowsPE AMD64 - Windows Server 2016 TP3 - Nano Server\media\VHD" ` -Type directory ; |
6.2.4. Example on creating the VHD folder in the Windows PE media content folder for Technical Preview X or GA
There is no difference in term of the command between Technical Preview 3, Technical Preview 4, Technical Preview 5 or GA except for the folder path.
| 001
002 003004 005 |
# Create a VHD folder in Windows PE Media Folder
# for Technical Preview 4 New-Item ` -Path "C:\NanoServer\WindowsPE AMD64 - Windows Server 2016 TP4 - Nano Server\media\VHD" ` -Type directory ; |
Copy the Nano Server VHD file to that newly create VHD folder in the Windows PE media folder. It has to be in the media folder so that the file will be included when we compile it into an ISO image.
6.2.5. Example of copying the Nano Server Technical Preview 3 VHD to VHD folder in Windows media content folder
| 001
002 003004 005 006 007 |
# Copy NanoServer-Compute.vhd vDisk to Windows PE
# Media VHD Folder for Technical Preview 3 Copy-Item ` -Path C:\NanoServer\NanoServer-Compute\NanoServer-Compute.vhd ` -Destination "C:\NanoServer\WindowsPE AMD64 - Windows Server 2016 TP3 - Nano Server\media\VHD" ` -Recurse ` -Verbose ; |
6.2.6. Example of copying the Nano Server Technical Preview X or GA VHD to VHD folder in Windows media content folder
There is no difference in term of the command between Technical Preview 3, Technical Preview 4, Technical Preview 5 or GA except for the destination path.
| 001
002 003004 005 006 007 |
# Copy NanoServer-Compute.vhd vDisk to Windows PE
# Media VHD Folder for Technical Preview 4 Copy-Item ` -Path C:\NanoServer\NanoServer-Compute\NanoServer-Compute.vhd ` -Destination "C:\NanoServer\WindowsPE AMD64 - Windows Server 2016 TP4 - Nano Server\media\VHD" ` -Recurse ` -Verbose ; |
Let's return back to the ADK environment to use another command script for compiling to ISO image.
| 001
002 003 |
# Return back into the Windows Assessment and Deployment
# Kit (ADK) environment from PowerShell console C:\Windows\system32\cmd.exe /k "C:\Program Files (x86)\Windows Kits\10\Assessment and Deployment Kit\Deployment Tools\DandISetEnv.bat" |
Using the command script, we begin the compilation by specifying the Windows PE folder and the ISO Image file destination path.
6.2.7. Example of compiling Windows PE for Technical Preview 3
| 001
002 003 |
# Create the Windows PE ISO from the Windows PE
# Media folder for Technical Preview 3 "C:\Program Files (x86)\Windows Kits\10\Assessment and Deployment Kit\Windows Preinstallation Environment\MakeWinPEMedia.cmd" /ISO "C:\NanoServer\WindowsPE AMD64 - Windows Server 2016 TP3 - Nano Server" "C:\NanoServer\NanoServer-Compute\Windows_Server_2016_TP3_-_Nano_Server_for_vSphere_6.0.ISO" |
6.2.8. Example of compiling Windows PE for Technical Preview X or GA
There is no difference in term of the command between Technical Preview 3, Technical Preview 4, Technical Preview 5 or GA except for the source and destination path.
| 001
002 003 |
# Create the Windows PE ISO from the Windows PE
# Media folder for Technical Preview 4 "C:\Program Files (x86)\Windows Kits\10\Assessment and Deployment Kit\Windows Preinstallation Environment\MakeWinPEMedia.cmd" /ISO "C:\NanoServer\WindowsPE AMD64 - Windows Server 2016 TP4 - Nano Server" "C:\NanoServer\NanoServer-Compute\Windows_Server_2016_TP4_-_Nano_Server_for_vSphere_6.0.ISO" |
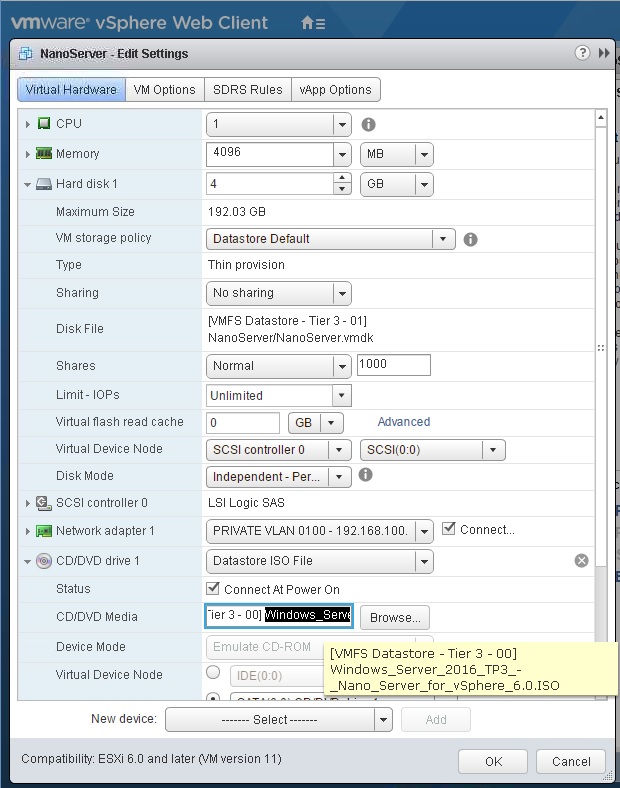
Once you obtained the ISO image file, you will need to mount the ISO image file on the Guest Virtual Machine using vSphere 6.0 Web Client and Power On the Guest VM.
6.3. Partitioning the VMDK using DiskPart in Windows PE
Powering On the Guest for the first time with Windows PE, we will automatically boot into Windows PE with a Command Prompt and it will be the interface that we will be using to partition the VMDK.
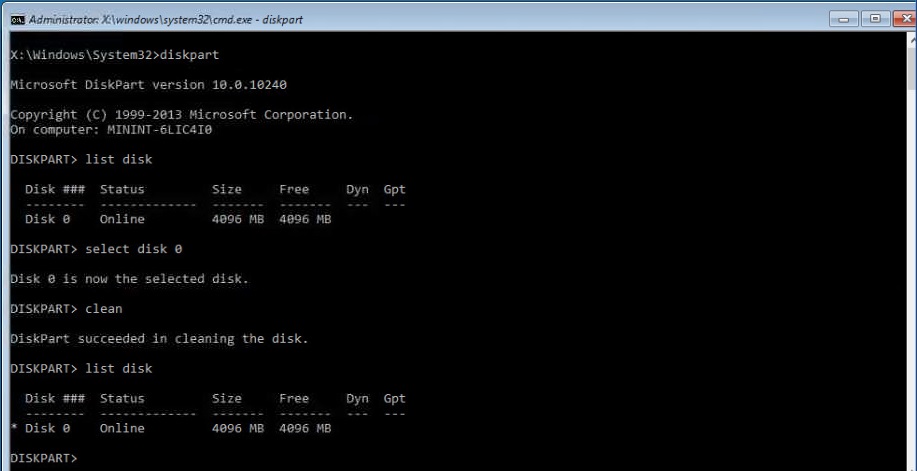
Firstly, we will use DiskPart to clean the VMDK Disk to ensure that the disk has no volume or partition structure.
| 001
002 003004 |
:: Clean the Disk 0
diskpart select disk 0 clean |
If you prefer to do this using PowerShell instead of DiskPart within Windows Preinstallation Environment (Windows PE), you will have to follow this guide on how to add PowerShell support into Windows PE prior creating the bootable ISO Image below.
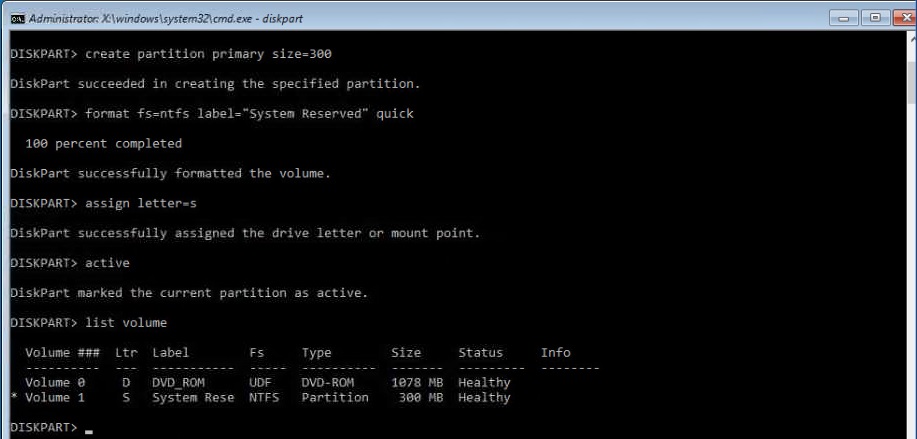
Next, we will have to manually create a System Reserved partition to store the Boot file configuration.
| 001
002 003004 005 |
:: Create the System Reserved 300MB Partition
create partition primary size=300 format fs=ntfs label="System Reserved" quick assign letter=s active |
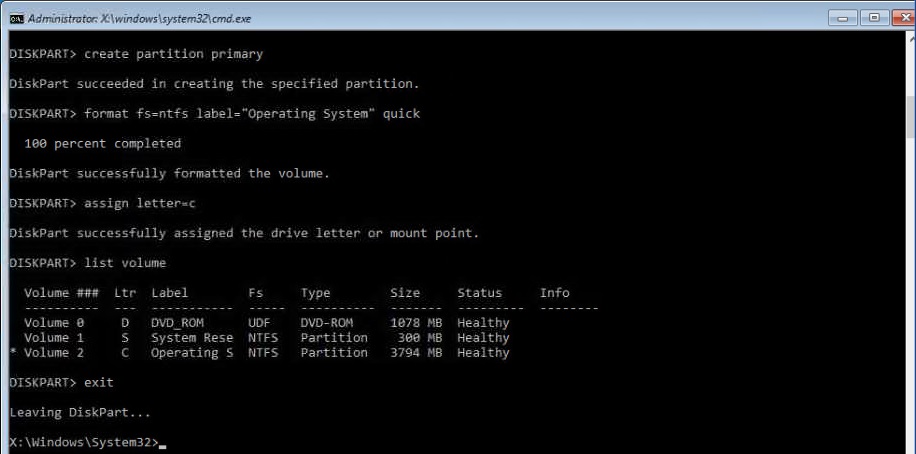
Next, we will use the remaining free space to create an Operating System partition where the Nano Server VHD file will be located and exit DiskPart.
| 001
002 003004 005 |
:: Create the Operating System Partition
create partition primary format fs=ntfs label="Operating System" quick assign letter=c exit |
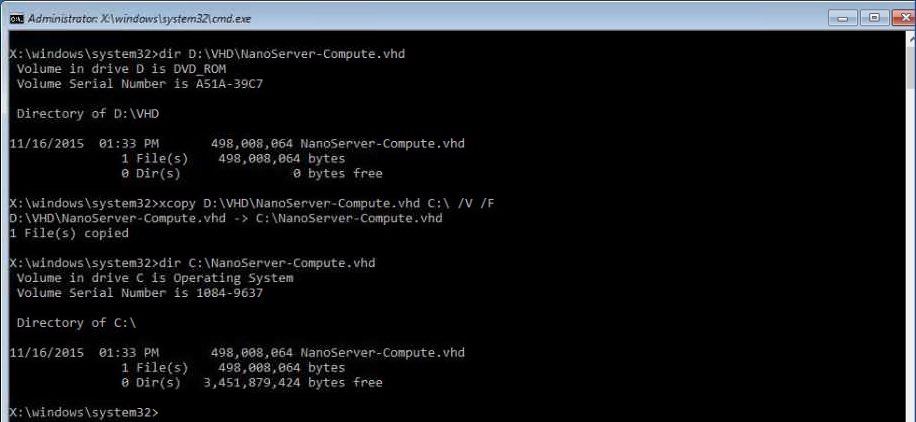
With the Operating System partition created, we will copy the Nano Server VHD file to the Operating System drive.
| 001
002 |
:: Copy the NanoServer-Compute.vhd from WindowsPE ISO to C:\ Operating System Drive
xcopy D:\VHD\NanoServer-Compute.vhd C:\ /V /F |
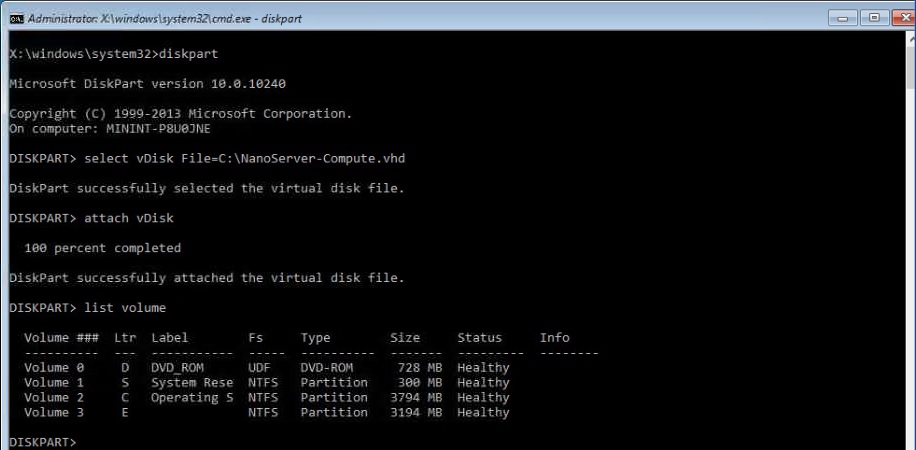
Next, we will using DiskPart again to attach the Nano Server VHD file as a vDisk volume.
| 001
002 003004 005 |
:: Attach the NanoServer.vhd vDisk using Diskpart
diskpart select vDisk File=C:\NanoServer-Compute.vhd attach vDisk list volume |
If your Nano Server image is in WIM Format for production environment, you will need to apply the WIM image to the Operating System drive and proceed to section 6.4 to create the boot information in boot manager.
| 001
002 |
:: Apply the NanoServer-Compute.wim from WindowsPE ISO to C:\ Operating System Drive
dism /apply-image /imagefile:D:\VHD\NanoServer-Compute.wim /index:1 /applydir:C:\ |
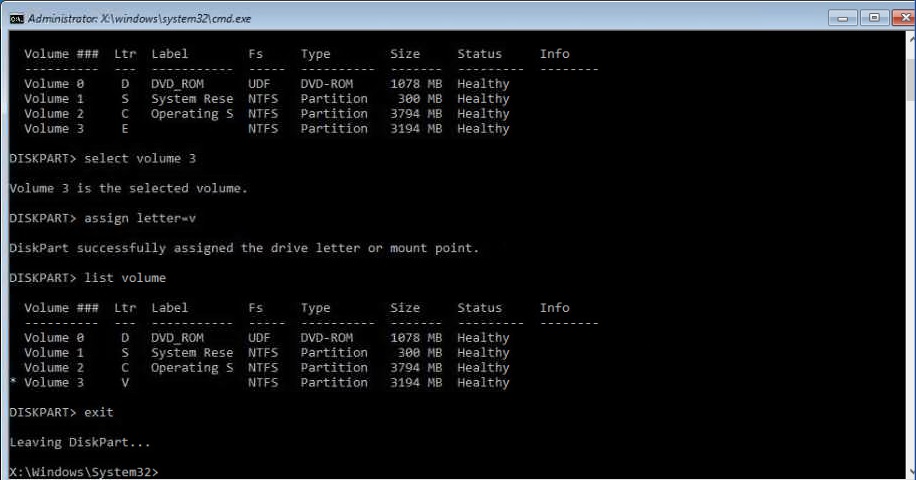
To make our life easy, we will assign a drive letter to identify the vDisk volume and exit DiskPart. And this is not the end of it because the attached vDisk volume is still not bootable due to the fact that the System Reserved partition do not have a boot file configuration of this virtual disk volume.
| 001
002 003004 |
:: Assign a Drive Letter to the NanoServer-Compute.vhd vDisk volume
select volume 3 assign letter=v exit |
6.4. Creating the Boot Configuration File using Windows PE
With the vDisk drive letter assigned and exited the DiskPart, we will change to the vDisk drive and navigate to the Windows\System32 folder. We will use the BCDboot tool and specify the source of the boot environment file that requires to be copied to the System Reserved drive.
| 001
002 003004 |
:: Create boot file on System Reserved drive
V: cd V:\Windows\System32 bcdboot V:\Windows /s S: |
If you are not using a vDisk for Nano Server image that is in VHD/VHDX format and have already applied the Nano Server image in WIM format to the operating system drive, we will use the BCDboot tool and specify the source of the boot environment file that requires to be copied to the System Reserved drive.
| 001
002 003004 |
:: Create boot file on System Reserved drive
C: cd C:\Windows\System32 bcdboot C:\Windows /s S: |
If you are interested in understanding BCDBoot, you can refer to this document link below;
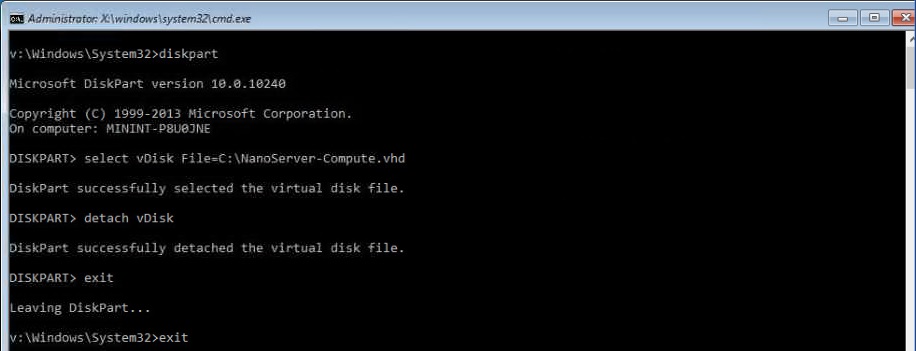
Once the boot files has created successfully, we will return to DiskPart, detach the virtual disk volume and exit everything for an automatic reboot.
| 001
002 003004 005 006 |
:: Detach the vDisk and exit to reboot
diskpart select vDisk File=C:\NanoServer-Compute.vhd detach vDisk exit exit |
7. Having the first look of Nano Server from vSphere Remote Console
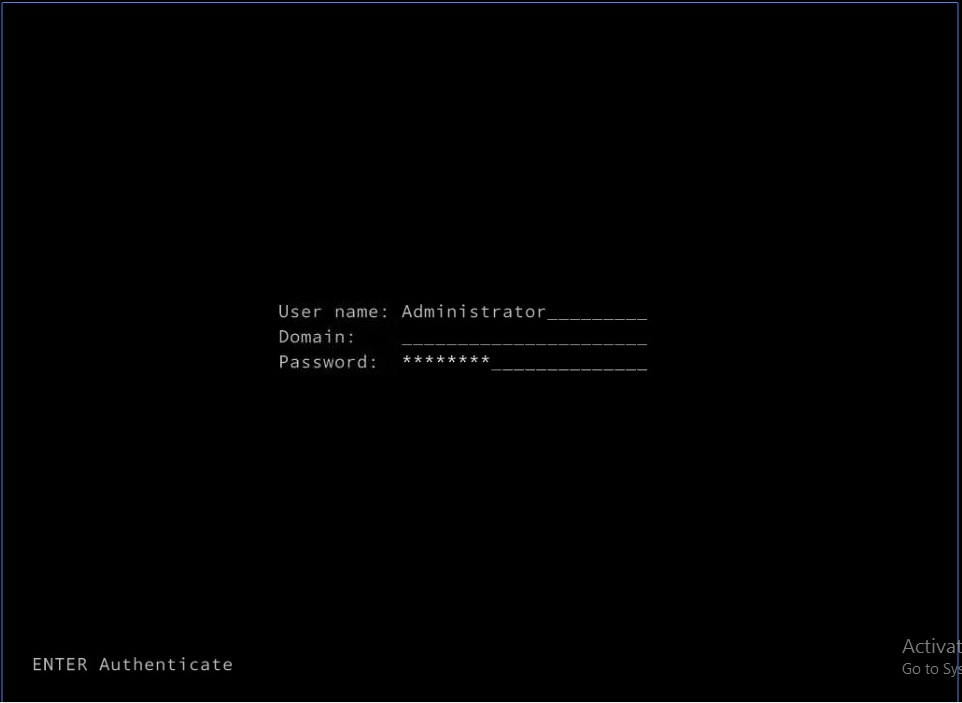
After exiting Windows PE environment and reboot automatically, you can view login screen on your Remote Console. Check that the keyboard is working on the Remote Console and you can really type to login.
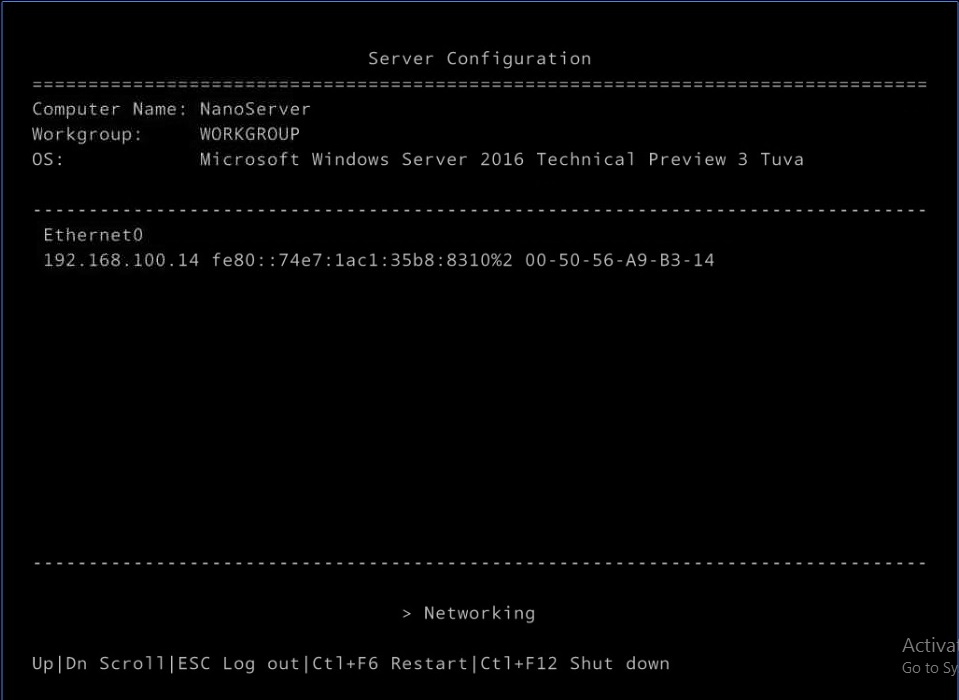
7.1. First console view of Technical Preview 3 after login
After logging into the Nano Server through Remote Console, there is nothing much except text information of the Server Configuration. We cannot do anything in here except for these 4 tasks;
- Navigate using Up and Down arrows
- Initiate to Log Off using ESCape button
- Initiate a Restart or Reboot using ConTroL and F6 button together
- Initiate a Shut down using ConTroL and F12 button
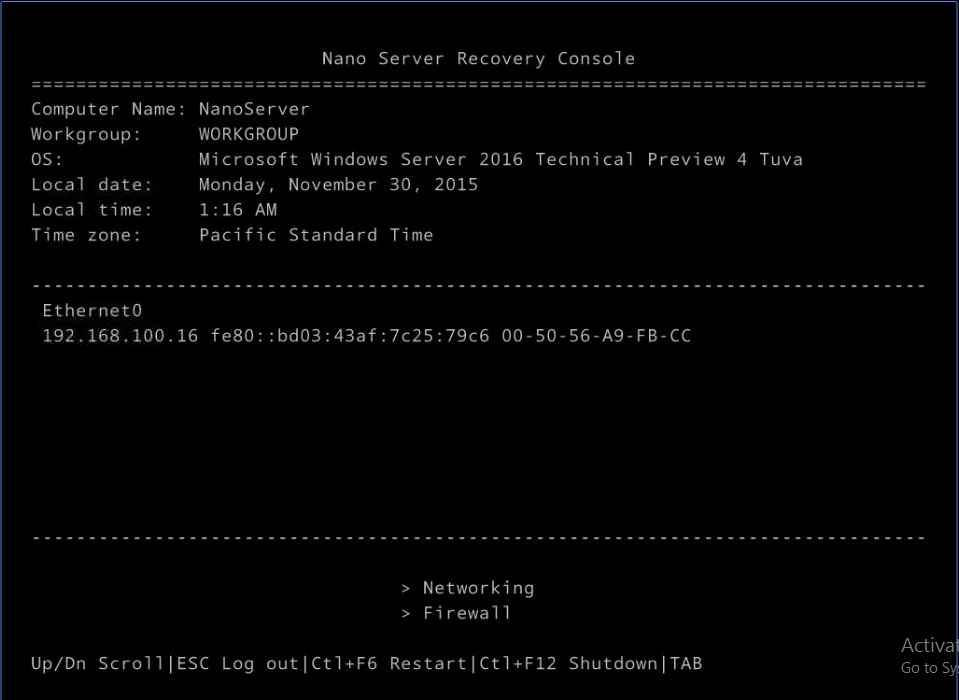
7.2. First console view of Technical Preview 4 after login
With Technical Preview 4, there are a lot of significant improvements with the console and these are the things you can do;
- Toggle Network Adapter state to Enable or Disable
- Customise IPv4 configuration to be Static or DHCP on Network Adapter
- Customise IPv6 configuration to be Static or DHCP on Network Adapter
- View Routing Table
- Add IPv4 Static route to the Routing Table
- Add IPv6 Static route to the Routing Table
- View Window Firewall Rules
- Toggle Windows Firewall rule to Enable or Disable
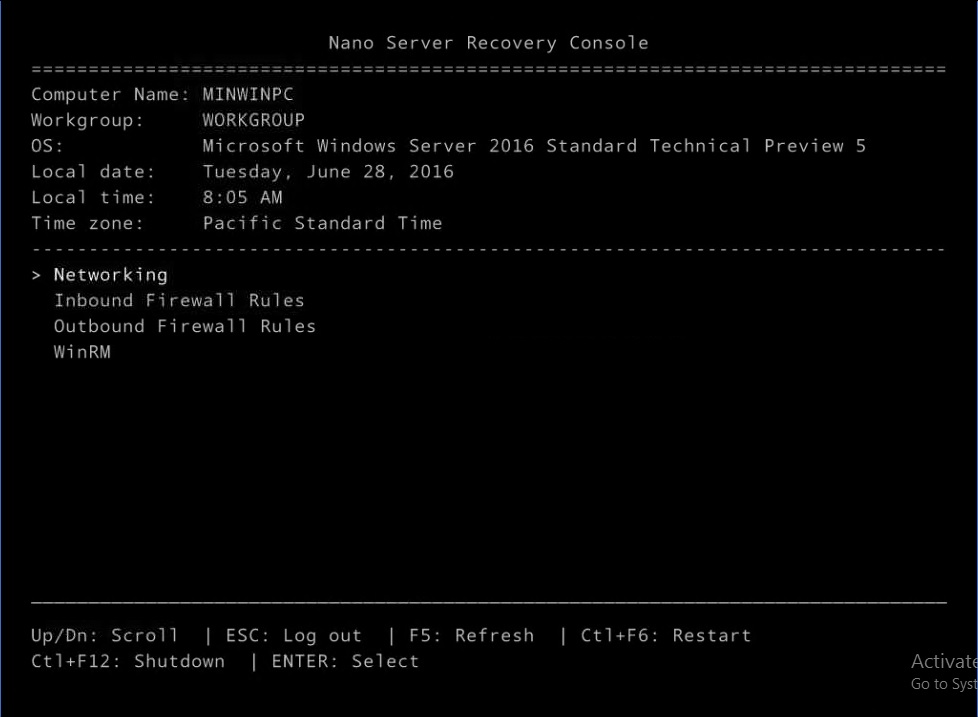
7.3. First console view of Technical Preview 5 after login
With Technical Preview 5, there are a few enhancements with the console such as:
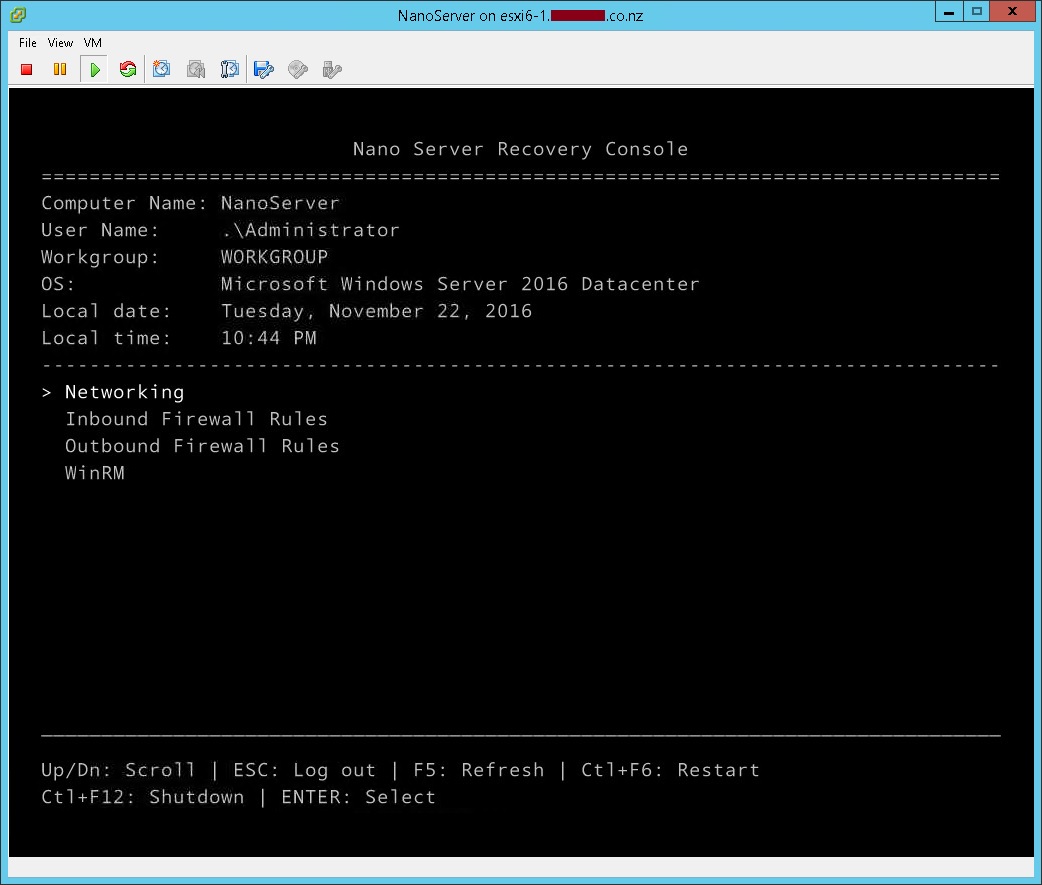
- Request to change your password when you first login to the console
- Seperate layout of Inbound and Outbound Firewall Rules
- Reset Windows Remote Management (WinRM) configuration and WinRM firewall rules
- Everything that you already knew in Technical Preview 4
7.4. First console view of General Availablity (GA) after login
With the General Availability (GA) release of Windows Server 2016, the Nano Server Recovery Console has not changed since Technical Preview 5 except that it is now displaying the official operating system name and edition instead.
7.5. How to manage the Nano Server remotely?
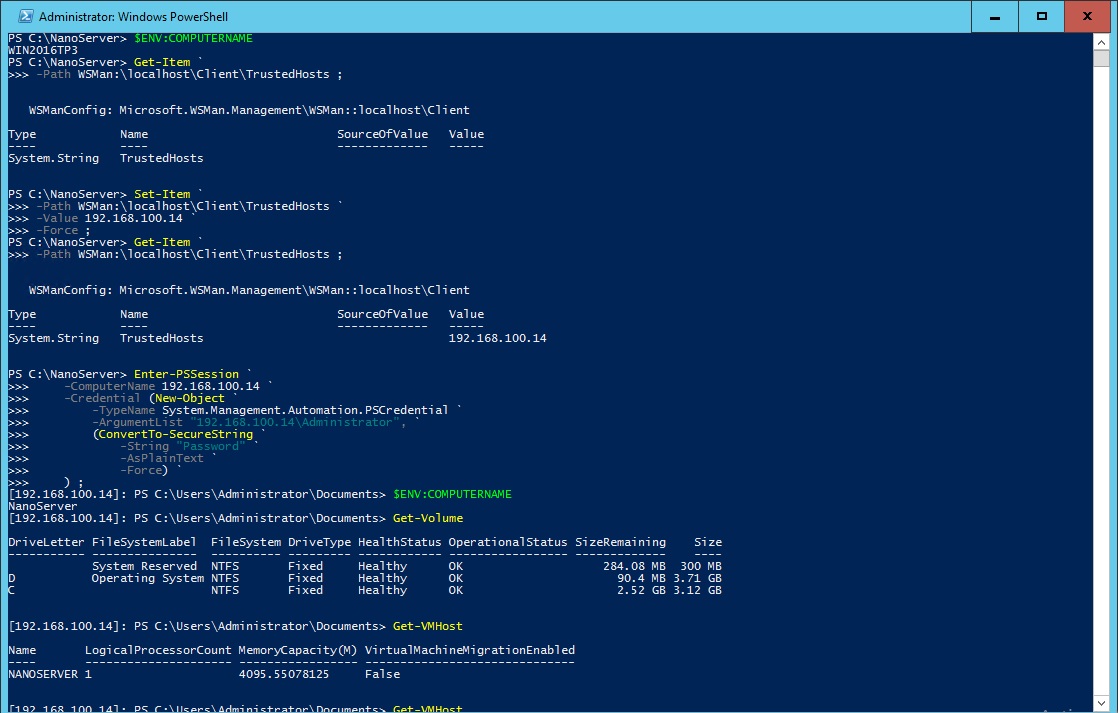
Since it has no Graphical User Interface and it limited on what we can do in remote console, the most preferred method will be using PowerShell to remotely connect to the Nano Server for any management at this stage.
# Verify if the Nano Server is a Trusted Hosts
Get-Item `
-Path WSMan:\localhost\Client\TrustedHosts ;
# Set the Nano Server IP Address to be a Trusted Hosts
Set-Item `
-Path WSMan:\localhost\Client\TrustedHosts `
-Value 192.168.100.14 `
-Force ;
# Establish a remote PowerShell Session to the Nano Server
Enter-PSSession `
-ComputerName 192.168.100.14 `
-Credential (New-Object `
-TypeName System.Management.Automation.PSCredential `
-ArgumentList "192.168.100.14\Administrator", `
(ConvertTo-SecureString `
-String "Password" `
-AsPlainText `
-Force) `
) ;
8. References
- Microsoft TechNet Evaluation Center - Windows Server 2016 Technical Preview 4
- Nano Server installation option of Windows Server Technical Preview 4 for Developers
- GitHub - NanoVHD
- Microsoft TechNet - Getting Started with Nano Server
- Microsoft Developer Network - Getting Started with Nano Server
- Microsoft Virtual Academy - A Deep Dive into Nano Server
- Microsoft TechNet Blog - Deploying Nano Server to a Bare-Metal Machine using a WIM and WinPE by Refaat Issa [MSFT]
- Microsoft TechNet Blog - How to use WDS to PxE Boot a Nano Server VHD by Refaat Issa [MSFT]
9. See Also
- Nano Server Survival Guide by Ryen Tang
- Microsoft Azure: Managing Nano Server with Server Management Tools by Ryen Tang
- Microsoft Azure: Deploying Windows Server 2016 Nano Server by Ryen Tang
- Nano Server: Getting Started with Image Builder by Ryen Tang
- Nano Server: Using New-NanoServerImage with Show-Command to deploy Nano Server by Ryen Tang
- Nano Server: Viewing Application, Security and System Event Logs using WMI by Ryen Tang
- Nano Server: Deploying an Internet Information Services (IIS) Web Server by Ryen Tang
- Nano Server: Deploying ASP.NET 5 site on Internet Information Services (IIS) Web Server by Ryen Tang
- Nano Server: Deploying PHP 7.0.6 on Internet Information Services (IIS) Web Server by Ryen Tang
- Nano Server: Deploying MySQL Database Server by Ryen Tang
- Nano Server: Deploying Python 3.x interpreter by Ryen Tang
- Nano Server: Getting Started in Container with Docker by Ryen Tang
