Securely connecting to Azure ServiceBus using WebClient and OAuth WRAP
Introduction
The following illustrates a way to connect to an Azure ServiceBus Queue using a WebClient instead of using the latest APIs supplied in the Azure SDK. The primary reason for this is to illustrate connectivity from clients that either are not .net based or are limited in their version of .Net.
In this particular situation, we're integrating the Unity 3D game engine which does not support .NET 4.0 as it runs on Mono. This required us to create a client using .NET Framework 3.5 and to use a WebClient to post messages to the queue. As well as requiring a change to the client, we also needed to configure my ServiceBus namespace to support ACS.
In August 2014, new namespace's created in the Azure portal stopped supported ACS by default. As there is no way of adding ACS support, ACS support must be specified when the namespace is created. More information is supplied in MSDN here.
Sample Project
You will need an Azure subscription and the ability to create a new Service Bus namespace. Because of this Azure Powershell is also required.
*There are not any requirements for additional packages from NuGet.
A sample project is available for download from the MSDN Gallery.*
Client
The solution contains two projects: a SBClient project and unity test project. The SBClient illustrates a simple post of a message to an Azure Service Bus Queue using the WebClient class. The code snippet below shows the actual post is very straightforward:
public static  bool SubmitEvent(string payload)
{
    WebClient webClient = new  WebClient();
    webClient.Headers[HttpRequestHeader.Authorization] = GetToken();

    var response = webClient.UploadData(ServiceHttpAddress, "POST", System.Text.Encoding.Default.GetBytes(payload));
    string responseString = Encoding.UTF8.GetString(response);

    return string.IsNullOrEmpty(responseString);
}
The GetToken method takes a bit more explaining. MSDN does a better job here. In our terms, we again use an instance of WebClient to get a token to from the our ACS endpoint in Azure.
private static  string GetToken()

{
    var acsEndpoint = "https://" + ServiceNamespace + "-sb." + acsHostName + "/WRAPv0.9/";

    // Note that the realm used when requesting a token uses the HTTP scheme, even though
    // calls to the service are always issued over HTTPS
    var realm = "http://" + ServiceNamespace + "." + sbHostName + "/";

    NameValueCollection values = new  NameValueCollection();
    values.Add("wrap_name", issuerName);
    values.Add("wrap_password", issuerSecret);
    values.Add("wrap_scope", realm);

    WebClient webClient = new  WebClient();
    byte[] response = webClient.UploadValues(acsEndpoint, values);

    string responseString = Encoding.UTF8.GetString(response);

    var responseProperties = responseString.Split('&');
    var tokenProperty = responseProperties[0].Split('=');
    var token = Uri.UnescapeDataString(tokenProperty[1]);

    return "WRAP access_token=\""  + token + "\"";
}
In the class there are several strings that will need to be updated with values from the particular Azure ServiceBus namespace (where to locate the values is explained below when setting up Azure):
static string  ServiceNamespace = "<namespace name>";
static string  ServiceHttpAddress = "https://<;namespace name>.servicebus.windows.net/<queue name>/messages";

const string  acsHostName = "accesscontrol.windows.net";
const string  sbHostName = "servicebus.windows.net";

const string  issuerName = "<service identity name>";
const string  issuerSecret = "<service identity password>";
Unit Test
The unit test is a bit simple but it does what we need it to do for this sample.
[TestClass]
public class  ServiceBusWriterTests
{
    [TestMethod]
    public void  PostNewMessage()
    {
        var wasSuccessful = ServiceBusWriter.SubmitEvent("This is a test.");

        Assert.IsTrue(wasSuccessful);
    }
}
Setting Up Azure Service Bus
Now for the interesting part. The first step is to launch Azure PowerShell and add your Azure account using the Add-AzureAccount command:
In this situation, we have two subscriptions so we selected the desired subscription using the Set-AzureSubscription command.
Next is to create a new Azure ServiceBus Namespace with ACS enabled. In this situation, we specified MyServiceBusQueue but you will need to choose a unique namespace for your namespace.
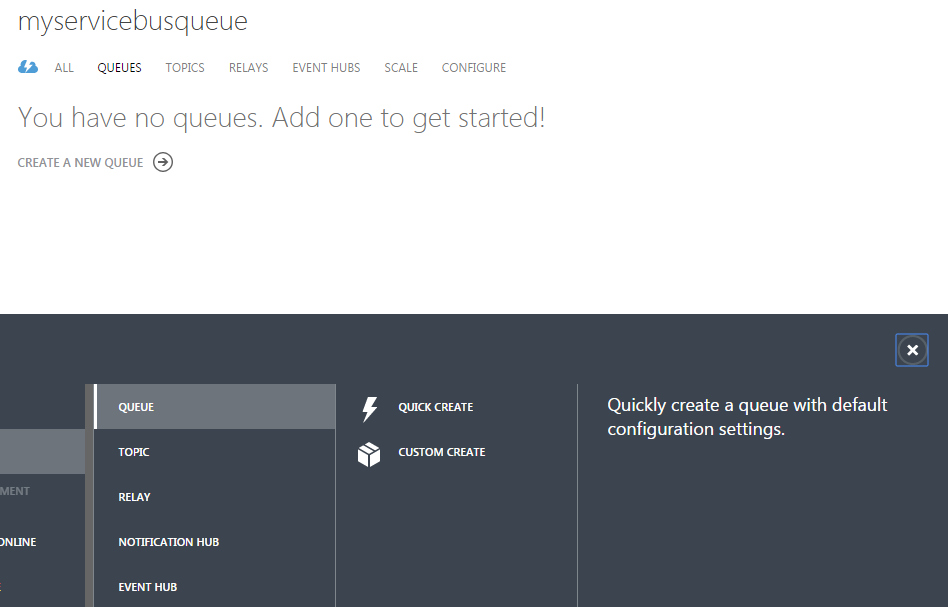
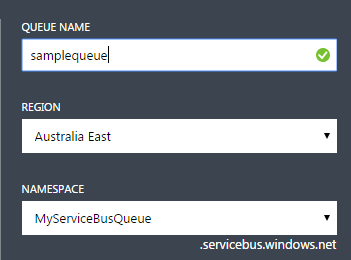
Notice the AcsManagementEndpoint. In the Azure portal create a new Queue under the namespace (you can use PowerShell but the portal is simpler).
We have enough now to update our source code and get the basic sample running. See the updated constant strings below:
static string  ServiceNamespace = "MyServiceBusQueue";

static string  ServiceHttpAddress = "https://myservicebusqueue.servicebus.windows.net/samplequeue/messages";

const string  acsHostName = "accesscontrol.windows.net";
const string  sbHostName = "servicebus.windows.net";

const string  issuerName = "owner";
const string  issuerSecret = "PmAIPe0XGySxvw8zvz/ELfOh2oPTh28Wa3EEzVAkJ3M=";
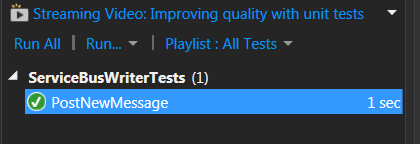
And when running our test we see that we retrieve the token and submit without a failure:
ACS Security - Service Identity
Using owner to connect to the service bus is not ideal in most situations where access might be performed by clients outside your control. In this situation, desktop games will be connecting to a namespace so we wanted to limit the access to only being able to post messages to the queue and wanted to control the password being used.
By creating a service identity in the Azure Access Control Service with send only permission, we can limit access to the queue for those clients.
First, let's create a new service identity called UnityClient. In the Azure portal, select the namespace and click Connection Information. Be sure to do this at the namespace level and not at the queue level!
https://i1.code.msdn.s-msft.com/securely-connecting-to-b1f08adc/image/file/140646/1/connection.png
This then allows us to navigate to the ACS portal:
https://i1.code.msdn.s-msft.com/securely-connecting-to-b1f08adc/image/file/140648/1/openacs.png
Now we need to create a new Service Identity:
The UnityClient identity and a generated password are shown below:
https://i1.code.msdn.s-msft.com/securely-connecting-to-b1f08adc/image/file/140653/1/unityclient.png
Now that the service identity is created, we need to amend the rule group for when we connect to the identity has permission to send to the queue.
https://i1.code.msdn.s-msft.com/securely-connecting-to-b1f08adc/image/file/140650/1/rulegroup.png
The Default Rule Group has three already defined rules for the owner Service identity. In my terms they are:
- If the Service Identity is owner then they can manage
- If the Service Identity is owner then they can listen
- If the Service Identity is owner then they can send
The following adds a new rule that is basically:
- If the Service Identity is UnityClient then they can send
https://i1.code.msdn.s-msft.com/securely-connecting-to-b1f08adc/image/file/140651/1/ruleif.png
https://i1.code.msdn.s-msft.com/securely-connecting-to-b1f08adc/image/file/140652/1/rulethen.png
Back to the Unit Test!
Now that our identity has been set up, we need to update our settings in our client to now use the all-powerful owner but use the limited client:
static string  ServiceNamespace = "MyServiceBusQueue";

static string  ServiceHttpAddress = "https://myservicebusqueue.servicebus.windows.net/samplequeue/messages";

const string  acsHostName = "accesscontrol.windows.net";
const string  sbHostName = "servicebus.windows.net";

const string  issuerName = "UnityClient";
const string  issuerSecret = "V1nRW+pJV5/62voWmqnDo6dxLC9M/+SfQWUbfuq6iRg=";
And our unit test should still pass!
https://i1.code.msdn.s-msft.com/securely-connecting-to-b1f08adc/image/file/140654/1/unittest2.png
Summary
The sample project illustrated how to send messages to an Azure Queue using a WebClient and ACS. In situations where the technology available includes the ability to use the Azure SDK, this is recommended as it simplifies both security and interoperability with Azure.
It is also important to note that access to Azure should be limited to only what is required. In most situations communication to Azure should be done via specific identity and the use of owner should be restricted.


