SharePoint 2013: how to create a custom access denied page
Introduction
Previously, in SharePoint 2010, when modifying the Access Denied page via PowerShell, you used the web application's UpdateMappedPage method. Now, in SharePoint 2013, you use the Set-SPCustomLayoutsPage command. The new approach greatly simplifies deploying such custom application pages. This posting shows how to make an elementary modification to the AccessDenied.ASPX page, and then configure the web application to use that new page.
Procedure
Log into one of the farm WFEs as a farm administrator.
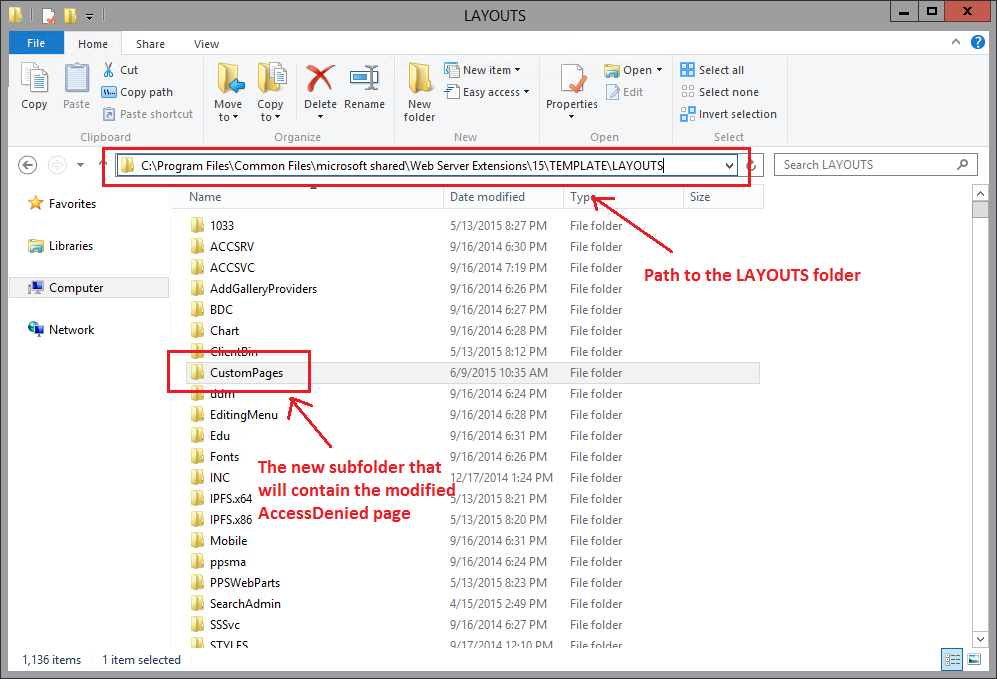
Open Windows Explorer, and then navigate to this folder:
C:\Program Files\Common Files\microsoft shared\Web Server Extensions\15\TEMPLATE\LAYOUTS\
Add a subfolder to this folder, naming it CustomPages.
Note that this is the physical path to the CustomPages folder. The relative path would be:
[web app URL]/_layouts/15/custompages
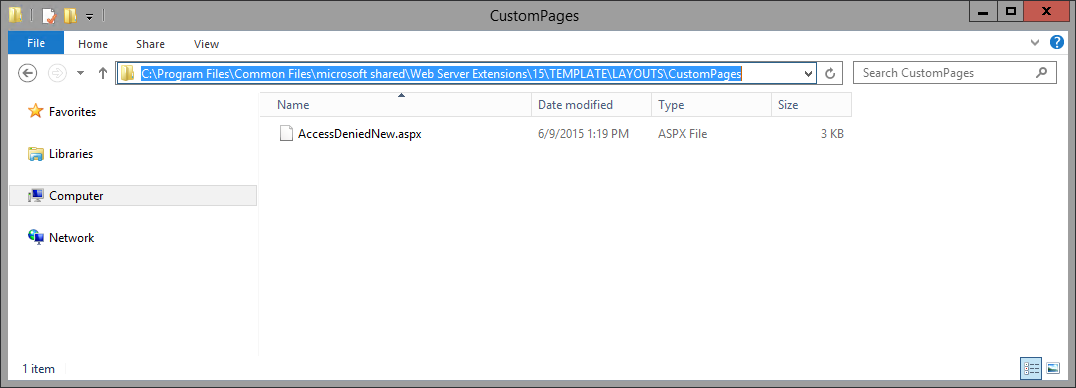
In the LAYOUTS folder copy the file AccessDenied.ASPX into the CustomPages subfolder, renaming it AccessDeniedNew.ASPX.
Modify AccessDeniedNew.ASPX as desired. To add text or other HTML elements to this page, be sure to introduce them within <asp:Content tags. In the example below, formatted text has been added so that it will appear just below the "Sorry, this site..." message. The intent here is to keep the message simple in order to facilitate rapid comprehension and engagement. Added text is highlighted.
 .
.After completing the modification on this WFE, copy the CustomPages subfolder into the LAYOUTS folder of each of the WFEs in your farm.
NOTE: if you don't do this, your users will experience inconsistent responses - some getting the default accessdenied page and some the new one, depending on which WFE the farm's NLB service routed the user's request to.
Open a SharePoint Management Shell using a farm administrator account having the SharePoint_Shell_Access role for the farm configuration database. To check for those accounts that do have this role for the farm configuration database, execute Get-SPShellAdmin.
Execute Get-SPCustomLayoutsPage to view what custom pages have already been configured. If you haven't configured any custom message pages yet, you will see something like the following:
Execute the command that will update the farm configuration database to point to the new location of the AccessDenied page:
Set-SPCustomLayoutsPage -Identity "AccessDenied" -RelativePath "/_layouts/15/custompages/AccessDeniedNew.aspx" -WebApplication "http:/mywebapplication/"The AccessDenied page path is now updated:
Open a browser using a standard account, and then navigate to a site or page that your account does not have access to. The new AccessDenied page is presented. Note that an IISReset does not need to be performed. The change takes affect immediately.
References
- SharePoint 2013
- SharePoint 2010
- SharePoint 2010: How to Customize Application Pages
- How to Customize Error Page, Page Not Found and Access Denied in SharePoint 2010
- SPWebApplication.UpdateMappedPage method
- SP 2010: How To - Event Receivers and Custom Error Pages
- Customize the Access Denied Page
- Mapping Custom Error Pages for SharePoint 2010 Site
Notes
- Thanks to KeithTuomi for his response, to this posting, providing the necessary steps.
- This procedure was performed on a small, traditional-topology SharePoint 2013 farm that includes one DB, one App and two WFEs in (Windows) NLB configuration.
- Using the steps shown in this posting, you can also deploy custom Confirmation, Error, Login, RequestAccess, Signout and WebDeleted pages. Just change the value of the Identity parameter appropriately.


