Cloud App Discovery System Center Deployment Guide
The objective of this article is to provide you with instructions, and critical considerations for deploying the Cloud App Discovery agent in an enterprise environment with Microsoft System Center Configuration Manager
Overview
| What’s covered | Instructions, and critical considerations for deploying the Cloud App Discovery agent in an enterprise environment with Microsoft System Center Configuration Manager |
| Primary audience | Microsoft Windows administrators |
| IT environment | Microsoft Windows 7 and above, Windows Server 2008 R2, Windows Server 2012, Microsoft System Center 2012 R2 Configuration Manager |
Requirements
- Change permissions on the certificate file (tenant.cert) to ‘read-only’
Best Practices
We strongly recommend enabling auto-updates on the agent (this is the default policy setting) to ensure that your users have the latest features and security fixes.
For more information on auto-updates, see Agent Changelog
Deployment
Approach
Enterprise software deployment requires a phased roll-out to capture and resolve any issues before deploying the software company wide.
We recommend you deploy the Cloud App Discovery agent in a structured approach.
Prepare your installation package
The Cloud App Discovery agent includes both an executable (.exe) and a certificate file (.cert) bundled in a zipped folder.
Use Microsoft System Center Configuration Manger to package, deliver, and maintain distributions of the Cloud App Discovery agent.
Microsoft System Center Configuration Manager includes varying levels of logging capabilities. Depending on your need for this information, it is important to configure it to a point where you can confirm the success or failure of the installation.
Installation Procedure
Create a Distribution Point
To publish or assign your computer program, you must create a distribution point on the server:
Log on to the server computer as Administrator
Create a shared network folder where you will put the Cloud App Discovery agent executable (.exe file) and certificate (.cert file) that you want to distribute.
For this purpose, the executable and certificate are located in \serreslab1\testpkg.

Note
This share must be accessible by your client machine.
The client machine will request the file from this location.

Verify that the share is working correctly.
Change permissions on the certificate file (tenant.cert) to ‘read-only’

- Right click on the certificate file (tenant.cert), and then click Properties.
- On the General tab, as Attributes, select Read-only.
- Click Apply.
Create a new package in Microsoft System Center Configuration Manager
Launch Microsoft System Center Configuration Manager.

Navigate to Software Library > Application Management > Packages > Create Package.
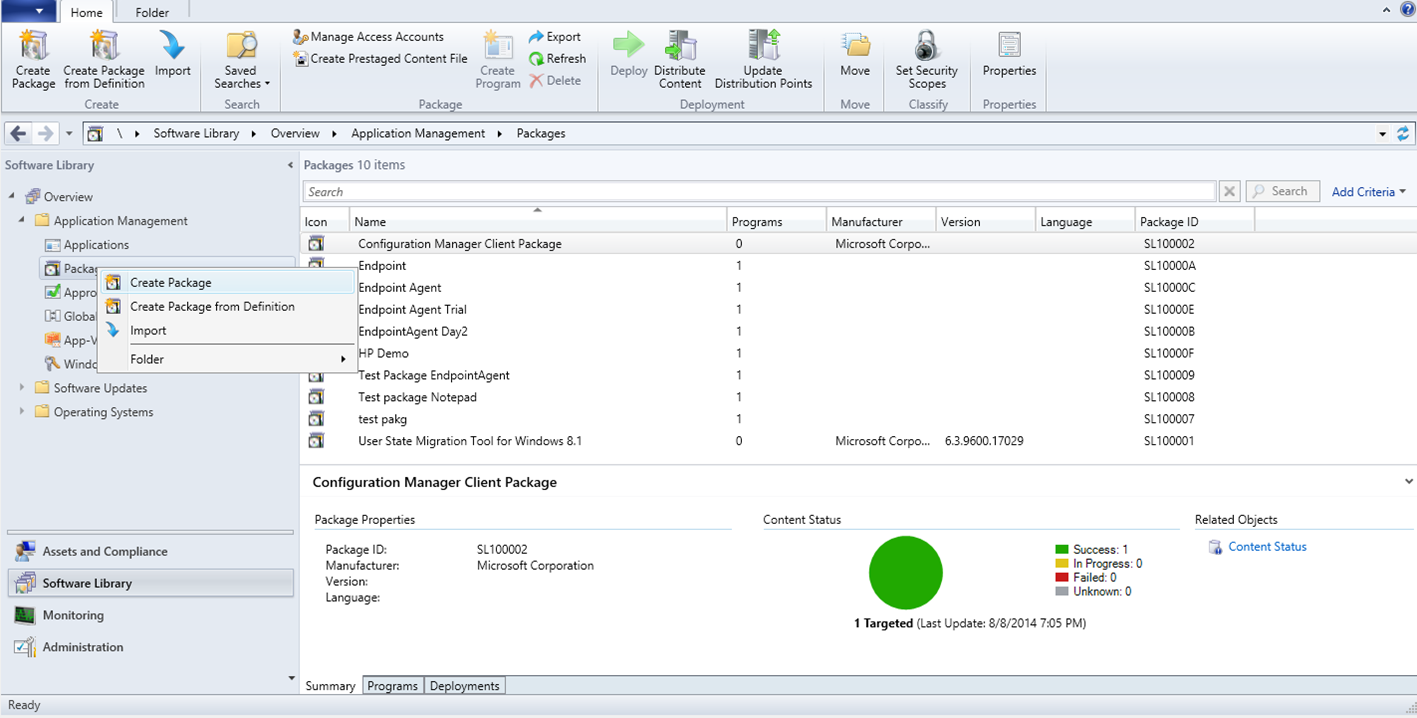
Provide a name for this package, and then click Next.
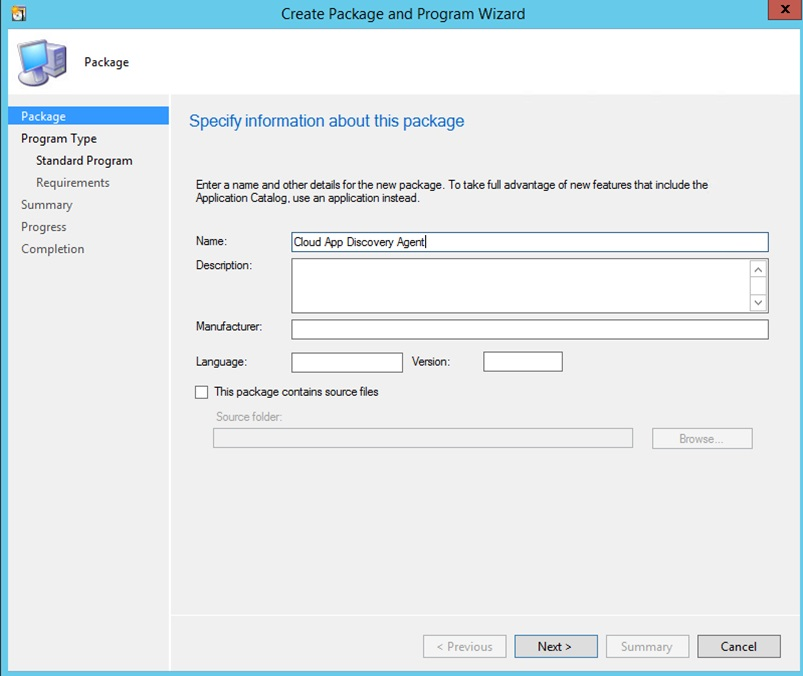
Select the program type you want to create, and then click Next.
For the purpose of the scenario in this topic, Standard Program is selected.

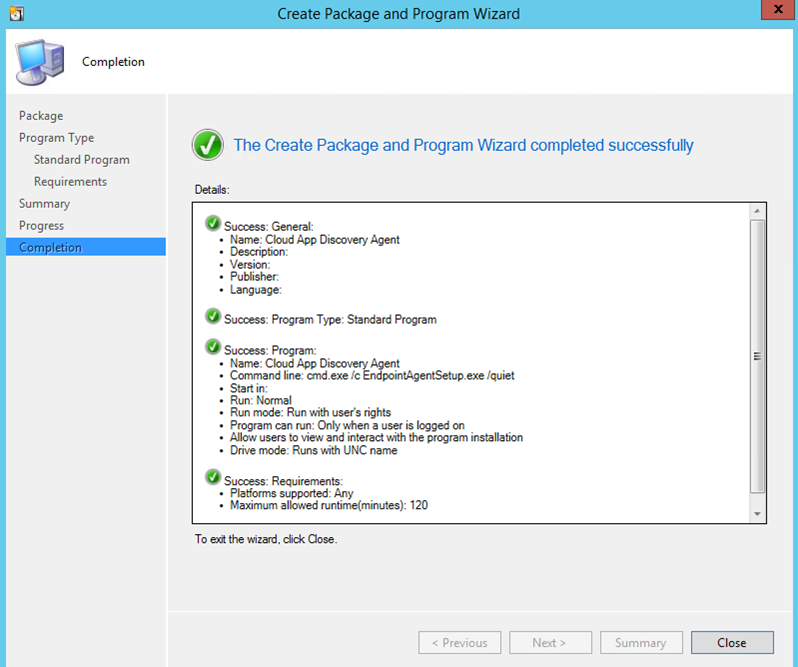
Specify a Name and Command Line, and then click Next.
Installation command:
cmd.exe/cEndpointAgentSetup.exe/quiet
Note
In the command, the switch "/quiet" performs a quiet install.
Optional: You can specify the requirement for this standard program.
Confirm settings, and then click Next.
On the Completion page, click Close.
Set Source Folder
To open the Cloud App Discovery Agent Properties, right-click the newly created package, and then click Properties
Click the Data Source tab.
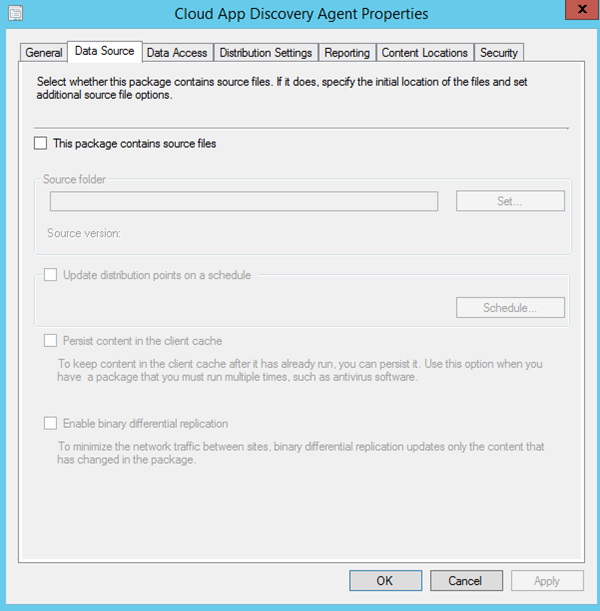
Select This package contains source files.

To open the Set Source Folder dialog, click Set, browse to the shared network folder you created, and then click OK.
****

Click Apply, and then OK.
Distribute Package
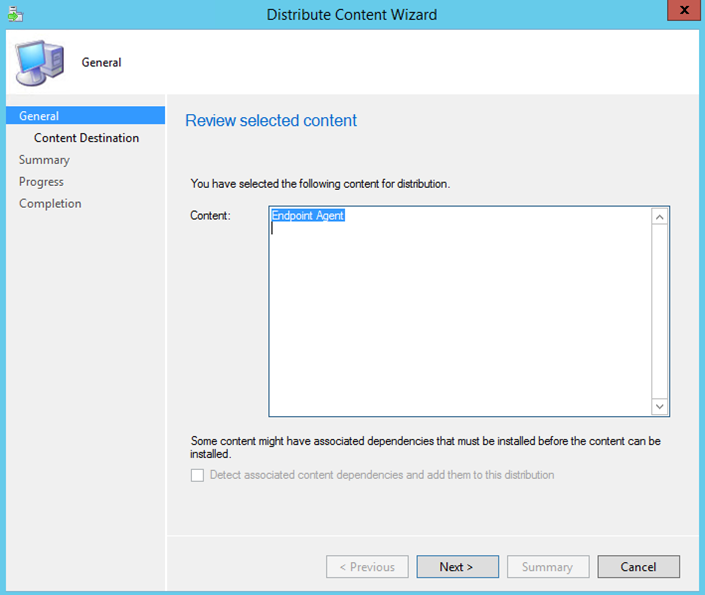
Right-click the newly created package, and then click Distribute Content.

Review the selected content, and then click Next.
Add a Distribution Point.

Select distribution points that will host this content, and then click OK.

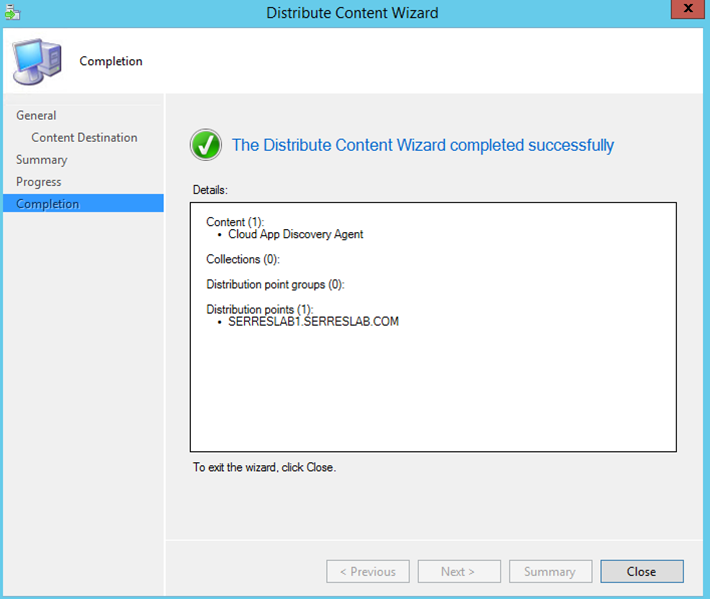
Confirm the settings, and then click Close.
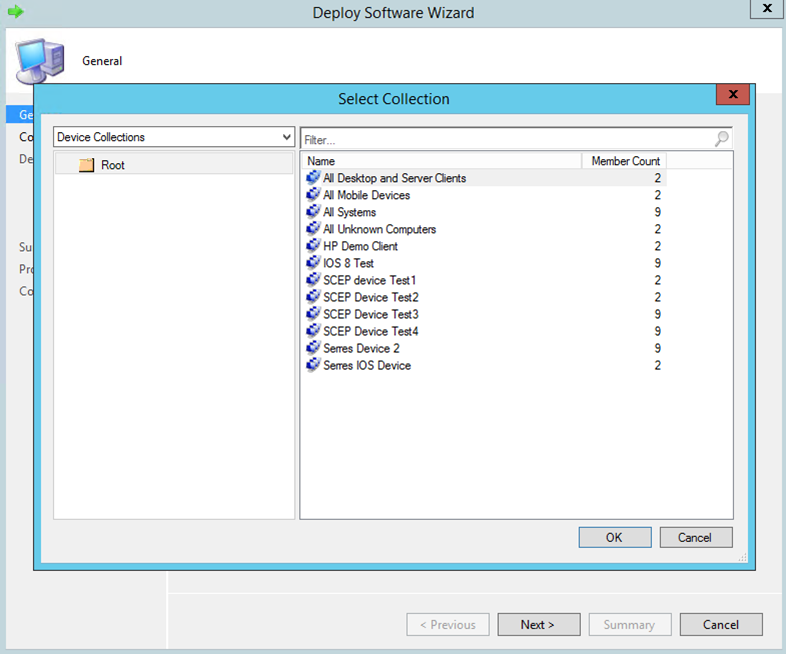
Deploy
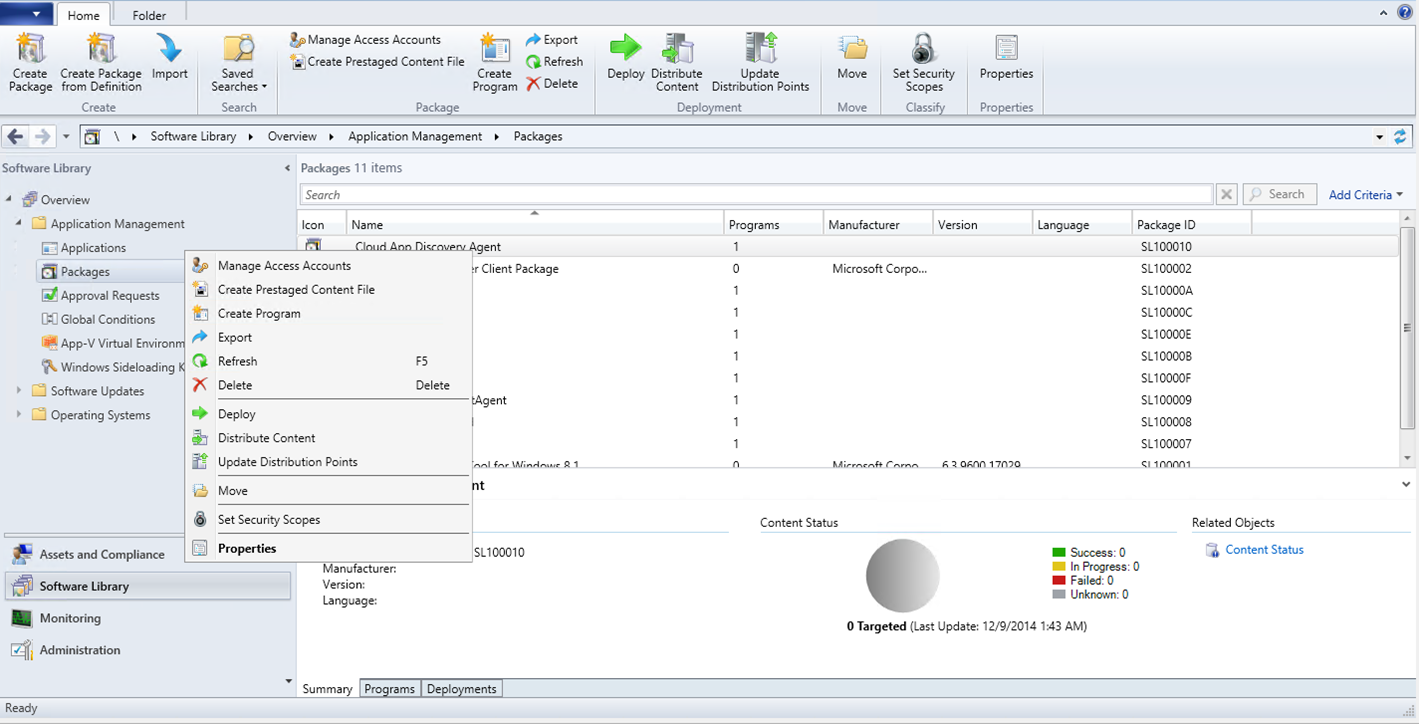
Right click on the package, and then click Deploy.
Specify a device collection.
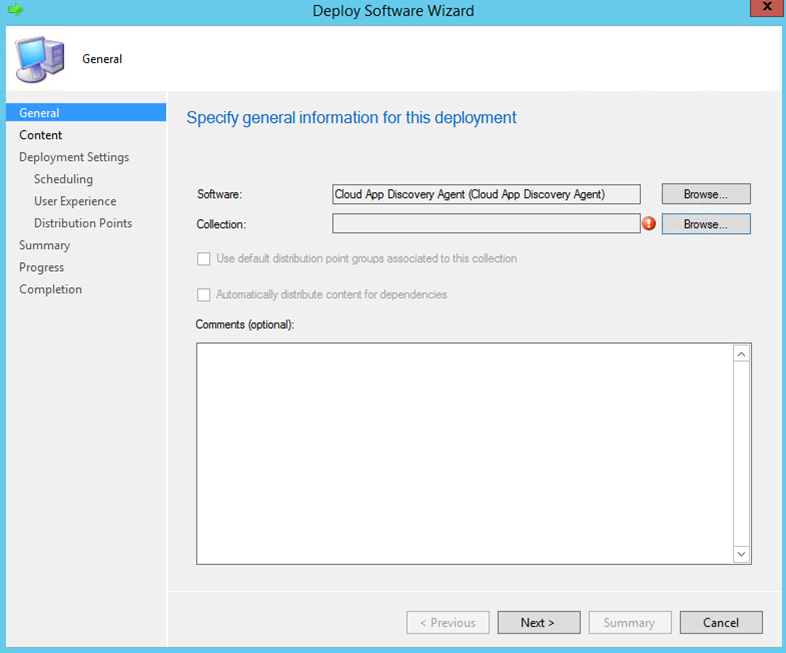
Select a collection, click OK, and then click Next.
Optional: Specify content destination, and then click Next.
Optional: Specify settings to control how this software is deployed, and then click Next.
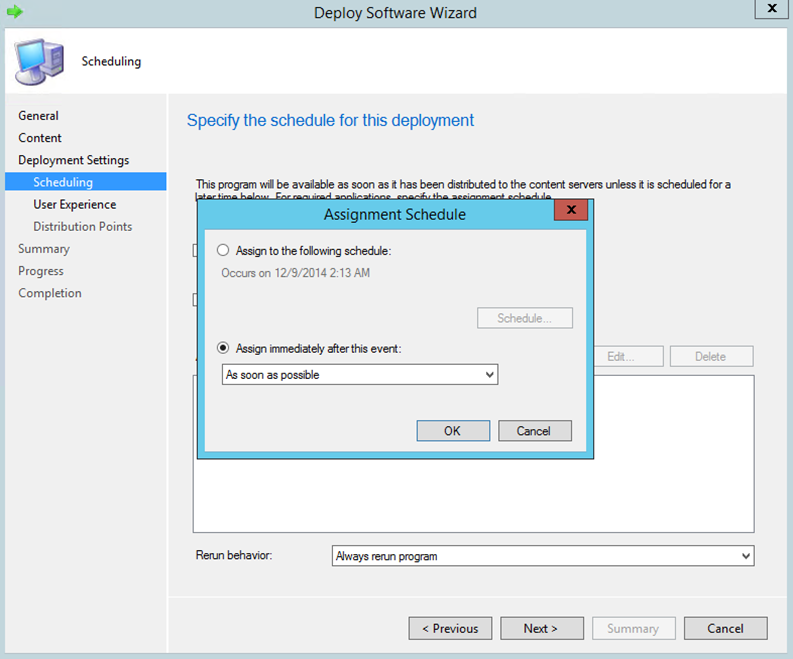
On the Specify the schedule for this deployment dialog, click New.
Select Assign immediate after this event, click OK, and then click Next.
Optional: Specify the user experience for installation of this software on the selected devices, and then click Next.
Optional: Specify how to run the content for this program according to the type of boundary the client is connected to, and then click Next.
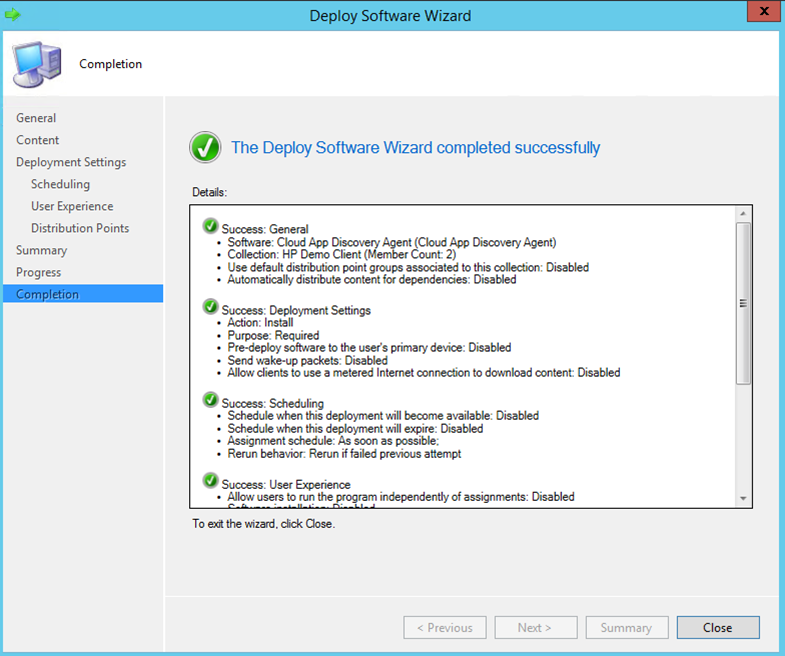
Deployment successfully complete
See Also
- Cloud App Discovery
- Active Directory Group Policy Management
- Assign an Application
- How to use Group Policy to remotely install software in Windows Server 2008 and in Windows Server 2003