SharePoint 2013: Review of the Get started with your site web part
Introduction
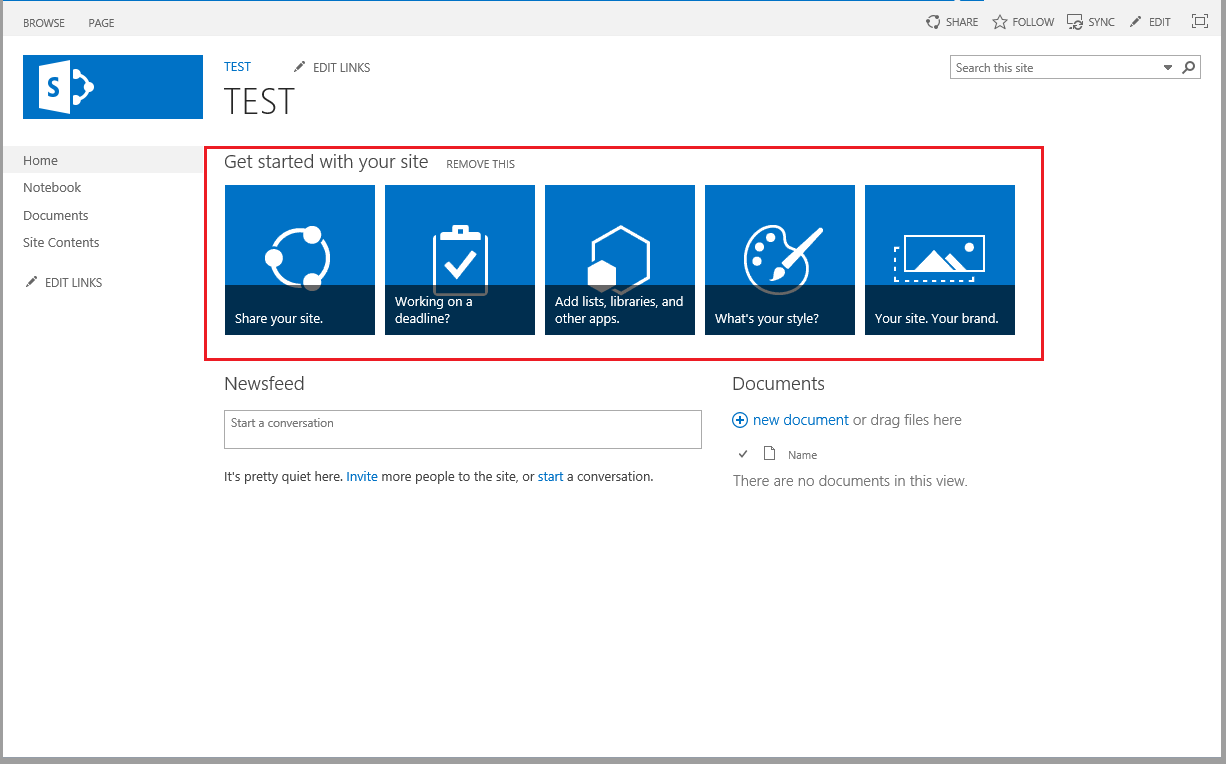
The Get started with your site web part is a new web part available with SharePoint server 2013. It provides a series of five quick links displayed as tiles that link to common tasks associated with building a new collaboration site, including:
- Sharing your site
- Clicking this tile results in a popup enabling you to configure access permissions
- Working on a deadline?
- Clicking this tile displays a popup listing links to the Tasks and Calendar lists
- Add Lists libraries and other apps
- Clicking this tile navigates the browser to the Site Contents page
- What's your style
- Clicking this tile navigates the browser to the Change the look page
- Your site. Your brand.
- Clicking this tile navigates the browser to the Title, description and logo page.
This web part appears automatically on the home page of some new site collections.
Specifically, it appears on the home page of those site collection template types for which the Wiki Page Home Page feature is automatically activated:
When the Wiki Page Home Page feature is activated, it causes a wiki page to be the site's landing page, not a standard web part page. You can see this by simply viewing the page in Edit mode. Web part pages display the Add a Web Part link in various zones on the page. The wiki page does not. A Wiki page enables you to enter both content and web parts into all wiki spaces.
The Get started with your site web part is a member of the group of web parts available to all site templates. It is not associated with any particular feature: you can deactivate all site features, and it will still be available. It is a single, self-contained web part providing the usual web part configuration options (layout, etc). You find this web part, by default, in the Media and Content group of web parts, seen when adding a new web part to a page:
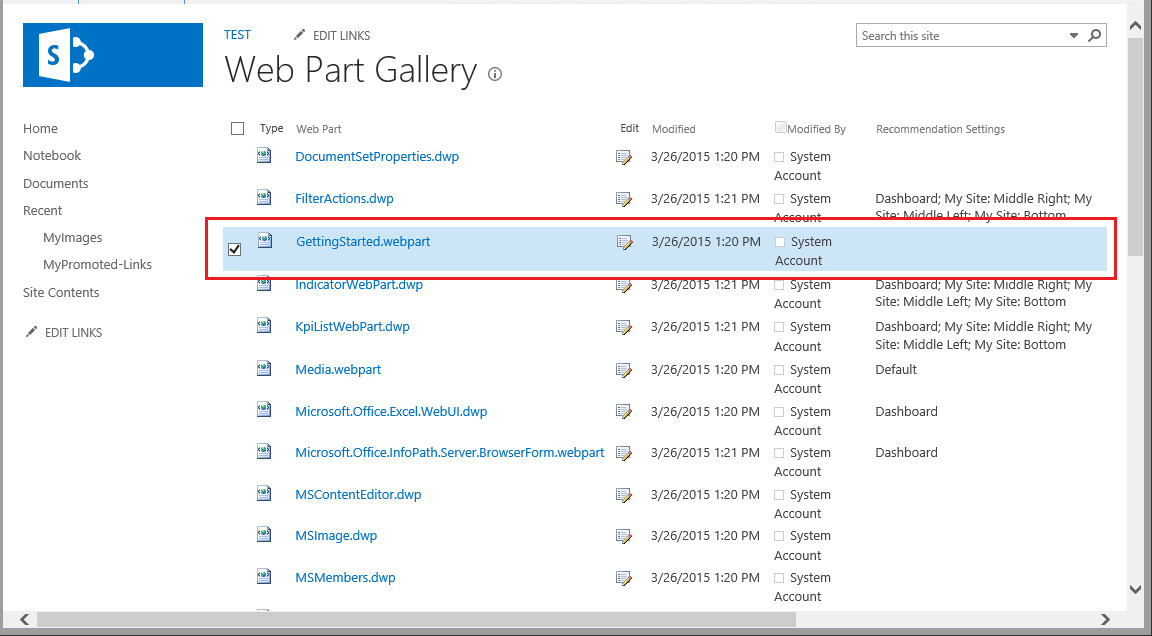
It is listed in a site's Web Part Gallery:
The Get started with your site web part functions quite a bit like the Promoted Links app. It presents a tiling experience similar to the Promoted Links web part. However, there the similarity ends.
Comparison with the Promoted Links App Part
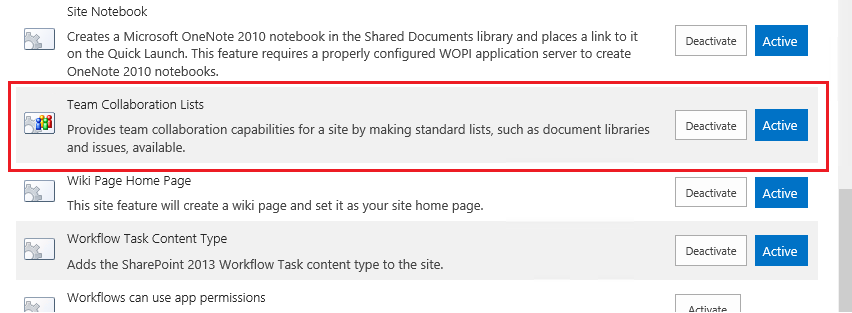
The Get started with your site web part is almost completely self-contained and you cannot modify the range of tiles that appear, the link URLs, and so on. All you really can do is add it to a web page, modify its basic web part properties and that's about it. In contrast, the Promoted Links app part enables you to modify a wide range of parameters, including the number of tiles you want to display, the link URLs, background images, and so on. Promoted Links is an app part. Moreover, it's part of the Team Collaboration Lists feature and only becomes available when you activate this feature:
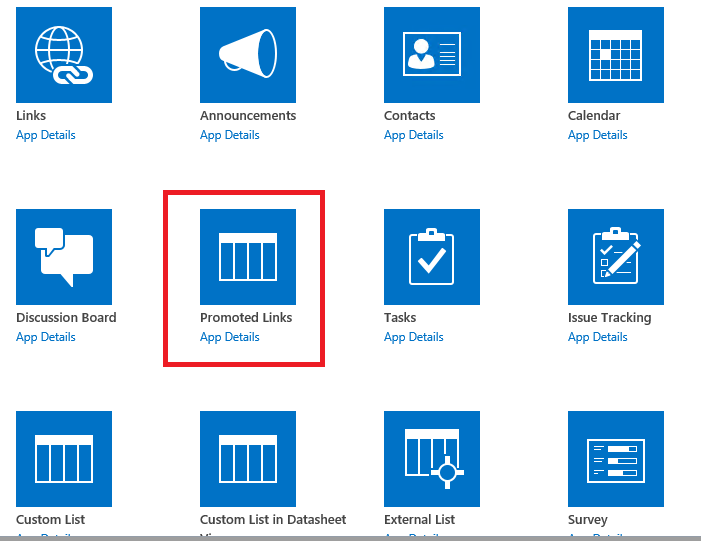
This feature is activated by default for some site templates, such as the Team Site template. Other templates for which it is automatically activated are listed in the table below. Once this feature is activated, you can then find the Promoted Links app part along with all the other app parts available to your site at the Site Contents page.
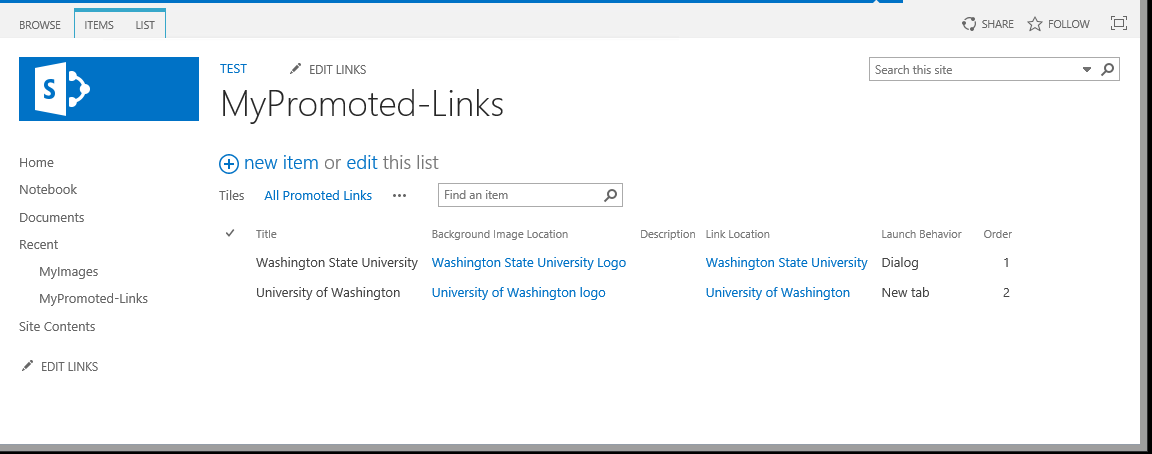
Like any other app, you first have to create it. Double-clicking the Promoted Links tile creates a new page just like if you added a list or library app to your site. Once it is created, you add entries to this "list" and configure them.
For example, let's say that I added a new Promoted Links app part to a site, naming it MyPromoted-Links. Next, I populate it with a couple of items:
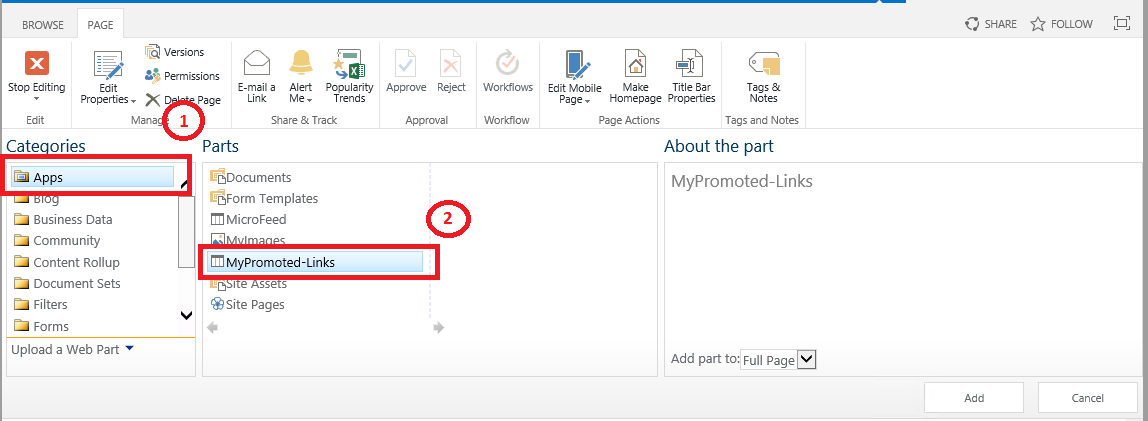
As you can see, it's just a type of list. Then, I would add a reference to that list to a web part page just like you would add a reference to any other site list or library in order to display it on a web part page
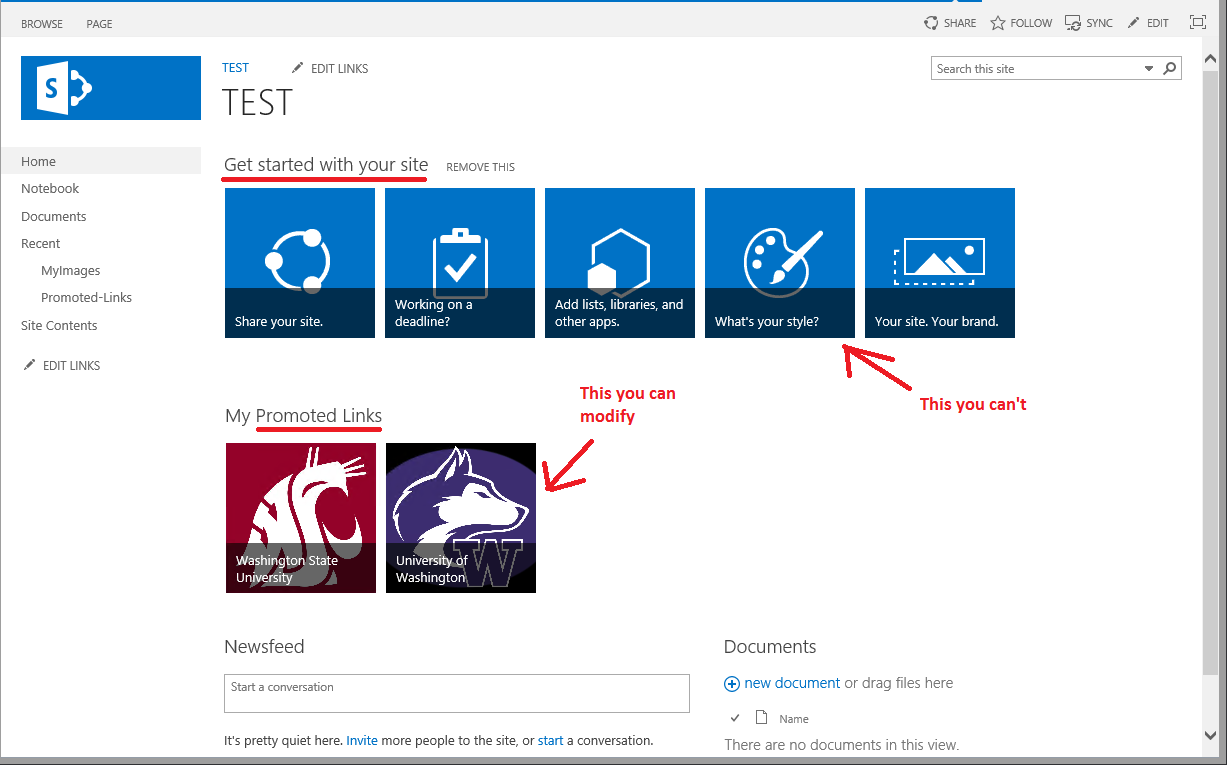
Below, I've add a reference to the MyPromoted-Links app to the landing page of my team site, which still features the Get started with your site web part but now also presents a reference to the Promoted Links app part
Contrast this with the Get started with your site web part, discussed in the beginning. As you can see, the respective processes for deploying these two SharePoint objects are very different. They are two completely different objects.
Site Templates that feature the Get started with your site Web Part
The Get started with your site web part is displayed automatically on the landing page of some types of those newly created site collections for which the Wiki Page Home Page site feature is automatically activated. Only a few such templates are configured this way. Here's a listing of the OOTB templates and which ones have this feature activated and which ones don't:
| Type | Template Activated | ||||||||||||||||||
| Collaboration |
|
||||||||||||||||||
| Enterprise |
|
||||||||||||||||||
| Publishing |
|
If you don't want to have the Get started with your site web part displayed on the home page of your site, you can easily remove it by simply deleting it from the page. You can also get rid of it by deactivating the Wiki Page Home Page site feature, which reverts the site's home page back to a web part page.
Remove the web part
Navigate to the page presenting the Get started with your site web part.
Check out the page (assuming Version history has been enabled on the library containing this page)
On the Settings menu, click Edit page.
Delete the web part.
Save the page.
Check the page back in.
*The Getting Started site feature has nothing to do with the Get started with your site web part. *
http://1.bp.blogspot.com/-zXjFTxty0-I/VR68VqLXmWI/AAAAAAAADQc/MvV5fUIa5_A/s1600/GettingStarted.20150327.15.B.png Deactivating the Getting Started site feature does NOT remove the Getting started with your site web part from the landing page. The Getting started with your site object is just a web part. It's always available to you, whether or not the Getting Started site feature is activated.
Add the web part
- Navigate to the target page.
- Check out the page (assuming Version history has been enabled on the library containing this page)
- On the Settings menu, click Edit page.
- Click inside a wiki space or click the Add a Web Part link.
- In the Categories section, select Media and Content, then select Get started with your site, and the click Add.
- Click Save.
- Check the page back in.
References
- Question about "Get Started With Your Web Site" web part
- Remove getting started from home page
- SharePoint 2013 "Get Started with your site" Web Part - FAQs
- Create Custom Promoted Link Tiles in SharePoint 2013
- Promoted links, The New OTB Tile Web Part in SharePoint 2013
- How to remove "Get started with your site"
- SharePoint 2013 Out of Box Web Parts: comprehensive overview of OOTB web parts.
