SharePoint Online: How to change primary administrator for all site collections using PowerShell
Overview
This article describes how to change the site collection owner for multiple site collections using Powershell. Two scenarios are considered:
- when all site collections will have one and the same primary administrator.
- when site collections should have different owners and you have assigned the owners to the sites in a .csv file.
One Admin Scenario
1. Download and install SharePoint Online Management Shell.
2. Open SharePoint Online Management Shell as an Administrator.
3. Enter
Connect-SPOService -Url https://tenant-admin.sharepoint.com
Where the URL represents the link to your SharePoint Online Admin Center. The cmdlet should ask for your credentials. Enter the administrator's credentials.
- Enter
Get-SPOSite | select url, owner
It will show you all the site collections and their current owners.
- Enter
$SiteUrls=(Get-SPOSite).Url
It will retrieve all site collections' URLs. We will need them for the next cmdlet.
- Updating the site collections. Instead of User@Domain.com enter the name of your future primary administrator. This cmdlet may take a while so this is probably a good time to go grab a coffee.
foreach($url in $SiteUrls) { Set-SPOSite -Identity $url -Owner User@Domain.com}
- Display the owners once again to check if the cmdlets brought the expected result.
Get-SPOSite | Select url, owner
Several Admins in CSV file Scenario
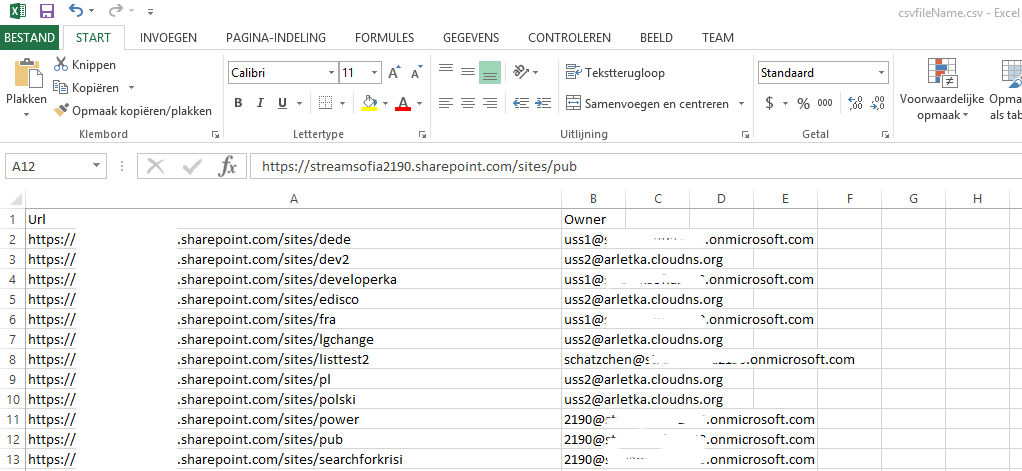
- Prepare a CSV file that will include exactly two columns or two values separated by commas in every line (depending on whether you are using Excel or .txt)
You do not need to include all site collections, but for every site collection that you do include, add the corresponding Owner. Empty fields will give you errors.
or

and change the file format into .csv
- Download and install SharePoint Online Management Shell.
- Open SharePoint Online Management Shell as an Administrator.
- Enter.
Connect-SPOService -Url https://tenant-admin.sharepoint.com
where the URL represents the link to your SharePoint Online Admin Center. The cmdlet should ask for your credentials. Enter the administrator's credentials.
- In order to export only the site collections and their current owners to a CSV file enter either
Get-SPOSite | select url, owner | export-csv c:\users\MyUSer\Desktop\csvfileName.csv
or
Get-SPOSite | export-csv C:\Users\MyUSer\Desktop\FileName.csv
- Enter
Import-CSV C:\Users\MyUser\Desktop\FileName.csv | foreach-object { Set-SPOSite -Identity $_.Url -Owner $_.Owner}
in order to assign the new owners to the site collections. This may take a while so don't hesitate to take a break.
- Verify the results by running the cmdlets from point four:
Get-SPOSite | select url, owner | export-csv c:\users\MyUSer\Desktop\CheckResults.csv
in order to export only the site collections and their current owners to a CSV file or
Get-SPOSite | export-csv C:\Users\MyUSer\Desktop\CheckResults.csv
Other Languages
Wiki: SharePoint Online: Jak zmienić właściciela dla wszystkich zbiorów witryn przy użyciu Powershell (pl-PL)
Wiki: SharePoint Online: Wie man Besitzer für alle Websitesammlungen mit Powershell ändert (de-DE)
