SharePoint Online: Disable or enable attachments to list items using Powershell
Why?
Want to keep your lists tidy? Saving space? Do you want to prevent users from adding unnecessary attachments to the list because their place belongs elsewhere?
This is a solution for you!
Or maybe you already disabled the feature? For some of the lists - for some not, and now you are looking for a quick way to restore the option for all lists?
This is also a solution for you! :)
User Interface
How to add attachments to list items
Open a SharePoint Online list.
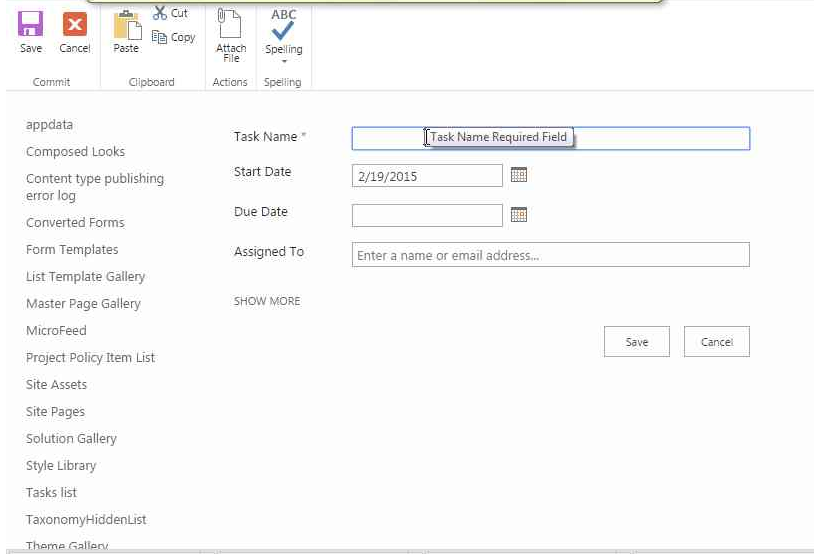
In the top left corner, click on the "new" button. Depending on the list, it can be "new item", "new task", "new event" or "new announcement".
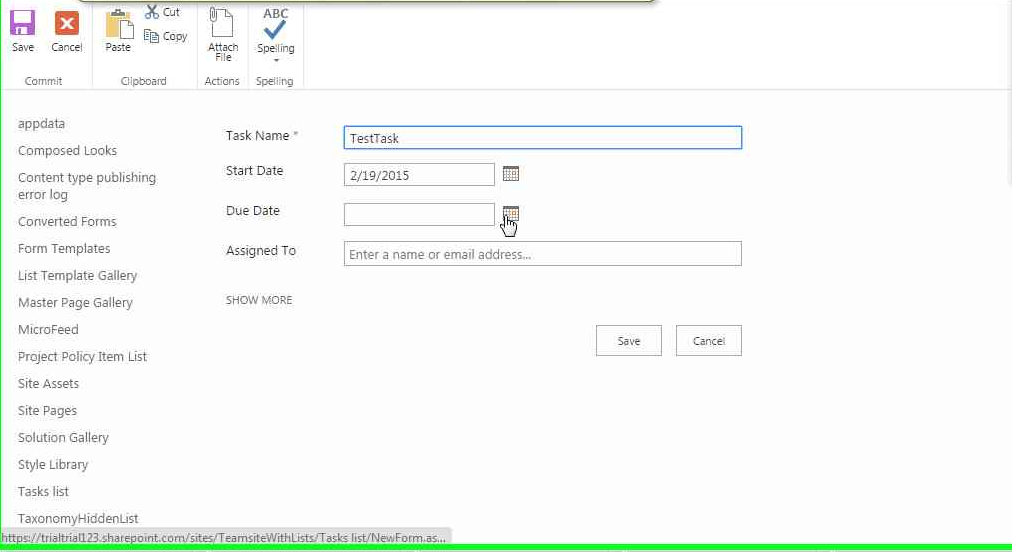
Fill in the required properties.
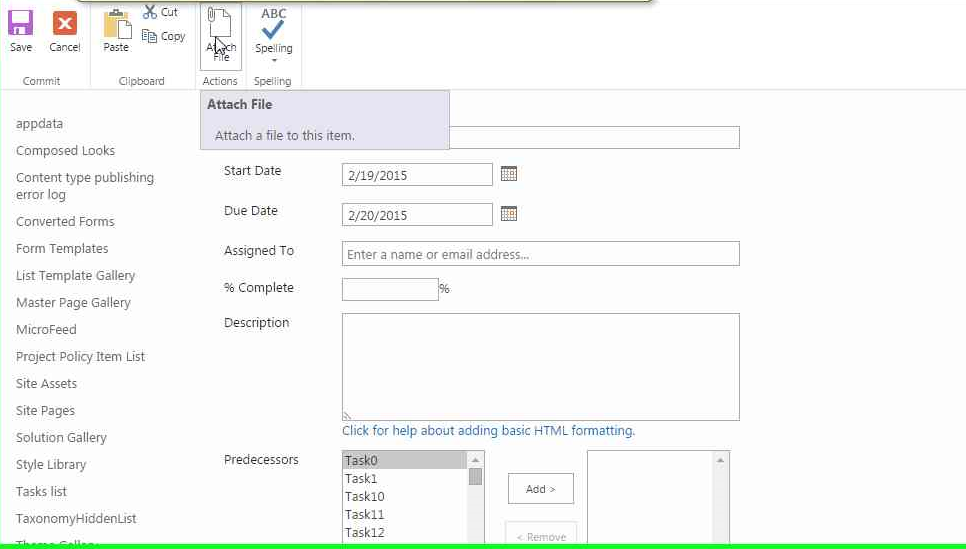
On the ribbon click button "Attach File".
Scroll down to choose a file.
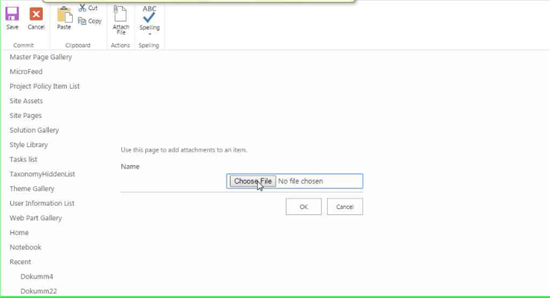
Save.
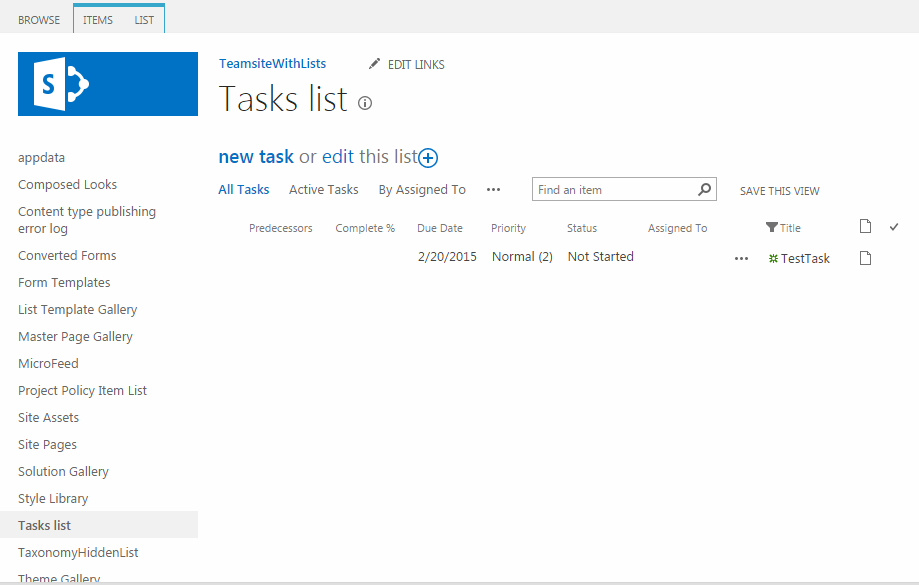
The item should be visible in the list view. You can see that it has the attachment through a file icon on the left hand side.
Disable/enable the option manually
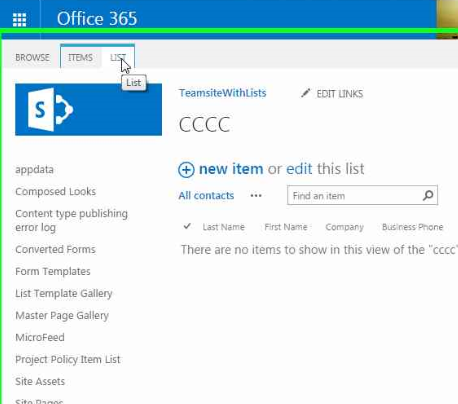
Go to to the list.
Click on the List tab.
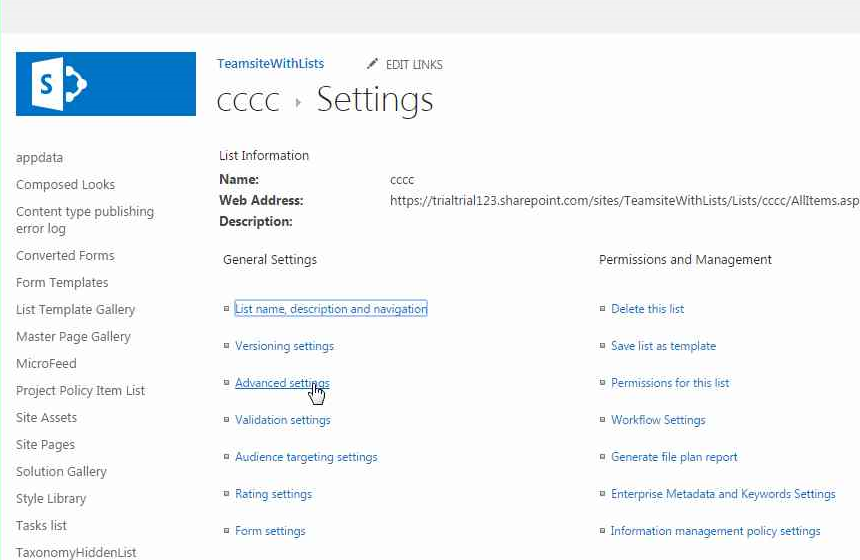
Click on List settings.
Choose Advanced settings.
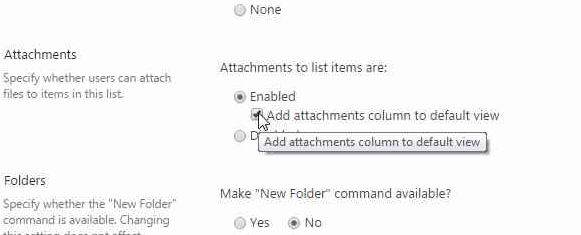
Scroll down to the Attachments paragraph.
Choose the setting. If you choose Enabled, the users will be able to add attachments to your list items. If you choose Disabled, the button will disappear. By default it is Enabled.
Unfortunately that's it if it comes to the options available from User Interface. If you have hundred lists and don't want to repeat those six steps for each and every one of them - PowerShell.
PowerShell
PowerShell is not the only way to leverage CSOM, the client-side object model, in order to perform operations against SharePoint Online. You can use it in Console Application or in an app. Similar - but not the same! - code could be used e.g. in C# application.
Prerequisites
PowerShell
It should be installed by default on newer Windows systems.
SharePoint Online SDK
The SharePoint Online Client Components SDK can be used to enable development with SharePoint Online. As per Microsoft description, this easy-to-use, redistributable package of the Microsoft Silverlight and Microsoft .NET managed client object models in Microsoft SharePoint Online enables developers to reference the client object model. The package includes a comprehensive collection of client-side object model (CSOM) DLLs including the portable libraries, enabling development on devices.1
Supported systems
- Windows 7
- Windows 8
- Windows Server 2008 R2
- Windows Server 2012
- Windows Server 2012 R2
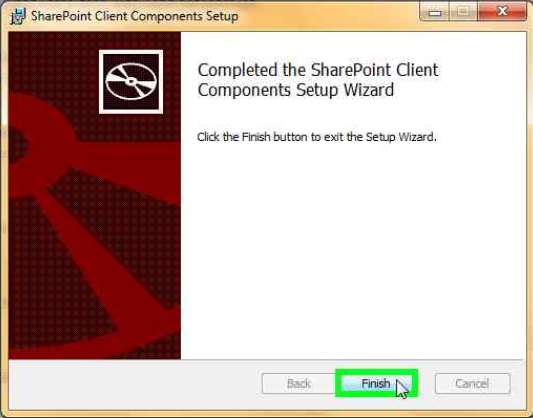
In order to install the prerequisite, download .msi package and run it on your computer. Automatic installation should follow:
Script
Windows 7
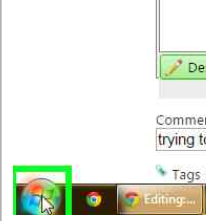
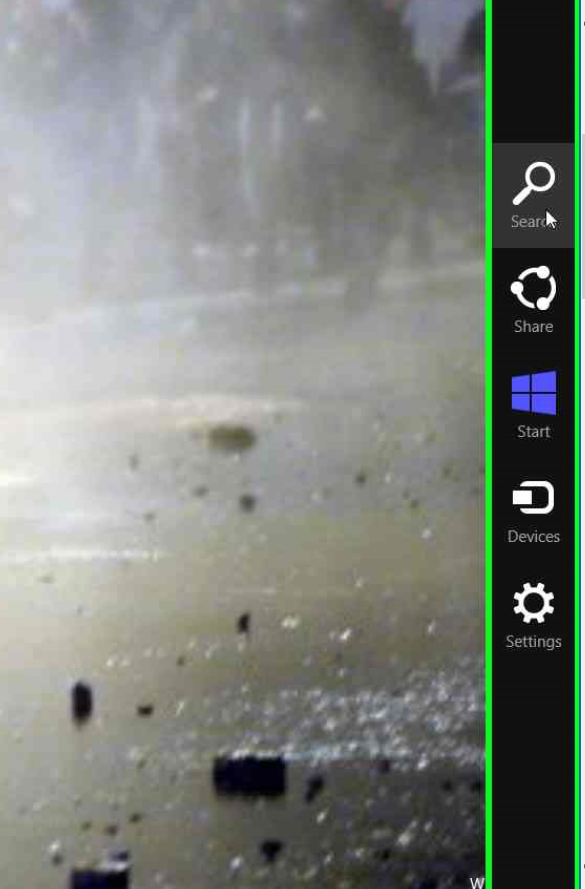
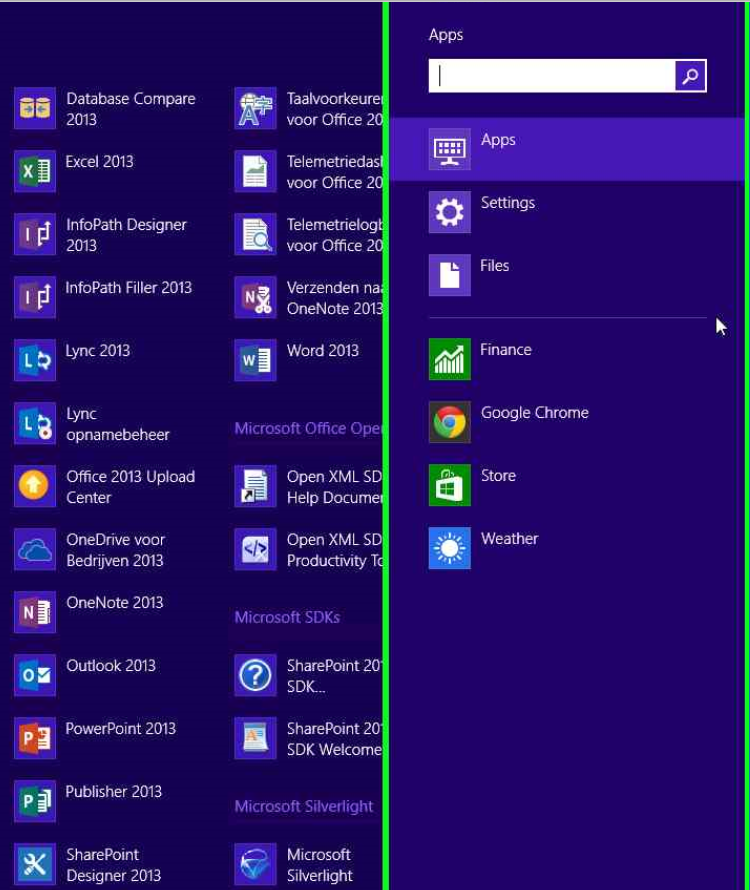
Click on the Start button in Windows 7 or open the Search in Windows 8 and enter: Powershell.
Windows 8
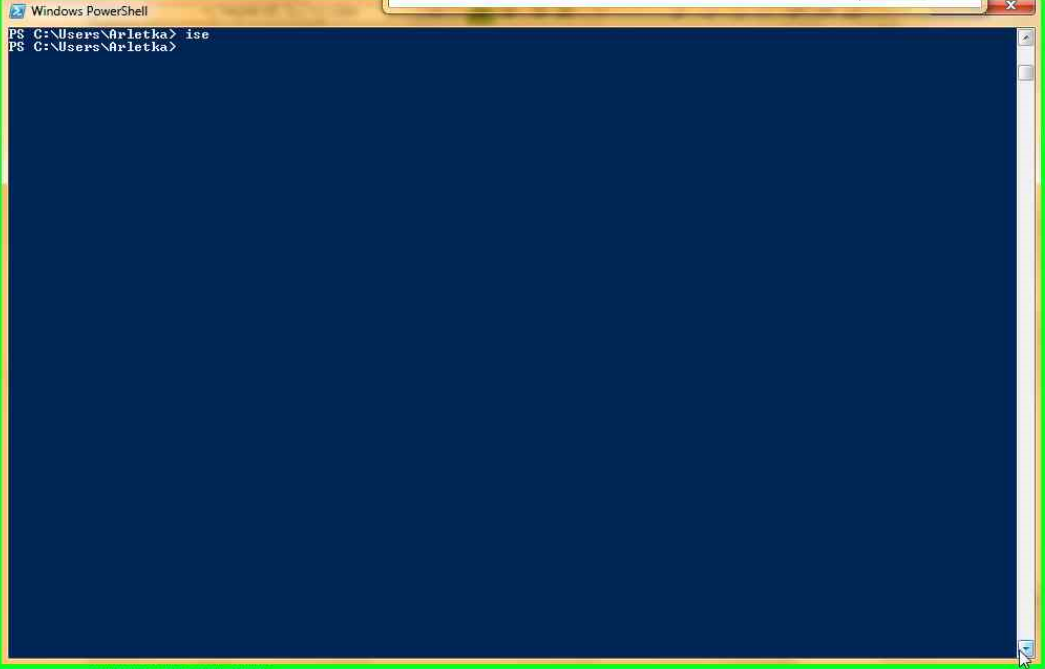
Type in *ise *and press Enter.
Powershell ISE should open.
The Windows PowerShell Integrated Scripting Environment (ISE) is a host application for Windows PowerShell, where you can run commands and write, test, and debug scripts in a single Windows-based graphic user interface. It allows for multiline editing, tab completion, syntax coloring, selective execution, context-sensitive help, and support for right-to-left languages.2
In the ISE Window, add the paths to SharePoint Online SDK installed earlier. Verify if the paths are exactly the same, e.g. on Windows Server you may need to change 15 into 16.
Add-Type -Path "c:\Program Files\Common Files\microsoft shared\Web Server Extensions\15\ISAPI\Microsoft.SharePoint.Client.dll"
Add-Type -Path ``"c:\Program Files\Common Files\microsoft shared\Web Server Extensions\15\ISAPI\Microsoft.SharePoint.Client.Runtime.dll"
Enter the credentials and the site where you want to change the attachments setting
$Username="trial@trialtrial123.onmicrosoft.com"
$AdminPassword=``""
$Url=``"https://trialtrial123.sharepoint.com/sites/teamsitewithlists"
It is a good practice to keep all information that a user may change in one place, instead of spread across the whole code for us to search whenever we want to re-use it. So let's decide now whether we will want to enable the attachments or disable them and store this decision as a bool variable:
$Attachments=$false
As you see, I have decided not to allow my users to attach files to the list items.
Now let's do something with the data we provided. For most of the actions it is useful to put them in a form of a function. Functions are blocks of code designed to perform a particular task. If we encapsulate our cmdlets in such a block, it will be very easy to re-use it later on and that's what automation is all about.
function Set-SPOListsAttachments
{
}
The function can take parameters, defined either in ( ) next to the function name or in a way shown below:
param (
``[Parameter(Mandatory=``$true``,Position=1)]
``[string]``$Username``,
``[Parameter(Mandatory=``$true``,Position=2)]
``[string]``$AdminPassword``,
``[Parameter(Mandatory=``$true``,Position=3)]
``[string]``$Url``,
``[Parameter(Mandatory=``$true``,Position=4)]
``[bool]``$Attachments
)
Password
We can either take password from the input earlier
$password = ConvertTo-SecureString -string $AdminPassword -AsPlainText -Force
or if you are concerned with security - ask for it every time the function will run (that's once per site).
$password=Read-Host -Prompt "Enter password" -AsSecureString
Let's create the context now for our actions. We will be operating within the site/ site collection we defined earlier in the $Url variable
$ctx=New-Object Microsoft.SharePoint.Client.ClientContext($Url)
Add the credentials to the context, so that we can authenticate.
$ctx .Credentials = New-Object Microsoft.SharePoint.Client.SharePointOnlineCredentials( $Username , $password )
.ExecuteQuery() isn't necessary at this stage, but I like to run it early to make sure that authentication ran smoothly. If there is an error in the $Url, $Username, $password, or the site doesn't exist, it will throw us an error and we can narrow down our troubleshooting scope.
$ctx .ExecuteQuery()
We want to apply the Attachments setting to all lists, so first we have to retrieve them.
$Lists = $ctx .Web.Lists
$ctx``.Load(``$Lists``)
$ctx``.ExecuteQuery()
In order to change the setting for every list, we have to loop through them. We can use for loop or foreach loop in this case.
Foreach( $ll in $Lists)
{
}
$ll represents the list at which my loop currently arrived. Set the property "Attachments" of the list $ll (current list) to the value hidden under variable $Attachments (in our case it is $false).
$ll .EnableAttachments = $Attachments
If you didn't specify the variable earlier and in the parameters of the function, you could just write:
$ll .EnableAttachments = $false
Update the list with the new settings.
$ll .Update()
Send this update for execution.
$ctx .ExecuteQuery()
.ExecuteQuery() is likely to throw us an error, so let's encapsulate it with try and catch.
try
{
``}
``catch [Net.WebException]
``{
``}
If something goes wrong, the code will probably continue, because in Powershell only terminating errors terminate the code execution. When the ThrowTerminatingError method is called, the Windows PowerShell runtime permanently stops the execution of the pipeline and throws a PipelineStoppedException exception. Any subsequent attempts to call WriteObject, WriteError, or several other APIs causes those calls to throw a PipelineStoppedException exception.3 Otherwise the code proceeds to the next object. Cmdlets can write any number of output objects or non-terminating errors before reporting a terminating error. However, the terminating error permanently stops the pipeline, and no further output, terminating errors, or non-terminating errors can be reported.3 I would like to know what went wrong, so let's add:
Write-Host "Failed" $_.Exception.ToString() -ForegroundColor Red
And the full try and catch:
try
``{
``$ctx``.ExecuteQuery()
``Write-Host $ll``.Title ``" Done" -ForegroundColor Green
``}
``catch [Net.WebException]
``{
``Write-Host "Failed" $_``.Exception.ToString() -ForegroundColor Red
``}
The only remaining thing is to call the cmdlet
Set-SPOListsAttachments -Username $Username -AdminPassword $AdminPassword -Url $Url -Attachments $Attachments
If you decided to skip the $password or $Attachments parameters (for security and ease resons), don't forget to modify the parameters of the functions
param (
``[Parameter(Mandatory=``$true``,Position=1)]
``[string]``$Username``,
``[Parameter(Mandatory=``$true``,Position=3)]
``[string]``$Url``,
)
The Position attribute of the parameters is optional, and the positions don't have to be contiguous. Positions 5, 100, and 250 work the same as positions 0, 1, and 2.4
The cmdlet will look different as well
Set-SPOListsAttachments -Username $Username -AdminPassword $AdminPassword -Url $Url -Attachments $Attachments
Full code without blabbing
#
# Created by Someone Awesome, 2015
#
function Set-SPOListsAttachments
{
param (
``[Parameter(Mandatory=``$true``,Position=1)]
``[string]``$Username``,
``[Parameter(Mandatory=``$true``,Position=2)]
``[string]``$AdminPassword``,
``[Parameter(Mandatory=``$true``,Position=3)]
``[string]``$Url``,
``[Parameter(Mandatory=``$true``,Position=4)]
``[bool]``$Attachments
)
$password = ConvertTo-SecureString -string ``$AdminPassword -AsPlainText -Force
``$ctx``=New-Object Microsoft.SharePoint.Client.ClientContext(``$Url``)
``$ctx``.Credentials = New-Object Microsoft.SharePoint.Client.SharePointOnlineCredentials(``$Username``, ``$password``)
``$ctx``.ExecuteQuery()
$Lists``=``$ctx``.Web.Lists
$ctx``.Load(``$Lists``)
$ctx``.ExecuteQuery()
Foreach(``$ll in ``$Lists``)
{
``$ll``.Attachments = $Attachments
``$ll``.Update()
``try
``{
``$ctx``.ExecuteQuery()
``Write-Host $ll``.Title ``" Done" -ForegroundColor Green
``}
``catch [Net.WebException]
``{
``Write-Host "Failed" $_``.Exception.ToString() -ForegroundColor Red
``}
}
}
# Paths to SDK. Please verify location on your computer.
Add-Type -Path ``"c:\Program Files\Common Files\microsoft shared\Web Server Extensions\15\ISAPI\Microsoft.SharePoint.Client.dll"
Add-Type -Path ``"c:\Program Files\Common Files\microsoft shared\Web Server Extensions\15\ISAPI\Microsoft.SharePoint.Client.Runtime.dll"
# Insert the credentials ``and the name of the site ``and the desired setting: ``$true or $false
$Username``=``"trial@trialtrial123.onmicrosoft.com"
$AdminPassword``=``"Pass"
$Url``=``"https://trialtrial123.sharepoint.com/sites/teamsitewithlists"
$Attachments``=``$false
Set-SPOListsAttachments -Username ``$Username -AdminPassword ``$AdminPassword -Url ``$Url -Attachments ``$Attachments
Download
The script is available also for download from the TechNet Script Gallery:
Disable or enable attachments to list items using PowershellEnable or disable attachments to items of a chosen list using Powershell Related articlesSharePoint Online: Delete unique permissions in multiple lists using CSOM (en-US)

