BizTalk Server: EDI Features Not Just For HIPAA
Introduction
BizTalk Server provides the most comprehensive EDI Platform available with many features and capabilities which are often overlooked.
This article covers use of two of those features that are documented under support for HIPAA, but are really just features of the EDI Disassembler itself:
- Custom Fields
- Trigger Fields
A companion solution can be downloaded from the MSDN Code Gallery at: (coming with Part 2)
Creating Custom Fields
When working with the HIPAA specific schemas, it’s easy to overlook that many of the EDI Loops and Segments have been essentially ‘promoted’ to first class segments with specific names and specifications to match the definitions in the Implementation Guides.
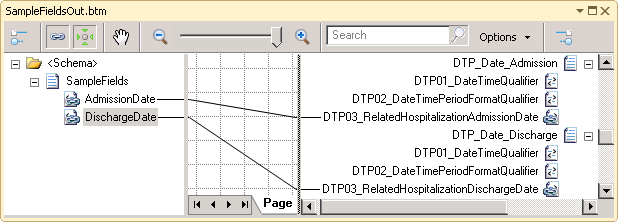
For example, DTP*435 and DTP*096 are identical X12 DTP segments yet they have first class element definitions in the schema:
- DTP_Date_Admission
- DTP_Date_Discharge
This makes generating EDI easy since the source value can be mapped directly to the corresponding output segment.
The ease is compared to all of the other X12 schemas which define the similar DTM segment only once for all potential values. Without Custom Fields, the developer must resort to a custom implementation, using Xslt or C#, to generate the correctly qualified DTM segments when more than one is required.
Creating a Custom Field
Creating a custom field is not difficult, but the modifications muse be made on the .xsd directly, not in the Schema Editor. In this example, we will create two custom instances of the transaction level DTM Segment in an X12 856 schema.
Add a copy of X12_00501_856.xsd to a BizTalk Project, then change the Target Namespace to something owned by the app, http://NotJustHIPAAEDIFeatures for example.
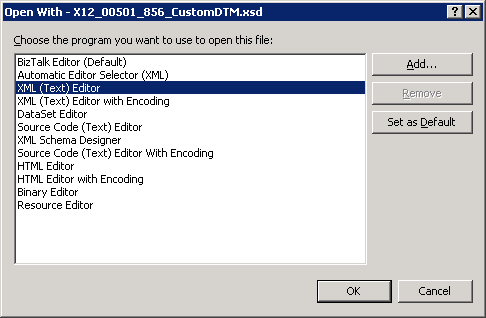
Right click on the X12_00501_856.xsd file in Solution Explorer and choose Open With…, then select XML (Text) Editor, then click OK.
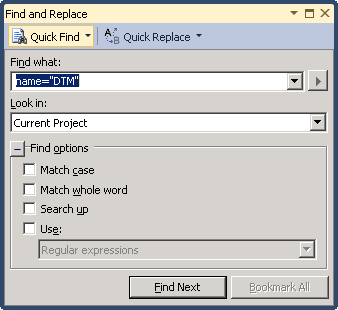
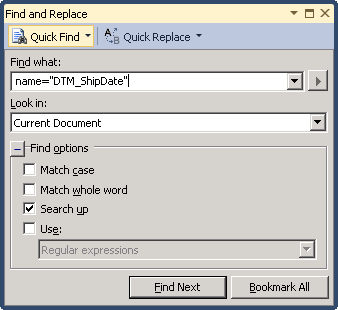
First, we need to find the element definition for DTM.[
Copy the entire element <xs:element name="DTM_ShipDate">. The easiest way to do this in Visual Studio is first collapse the element, then select the collapsed line. Then Paste immediately below.
After Pasting the definition, rename the first one to DTM_ShipDate:
<xs:element name="DTM_ShipDate">Repeat steps 3, 4 and 5 to create the definition for DTM_DeliveryDate.
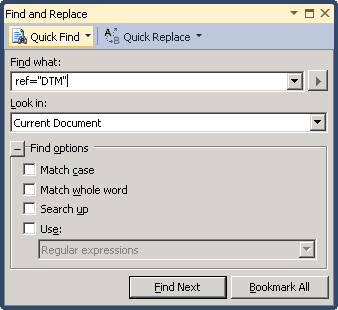
<xs:element name="DTM_DeliveryDate">Find the implementation of DTM.
Similar to steps 4, 5 and 6, Copy and Paste two new copies of:
<xs:element minOccurs="0" maxOccurs="10" ref="DTM">Change the ref attributes to DTM_ShipDate and DTM_DeliveryDate:
<xs:element minOccurs="0" maxOccurs="10" ref="DTM_ShipDate">
<xs:element minOccurs="0" maxOccurs="10" ref="DTM_DeliveryDate">
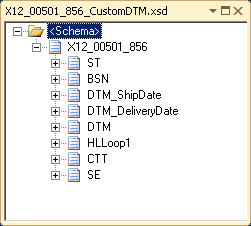
Save the .xsd and open the schema in the Schema Editor. We now have two custom DTM Segments for the two specific DTM types will will be using.
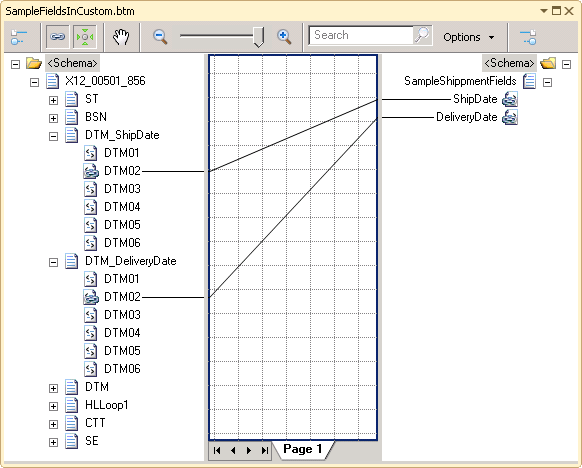
Now, we can map directly the custom fields, just as in the HIPAA map.
In these cases, the values of DTM01 would be set using the default value property of the Map. This is because the qualifier value for a custom files would likely be only one possible value. Adding proper validation support for this is covered in the last section.
Adding Trigger Fields
If all the app will do is send 856’s, the schema will work for that purpose, but this modified schema cannot be used to receive 856’s because there is no way for the EDI Disassembler to differentiate between the three DTM fields. If we test a sample EDI, all DTM segments will be transformed to DTM_ShipDate elements simply because that is the first matching schema definition.
This is where the two trigger annotations come in:
- trigger_field
- trigger_value
The trigger_field is the descendent element the EDI Disassembler will probe to determine if the trigger will fire. trigger_value is the value for the corresponding trigger_field.
Adding the Trigger Fields must also be done using the Xml Editor. Note, the trigger fields must be added to the element definition (name attribute) not any implementation (ref attribute).
With the 856 .xsd open in the Xml Editor. Locate the DTM_ShipDate element definition.
In the DTM_ShipDate definition, locate the b:recordInfo element and add the trigger fields like this:
<b:recordInfo structure="delimited" field_order="prefix" tag_name="DTM" delimiter_type="inherit_field" count_ignore="no" xmlns:b="http://schemas.microsoft.com/BizTalk/2003" notes="Date/Time Reference" trigger_field="DTM01" trigger_value="011">For trigger_field, the value is DTM01 for both. For Ship Date, the trigger_value is 011. For Delivery Date, the trigger_value is 017.
Modify DTM_DeliveryDate as in Step 2. The b:recordInfo element should be:
<b:recordInfo structure="delimited" field_order="prefix" tag_name="DTM" delimiter_type="inherit_field" count_ignore="no" xmlns:b="http://schemas.microsoft.com/BizTalk/2003" notes="Date/Time Reference" trigger_field="DTM01" trigger_value="017">
Now, if we process an 856 transaction with these DTM segments:
DTM*011*20141001*2218~

DTM*017*20141002*2330~

DTM*010*20140928*0000~
We get 011 and 017 in our custom fields and 010 in the generic DTM element:
<ns0:DTM_ShipDate>
    <DTM01>011</DTM01>
    <DTM02>20141001</DTM02>
    <DTM03>2218</DTM03>
</ns0:DTM_ShipDate>
<ns0:DTM_DeliveryDate>
    <DTM01>017</DTM01>
    <DTM02>20141002</DTM02>
    <DTM03>2330</DTM03>
</ns0:DTM_DeliveryDate>
<ns0:DTM>
    <DTM01>010</DTM01>
    <DTM02>20140928</DTM02>
    <DTM03>0000</DTM03>
</ns0:DTM>
As with the outbound process, an inbound map can now use direct links for the ShipDate and DeliveryDate values.
Adding Custom Field Validations
Creating the custom fields and adding the Trigger Fields is all that has to be done to use these features. If these schemas are to be shared, it is recommendable to make one more modification to support specific qualifier validation on the custom files. In this cast, that would be validating DTM01.
If we look at the original definition for DTM01 on the custom DTM_ShipDate element, we see it is based on an existing x12 enumerated type:
<xs:element name="DTM01" type="X12_ID_374">
Following this type, we find a very large enumeration:
<xs:simpleType name="X12_ID_374">
    <xs:restriction base="xs:string">
      <xs:enumeration value="001" />
      <xs:enumeration value="002" />
      <xs:enumeration value="003" />
...
In the case of DTM_ShipDate, we should restrict DTM01 to a single value, 011. This is accomplished by adding a new xs:simpleType definition like:
<xs:simpleType name="X12_ID_ShipDate">
    <xs:restriction base="xs:string">
      <xs:enumeration value="011" />
    </xs:restriction>
</xs:simpleType>
Then, back in the DTM01 definition of our custom DTM_ShipDate element, we change the type attribute to our new custom type:
<xs:element name="DTM01" type="X12_ID_ShipDate">
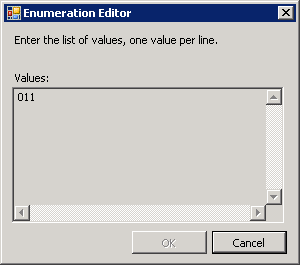
Going back to the Schema in either the Schema Editor or Mapper and checking the Enumeration value:
DTM01 on DTM_StartDate will not be validated with the single value 011.
Coming Soon!
Stay tuned for Part 2 which will cover two more very useful features:
- Splitting Subdocuments
- Combining Custom Fields, Triggers and Sub-document Creation
See Also
Another important place to find an extensive amount of BizTalk related articles is the TechNet Wiki itself. The best entry point is BizTalk Server Resources on the TechNet Wiki.
