Upgrade Assistant Tool for SQL Server 2012 (Ch.10 of 14): Compare Trace Files
This article is part of the serie on the SQL Server Upgrade Assistant:
[[Upgrade Assistant Tool for SQL Server 2012]] 1.0 Introduction
[[SQL Server Upgrade Assistant-Upgrade Assistant Process|1.1 Upgrade Assistant Process]]
[[SQL Server Upgrade Assistant-Upgrade Assistant Results|1.2 Upgrade Assistant Results]]
[[SQL Server Upgrade Assistant-Required Knowledge and Skills|1.3 Required Knowledge and Skills]]
[[SQL Server Upgrade Assistant-System Requirements|2.0 System Requirements]]
[[SQL Server Upgrade Assistant-Create a Test Environment|3.0 Create a Test Environment]]
[[SQL Server Upgrade Assistant-Create a Single Computer Test Environment|3.1 Single Computer Test Environment]]
[[SQL Server Upgrade Assistant-Create a Multiple Computer Test Environment|3.2 Multiple Computer Test Environment]]
[[SQL Server Upgrade Assistant-Installing SQL Server Upgrade Assistant|3.3 Install SQL Server Upgrade Assistant]]
[[SQL Server Upgrade Assistant-Capturing a Test Workload|4.0 Capture a Test Workload]]
[[SQL Server Upgrade Assistant-SQL Server 2005/2008 Baseline System|5.0 SQL Server 2005/2008 Baseline System]]
[[SQL Server Upgrade Assistant-Run Upgrade Advisor|6.0 Run Upgrade Advisor]]
[[SQL Server Upgrade Assistant-Replay Baseline Trace on SQL Server 2005/2008|7.0 Replay Baseline Trace on SQL Server 2005/2008]]
[[SQL Server Upgrade Assistant-Set Up Playback Test System|8.0 Set Up Playback Test System]]
[[SQL Server Upgrade Assistant-Replay Trace on SQL Server Code Name Denali|9.0 Replay Trace on SQL Server 2012]]
[[SQL Server Upgrade Assistant-Compare Trace Files|10.0 Compare Trace Files]]
[[SQL Server Upgrade Assistant-Advanced Topics|11.0 Advanced Topics]]
[[SQL Server Upgrade Assistant-Fixing Differences|12.0 Fixing Differences]]
[[SQL Server Upgrade Assistant-Troubleshooting|13.0 Troubleshooting]]
[[SQL Server Upgrade Assistant-Support|14.0 Support]]
This chapter contains:
10.0 Compare Trace Files
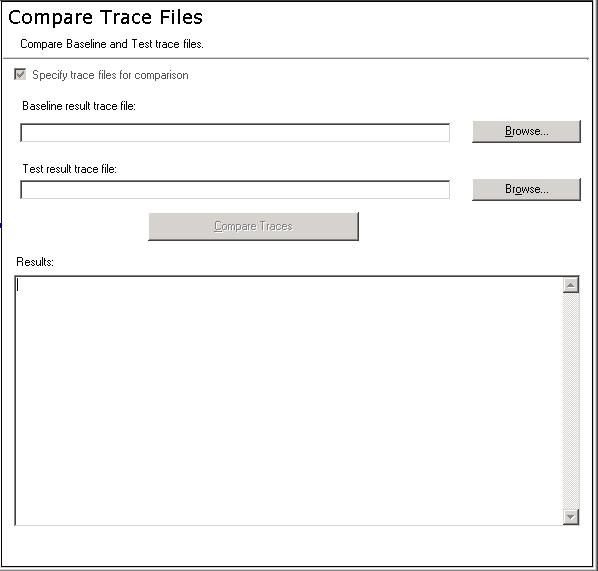
Use this page of the SQL Server Upgrade Assistant UI to compare the trace output files collected from one instance of SQL Server 2005/2008 and one instance of SQL Server Code Name “Denali”.
Figure 6 . Compare Trace Files
If you are using multiple computers for the test, run Compare Traces on the baseline server. For more information, see [[3.2 Create a Multiple Computer Test Environment]]
The workflow for comparing the two trace files you have generated from the new and old environments is:
- Check the “Specify trace files for comparison” check box. (If you have already done “Compare Traces”, you can uncheck it.)
- When the “Specify trace files for comparison” check box is checked, Upgrade Assistant for SQL Server 2012 will compare specified trace files, otherwise Upgrade Assistant for SQL Server 2012 will do “Compare Intermediate Traces”.
- Input a valid “Base line trace file”, or you can simply click the “Browse…” button on the right to specify it.
- Input a valid “Test Server trace file”, or you can simply click the “Browse…” button on the right to specify it.
- Click the “Compare Traces” button or the “Compare Intermediate Traces” button to start comparing traces.
Note:
The “Compare Intermediate Traces” button is clickable only when both of the Baseline intermediate trace and the Test intermediate trace are available. Intermediate traces are automatically generated by Upgrade Assistant for SQL Server 2012 after the replaying operation completes. So after both of the replaying operation against the baseline server and that against the test server successfully complete, the “Compare Intermediate Traces” button is clickable..
Log information will be displayed below the “Results” text box in real–time.
Dialog Controls for compare traces: “Specify trace files for comparison”
Check this to allow user to specify trace files for comparison.
“Base line trace file”
Input a path of the baseline trace file.
“Browse…” (Base line trace file)
Click this to select a path of the baseline trace file.
“Test Server trace file”
Input a path of the test server trace file.
“Browse…” (Test Server trace file)
Click this to select a path of the test server trace file.
“Compare Traces”
Click this to start comparing traces.
“Results”
Display log information in real-time mode
.
10.1 View Replay Differences
This step allows you to visualize differences between trace output files from SQL Server 2005/2008 and SQL Server 2012. The Upgrade Advisor uses Reporting Services to display the differences in a flexible format to allow you to analyze the differences detected. The workflow for displaying differences follows:
Once you have identified the differences between the versions, you can go here for help in fixing the issues: [[SQL Server Upgrade Assistant-Fixing Differences]].
View Trace Differences:
- Launch Upgrade Assistant for SQL Server 2012..
- Click the “View Trace Differences” link to display the “View Trace Differences” page.
- Click the “Show Results” button, the “DReplay Reporting” dialog will pop up.
- Click the “Clear Results” button to clear the existing result.
DReplay Reporting:
The “Reporting Details” data grid view will display the summary information with “Item”, “Baseline Server”, and “Test Server”.
- Check the “Show Diff” radio button to display the differed information in the data grid view down below.
- Check the “Show All” radio button to display all info in the data grid view down below.
- Click the “Export…” button to export data.
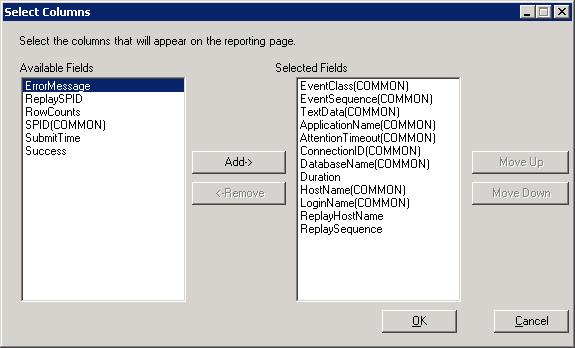
- Click the “Select Columns…” button to specify columns of the data grid view down below. (A new “Select Columns” dialog will pop up.)
- Select a cell, the detailed information will be displayed in the “Data” text box.
- Check the “Without Filter” radio button if you don’t want to use a filter.
- Check the “Use Filter” radio button if you want to use a filter.
- If the “Use Filter” radio button is checked, select the scope of the filter (Such as Baseline, Test, All).
- Specify “And/Or”, “Field”, “Operator”, and “Value” for each filter row.
- Click the “Apply Filter” button to apply the filter.
- Click the “Import Filter” button to import an existing filter file.
- Click the “Export Filter” button to import the current filter to a filter file.
View Statistics by SQL Batch:
- Click the “View Statistics by SQL Batch” link, the “View Statistics by SQL Batch” dialog is displayed to show statistics by SQL batch.
- Select a row, the detailed information will be displayed in the “Data” text box.
- Click the “Export” button to export data.
View Statistics by Error Category:
- Click the “View Statistics by Error Category” link, the “View Statistics by Error Category” dialog is displayed to show statistics by error category.
- Click the “Configure…” button to configure the error category. (An “Error Category Configuration” dialog will pop up.)
- Click the “Start” button to view statistics by error category.
- Click the “Export” button to export data.
- Click the “Clear Clause” button to clear a clause.
- Click the “Clear All” button to clear all clauses.
Now that you have finished the Upgrade Assitant process, there are a few advanced topics to consider for future use: [[SQL Server Upgrade Assistant-Advanced Topics|Advanced Topics]]


