TFS 2013 Release and Build Management: SharePoint 2013 Integration - Part 1
This post shows how to use TFS release and build management to release a SharePoint 2013 solutions and features.
This is Part one of a series as following:
- Part 1: Tutorial Prerequisites and Preparation Steps
- Part 2: Running SharePoint release without using build management
- Part 3: Running SharePoint build without using release management
- Part 4: Connecting Release with Build
Servers and Components Deployment
For this tutorial, we used three servers as following:
- Server 1: Contains TFS 2013 Update 2, and Sql server 2012 standard with SP1.
- Server 2: Contains TFS Release Management Server and Release Management Client with update 2.
- Server 3: This will be our build and testing server, it is recommend separating this in at least two servers, however we merged it in one server to save resources. This server contains:
- TFS Release Management with update 2 deployment agent.
- Sharepoint 2013 with SP1
- Visual Studio 2013 with update 2
- TFS Build Server, Controller and two Agents.
- TFS Release Management with update 2 Client
Setup Recommendation
In your deployment, you can distribute the components in less or more servers; I just have the following recommendation:
- Install Sharepoint 2013 and visual studio 2013 in the build server. If you do not want that, an extra needed steps needed to deploy Sharepoint dlls and visual studio build files on the this server.
- Build server will call release management server to start the release process. Therefore, it is mandatory to install release management client at the build server.
- In server 3, TFS Release Management deployment agent should run under a domain user who has the needed permission to deploy features and packages into Sharepoint Farm.
- For visual studio 2013, be sure to use release management 2013 with update 2, as it contains a build process template that support VS 2013
- You should be sure the all the needed ports are opened between the servers, the following table shows the default ports:
| Source Server Contains | Destination Server Contains | Port |
| TFS | SQL | 1433, 2383 |
| Release Server | SQL | 1433 |
Release Client |
Release Server | 1000 |
| Release Deployment Agent | Release Server | 1000 (both ways) |
| TFS | Build Server | 8080 (both ways) |
| Build Server | Build Agent | 9191 |
For more information about the needed ports, check the following link: http://msdn.microsoft.com/en-us/library/ms252473.aspx
Tutorial Prerequisites
As prerequisites for this tutorial, we supposed the following:
TFS already installed and configured.
If you do not have it, you can follow the below link for installation details.
Create at least one TFS team project.
Build service, controller and agent already installed and configured. For more information:
Release Management (Server, Client, and Deployment Agent) installed, configured, and connected to TFS server. For more information about this, check the following link:
Visual studio 2013 already installed in the build server, and connected to tfs.
Sharepoint server 2013 already installed in the build server and test server (in this tutorial both components exists in server 3)
Be sure that you have a one Sharepoint site to be used for this walkthrough.
Be sure that your Release Server and build management server and TFSs project are all connected to same TFS project collection
Running Sharepoint Solution
This is a simple Sharepoint solution with one package and two features. Each feature contains one visual web part with just a title. To run this sample solution, follow the below steps:
Download RMSharePoint file, extract it, and run the solution file as administrator. you can find it in the following one drive folder
In solution explorer, right click the solution node and click build. Be sure the solution successfully built.
You can debug the solution by press F5, then you can check the web parts in Sharepoint
Running PowerShell deployment script
You have to be sure you can deploy Sharepoint packages with PowerShell before start using TFS release management. It is better to do this now since fixing the deployment issues now easier and faster than troubleshooting with release management.
To deploy the package. Follow the below steps:
download RMSharepoint.ps1 file. http://1drv.ms/1Oo7cjN
With visual studio, Deploy the solution. Be sure that you have the WSP file in output folder.
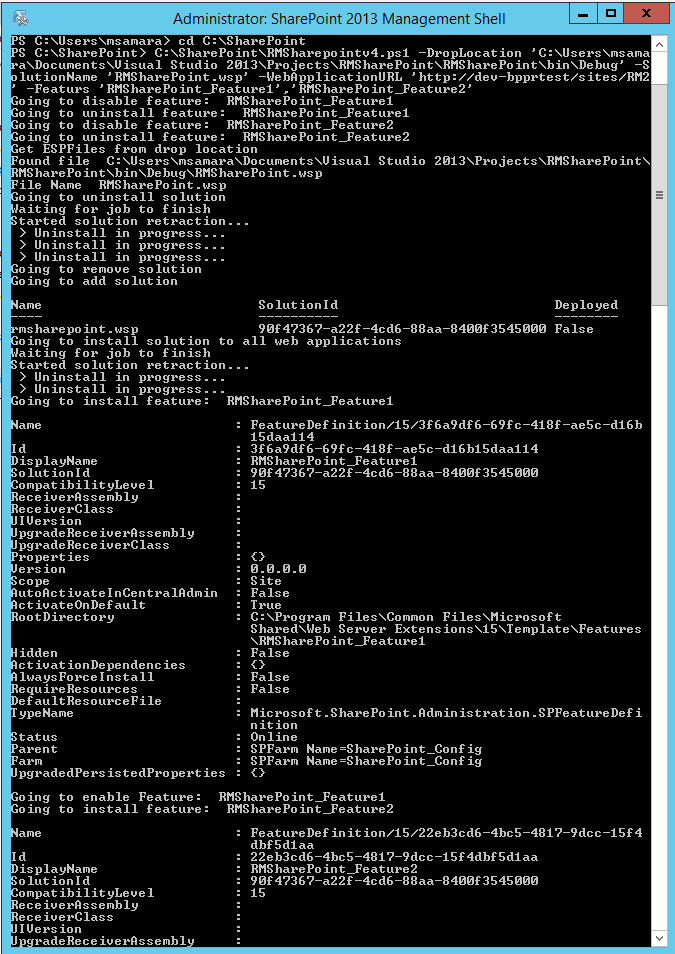
Open PowerShell as administrator, and the run the following command:
.\RMSharepoint.ps1 -DropLocation '[SolutionLocation]\RMSharePoint\bin\Debug' -SolutionName 'RMSharePoint.wsp' -WebApplicationURL 'http://dev-bpprtest/sites/RM2' -Featurs 'RMSharePoint_Feature1','RMSharePoint_Feature2'
For the first time, you might find some errors in the output screen; this since the features are not exist in the web site. Run the script again to be sure no errors shown in the output screen
Be sure that the output as following:
Verify that the features has deployed by adding the web part to one of the site pages
