Note
Access to this page requires authorization. You can try signing in or changing directories.
Access to this page requires authorization. You can try changing directories.
Scope
This article provides step by step method with screenshots on how to install SQL Server 2012 Service Pack 2(SP2) on standalone SQL Server instance.
If you are trying to Install Service pack on database which had Mirroring configured on it please refer to This Link. Steps to install SP2 would be same but few precautions needed to be taken care of.
Introduction
To begin, first please download SQL Server 2012 SP2 from This Link. If you browse this link you will be directed to page containing SQL Server 2012 SP2 on the same page there are various section on Details, System Requirements and Install Instruction. I highly recommend readers to please read all the sections before proceeding.
Before Installing Service Pack
Please follow below steps before upgrading SQL Server 2012 to SP2.
1.PLEASE first install Service pack on UAT/Test environment and test your application thoroughly. Make sure you test all your application functionalities completely. Although service packs or thoroughly tested Microsoft recommends to test it in your UAT environment before proceeding with deployment in production environment.
Backup system and user databases. Use TSQL backup command or SQL Server Management studio GUI to backup system and user databases. Since you backup system and user databases you don't need to backup jobs, SSIS packages, mail profiles, linked servers and logins as all of these would be included in MSDB and Master database backups.
If you use analysis services backup Analysis Service configuration files, databases and repositories. Backup files present at location
C:\Program Files\Microsoft SQL Server\MSAS11.<InstanceID>\OLAP\Data\
C:\Program Files\Microsoft SQL Server\MSAS11.<InstanceID>\OLAP\Config\ directory.Make sure enough space is available on drive where resource/system databases are present. Resource database is utilized during service pack upgrade. The Resource database makes upgrading to a new version of SQL Server an easier and faster procedure. In earlier versions of SQL Server, upgrading required dropping and creating system objects. Because the Resource database file contains all system objects, an upgrade is now accomplished simply by copying the single Resource database file to the local server.
Service pack upgrade would require a downtime of application. Make sure application does not access database during service pack upgrade. Make sure you stop all jobs and activities on database before proceeding. you don't need to shutdown database services to apply service pack.
Make sure you are administrator on the system and always run the service pack executable with administrator privileges.
Steps to Install SP2
Click on download mark on the link and download 64 bit or 32 bit of installable as per your machine architecture. We would be upgrading SQL Server 2012 64 bit to SP2 so download will be SQLServer2012SP2-KB2958429-x64-ENU.exe. Download the installable on local drive
Right click on Installable(SQLServer2012SP2-KB2958429-x64-ENU.exe) and select run as administrator. it will start extracting and will show as per below screenshot.
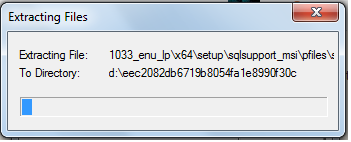
After extraction is complete below message will appear. extraction might take few minutes

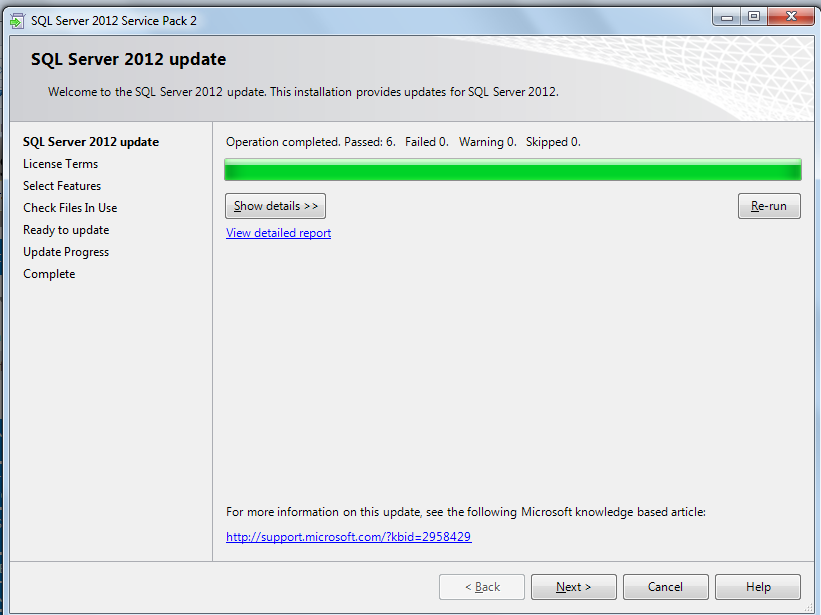
After finishing below screen will appear. You can click on show details you check what all checks are performed by SQL server before starting installation of SP2. Sometimes is OS on which SQL Server is installed has restart pending it will show here as error saying restart pending. In that case you have to cancel the setup restart the OS and then again run the setup as administrator
After you click next you would reach to License term page. You need to select the I accept check box and click on next
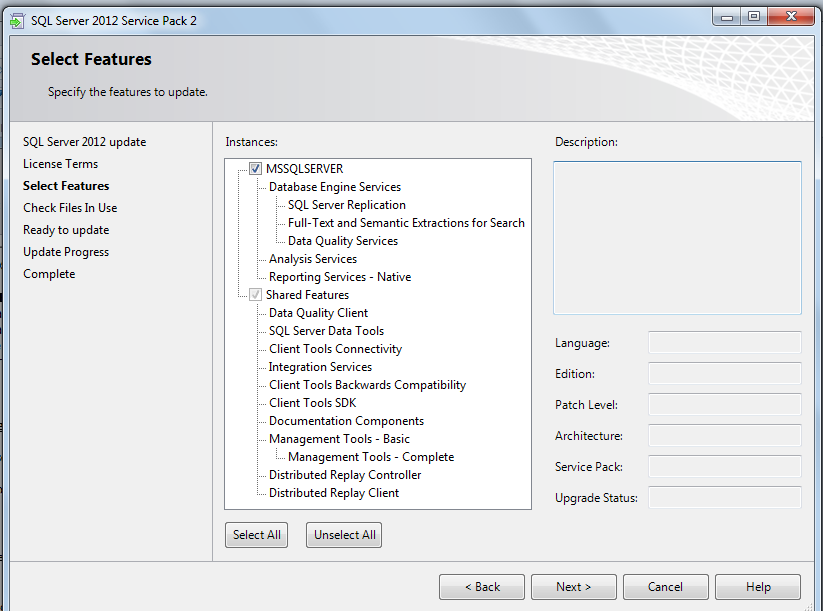
After that Select Features page will appear on which you can select features of SQL Server you want to upgrade to SP2 and click next.
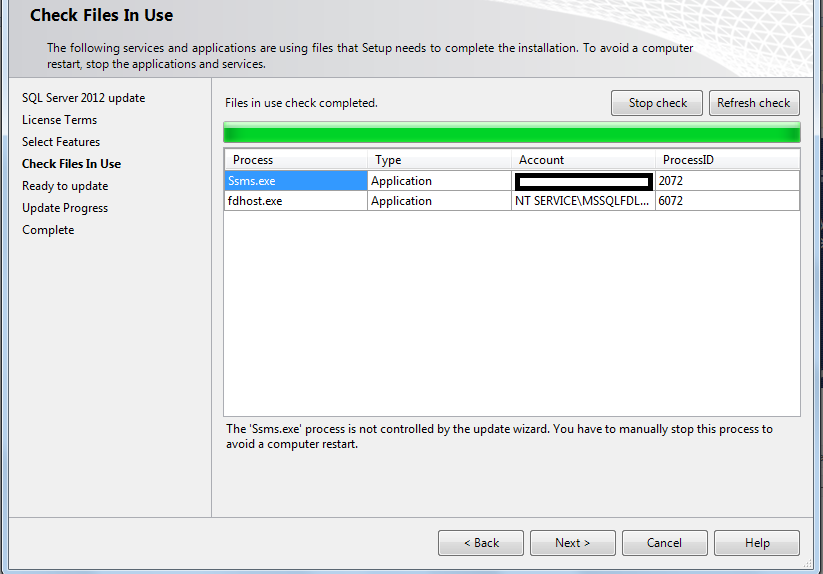
Next we would move to page Check files In use. On this page SQL Server check files related to SQL Server which are currently used by user and upgrade to such features will only be visible after SQL Server restart.
After checking files if SQL Server service pack installation found some already used components of SQL Server it will point out as below. If you see SQL Server management studio is open with one other file. You can click on next and proceed but in that case you will have to RESTART SQL Server service after installation of service pack completes. Or else you can close the applications and click on refresh check if you do not want to restart SQL Server service.
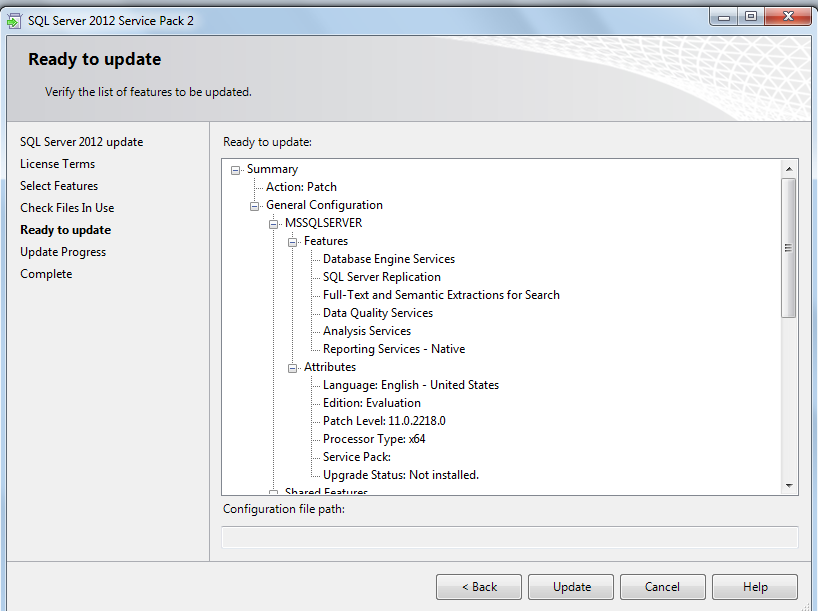
After you are done with the choice click next. This will take you to ready to upgrade screen where you can cross check what are features being updated.
Click on update to install SP2. This will take you to Install progress screen
Allow installation to complete and if it completes successfully you would get below screen
If Service Pack install fails please take help of Log files present at location C:\Program Files\Microsoft SQL Server\110\Setup Bootstrap\Log assuming C drive us system drive.
Uninstall Service Pack
If after service pack upgrade you face issue in you environment there is an option to remove service pack. You can go to add remove program and remove the service pack. Go to Run and type appwiz.cpl add remove window will pop up. If you will search on Uninstall or change program window you won't find service pack 2. Lots of new user gets confused thinking Service pack is not installed correctly. But you need to click on View Installed Updates to see service pack.
After clicking on view installed updates below window will pop up. Select SQL Server 2012 SP2 and then click on Uninstall to uninstall the Service pack.
Suggested Readings
Overview of SQL Server Servicing Installation
Install SQL Server 2012 servicing updates
