Azure Site Recovery: Configuration
Overview
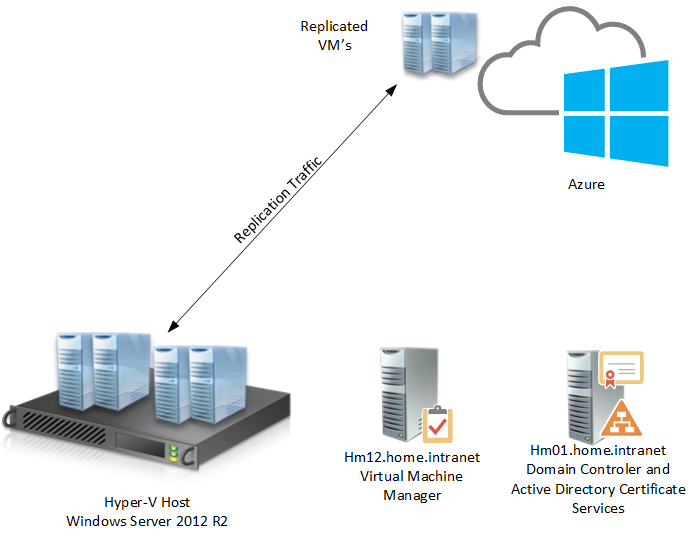
Microsoft Azure Site Recovery is a feature that can be used to protect on-premise servers and replicate virtual machines to another on-premise datacenter or to Microsoft Azure Cloud. This article aims to show the steps to configure a basic scenario replicating virtual machines from on-premise environment to the Microsoft Azure public cloud.
An Azure Visual Studio Premium account with MSDN with Site Recovery service enabled will be used. In the on-premise evirioment comprise of one Hyper-v host and one Virtual Machine Manager server. All servers are running Windows Server 2012 R2 Standard and are members of the same Active Directory Domain Services
The domain controller has the Active Directory Certificate Services installed and configured as an enterprise CA. This will be used to generate the certificate to authenticate the Virtual Machine Manager on Microsoft Azure.
Certificate
The Computer template will be used to generate the certificate. Logon on the Virtual Machine Manager Server and load Certificate Snap-In.
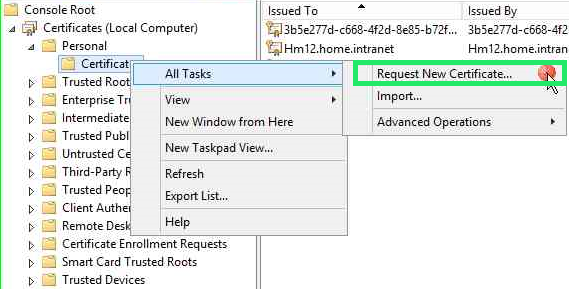
Right click on Personal container -> Certificate and Request a New Certificate.
Select the Computer template and click Enroll
In the properties of the certificate* Enhaced key Usage *must contain the parameter Client authetication (1.3.6.1.5.5.7.3.2)
Export the certificate to a file to use it in the Recovery Site configuration.
Create Virtual Machine Manager Private Cloud
To replicate virtual machines from the on-premise environment to the Microsoft Azure cloud is necessary that the virtual machines are contained within a private cloud in Virtual Machine Manager.
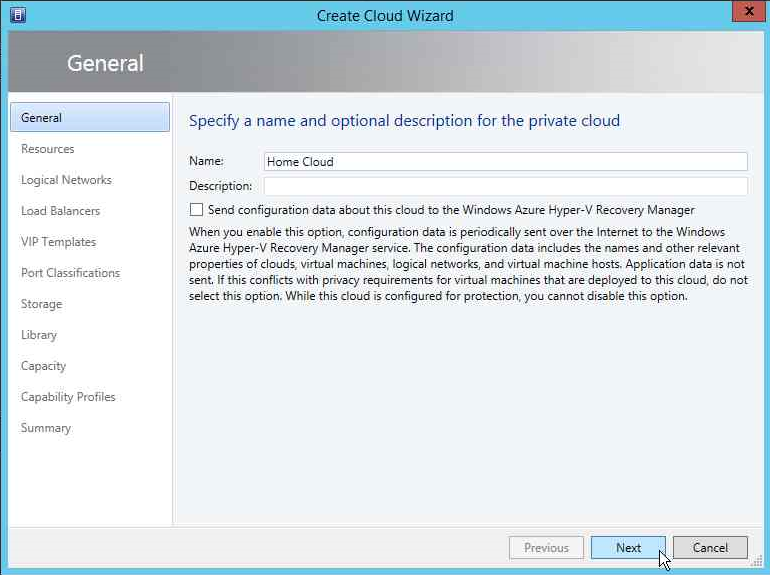
To create a Private Cloud access the configuration console of Virtual Machine Manager, click * VM and the Services* tab, and Crete Cloud.
The creation wizard starts, set the name of Private Cloud
Select the physical host that will be part of this cloud
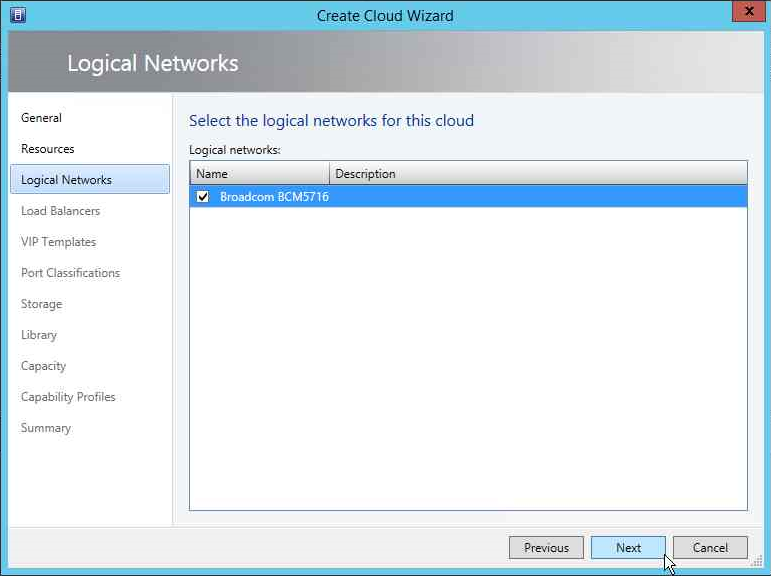
Configure the NIC that the virtual machines use to communicate
Do not use any machines for Load Balancers
I have no template created this Virtual Machine Manager
I will not classify traffic
Set the location where the machines will be created
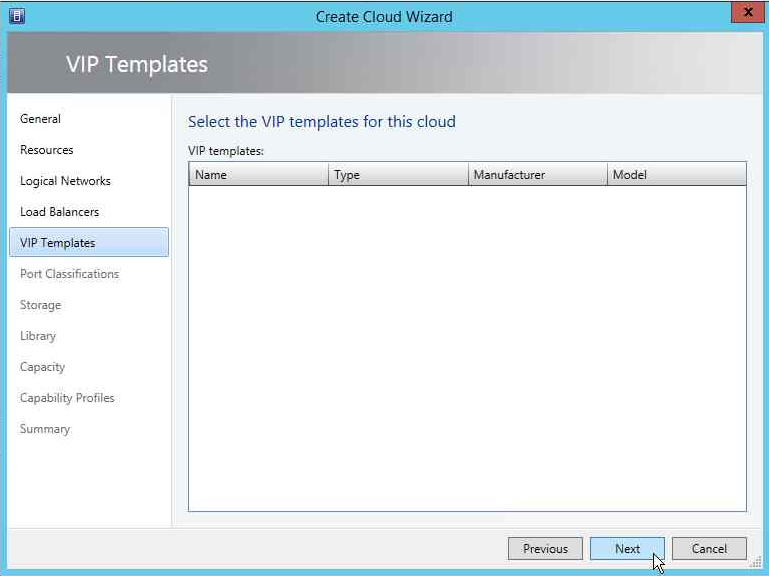
I will not need any for this Library deploied
I will use the full capacity of the host to Private Cloud
Select the hypervisor host, in this case the Hyper-V
Verify all information the cloud and finish the wizard.
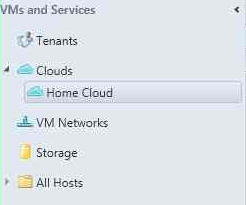
Private cloud created is displayed in VMs and Services
Configure Virtual Machine on a Private Cloud
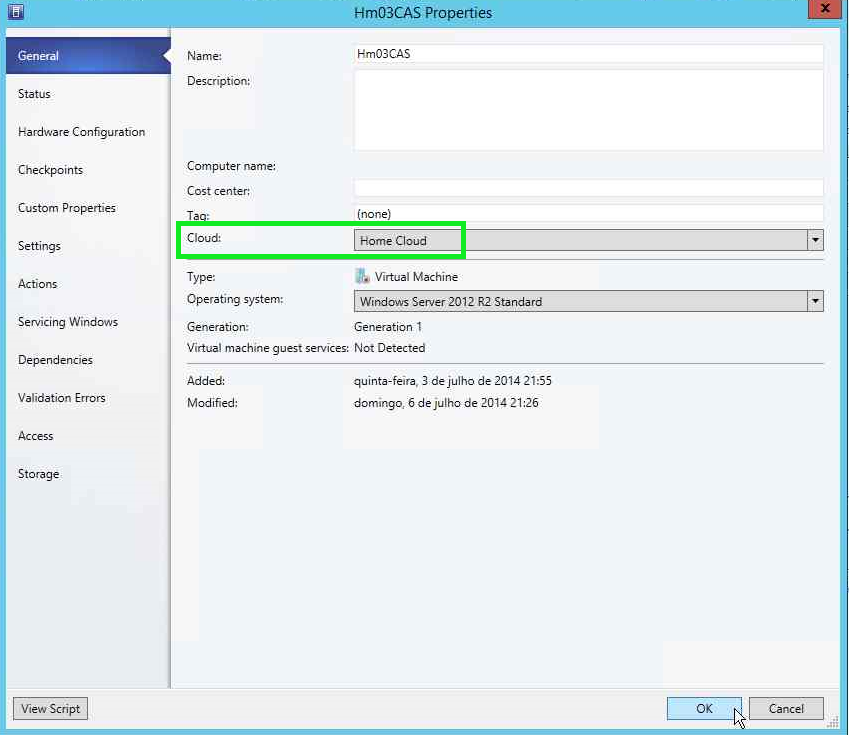
To add existing virtual machines in private clouds created, select the virtual machine and click the right button. On the properties of the machine
In General configuration of the machine, select the field Cloud and select private cloud created.
The assistant must add the virtual machine in the Private Cloud
Deploy Azure Site Recovery
Create Recovery Services Vault
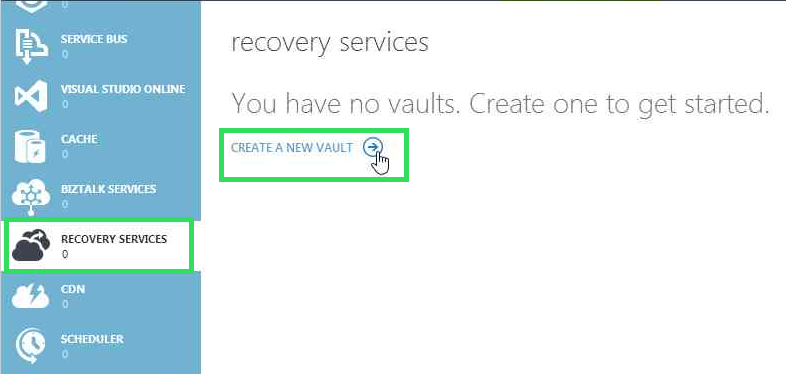
Access the Management Portal for Microsoft Azure https://manage.windowsazure.com. In Recovery Services click Create a New Vault
The creation wizard starts, select the *Site Recovey Vault *
Then select Quick Create and configure the name of the region for the Vault.
On administration portal the creation status can be monitored
Configuring Site Recovery Vault
By accessing the vault for the first time, a configuration wizard appears. This wizard can be accessed anytime by clicking on the cloud icon in the top corner.
The first step is to configure the purpose of the service. Select in Site Revovery in the dropdown select Between an on-premises site and Microsoft Azure
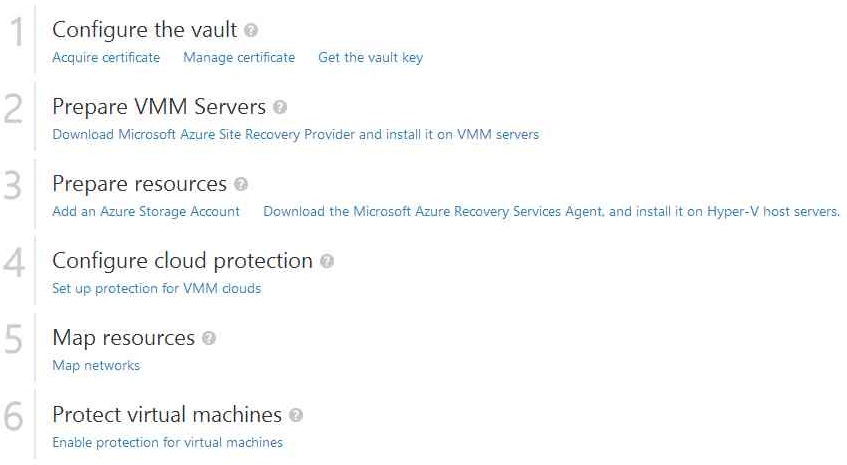
The initial page informed all steps for configuring the vault. Next we will follow this steps to configure the vault
**Configuring Certificate **
The first step is to configure the digital certificate is used to authenticate VMM server.
In the Management Portal for Microsoft Azure select the Manage Certificate option
Select the exported certificate.
Then click on the link Get the vault key,
Copy the string of the vault key field on a notepad file.
Preparing Virtual Machine Manager
The second step is to prepare *Virtual Machine Manager *installing Site Recovery Provider that will make changes to settings in the VMM and the private cloud.
Click the link for step two to download the provider.
Start the installation wizard on a VMM Server.
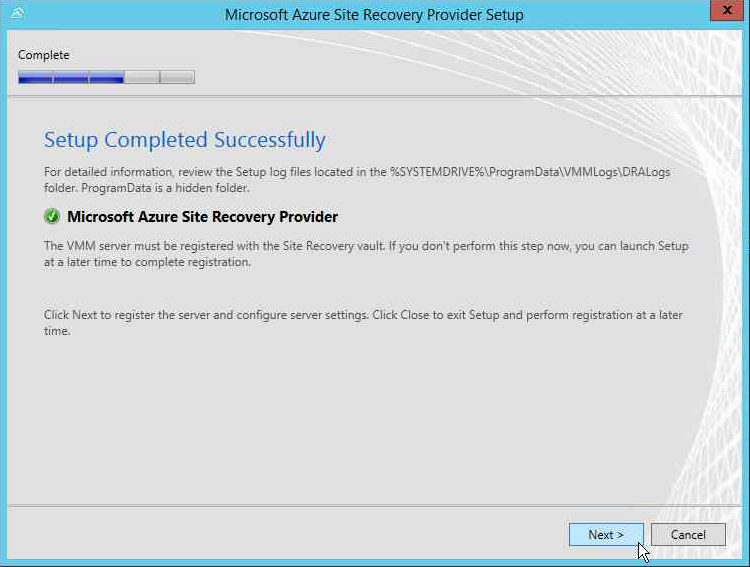
With the installation complete, click Next to begin the configuration.
Configure the proxy information for internet connection.
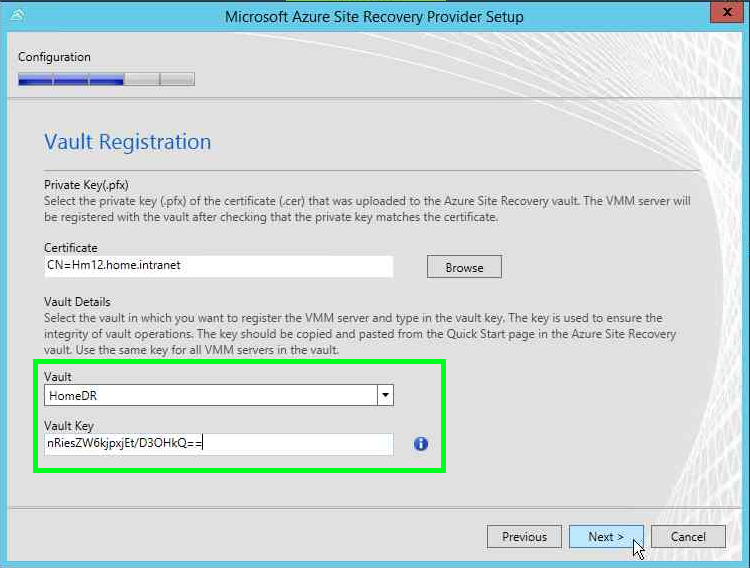
Click Browse and select the certificate configured in Site Recovery vault.
With the selected certificate, choose the vault where the private cloud will be configured, and enter the value of the Vault Key to authenticate the VMM.
I will not enable encryption for data storage.
The wizard automatically configures the VMM Server information, click Register to begin configuring the Provider and connect to the public cloud.
Finish the wizard and return to the Microsoft Azure console.
Create Storage Account
Then you need to configure a Storage Account, where the replicated discs will be stored.
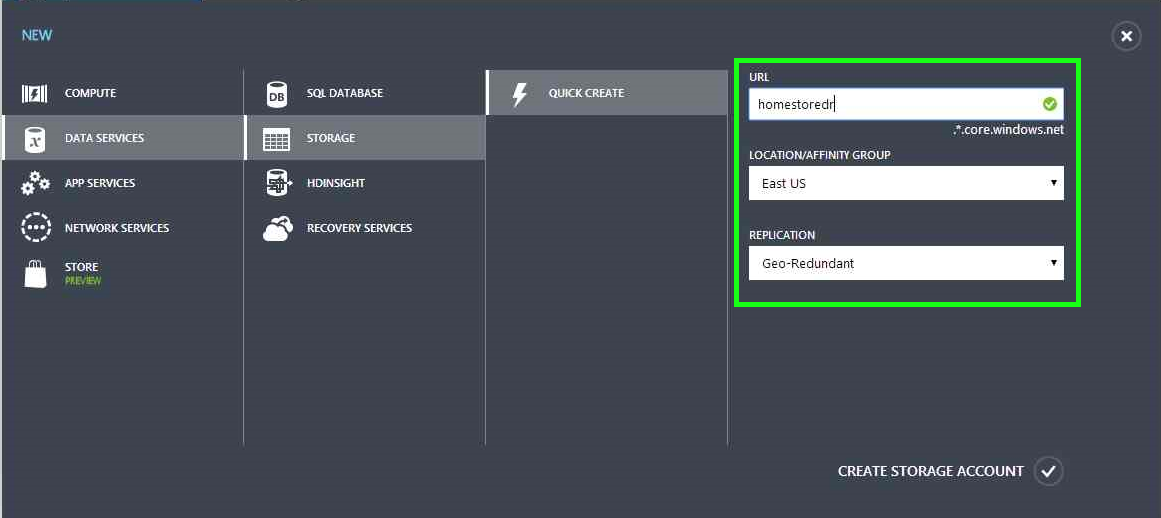
Click Add an Azure Storage Account.
Set the name for the account, select the same Azure region where the vault was created. The Storage Account must be georedundante for be used by Site Recovery vault.
Prepare Hyper-V host
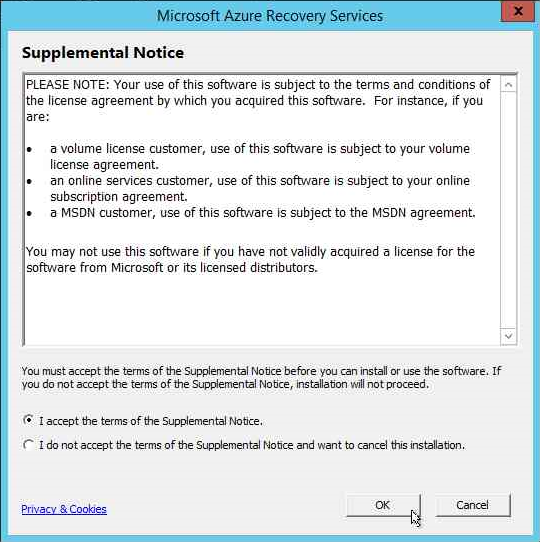
In each Hyper-V host member of the Private Cloud the Recovery Service Agent must be installed. Before starting the agent installation make sure that the following components are installed:
- Windows Identity Foundation
- Microsoft. NET Framework 4
- Windows Powershell
Click the link from step three to download the agent.
Begin installing the agent on Hyper-V Server.
The installation wizard checks for prerequisite components.
Select the installation folder.
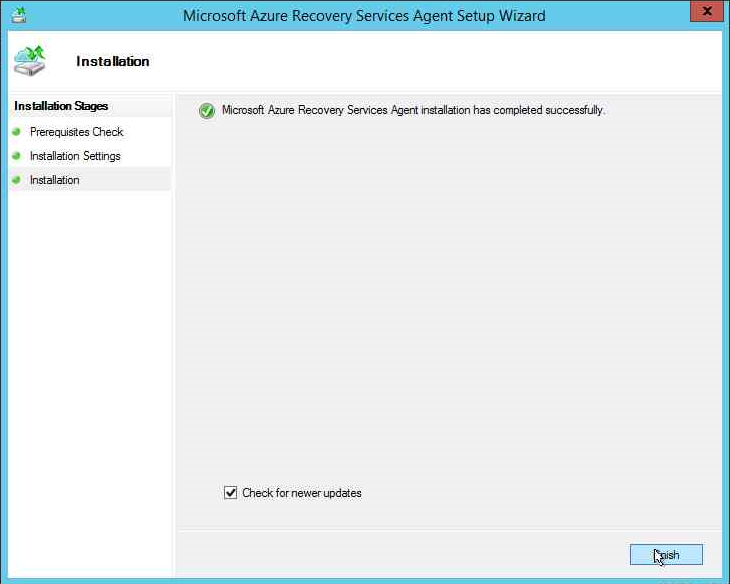
The process must end without fail.
Protecting VMM Cloud
With the Provider installed on the VMM and the agent installed on all Hyper-V hosts the process of protecting the VMM Cloud.
Click the link in the fourth step Set up protection for VMM Clouds
All clouds present in your on-premise environment must be listed on the Protected Items tab. Click on the cloud to be protected.
Click Configure protection settings.
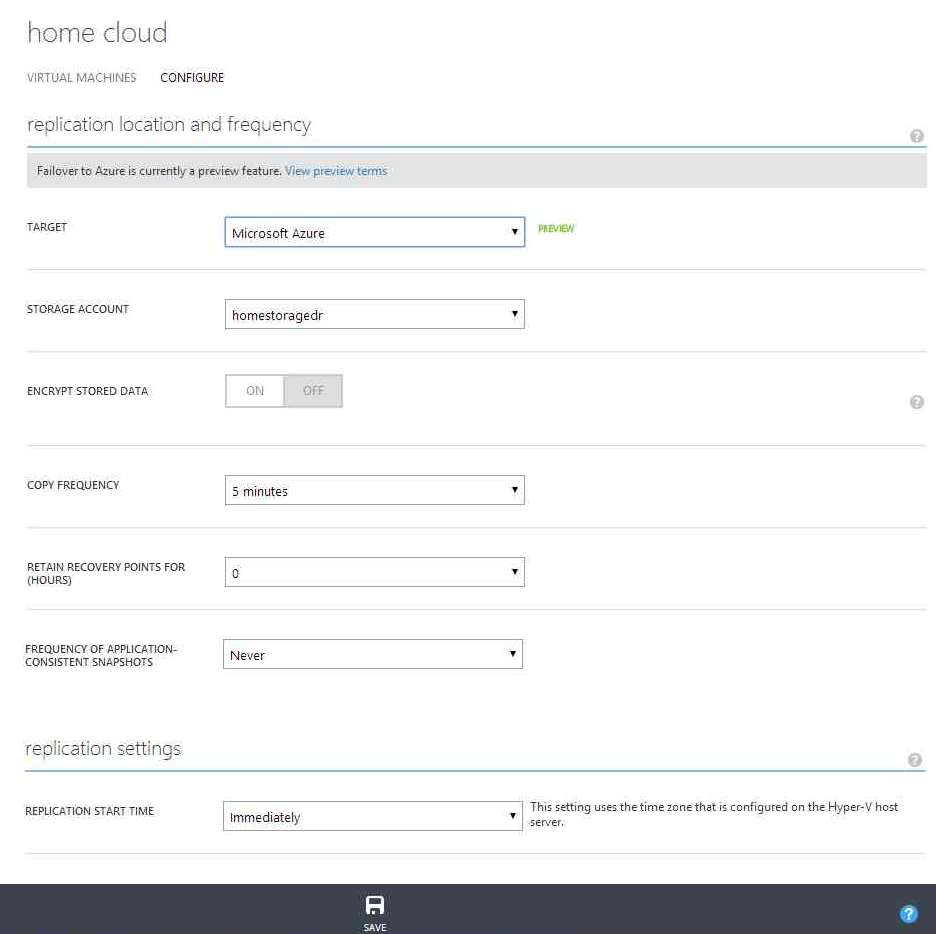
Select the destination of replication, in this case we replicate machines to Microsoft Azure.
In the next step, configure replication parameters, like frequency and when the replication will start. Click Save to start configuration Jobs
The progress can be followed on Jobs tab,
Network Map
By default all virtual machines that are part of the same fault plane in Azure can communicate with each other. To expand the network connection of the Azure VMs is necessary to configure and map a virtual network on Microsoft Azure.
Click Network in the administration portal.
Select the option to create a new virtual network. Click Custom Create
Configure the network name, and select the same region of the Azure Storage Account and where Site Recovery vault were configured.
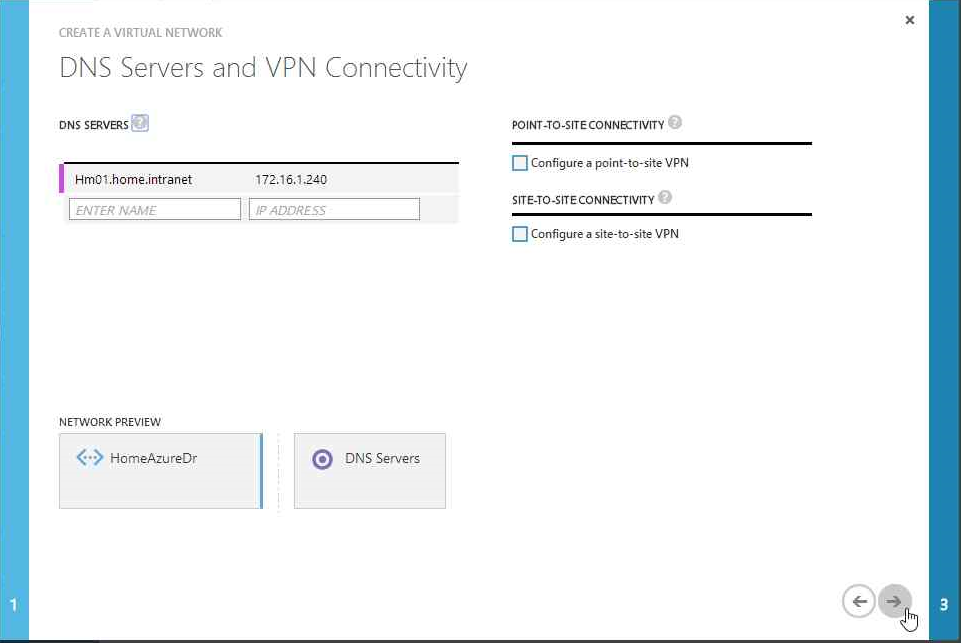
Configure the DNS server on the network
And the ip address.
The process of creating the network should initiate
When creating network complete, go back to the vault and start mapping the network and the network created VMM Server.
Select the networks of origin and destination and click *Map *
Select the network created for the sire disaster
Networks should be mapped successfully.
**Protecting Virtual Machines **
With Azure and VMM cloud integrated and configured you can configure virtual machines to be protected in the Azure environment. Before you begin configuring is necessary to mark the disk as installed with the operating system on the virtual machine properties.
Enter the virtual machine properties, in the Hardware Configuration tab locate the disk where the operating system is installed and select the option Contains the operating system for the virtual machine.
Return to the Microsoft Azure portal, go to Protected Items tab, click the Private Cloud where the virtual machine is contained.
Click Enable Protection to enable protection in the cloud.
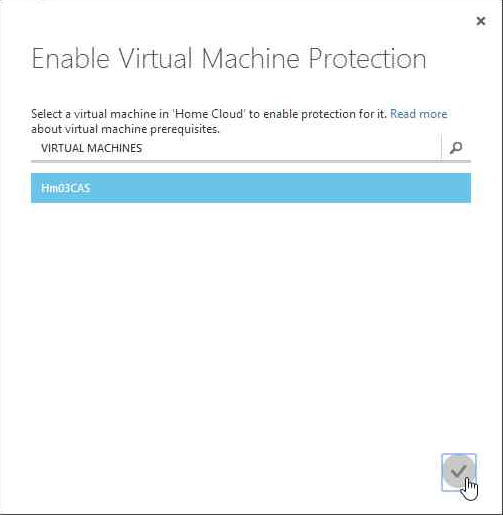
Select virtual machines to be protected.
The activities for the protection of the machines should start.
And the status of the machine is changed to Initial replication is in Progress - OK.
Depending on the size of the disk replicated the process can take several hours. When the process is complete the status of the machine should be changed to *Protected - OK. *
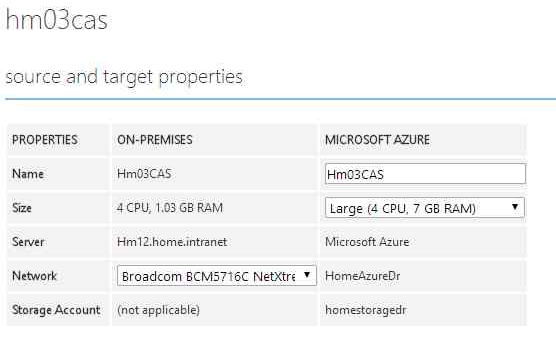
The assistant must also configure the processors and memory available to the virtual machine on Microsoft Azure cloud.
Create Recovery Plans
With the virtual machines protected is necessary to configure system failure and recovery plan. Configuring the Recovery Plan Microsoft Azure ensures that the process of failure of virtual machines occurs in a cohesive way, failing the machines as a unit.
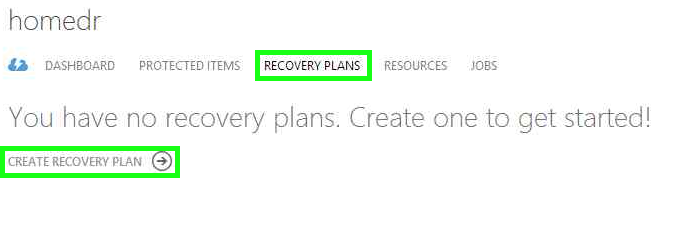
Access to Recovery Plans tab and select the option to *Create Recovery Plan. *
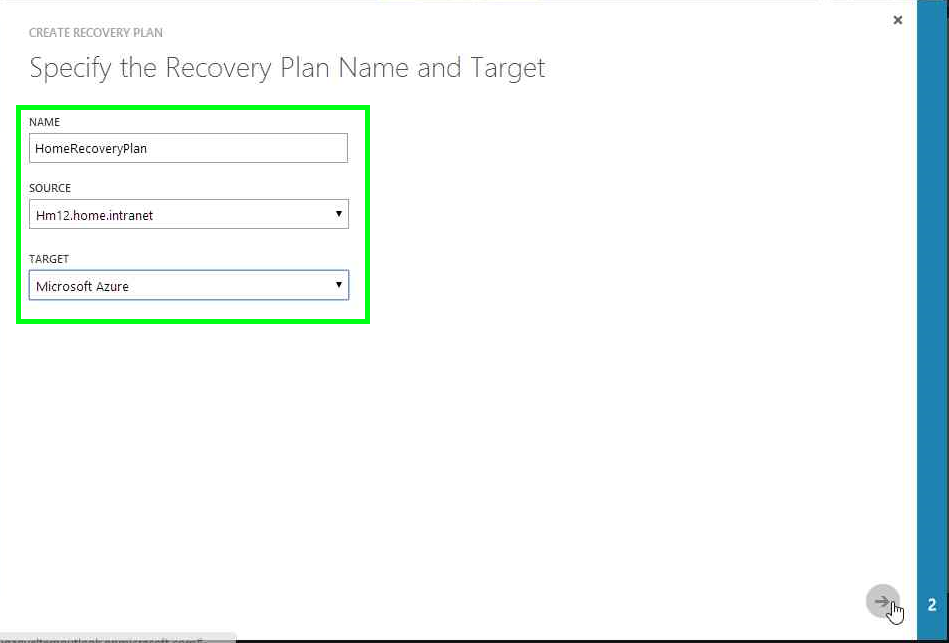
Configure a name for the plan, origin and destination of the failover machine.
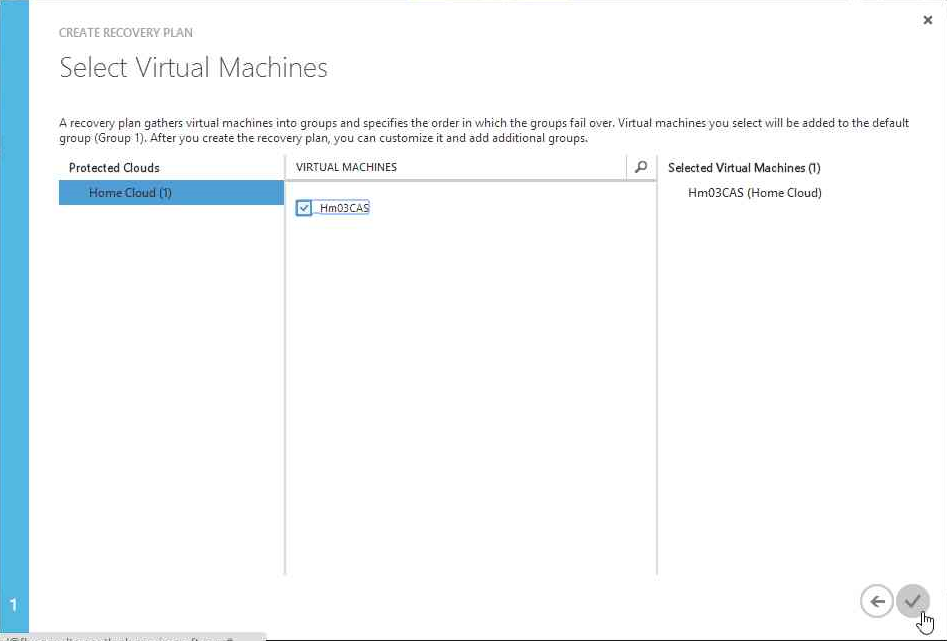
Select the virtual machines that must fail together to the cloud
The logical group must be created with the machines as members.
Testing Failover
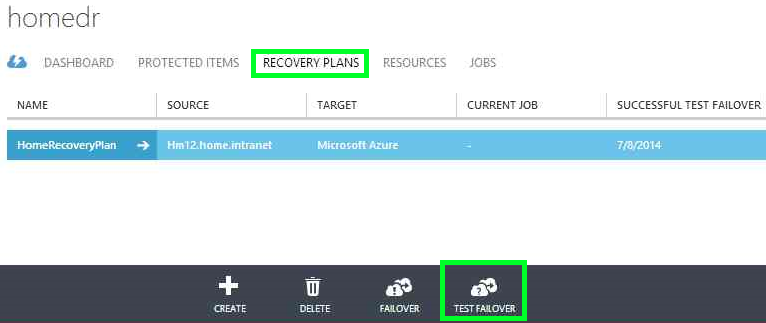
The Recovery Plan also assists in fault testing to the cloud, to start the test fails click Test Failover.
Select the destination network
Follow in the Jobs tab the status of all activities and any problems that should be corrected.
Related Articles
**References **
- http://msdn.microsoft.com/en-us/library/azure/dn788903.aspx
- http://azure.microsoft.com/en-us/documentation/articles/hyper-v-recovery-manager-azure/
- http://technet.microsoft.com/en-us/library/gg610567.aspx
- http://technet.microsoft.com/en-us/library/jj860425.aspx
