Programming Home Projects with Microsoft Small Basic: Chapter 6: Flash Card Math Quiz Project
Small Basic > Small Basic Books > **Programming Home Projects with Small Basic **> 6: Flash Card Math Quiz Project
 This chapter is adapted from the book Programming Home Projects with Microsoft Small Basic by Philip Conrod and Lou Tylee.
To purchase this book in its entirety, please see the Computer Science For Kids web site.
6. Flash Card Math Quiz Project
In this chapter, we build a project that lets kids (or adults) practice their basic addition, subtraction, multiplication and division skills. The Flash Card Math Quiz Project allows you to select problem type, what numbers you want to use and has three timing options. We also look at using random numbers and accepting keyboard input.
Flash Card Math Quiz Project Preview
In this chapter, we will build a flash card math program. Random math problems (selectable from addition, subtraction, multiplication, and/or division) using the numbers from 0 to 9 are presented. Timing options are available to help build both accuracy and speed.
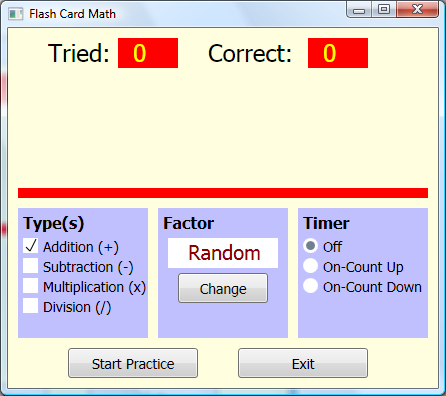
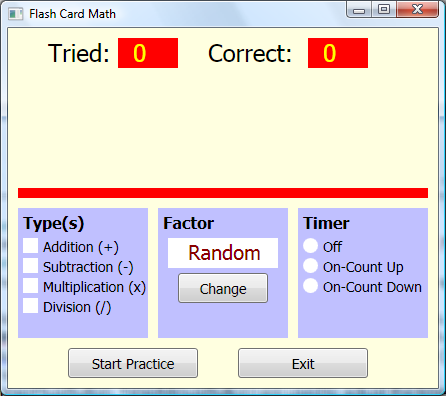
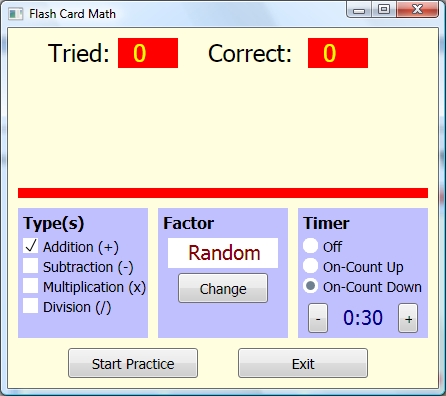
The finished project is saved as FlashCard in the HomeSB\HomeSB Projects\FlashCard folder. Start Small Basic and open the finished project. Run the project (click Run in the toolbar or press <F5>). The flash card math program will appear as:
Many options are available. First, choose problem type from the Type box. Choose from Addition, Subtraction, Multiplication, and/or Division problems (click on your choice; you may choose more than one problem type). Choose your Factor (use the Change button), any number from 0 to 9, or choose Random for random factors. These options may be changed at any time. To practice math facts, click on the Start Practice button.
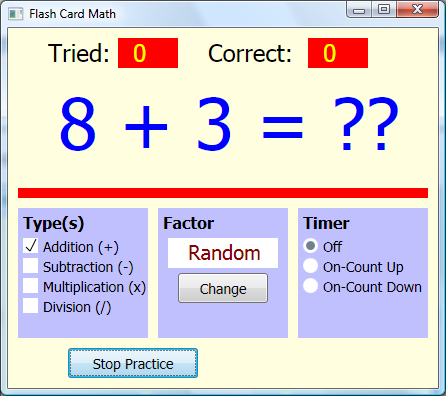
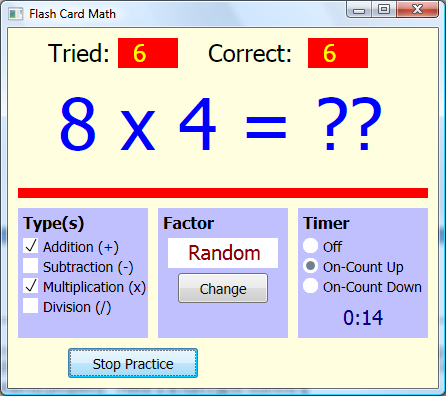
When I click Start Practice (using the default choices), I see:
You can now see there is a large display in the middle where the problem (8 + 3 =) is displayed. The program is waiting for an answer to this problem. Type your answer. If it is correct, the number next to Correct: is incremented. Whether correct or not, another problem is presented.
A few notes on entering your answer. The primary goal of the program is to build speed in solving simple problems. As such, you have one chance to enter an answer - there is no erasing. If the answer has more than two digits (the number of digits in the answer is shown using question marks), type your answer from left to right. For example, if the answer is 10, type a 1 then a 0. Try several addition problems to see how answers are entered. You can stop practicing math problems, at any time, by clicking the Stop Practice button.
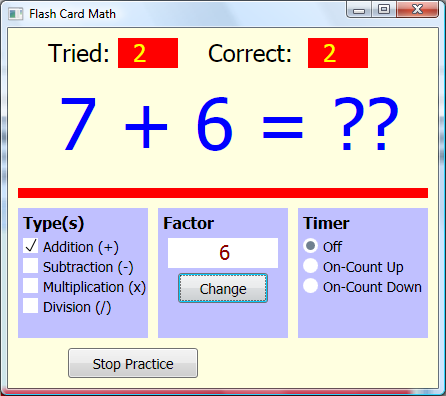
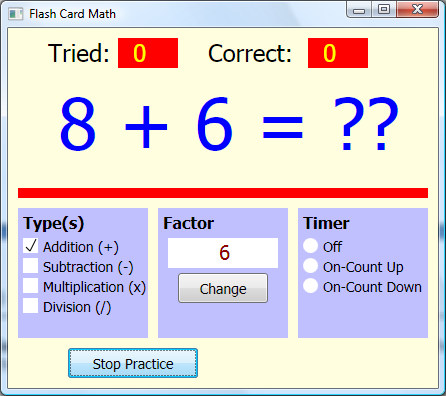
Other problem types can be selected and a new factor chosen at any time. Each problem is generated randomly, based on problem type and factor value. For Addition, you are given problems using your factor as the second addend. If you choose 6 as your factor (click Change until 6 appears as the Factor), an example problem would be:
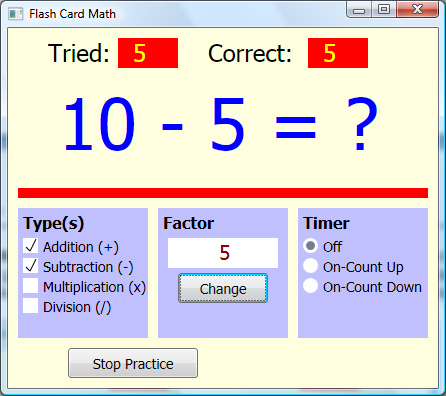
For Subtraction (click Subtraction under Type – note the added check mark) you are given problems using your factor as the subtrahend (the number being subtracted). Selecting a factor of 5, an example subtraction problem is:
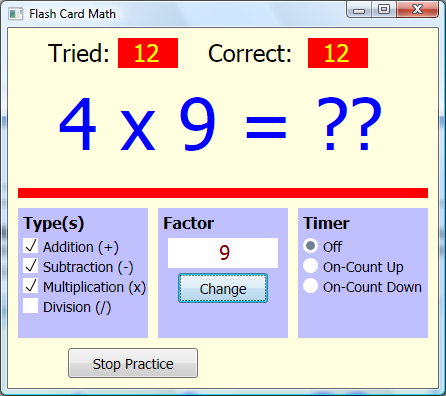
For Multiplication, you are given problems using your factor as the multiplier (the number you’re multiplying by). If a factor of 9 is selected, an example multiplication problem is:
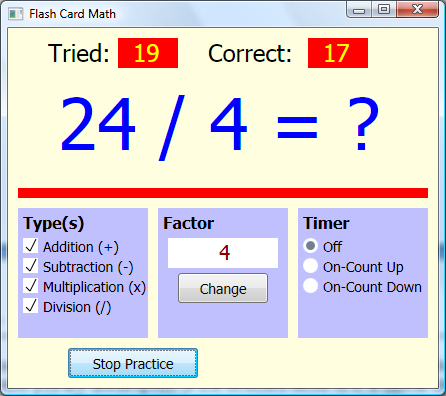
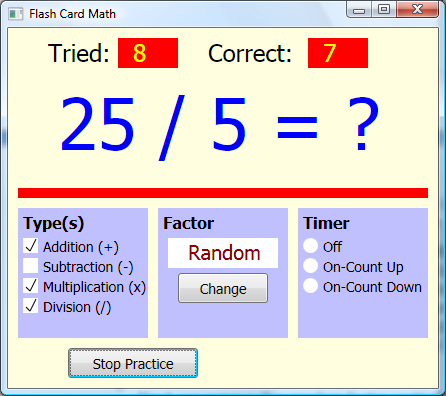
Lastly, for Division, you are given problems using your factor as the divisor (the number you are dividing by). If the selected factor is 4, a typical division problem would be:
As mentioned, you do not have to choose a specific factor – Random factors can be chosen. Try all kinds of factors with all kinds of problem types.
There is another option to consider when using the flash card math project – the corresponding option choices are in the Timer box. These options can only be selected when not solving problems. There are three choices here. If you select Off, you solve problems until you click Stop Practice. If you select On-Count Up, a timer will appear and the computer will keep track of how long you were solving problems (a maximum of 30 minutes is allowed). If you select On-Count Down, a timer will appear, along with +/- buttons. The buttons are used to set how long you want to solve problems (a maximum of 30 minutes is allowed). The timer will then count down, allowing you to solve problems until the allotted time expires.
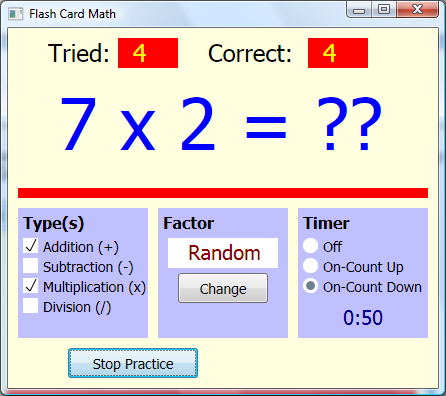
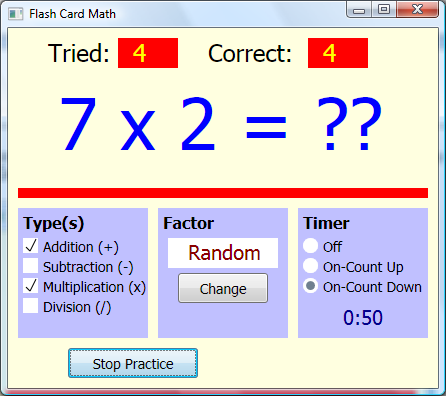
Try the timer options if you’d like. Here’s the beginning of a run I made using the On-Count Down option (starting at 1 minute):
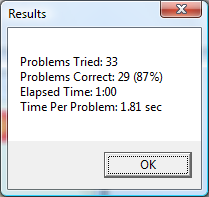
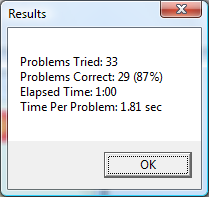
Once you are done practicing math problems (either you clicked Stop Practice or time ran out with the On-Count Down option), a message box appears giving you the results of your little quiz. This box tells you how many problems you solved and how many you got correct (including a percentage score). If the timer was on, you are also told how long you were solving problems and how much time (on average) you spent on each problem. Here’s the message box I saw when I finished the quiz I started above:
Click OK and you can try again. Click the Exit button in Flash Card Math when you are done solving problems.
You will now build this project in several stages. We first address window design. We discuss the controls used to build the window and establish initial properties. And, we address code design in detail. We cover random generation of problems, selection of the various program options, and how to use timing.
Flash Card Math Window Design
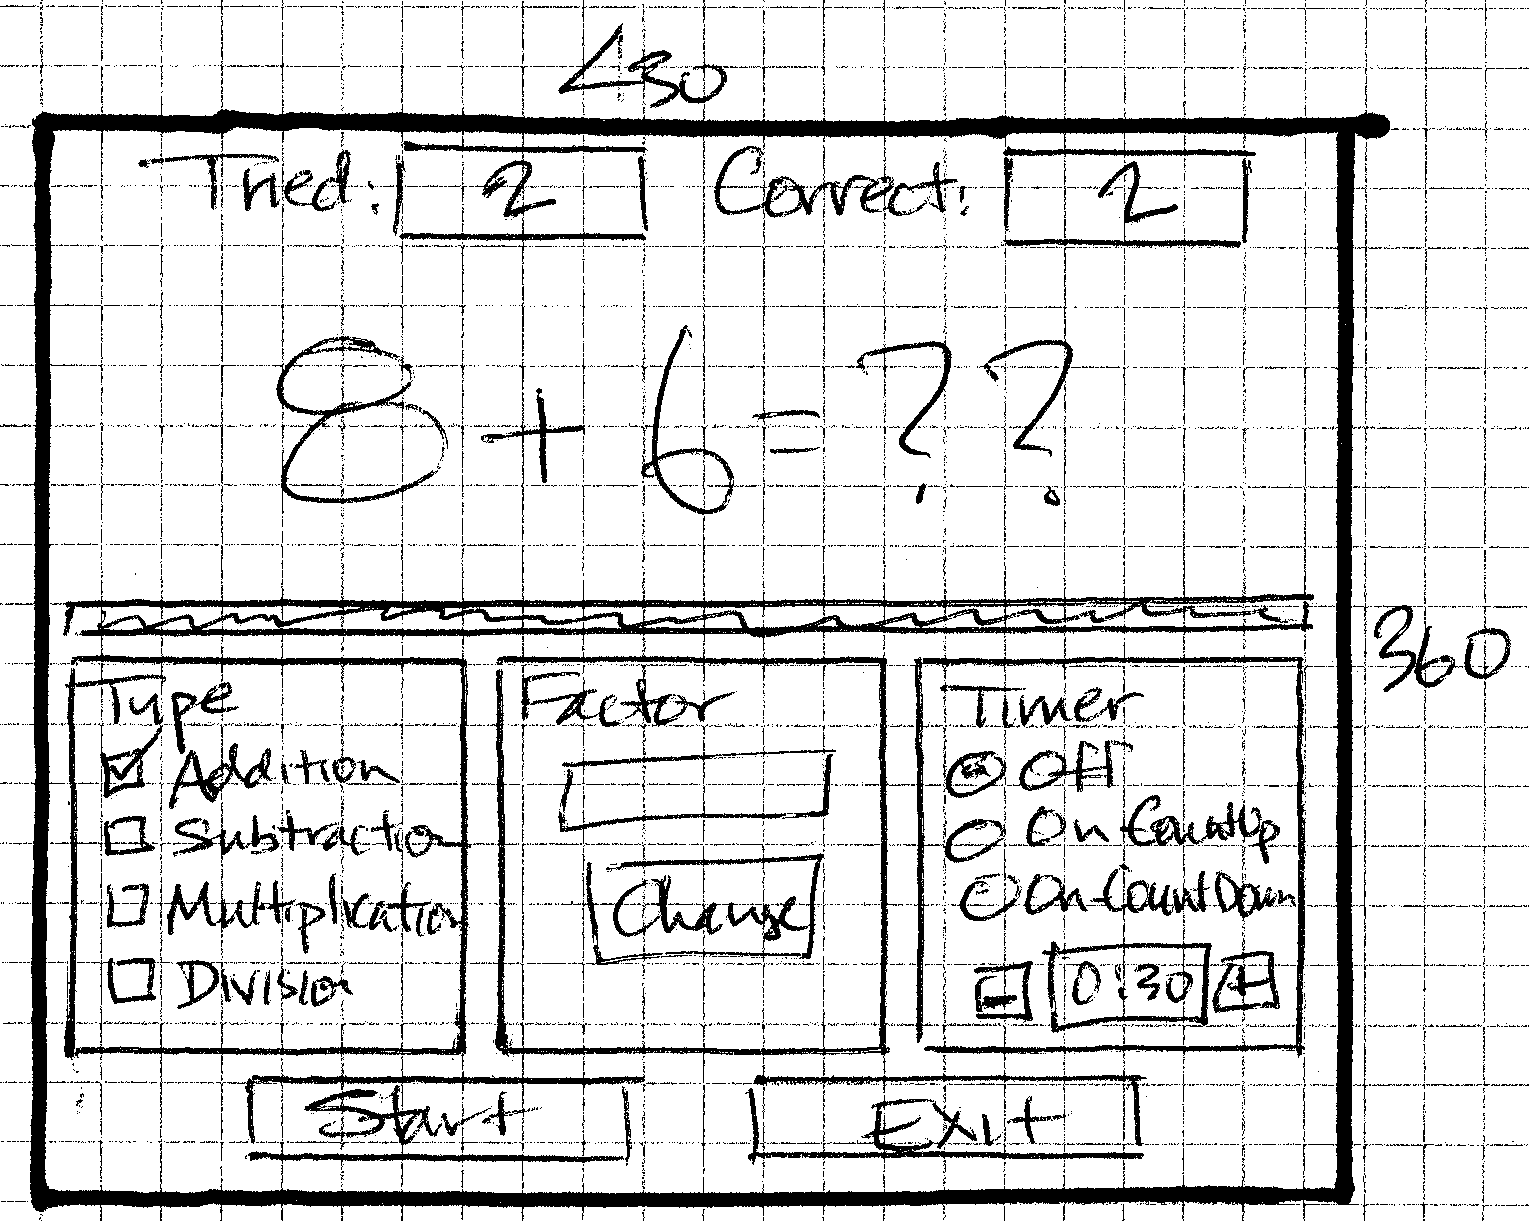
Here is the sketch for the window layout of the Flash Card Math program:
There’s a lot here. Two labeled text shapes are used for scoring. There’s a large text shape in the middle of the window used to display the math problem. A dividing rectangle separates the problem display from option choices and buttons. Two button controls (at the bottom of the window) are used to start and stop the problems and to exit the project. There are three rectangles used to group option choices. The first holds four “check boxes” used to select problem type. The second holds a button and display used to select numbers used in the problems. The third box holds three little circles used to select the timing option. Two small button controls (marked with – and +) are used to adjust the amount of time used in the flash card drills.
We will begin writing code for the application. We will write the code in several steps. We start with the code needed to add all the above elements to the program window. The program will be built in its default configuration: Addition problems, Random factor and timer Off. Later, we add code to change these default values.
Start a new program in Small Basic. Once started, we suggest you immediately save the program with a name you choose. This sets up the folder and file structure needed for your program.
Window Design – Scoring and Problem Display
We begin by setting up the graphics window and adding the text shapes that display the number of problems tried (TriedDisplay) and the number answered correctly (CorrectDisplay). We also add an empty text shape (ProblemDisplay, with a very large font) to display the problem to answer and draw a red, dividing rectangle. Add this code to your program:
' Flash Card Math
InitializeProgram()
Sub InitializeProgram
'graphics window
GraphicsWindow.Width = 430
GraphicsWindow.Height = 360
GraphicsWindow.Title = "Flash Card Math"
GraphicsWindow.BackgroundColor = "LightYellow"
* 'labels/scores*
GraphicsWindow.BrushColor = "Black"
GraphicsWindow.FontBold = "false"
GraphicsWindow.FontSize = 24
GraphicsWindow.DrawText(40, 10, "Tried:")
GraphicsWindow.DrawText(200, 10, "Correct:")
GraphicsWindow.BrushColor = "Red"
GraphicsWindow.FillRectangle(110, 10, 60, 30)
GraphicsWindow.FillRectangle(300, 10, 60, 30)
GraphicsWindow.BrushColor = "Yellow"
TriedDisplay = Shapes.AddText("0")
Shapes.Move(TriedDisplay, 125, 10)
CorrectDisplay = Shapes.AddText("0")
Shapes.Move(CorrectDisplay, 315, 10)
* 'problem display*
GraphicsWindow.BrushColor = "Blue"
GraphicsWindow.FontSize = 72
ProblemDisplay = Shapes.AddText("")
Shapes.Move(ProblemDisplay, 50, 50)
* 'divider*
GraphicsWindow.BrushColor = "Red"
GraphicsWindow.FillRectangle(10, 160, 410, 10)
EndSub
The first line of code calls a subroutine InitializeProgram where we will put all code needed to set up the program for use. All remaining code here goes in that subroutine.
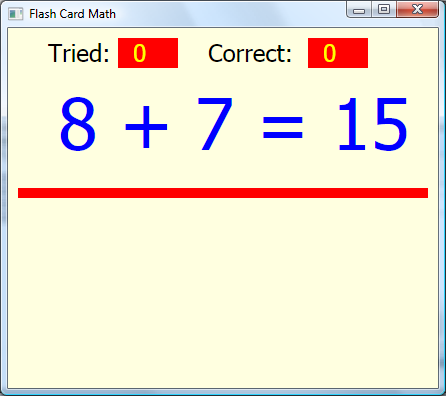
As written, you won’t see a problem since ProblemDisplay is blank. To get an idea of what a problem will look like, temporarily change the line setting the text to:
ProblemDisplay = Shapes.AddText("8 + 7 = 15")
Now, Save and Run the program. You should see:
Notice how we put the text shapes (TriedDisplay and CorrectDisplay) on red rectangles to give them some background. You may wonder how we knew to use FontSize of 72 in the problem display. There was no magic - we just tried different values until we got a nice display.
Remember to change the line setting the problem display back to:
ProblemDisplay = Shapes.AddText("")
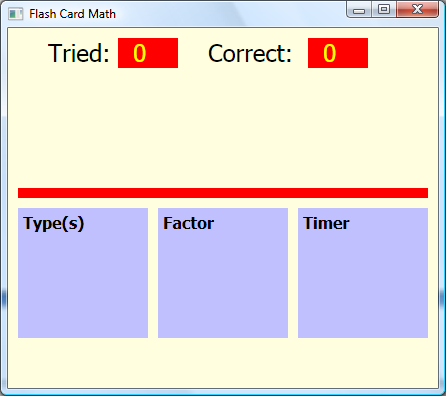
Next, we start writing the code to choose the program options. Before doing this, add this code (in InitializeProgram) to draw and label the three blue rectangles to hold each option choice:
'problem types/factor/timer
GraphicsWindow.BrushColor = GraphicsWindow.GetColorFromRGB(192, 192, 255)
GraphicsWindow.FillRectangle(10, 180, 130, 130)
GraphicsWindow.FillRectangle(150, 180, 130, 130)
GraphicsWindow.FillRectangle(290, 180, 130, 130)
GraphicsWindow.BrushColor = "Black"
GraphicsWindow.FontSize = 16
GraphicsWindow.FontBold = "true"
GraphicsWindow.DrawText(15, 185, "Type(s)")
GraphicsWindow.DrawText(155, 185, "Factor")
GraphicsWindow.DrawText(295, 185, "Timer")
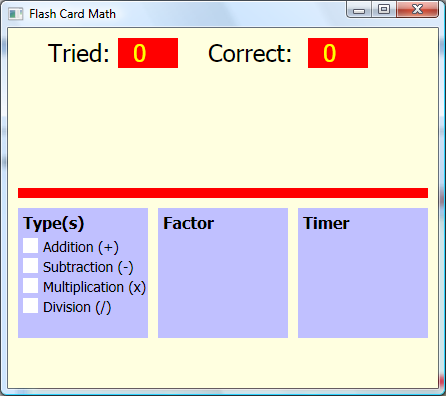
Save and Run to see the added rectangles:
Window Design – Choosing Problem Types
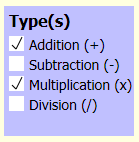
In the Flash Card Math program, you can practice any of the four basic arithmetic operations: addition, subtraction, multiplication and/or division. We want to provide the user with a convenient way to choose among the problem types. Here’s a display of the method chosen:
White squares are drawn next to the choices. When a user clicks a square, if there is no check mark there, one appears (selecting that problem type). If a check mark is already there, it disappears (deselecting that problem type).
The code to implement the selection process is a bit complicated and will be discussed later. For now, we draw the display assuming only Addition problems (default choice) are available. Add this code to InitializeProgram:
'problem types
GraphicsWindow.BrushColor = "Black"
GraphicsWindow.FontSize = 14
GraphicsWindow.FontBold = "false"
GraphicsWindow.DrawText(35, 210, "Addition (+)")
GraphicsWindow.DrawText(35, 230, "Subtraction (-)")
GraphicsWindow.DrawText(35, 250, "Multiplication (x)")
GraphicsWindow.DrawText(35, 270, "Division (/)")
GraphicsWindow.BrushColor = "White"
GraphicsWindow.FillRectangle(15, 210, 15, 15)
GraphicsWindow.FillRectangle(15, 230, 15, 15)
GraphicsWindow.FillRectangle(15, 250, 15, 15)
GraphicsWindow.FillRectangle(15, 270, 15, 15)
ProblemSelected[1] = "true"
ProblemSelected[2] = "false"
ProblemSelected[3] = "false"
ProblemSelected[4] = "false"
This code draws four white squares with the appropriate labels. An array ProblemSelected is used to specify which problem types are selected. For now, only element 1 (Addition problems) is “true”.
Save and Run the program. The selection squares appear:
No check mark appears in the square indicating that Addition problems are selected. We will correct that when we write code for the selection process.
**
**
Window Design - Factor Selection
A user can choose a particular number (factor) from 0 to 9 to practice math problems or can choose a random factor. This choice is made in the Factor selection box. Like we did for the problem type selection, we simply set up the window for the default choice (Random factor), then later address the code for changing the factor.
Add this code to InitializeProgram:
'factor
GraphicsWindow.BrushColor = "White"
GraphicsWindow.FillRectangle(160, 210, 110, 30)
GraphicsWindow.BrushColor = "DarkRed"
GraphicsWindow.FontSize = 20
FactorDisplay = Shapes.AddText("Random")
Shapes.Move(FactorDisplay, 180, 212)
FactorChoice = -1
GraphicsWindow.BrushColor = "Black"
GraphicsWindow.FontSize = 14
FactorButton = Controls.AddButton("Change", 170, 245)
Controls.SetSize(FactorButton, 90, 30)
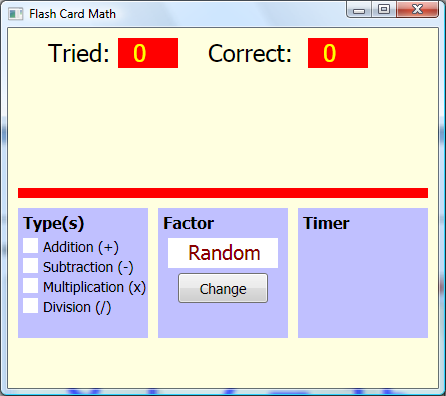
This places a text shape (FactorDisplay) on top of a white rectangle to show which factor is selected (shows Random for now). A button control (FactorButton) will be used to change this display. The variable FactorChoice keeps track of the selected factor. If it is positive, its value is the selected factor (0 to 9). When its value is -1 (the default value here), a random factor is used.
Save and Run the program to see the factor selection box:
Later, we write code to change the displayed factor when the Change button is clicked.
**
**
Window Design - Timer Options
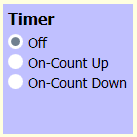
In the Flash Card Math program, you can time your practice if you choose. There are three choices: timer Off, timer On – Count Up, timer On – Count Down. Like the problem type selection, we want to provide the user with a convenient way to choose the timer option. The difference between this selection and that of problem type is that only one choice can be made. Here’s a display of the method chosen:
White circles are drawn next to the choices. When a user clicks a circle, that circle is marked (selecting that timer option). All other choices become ‘unmarked’. When one of the timer On options is selected, timing information and buttons to change times will be displayed under the circles.
Also, like the problem type selection, the code behind selecting timing options is involved and will be discussed later. Here, we write code to build the display and use the default option of timer Off. Add this code to InitializeProgram:
'timer choices
GraphicsWindow.BrushColor = "Black"
GraphicsWindow.FontSize = 14
GraphicsWindow.FontBold = "false"
GraphicsWindow.DrawText(315, 210, "Off")
GraphicsWindow.DrawText(315, 230, "On-Count Up")
GraphicsWindow.DrawText(315, 250, "On-Count Down")
GraphicsWindow.BrushColor = "White"
GraphicsWindow.FillEllipse(295, 210, 15, 15)
GraphicsWindow.FillEllipse(295, 230, 15, 15)
GraphicsWindow.FillEllipse(295, 250, 15, 15)
TimerChoice = 0 ' 0-off, 1 -on/up, 2- on/down
GraphicsWindow.BrushColor = "DarkBlue"
GraphicsWindow.FontSize = 20
TimeDisplay = Shapes.AddText("0:30")
Shapes.Move(TimeDisplay, 335, 277)
GraphicsWindow.BrushColor = "Black"
GraphicsWindow.FontSize = 14
TimerPlusButton = Controls.AddButton("+", 390, 275)
Controls.SetSize(TimerPlusButton, 20, 30)
TimerMinusButton = Controls.AddButton("-", 300, 275)
Controls.SetSize(TimerMinusButton, 20, 30)
This code draws the circles (ellipses) next to the labeled choices. A variable TimerChoice stores which option is selected (0-off, 1-on, count up, 2-on, count down). It is set to zero initially (timer is off). A text shape (TimeDisplay) is used to display time when the timer is used and two buttons (TimerPlusButton, TimerMinusButton) are used to adjust the timer in the count down situation.
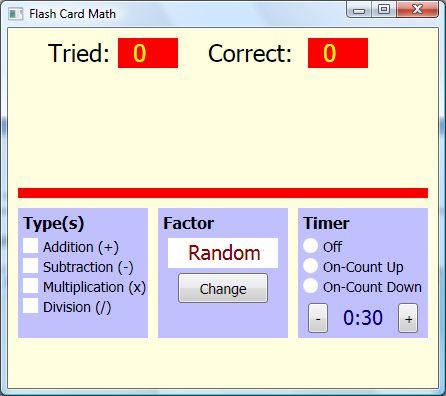
Save and Run the program to see the new additions:
No selection mark appears in the circle indicating the Timer is Off. We will correct that when we write code for the selection process. TimeDisplay and the two adjustment buttons should not appear in the default configuration (timer Off), so add these three lines in InitializeProgram (after the code just added to create them) to hide these controls:
Shapes.HideShape(TimeDisplay)
Controls.HideControl(TimerMinusButton)
Controls.HideControl(TimerPlusButton)
Rerun the program to make sure the controls are hidden.
**
**
Window Design - Add Buttons
The final element needed in the window are the two buttons to control the program operation. One button (StartStopButton) is used to start and stop practice of math problems. One button (ExitButton) is used to stop the program. Add this code to InitializeProgram:
'buttons
GraphicsWindow.BrushColor = "Black"
GraphicsWindow.FontSize = 14
StartStopButton = Controls.AddButton("Start Practice", 60, 320)
Controls.SetSize(StartStopButton, 130, 30)
ExitButton = Controls.AddButton("Exit", 230, 320)
Controls.SetSize(ExitButton, 130, 30)
Save and Run the program to see the final window design:
We now start writing the code behind choosing all the options and generating and solving problems. As a first step, we write the code that generates a random problem and gets the answer from the user, updating the score.
**
**
Code Design – Start Practice
The idea of the flash card math project is to display a problem, receive an answer from the user and check for correctness. Problems can be of four different types with different factor choices and different timer options. For now, we work with Addition problems with Random factors. And, we will ignore the timer options. Once this initial code is working satisfactorily, other problem types and factors and timing will be considered. Again, this step-by-step approach to building a project is far simpler than trying to build everything at once.
Things begin by clicking the Start Practice button (StartStopButton). When this happens, the following steps are taken:
- Change caption of StartStopButton to Stop Practice.
- Hide ExitButton.
- Set number of problems tried (NumberTried) and number correct (NumberCorrect) to zero.
- Generate and display a problem in ProblemDisplay.
- Obtain answer from user.
- Check answer and update score.
Once each generated problem is answered, subsequent problems are generated and answered.
The user answers problems until he/she clicks Stop Practice (or time elapses in timed drills). The steps followed at this point are:
- Change caption of StartStopButton to Start Practice
- Show ExitButton.
- Clear ProblemDisplay.
- Present results.
The code behind the listed steps is fairly straightforward. First, add this line at the end of InitializeProgram to allow detection of button clicks:
Controls.ButtonClicked = ButtonClickedSub
And the corresponding subroutine (ButtonClickedSub) called when a button is clicked:
Sub ButtonClickedSub
B = Controls.LastClickedButton
If (B = StartStopButton) Then
StartStopButtonClicked()
ElseIf (B = ExitButton) Then
Program.End()
** EndIf**
EndSub
We have added possibilities for clicking on either StartStopButton or ExitButton. As seen, if a user clicks the ExitButton, the program simply ends.
Now, use this code in the StartStopButtonClicked subroutine (implements the steps above, except for presenting results):
Sub StartStopButtonClicked
If (Controls.GetButtonCaption(StartStopButton) = "Start Practice") Then
Controls.SetButtonCaption(StartStopButton, "Stop Practice")
Controls.HideControl(ExitButton)
NumberTried = 0
NumberCorrect = 0
Shapes.SetText(TriedDisplay, "0")
Shapes.SetText(CorrectDisplay, "0")
GetProblem()
Else
Controls.SetButtonCaption(StartStopButton, "Start Practice")
Controls.ShowControl(ExitButton)
Shapes.SetText(ProblemDisplay, "")
EndIf
EndSub
This code uses a subroutine GetProblem to generate the random problem and display it in ProblemDisplay. Add this nearly empty procedure (we’ll fill it in soon).
Sub GetProblem
Shapes.SetText(ProblemDisplay, "Problem!!")
EndSub
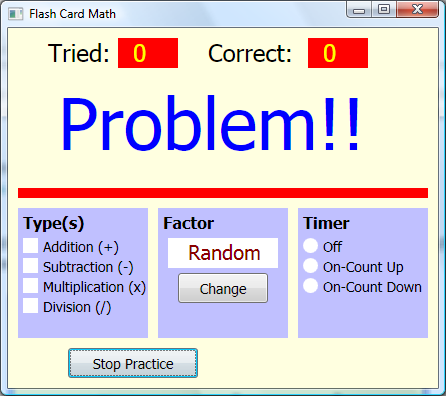
Save and Run the project. Click Start Practice to make sure buttons change as planned. You will also see the generated “problem”:
Now, click Stop Practice. Make sure Exit works.
This framework seems acceptable. We continue code design by discussing problem generation and obtaining an answer (including scoring) from the user. Then, later we discuss timing and presenting the results.
Code Design – Problem Generation
To generate a problem, we examine the current options selected by the user and produce a random problem based on these selections. All code will be in the GetProblem subroutine currently in the framework code. And, even though we are only using Addition problems with Random factors in this initial design, we will write code for all possibilities.
The steps involved in generating a random flash card problem are:
- Select problem type (random selection based on checked choices in Type box)
- Generate factor (based on selection in Factor box)
- Formulate problem and determine correct answer.
- Display problem in ProblemDisplay text shape, replacing correct answer with question marks (?) in place of digits. An example of the desired form of the returned value is:
8 + 6 = ??
where question marks tell the user how many digits are in the correct answer.
- Initialize YourAnswer to blank and DigitNumber (used to check if you have typed in all the digits to the answer).
Let’s look at each step of the problem generation process. The first step is to choose a random problem type from the maximum of four possibilities. We will use a simple approach, first generating a random number from 1 to 4 (1 representing addition, 2 representing subtraction, 3 representing multiplication and 4 representing division). If the corresponding element of the ProblemSelected array is “true” (meaning that check box is checked), that will be the problem type. It that element of ProblemSelected is “false”, we choose another random number. We continue this process until a problem type is selected. Notice this approach assumes at least one check box is always selected. We will make sure this is the case when developing code for the problem type option. There are more efficient ways to choose problem type which don’t involve loops, but, for this simple problem, this works quite well.
A snippet of code that performs the choice of problem type (ProblemType) is:
ProblemType = 0
While (ProblemType = 0)
P = Math.GetRandomNumber(4)
If (P = 1 And ProblemSelected[1]) Then
'Addition
ProblemType = P
ElseIf (P = 2 And ProblemSelected[2]) Then
'Subtraction
ProblemType = P
ElseIf (P = 3 And ProblemSelected[3]) Then
'Multiplication
ProblemType = P
ElseIf (P = 4 And ProblemSelected[4]) Then
'Division
ProblemType = P
EndIf
EndWhile
Once a problem type is selected, we determine the factor used to generate a problem. It can be a selected value from 0 to 9, or a random value from 0 to 9, based on the value selected in the Factor box. For now, we assume that value is provided by a subroutine GetFactor that determines a Factor value, based on problem type ProblemType.
Each problem has four variables associated with it: Factor, representing the value returned by GetFactor, Number, the other number used in the math problem, CorrectAnswer, the problem answer, and Problem, a string representation of the unsolved problem. Once a problem type and factor have been determined, we find values for each of these variables. Each problem type has unique considerations for problem generation. Let’s look at each type.
For Addition problems (ProblemType = 1), the selected factor is the second addend in the problem. The string form of addition problems (Problem) will be:
Number + Factor =
where Number is a random value from 0 to 9, while recall Factor is the selected factor. A snippet of code to generate an addition problem and determine the CorrectAnswer is:
Number = Math.GetRandomNumber(10) - 1
GetFactor()
CorrectAnswer = Number + Factor
Problem = Number + " + " + Factor + " = "
For Subtraction problems (ProblemType = 2), the factor is the subtrahend (the number being subtracted). The string form of subtraction problems (Problem) will be:
Number - Factor =
We want all the possible answers to be positive numbers between 0 and 9. Because of this, we formulate the problem in a backwards sense, generating a random answer (CorrectAnswer), then computing Number based on that answer and the known factor (Factor). The code that does this is:
GetFactor()
CorrectAnswer = Math.GetRandomNumber(10) - 1
Number = CorrectAnswer + Factor
Problem = Number + " - " + Factor + " = "
For Multiplication problems (ProblemType = 3), the selected factor is the multiplier (the number you’re multiplying by) in the problem. The string form of multiplication problems (Problem) will be:
Number x Factor =
where Number is a random value from 0 to 9, and Factor is the factor. A snippet of code to generate a multiplication problem and the CorrectAnswer is:
Number = Math.GetRandomNumber(10) - 1
GetFactor()
CorrectAnswer = Number * Factor
Problem = Number + " x " + Factor + " = "
For Division problems (ProblemType = 4), the factor is the divisor (the number doing the dividing). The string form of division problems (Problem) will be:
Number / Factor =
Like in subtraction, we want all the possible answers to be positive numbers between 0 and 9. So, we again formulate the problem in a backwards sense, generating a random answer (CorrectAnswer), then computing Number based on that answer and the known factor (Factor). The code that does this is:
GetFactor()
CorrectAnswer = Math.GetRandomNumber(10) - 1
Number = CorrectAnswer * Factor
Problem = Number + " / " + Factor + " = "
Note with division, we must make sure the factor is never zero (can’t divide by zero).
The GetFactor routine provides the factor based on the selected value (FactorChoice) in the Factor box and problem type ProblemType. For random factors, it will make sure a zero is not returned if a division problem is being generated. The GetFactor subroutine is thus:
Sub GetFactor
If (FactorChoice = -1) Then
If (ProblemType = 4) Then
Factor = Math.GetRandomNumber(9)
Else
Factor = Math.GetRandomNumber(10) - 1
EndIf
Else
Factor = FactorChoice
EndIf
EndSub
If the Random (FactorChoice = -1) option is selected, 0 to 9 is returned for addition, subtraction and multiplication problems; 1 to 9 is returned for division problems (ProblemType = 4). In other cases, the selected factor is returned (we will have to make sure zero is not a choice when doing division).
The GetProblem subroutine is nearly complete. We want to return the Problem variable with appended question marks that represent the number of digits (NumberDigits) in the correct answer and we need to initialize YourAnswer and DigitNumber. The code snippet that does this is:
If (CorrectAnswer < 10) Then
NumberDigits = 1
Shapes.SetText(ProblemDisplay, Problem + "?")
Else
NumberDigits = 2
Shapes.SetText(ProblemDisplay, Problem + "??")
EndIf
YourAnswer = ""
DigitNumber = 1
We can now assemble all the little code snippets into a final form for the GetProblem subroutine. To build the GetProblem subroutine, first eliminate the single line of code that displays “Problem!!”. Then, start with the snippet that selects problem type. Add each problem generation segment (one for each of the four mathematical operations) in its corresponding location. Finally, add the question mark appending code. The finished function is:
Sub GetProblem
ProblemType = 0
While (ProblemType = 0)
P = Math.GetRandomNumber(4)
If (P = 1 And ProblemSelected[1]) Then
'Addition
ProblemType = P
Number = Math.GetRandomNumber(10) - 1
GetFactor()
CorrectAnswer = Number + Factor
Problem = Number + " + " + Factor + " = "
ElseIf (P = 2 And ProblemSelected[2]) Then
'Subtraction
ProblemType = P
GetFactor()
CorrectAnswer = Math.GetRandomNumber(10) - 1
Number = CorrectAnswer + Factor
Problem = Number + " - " + Factor + " = "
ElseIf (P = 3 And ProblemSelected[3]) Then
'Multiplication
ProblemType = P
Number = Math.GetRandomNumber(10) - 1
GetFactor()
CorrectAnswer = Number * Factor
Problem = Number + " x " + Factor + " = "
ElseIf (P = 4 And ProblemSelected[4]) Then
'Division
ProblemType = P
GetFactor()
CorrectAnswer = Math.GetRandomNumber(10) - 1
Number = CorrectAnswer * Factor
Problem = Number + " / " + Factor + " = "
EndIf
EndWhile
If (CorrectAnswer < 10) Then
NumberDigits = 1
Shapes.SetText(ProblemDisplay, Problem + "?")
Else
NumberDigits = 2
Shapes.SetText(ProblemDisplay, Problem + "??")
EndIf
EndSub
Add this to the project along with the code for GetFactor.
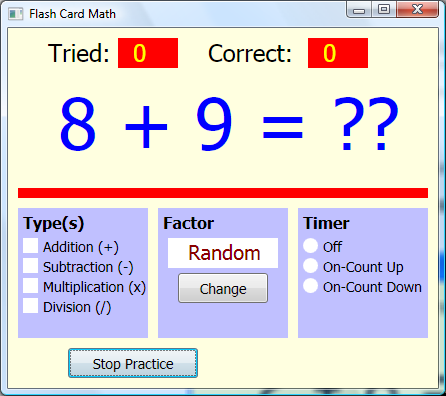
Save and Run the project. Click Start Practice and you should see a random addition problem:
The two question marks tell us there are two digits in the correct answer. We’ll see how to get that answer next. At this point, all you can do is click Stop Practice. You can then click Start Practice to see another addition problem if you’d like. View as many random addition problems as you want.
Code Design – Obtaining Answer
Once a problem is displayed, the user can enter the digits in the answer. These digits will be entered using the keyboard. The keystrokes will be handled by the graphics window KeyDown event.
The steps for obtaining and checking an answer are:
- Make sure keystroke is a number (0 to 9).
- If number, keep keystroke as part of your answer and replace question mark with number.
- If a question mark remains, exit waiting for another keystroke.
- If all question marks are gone, compare your answer (YourAnswer) with correct answer (CorrectAnswer).
- Increment the number of problems tried.
- If your answer is correct, increment the number of correct problems.
- Update scoring label controls.
- Generate another problem.
Add this line of code at the end of InitializeProgram to assign the KeyDownSub subroutine to the KeyDown event:
GraphicsWindow.KeyDown = KeyDownSub
The KeyDownSub subroutine that incorporates the steps listed above is then:
Sub KeyDownSub
If (Controls.GetButtonCaption(StartStopButton) = "Stop Practice") Then
'can only check keystrokes when practicing-only allow number keys
'number is last character in keypressed
KeyPressed = Text.GetSubTextToEnd(GraphicsWindow.LastKey, Text.GetLength(GraphicsWindow.LastKey))
If (Text.GetCharacterCode(KeyPressed) >= Text.GetCharacterCode("0") And Text.GetCharacterCode(KeyPressed) <= Text.GetCharacterCode("9")) Then
YourAnswer = Text.Append(YourAnswer, KeyPressed)
If DigitNumber <> NumberDigits Then
DigitNumber = DigitNumber + 1
Shapes.SetText(ProblemDisplay, Problem + YourAnswer + "?")
Else
NumberTried = NumberTried + 1
'check answer
If (YourAnswer = CorrectAnswer) Then
NumberCorrect = NumberCorrect + 1
EndIf
Shapes.SetText(TriedDisplay, NumberTried)
Shapes.SetText(CorrectDisplay, NumberCorrect)
GetProblem()
EndIf
EndIf
EndIf
EndSub
In the first few lines of code, we make sure we are solving problems before allowing any keystrokes. Notice how all digits in your answer (represented by the typed character in KeyPressed) are saved and concatenated into YourAnswer. Also, notice how the displayed problem is updated, overwriting a question mark, with each keystroke. As mentioned earlier, the program only gives you one chance to enter an answer - there is no erasing.
**
**
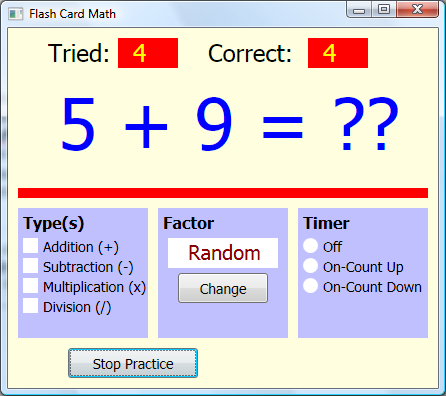
Save and Run the project. You should now be able to answer as many random addition problems as you’d like. Try it. Make sure the score is updating properly. Here’s my window after trying a few problems:
You can stop practicing problems, at any time, by clicking the Stop Practice button. Random addition problems will get boring after a while. Let’s add the logic for other problem types and other factors.
Code Design – Choosing Problem Type
The selection of problem type seems simple. Choose the check box or check boxes you want and the correct problem will be generated. But there are a couple of problems we’ve alluded to. We need to keep a user from “unchecking” all the boxes, leaving no problem type to select. We must make sure at least one box is always selected. And, if Division problems are selected, we cannot allow zero (0) to be used as a factor.
Here, we write code to mark and unmark check boxes and to address the first problem (always having one problem selected). The problem of a zero factor in division problems is addressed when we discuss factors in the next section. Let’s review the location of each check box (all squares with 15 pixel sides). This will define the ‘clickable’ areas.
Addition – Check box is at (15, 210)
Subtraction – Check box is at (15, 230)
Multiplication – Check box is at (15, 250)
Division – Check box is at (15, 270)
To allow detection of mouse clicks, add this single line of code at the end of InitializeProgram:
GraphicsWindow.MouseDown = MouseDownSub
Now, in the MouseDownSub subroutine, we do the following:
- Determine which check box was clicked (ProblemTypeClicked).
- If clicked box is checked (ProblemSelected is “true”), uncheck the box unless the number of boxes checked (Selections) is one. Decrement Selections if possible.
- If selected box is unchecked (ProblemSelected is “false”), check the box and increment Selections.
The initial selection is Addition problems. Add this initialization code to InitializeProgram after the code setting the initial values of the ProblemSelected array.
Selections = 1
ProblemTypeClicked = 1
MarkProblemType()
Note the initialization code calls a subroutine (MarkProblemType) to place an initial check mark next to Addition. That routine is:
Sub MarkProblemType
If (ProblemTypeClicked < 0) Then
ProblemTypeClicked = Math.Abs(ProblemTypeClicked)
GraphicsWindow.BrushColor = "White"
GraphicsWindow.FillRectangle(15, 190 + ProblemTypeClicked * 20, 15, 15)
Else
GraphicsWindow.PenColor = "Black"
GraphicsWindow.PenWidth = 1
GraphicsWindow.DrawLine(18, 199 + ProblemTypeClicked * 20, 22, 203 + ProblemTypeClicked * 20)
GraphicsWindow.DrawLine(22, 203 + ProblemTypeClicked * 20, 28, 191 + ProblemTypeClicked * 20)
EndIf
EndSub
This subroutine will place a check mark (drawn using two DrawLine methods within the selected check box) when ProblemTypeClicked is positive. When ProblemTypeClicked is negative, the check mark is removed (the box is cleared).
With this information, the MouseDownSub procedure that implements the needed steps is:
Sub MouseDownSub
X = GraphicsWindow.MouseX
Y = GraphicsWindow.MouseY
'problem selections - must always have at least one selected
If (X > 15 And X < 30 And Y > 210 And Y < 285) Then
If (Y > 210 And Y < 225) Then
'clicked addition
ProblemTypeClicked = 1
ElseIf (Y > 230 And Y < 245) Then
'clicked subtraction
ProblemTypeClicked = 2
ElseIf (Y > 250 And Y < 265) Then
'clicked multiplication
ProblemTypeClicked = 3
ElseIf (Y > 270 And Y < 285) Then
'clicked division
ProblemTypeClicked = 4
EndIf
If (ProblemSelected[ProblemTypeClicked] And Selections <> 1) Then
'clear choice if not last one selected
Selections = Selections - 1
ProblemSelected[ProblemTypeClicked] = "false"
ProblemTypeClicked = -ProblemTypeClicked
MarkProblemType()
ElseIf (ProblemSelected[ProblemTypeClicked] = "false") Then
'mark choice
Selections = Selections + 1
ProblemSelected[ProblemTypeClicked] = "true"
MarkProblemType()
EndIf
EndIf
EndSub
You should be able to see how the various steps are implemented. In particular, note when a box is to be cleared, the ProblemTypeClicked is converted to a negative number before calling MarkProblemType. Enter this code into your project.
Save and Run the project. Make sure all the newly installed code is doing its job. Try to “uncheck” all the problem type boxes – one box will always remain. You can now solve any problem type. If you change options while solving problems, the changes will be seen once you finish solving the current problem. Try solving problems, changing problem type. Here’s my window while solving a division problem (note the check marks):
Next, we remove the random factor restriction.
Code Design – Changing Factor
Thus far, we have only used a random factor in problems. To add the capability of other factors, we need code for clicking the FactorButton. With each click of that button, we cycle through values of FactorChoice (0 through 9, -1 for random factors) and display that choice in the text shape (FactorDisplay).
Add the shaded code to ButtonClickSub to detect clicks of FactorButton:
Sub ButtonClickedSub
B = Controls.LastClickedButton
If (B = StartStopButton) Then
StartStopButtonClicked()
ElseIf (B = ExitButton) Then
Program.End()
ElseIf (B = FactorButton) Then
FactorButtonClicked()
EndIf
EndSub
Add the FactorButtonClicked subroutine to cycle through and display factor values:
Sub FactorButtonClicked
'change factor choice
FactorChoice = FactorChoice + 1
If (FactorChoice > 9) Then
FactorChoice = -1
Shapes.SetText(FactorDisplay, "Random")
Else
Shapes.SetText(FactorDisplay, Text.Append(" ", FactorChoice))
EndIf
EndSub
Save and Run the program. Click Start Practice. Click Change and watch the values change. Here is my window showing an Addition problem with a selected Factor of 6:
We need two changes related to not allowing a zero factor for Division problems. First, make the shaded change to the FactorButtonClicked subroutine:
Sub FactorButtonClicked
'change factor choice
FactorChoice = FactorChoice + 1
If (FactorChoice > 9) Then
FactorChoice = -1
Shapes.SetText(FactorDisplay, "Random")
Else
If (ProblemSelected[4] And FactorChoice = 0) Then
'no zero if doing division
FactorChoice = 1
EndIf
Shapes.SetText(FactorDisplay, Text.Append(" ", FactorChoice))
EndIf
EndSub
Here, if Division is a selected problem type and a zero factor is selected, the zero factor will be skipped over.
Second, make the shaded change to the MouseDownSub subroutine:
Sub MouseDownSub
X = GraphicsWindow.MouseX
Y = GraphicsWindow.MouseY
'problem selections - must always have at least one selected
If (X > 15 And X < 30 And Y > 210 And Y < 285) Then
If (Y > 210 And Y < 225) Then
'clicked addition
ProblemTypeClicked = 1
ElseIf (Y > 230 And Y < 245) Then
'clicked subtraction
ProblemTypeClicked = 2
ElseIf (Y > 250 And Y < 265) Then
'clicked multiplication
ProblemTypeClicked = 3
ElseIf (Y > 270 And Y < 285) Then
'clicked division
ProblemTypeClicked = 4
EndIf
If (ProblemSelected[ProblemTypeClicked] And Selections <> 1) Then
'clear choice if not last one selected
Selections = Selections - 1
ProblemSelected[ProblemTypeClicked] = "false"
ProblemTypeClicked = -ProblemTypeClicked
MarkProblemType()
ElseIf (ProblemSelected[ProblemTypeClicked] = "false") Then
'mark choice
Selections = Selections + 1
ProblemSelected[ProblemTypeClicked] = "true"
MarkProblemType()
'make sure zero not selected factor if division selected
If (ProblemTypeClicked = 4 And FactorChoice = 0) Then
FactorButtonClicked()
EndIf
EndIf
EndIf
EndSub
In this added code, if a user selects Division and zero is the factor, we simulate a click on FactorButton to increment the factor to one.
Save and Run the program again. Check Division problems. Click on the Change button and notice the zero factor never appears. Uncheck Division problems. Choose 0 as a factor using the Change button. Now, check Division again. Notice the factor is changed to 1 and the 0 option does not appear with subsequent clicks on Change. You can now solve any problem type with any factor.
Code Design – Timing Options
Having coded problem generation and answer checking, we can now address the use of timing in the flash card math project. Up to now, we’ve assumed the timer is off (TimerChoice = 0). We have two possibilities for a timer: (1) one where the timer counts up, keeping track how long you are solving problems (TimerChoice = 1), and (2) one where the timer counts down from some preset value (TimerChoice = 2). In both cases, a text shape (TimeDisplay) displays the time in minutes:seconds form. In the second case, two button controls (TimerMinusButton and TimerPlusButton) are used to set the value. The timing will be controlled with a Timer object with an interval of 1 second (1000 milliseconds).
We allow changing problem type and factors while solving problems. It wouldn’t make sense to be able to change timer options while solving problems – the times would not be correct. We will only allow selection of timer options prior to clicking Start Practice. First, we write code to mark the circles next to the three timing options (only one option can be selected). Here are the locations of the circles (all 15 pixel diameters). This will define the ‘clickable’ areas.
Off – Circle is at (295, 210)
On, Count Up – Circle is at (295, 230)
On, Count Down – Circle is at (295, 250)
Add the shaded code to ButtonDownSub to detect the appropriate mouse clicks:
Sub MouseDownSub
X = GraphicsWindow.MouseX
Y = GraphicsWindow.MouseY
'problem selections - must always have at least one selected
* .*
* .*
If (Controls.GetButtonCaption(StartStopButton) = "Start Practice") Then
'timer selections - only one can be selected
If (X > 295 And X < 310 And Y > 210 And Y < 265) Then
'problem selections - must always have at least one selected
If (Y > 210 And Y < 225) Then
'clicked timer off
TimerChoice = 0
MarkTimerChoice()
ElseIf (Y > 230 And Y < 245) Then
'clicked timer on - count up
TimerChoice = 1
MarkTimerChoice()
ElseIf (Y > 250 And Y < 265) Then
'clicked timer on - count down
TimerChoice = 2
MarkTimerChoice()
EndIf
EndIf
EndIf
EndSub
Note changes can only be made when StartStopButton displays a Start Practice caption.
This code uses a subroutine (MarkTimerChoice) to mark the selected option and unmark the others. That routine is:
Sub MarkTimerChoice
GraphicsWindow.BrushColor = "White"
GraphicsWindow.FillEllipse(295, 210, 15, 15)
GraphicsWindow.FillEllipse(295, 230, 15, 15)
GraphicsWindow.FillEllipse(295, 250, 15, 15)
GraphicsWindow.BrushColor = "SlateGray"
GraphicsWindow.FillEllipse(298, 213 + TimerChoice * 20, 9, 9)
EndSub
The initial selection is Off. Add this line after the line setting the initial value of TimerChoice in InitializeProgram:
MarkTimerChoice()
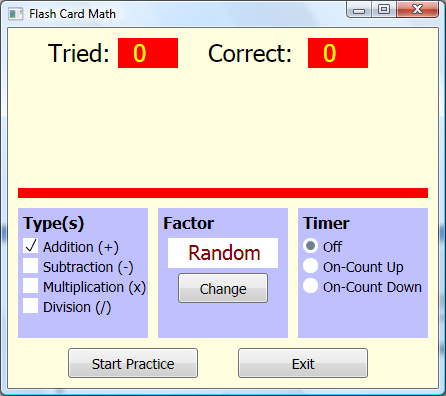
Save and Run the program. Notice the initial selection of the Off option:
Choose other Timer options to make sure proper marking is done.
Other steps must be followed when we switch from one timing option to the next. We will use a variable (ProblemTime) to store the time value (whether counting up or down) in seconds. When counting down, ProblemTime will start at 30 times TimerIndex (a value set by the two timer control buttons). Those steps followed when changing options are:
- If Off (TimerChoice = 0) is selected: hide TimerDisplay, TimerMinusButton, TimerPlusButton.
- If On-Count Up (TimerChoice = 1) is selected, show TimerDisplay and hide TimerMinusButton and TimerPlusButton. Initialize ProblemTime to 0. Display ProblemTime.
- If On-Count Down (TimerChoice = 2) is selected, show TimerDisplay, TimerMinusButton, TimerPlusButton. Initialize ProblemTime to 30 times TimerIndex. Display ProblemTime.
Before attacking this code, add a line to InitializeProgram (after the call to MarkTimerChoice) setting an initial value for TimerIndex:
TimerIndex = 1
The steps listed above are all implemented in the MouseDownSub subroutine. The needed additions are shaded:
Sub MouseDownSub
X = GraphicsWindow.MouseX
Y = GraphicsWindow.MouseY
'problem selections - must always have at least one selected
* .*
* .*
If (Controls.GetButtonCaption(StartStopButton) = "Start Practice") Then
'timer selections - only one can be selected
If (X > 295 And X < 310 And Y > 210 And Y < 265) Then
'problem selections - must always have at least one selected
If (Y > 210 And Y < 225) Then
'clicked timer off
TimerChoice = 0
MarkTimerChoice()
Shapes.HideShape(TimeDisplay)
Controls.HideControl(TimerMinusButton)
Controls.HideControl(TimerPlusButton)
ElseIf (Y > 230 And Y < 245) Then
'clicked timer on - count up
TimerChoice = 1
MarkTimerChoice()
Shapes.ShowShape(TimeDisplay)
Controls.HideControl(TimerMinusButton)
Controls.HideControl(TimerPlusButton)
ProblemTime = 0
FormatTime()
Shapes.SetText(TimeDisplay, FormattedTime)
ElseIf (Y > 250 And Y < 265) Then
'clicked timer on - count down
TimerChoice = 2
MarkTimerChoice()
Shapes.ShowShape(TimeDisplay)
Controls.ShowControl(TimerMinusButton)
Controls.ShowControl(TimerPlusButton)
ProblemTime = 30 * TimerIndex
FormatTime()
Shapes.SetText(TimeDisplay, FormattedTime)
EndIf
EndIf
EndIf
EndSub
This subroutine uses another subroutine FormatTime that converts ProblemTime (seconds) as a FormattedTime in 00:00 format:
Sub FormatTime
Minutes = Math.Floor(ProblemTime / 60)
Seconds = ProblemTime - Minutes * 60
If (Seconds < 10) Then
FormattedTime = Minutes + ":0" + Seconds
Else
FormattedTime = Minutes + ":" + Seconds
EndIf
EndSub
This subroutine takes the time (ProblemTime) in seconds and breaks it into minutes and seconds. Add this new code to your project.
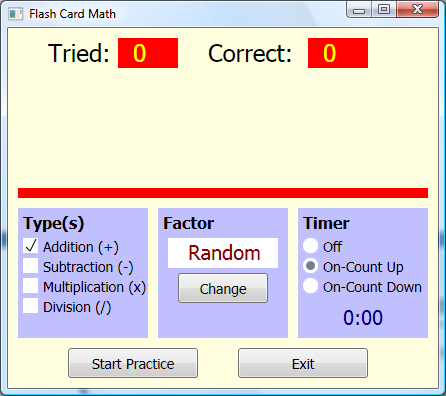
Let’s check both timer options to make sure the window changes as desired. Save and Run the program. Click On-Count Up. You should see:
The ‘count-up’ time is displayed.
Now, choose On-Count Down to see:
The ‘count-down’ time is displayed along with adjustment button controls. In this mode, TimerIndex is used to initialize the ProblemTime variable. This value is changed by clicking on the +/- control buttons (TimerPlusButton and TimerMinusButton). We will keep TimerIndex between 1 and 60. This allows a maximum of 30 minutes (1800 seconds) for a timed flash card math session.
Add the shaded code to ButtonClickedSub to detect clicking on these buttons and adjustment of the TimerIndex value (along with the TimeDisplay):
Sub ButtonClickedSub
B = Controls.LastClickedButton
If (B = StartStopButton) Then
StartStopButtonClicked()
ElseIf (B = ExitButton) Then
Program.End()
ElseIf (B = FactorButton) Then
FactorButtonClicked()
ElseIf (B = TimerPlusButton) Then
TimerIndex = TimerIndex + 1
If (TimerIndex > 60) Then
TimerIndex = 60
EndIf
ProblemTime = 30 * TimerIndex
FormatTime()
Shapes.SetText(TimeDisplay, FormattedTime)
ElseIf (B = TimerMinusButton) Then
TimerIndex = TimerIndex - 1
If (TimerIndex < 1) Then
TimerIndex = 1
EndIf
ProblemTime = 30 * TimerIndex
FormatTime()
Shapes.SetText(TimeDisplay, FormattedTime)
EndIf
EndSub
A Timer object will be used to control the time display. Add these at the end of InitializeProgram to set the Interval and establish the Tick event subroutine (TimerTickSub):
Timer.Interval = 1000
Timer.Tick = TimerTickSub
Timer.Pause()
Clicking Start Practice will start the timing process; the steps are:
- If Off (TimerChoice = 0) is selected, do nothing else.
- If On-Count Up (TimerChoice = 1) is selected:
- Initialize ProblemTime to zero; display ProblemTime.
- Start timer.
- If On-Count Down (TimerChoice = 2) is selected:
- Initialize ProblemTime to 30 times TimerIndex; display ProblemTime.
- Hide TimerPlusButton and TimerMinusButton.
- Start timer.
Clicking Stop Practice will stop the timing process. The corresponding steps:
- Stop timer.
- Show TimerPlusButton and TimerMinusButton if TimerChoice = 2.
Each of these steps is handled in the StartStopButton subroutine. The modified procedure (changes are shaded) is:
Sub StartStopButtonClicked
If (Controls.GetButtonCaption(StartStopButton) = "Start Practice") Then
Controls.SetButtonCaption(StartStopButton, "Stop Practice")
Controls.HideControl(ExitButton)
NumberTried = 0
NumberCorrect = 0
Shapes.SetText(TriedDisplay, "0")
Shapes.SetText(CorrectDisplay, "0")
GetProblem()
If (TimerChoice <> 0) Then
If (TimerChoice = 1) Then
ProblemTime = 0
Else
ProblemTime = 30 * TimerIndex
Controls.HideControl(TimerMinusButton)
Controls.HideControl(TimerPlusButton)
EndIf
FormatTime()
Shapes.SetText(TimeDisplay, FormattedTime)
Timer.Resume()
EndIf
Else
Controls.SetButtonCaption(StartStopButton, "Start Practice")
Controls.ShowControl(ExitButton)
Shapes.SetText(ProblemDisplay, "")
Timer.Pause()
If (TimerChoice = 2) Then
Controls.ShowControl(TimerMinusButton)
Controls.ShowControl(TimerPlusButton)
EndIf
EndIf
EndSub
Make the indicated changes. We’re almost ready to try the timing – just one more procedure to code.
When the timer is running, the time display (TimeDisplay) is updated every second (we use an Interval property of 1000). The displayed time is incremented if counting up, decremented if counting down. The steps involved for counting up are:
- Increment ProblemTime by 1.
- Display ProblemTime.
- If ProblemTime is 1800 (30 minutes), stop solving problems.
Note we limit the total solving time to 30 minutes.
The steps for counting down are:
- Decrement ProblemTime by 1.
- Display ProblemTime.
- If ProblemTime is 0, stop solving problems.
The code to update the displayed time is placed in the TimerTickSub subroutine. The code that implements the above steps are:
Sub TimerTickSub
If (TimerChoice = 1) Then
ProblemTime = ProblemTime + 1
FormatTime()
Shapes.SetText(TimeDisplay, FormattedTime)
If ProblemTime >= 1800 Then
StartStopButtonClicked()
EndIf
Else
ProblemTime = ProblemTime - 1
FormatTime()
Shapes.SetText(TimeDisplay, FormattedTime)
If (ProblemTime = 0) Then
StartStopButtonClicked()
EndIf
EndIf
EndSub
Notice to stop solving problems, we simulate a click on Stop Practice (the StartStopButton button). Add this procedure to the project.
We’re done implementing the modifications to add timing in the flash card math project. Save and Run the project. You want to make sure all the timer options work correctly. First, check to see that the project still works correctly with no timer.
Once you are convinced the no timer option still works, stop solving problems and choose the On-Count Up option. Run the project. Make sure the timer increments properly. Here’s a run I just started:
Click Stop Practice at some point. You should also make sure the program automatically stops after 30 minutes (go have lunch while the program runs).
Choose the On-Count Down option. Change the amount of allowed time using the vertical scroll bar. Make sure it reaches a maximum of 30:00 (it has a minimum of 0:30). Run the project. Make sure the time decrements correctly. Here’s a run I made using a starting time of 1:00:
Make sure the program stops once the time elapses.
Code Design – Presenting Results
Once a user stops solving problems, we want to let he/she know how well they did in answering problems. The information of use would be:
- The number of problems tried.
- The number of correct answers.
- The percentage score (Score).
- If timing, amount of elapsed time and time spent (on average) on each problem.
If timing up, the elapsed time is equal to ProblemTime. If timing down, the elapsed time is equal to the initial amount of time minus ProblemTime.
All of this information is readily available from the current variable set. The results are presented in the StartStopButtonClicked subroutine (following clicking of Stop Practice). We will use a simple message box to relay the results. The modified StartStopButtonClicked subroutine (changes are shaded) that displays the results is:
Sub StartStopButtonClicked
If (Controls.GetButtonCaption(StartStopButton) = "Start Practice") Then
Controls.SetButtonCaption(StartStopButton, "Stop Practice")
Controls.HideControl(ExitButton)
NumberTried = 0
NumberCorrect = 0
Shapes.SetText(TriedDisplay, "0")
Shapes.SetText(CorrectDisplay, "0")
GetProblem()
If (TimerChoice <> 0) Then
If (TimerChoice = 1) Then
ProblemTime = 0
Else
ProblemTime = 30 * TimerIndex
Controls.HideControl(TimerMinusButton)
Controls.HideControl(TimerPlusButton)
EndIf
FormatTime()
Shapes.SetText(TimeDisplay, FormattedTime)
Timer.Resume()
EndIf
Else
Controls.SetButtonCaption(StartStopButton, "Start Practice")
Controls.ShowControl(ExitButton)
Shapes.SetText(ProblemDisplay, "")
Timer.Pause()
If (TimerChoice = 2) Then
Controls.ShowControl(TimerMinusButton)
Controls.ShowControl(TimerPlusButton)
EndIf
If (NumberTried > 0) Then
CRLF = Text.GetCharacter(13)
Score = Math.Floor(100 * (NumberCorrect / NumberTried))
Message = "Problems Tried: " + NumberTried + CRLF
Message = Message + "Problems Correct: " + NumberCorrect + " (" + Score + "%)" + CRLF
If (TimerChoice = 0) Then
Message = Message + "Timer Off"
Else
If (TimerChoice = 2) Then
ProblemTime = 30 * TimerIndex - ProblemTime
EndIf
FormatTime()
Message = Message + "Elapsed Time: " + FormattedTime + CRLF
Message = Message + "Time Per Problem: " + Math.Floor(100 * (ProblemTime / NumberTried)) / 100 + " sec"
EndIf
GraphicsWindow.ShowMessage(Message, "Results")
EndIf
EndIf
EndSub
Add the noted changes.
One last time – Save and Run the project. Solve some problems and see the results. Make sure the results display correctly whether timing or not. Here is a set of results I received while using the timing down option:
**
**
Flash Card Math Quiz Project Code Listing
Here is the complete listing of the Flash Card Math Quiz Small Basic program:
' Flash Card Math
InitializeProgram()
Sub InitializeProgram
'graphics window
GraphicsWindow.Width = 430
GraphicsWindow.Height = 360
GraphicsWindow.Title = "Flash Card Math"
GraphicsWindow.BackgroundColor = "LightYellow"
'labels/scores
GraphicsWindow.BrushColor = "Black"
GraphicsWindow.FontBold = "false"
GraphicsWindow.FontSize = 24
GraphicsWindow.DrawText(40, 10, "Tried:")
GraphicsWindow.DrawText(200, 10, "Correct:")
GraphicsWindow.BrushColor = "Red"
GraphicsWindow.FillRectangle(110, 10, 60, 30)
GraphicsWindow.FillRectangle(300, 10, 60, 30)
GraphicsWindow.BrushColor = "Yellow"
TriedDisplay = Shapes.AddText("0")
Shapes.Move(TriedDisplay, 125, 10)
CorrectDisplay = Shapes.AddText("0")
Shapes.Move(CorrectDisplay, 315, 10)
'problem display
GraphicsWindow.BrushColor = "Blue"
GraphicsWindow.FontSize = 72
ProblemDisplay = Shapes.AddText("")
Shapes.Move(ProblemDisplay, 50, 50)
'divider
GraphicsWindow.BrushColor = "Red"
GraphicsWindow.FillRectangle(10, 160, 410, 10)
'problem types/factor/timer
GraphicsWindow.BrushColor = GraphicsWindow.GetColorFromRGB(192, 192, 255)
GraphicsWindow.FillRectangle(10, 180, 130, 130)
GraphicsWindow.FillRectangle(150, 180, 130, 130)
GraphicsWindow.FillRectangle(290, 180, 130, 130)
GraphicsWindow.BrushColor = "Black"
GraphicsWindow.FontSize = 16
GraphicsWindow.FontBold = "true"
GraphicsWindow.DrawText(15, 185, "Type(s)")
GraphicsWindow.DrawText(155, 185, "Factor")
GraphicsWindow.DrawText(295, 185, "Timer")
'problem types
GraphicsWindow.BrushColor = "Black"
GraphicsWindow.FontSize = 14
GraphicsWindow.FontBold = "false"
GraphicsWindow.DrawText(35, 210, "Addition (+)")
GraphicsWindow.DrawText(35, 230, "Subtraction (-)")
GraphicsWindow.DrawText(35, 250, "Multiplication (x)")
GraphicsWindow.DrawText(35, 270, "Division (/)")
GraphicsWindow.BrushColor = "White"
GraphicsWindow.FillRectangle(15, 210, 15, 15)
GraphicsWindow.FillRectangle(15, 230, 15, 15)
GraphicsWindow.FillRectangle(15, 250, 15, 15)
GraphicsWindow.FillRectangle(15, 270, 15, 15)
ProblemSelected[1] = "true"
ProblemSelected[2] = "false"
ProblemSelected[3] = "false"
ProblemSelected[4] = "false"
Selections = 1
ProblemTypeClicked = 1
MarkProblemType()
'factor
GraphicsWindow.BrushColor = "White"
GraphicsWindow.FillRectangle(160, 210, 110, 30)
GraphicsWindow.BrushColor = "DarkRed"
GraphicsWindow.FontSize = 20
FactorDisplay = Shapes.AddText("Random")
Shapes.Move(FactorDisplay, 180, 212)
FactorChoice = -1
GraphicsWindow.BrushColor = "Black"
GraphicsWindow.FontSize = 14
FactorButton = Controls.AddButton("Change", 170, 245)
Controls.SetSize(FactorButton, 90, 30)
'timer choices
GraphicsWindow.BrushColor = "Black"
GraphicsWindow.FontSize = 14
GraphicsWindow.FontBold = "false"
GraphicsWindow.DrawText(315, 210, "Off")
GraphicsWindow.DrawText(315, 230, "On-Count Up")
GraphicsWindow.DrawText(315, 250, "On-Count Down")
GraphicsWindow.BrushColor = "White"
GraphicsWindow.FillEllipse(295, 210, 15, 15)
GraphicsWindow.FillEllipse(295, 230, 15, 15)
GraphicsWindow.FillEllipse(295, 250, 15, 15)
TimerChoice = 0 ' 0-off, 1 -on/up, 2- on/down
MarkTimerChoice()
TimerIndex = 1
GraphicsWindow.BrushColor = "DarkBlue"
GraphicsWindow.FontSize = 20
TimeDisplay = Shapes.AddText("0:30")
Shapes.Move(TimeDisplay, 335, 277)
GraphicsWindow.BrushColor = "Black"
GraphicsWindow.FontSize = 14
TimerPlusButton = Controls.AddButton("+", 390, 275)
Controls.SetSize(TimerPlusButton, 20, 30)
TimerMinusButton = Controls.AddButton("-", 300, 275)
Controls.SetSize(TimerMinusButton, 20, 30)
Shapes.HideShape(TimeDisplay)
Controls.HideControl(TimerMinusButton)
Controls.HideControl(TimerPlusButton)
'buttons
GraphicsWindow.BrushColor = "Black"
GraphicsWindow.FontSize = 14
StartStopButton = Controls.AddButton("Start Practice", 60, 320)
Controls.SetSize(StartStopButton, 130, 30)
ExitButton = Controls.AddButton("Exit", 230, 320)
Controls.SetSize(ExitButton, 130, 30)
Controls.ButtonClicked = ButtonClickedSub
GraphicsWindow.KeyDown = KeyDownSub
GraphicsWindow.MouseDown = MouseDownSub
Timer.Interval = 1000
Timer.Tick = TimerTickSub
Timer.Pause()
EndSub
Sub ButtonClickedSub
B = Controls.LastClickedButton
If (B = StartStopButton) Then
StartStopButtonClicked()
ElseIf (B = ExitButton) Then
Program.End()
ElseIf (B = FactorButton) Then
FactorButtonClicked()
ElseIf (B = TimerPlusButton) Then
TimerIndex = TimerIndex + 1
If (TimerIndex > 60) Then
TimerIndex = 60
EndIf
ProblemTime = 30 * TimerIndex
FormatTime()
Shapes.SetText(TimeDisplay, FormattedTime)
ElseIf (B = TimerMinusButton) Then
TimerIndex = TimerIndex - 1
If (TimerIndex < 1) Then
TimerIndex = 1
EndIf
ProblemTime = 30 * TimerIndex
FormatTime()
Shapes.SetText(TimeDisplay, FormattedTime)
EndIf
EndSub
Sub StartStopButtonClicked
If (Controls.GetButtonCaption(StartStopButton) = "Start Practice") Then
Controls.SetButtonCaption(StartStopButton, "Stop Practice")
Controls.HideControl(ExitButton)
NumberTried = 0
NumberCorrect = 0
Shapes.SetText(TriedDisplay, "0")
Shapes.SetText(CorrectDisplay, "0")
GetProblem()
If (TimerChoice <> 0) Then
If (TimerChoice = 1) Then
ProblemTime = 0
Else
ProblemTime = 30 * TimerIndex
Controls.HideControl(TimerMinusButton)
Controls.HideControl(TimerPlusButton)
EndIf
FormatTime()
Shapes.SetText(TimeDisplay, FormattedTime)
Timer.Resume()
EndIf
Else
Controls.SetButtonCaption(StartStopButton, "Start Practice")
Controls.ShowControl(ExitButton)
Shapes.SetText(ProblemDisplay, "")
Timer.Pause()
If (TimerChoice = 2) Then
Controls.ShowControl(TimerMinusButton)
Controls.ShowControl(TimerPlusButton)
EndIf
If (NumberTried > 0) Then
CRLF = Text.GetCharacter(13)
Score = Math.Floor(100 * (NumberCorrect / NumberTried))
Message = "Problems Tried: " + NumberTried + CRLF
Message = Message + "Problems Correct: " + NumberCorrect + " (" + Score + "%)" + CRLF
If (TimerChoice = 0) Then
Message = Message + "Timer Off"
Else
If (TimerChoice = 2) Then
ProblemTime = 30 * TimerIndex - ProblemTime
EndIf
FormatTime()
Message = Message + "Elapsed Time: " + FormattedTime + CRLF
Message = Message + "Time Per Problem: " + Math.Floor(100 * (ProblemTime / NumberTried)) / 100 + " sec"
EndIf
GraphicsWindow.ShowMessage(Message, "Results")
EndIf
EndIf
EndSub
Sub GetProblem
ProblemType = 0
While (ProblemType = 0)
P = Math.GetRandomNumber(4)
If (P = 1 And ProblemSelected[1]) Then
'Addition
ProblemType = P
Number = Math.GetRandomNumber(10) - 1
GetFactor()
CorrectAnswer = Number + Factor
Problem = Number + " + " + Factor + " = "
ElseIf (P = 2 And ProblemSelected[2]) Then
'Subtraction
ProblemType = P
GetFactor()
CorrectAnswer = Math.GetRandomNumber(10) - 1
Number = CorrectAnswer + Factor
Problem = Number + " - " + Factor + " = "
ElseIf (P = 3 And ProblemSelected[3]) Then
'Multiplication
ProblemType = P
Number = Math.GetRandomNumber(10) - 1
GetFactor()
CorrectAnswer = Number * Factor
Problem = Number + " x " + Factor + " = "
ElseIf (P = 4 And ProblemSelected[4]) Then
'Division
ProblemType = P
GetFactor()
CorrectAnswer = Math.GetRandomNumber(10) - 1
Number = CorrectAnswer * Factor
Problem = Number + " / " + Factor + " = "
EndIf
EndWhile
YourAnswer = ""
DigitNumber = 1
If (CorrectAnswer < 10) Then
NumberDigits = 1
Shapes.SetText(ProblemDisplay, Problem + "?")
Else
NumberDigits = 2
Shapes.SetText(ProblemDisplay, Problem + "??")
EndIf
EndSub
Sub GetFactor
If (FactorChoice = -1) Then
If (ProblemType = 4) Then
Factor = Math.GetRandomNumber(9)
Else
Factor = Math.GetRandomNumber(10) - 1
EndIf
Else
Factor = FactorChoice
EndIf
EndSub
Sub KeyDownSub
If (Controls.GetButtonCaption(StartStopButton) = "Stop Practice") Then
'can only check keystrokes when practicing-only allow number keys
'number is last character in keypressed
KeyPressed = Text.GetSubTextToEnd(GraphicsWindow.LastKey, Text.GetLength(GraphicsWindow.LastKey))
If (Text.GetCharacterCode(KeyPressed) >= Text.GetCharacterCode("0") And Text.GetCharacterCode(KeyPressed) <= Text.GetCharacterCode("9")) Then
YourAnswer = Text.Append(YourAnswer, KeyPressed)
If DigitNumber <> NumberDigits Then
DigitNumber = DigitNumber + 1
Shapes.SetText(ProblemDisplay, Problem + YourAnswer + "?")
Else
NumberTried = NumberTried + 1
'check answer
If (YourAnswer = CorrectAnswer) Then
NumberCorrect = NumberCorrect + 1
EndIf
Shapes.SetText(TriedDisplay, NumberTried)
Shapes.SetText(CorrectDisplay, NumberCorrect)
GetProblem()
EndIf
EndIf
EndIf
EndSub
Sub MouseDownSub
X = GraphicsWindow.MouseX
Y = GraphicsWindow.MouseY
'problem selections - must always have at least one selected
If (X > 15 And X < 30 And Y > 210 And Y < 285) Then
If (Y > 210 And Y < 225) Then
'clicked addition
ProblemTypeClicked = 1
ElseIf (Y > 230 And Y < 245) Then
'clicked subtraction
ProblemTypeClicked = 2
ElseIf (Y > 250 And Y < 265) Then
'clicked multiplication
ProblemTypeClicked = 3
ElseIf (Y > 270 And Y < 285) Then
'clicked division
ProblemTypeClicked = 4
EndIf
If (ProblemSelected[ProblemTypeClicked] And Selections <> 1) Then
'clear choice if not last one selected
Selections = Selections - 1
ProblemSelected[ProblemTypeClicked] = "false"
ProblemTypeClicked = -ProblemTypeClicked
MarkProblemType()
ElseIf (ProblemSelected[ProblemTypeClicked] = "false") Then
'mark choice
Selections = Selections + 1
ProblemSelected[ProblemTypeClicked] = "true"
MarkProblemType()
'make sure zero not selected factor if division selected
If (ProblemTypeClicked = 4 And FactorChoice = 0) Then
FactorButtonClicked()
EndIf
EndIf
EndIf
If (Controls.GetButtonCaption(StartStopButton) = "Start Practice") Then
'timer selections - only one can be selected
If (X > 295 And X < 310 And Y > 210 And Y < 265) Then
'problem selections - must always have at least one selected
If (Y > 210 And Y < 225) Then
'clicked timer off
TimerChoice = 0
MarkTimerChoice()
Shapes.HideShape(TimeDisplay)
Controls.HideControl(TimerMinusButton)
Controls.HideControl(TimerPlusButton)
ElseIf (Y > 230 And Y < 245) Then
'clicked timer on - count up
TimerChoice = 1
MarkTimerChoice()
Shapes.ShowShape(TimeDisplay)
Controls.HideControl(TimerMinusButton)
Controls.HideControl(TimerPlusButton)
ProblemTime = 0
FormatTime()
Shapes.SetText(TimeDisplay, FormattedTime)
ElseIf (Y > 250 And Y < 265) Then
'clicked timer on - count down
TimerChoice = 2
MarkTimerChoice()
Shapes.ShowShape(TimeDisplay)
Controls.ShowControl(TimerMinusButton)
Controls.ShowControl(TimerPlusButton)
ProblemTime = 30 * TimerIndex
FormatTime()
Shapes.SetText(TimeDisplay, FormattedTime)
EndIf
EndIf
EndIf
EndSub
Sub MarkProblemType
If (ProblemTypeClicked < 0) Then
ProblemTypeClicked = Math.Abs(ProblemTypeClicked)
GraphicsWindow.BrushColor = "White"
GraphicsWindow.FillRectangle(15, 190 + ProblemTypeClicked * 20, 15, 15)
Else
GraphicsWindow.PenColor = "Black"
GraphicsWindow.PenWidth = 1
GraphicsWindow.DrawLine(18, 199 + ProblemTypeClicked * 20, 22, 203 + ProblemTypeClicked * 20)
GraphicsWindow.DrawLine(22, 203 + ProblemTypeClicked * 20, 28, 191 + ProblemTypeClicked * 20)
EndIf
EndSub
Sub FactorButtonClicked
'change factor choice
FactorChoice = FactorChoice + 1
If (FactorChoice > 9) Then
FactorChoice = -1
Shapes.SetText(FactorDisplay, "Random")
Else
If (ProblemSelected[4] And FactorChoice = 0) Then
'no zero if doing division
FactorChoice = 1
EndIf
Shapes.SetText(FactorDisplay, Text.Append(" ", FactorChoice))
EndIf
EndSub
Sub MarkTimerChoice
GraphicsWindow.BrushColor = "White"
GraphicsWindow.FillEllipse(295, 210, 15, 15)
GraphicsWindow.FillEllipse(295, 230, 15, 15)
GraphicsWindow.FillEllipse(295, 250, 15, 15)
GraphicsWindow.BrushColor = "SlateGray"
GraphicsWindow.FillEllipse(298, 213 + TimerChoice * 20, 9, 9)
EndSub
Sub FormatTime
Minutes = Math.Floor(ProblemTime / 60)
Seconds = ProblemTime - Minutes * 60
If (Seconds < 10) Then
FormattedTime = Minutes + ":0" + Seconds
Else
FormattedTime = Minutes + ":" + Seconds
EndIf
EndSub
Sub TimerTickSub
If (TimerChoice = 1) Then
ProblemTime = ProblemTime + 1
FormatTime()
Shapes.SetText(TimeDisplay, FormattedTime)
If ProblemTime >= 1800 Then
StartStopButtonClicked()
EndIf
Else
ProblemTime = ProblemTime - 1
FormatTime()
Shapes.SetText(TimeDisplay, FormattedTime)
If (ProblemTime = 0) Then
StartStopButtonClicked()
EndIf
EndIf
EndSub
**
**
Flash Card Math Quiz Project Review
The Flash Card Math Quiz project is now complete. Save and Run the project and make sure it works as designed. Recheck that all options work and interact properly. Let your kids (or anyone else) have fun tuning up their basic math skills.
If there are errors in your implementation, go back over the steps of window and code design. Use the debugger when needed. Go over the developed code – make sure you understand how different parts of the project were coded. As mentioned in the beginning of this chapter, the completed project is saved as FlashCard in the HomeSB\HomeSB Projects\FlashCard folder.
While completing this project, new concepts and skills you should have gained include:
- How to make selections among options.
- Use of the KeyDown event for input.
- Using a message box to report results.
**
**
Flash Card Math Quiz Project Enhancements
Possible enhancements to the flash card math project include:
- As implemented, the only feedback a user gets about entered answers is an update of the score. Some kind of audible feedback would be a big improvement (a positive sound for correct answer, a negative sound for a wrong answer). We discuss adding sounds to a project in the final chapter – you might like to look ahead.
- When a user stops answering problems, it would be nice to have a review mode where the problems missed are presented. You would need some way to save each problem that was answered incorrectly.
- Kids like rewards. As you gain more programming skills, a nice visual display of some sort for good work would be a fun addition.
- Currently, once a problem is answered, the next problem is immediately displayed. Some kind of delay (perhaps make it optional and adjustable) might be desired.
Excerpt © Copyright 2010-2013 By Kidware Software LLC All Rights Reserved. Computer Science For Kids, the Computer Science For Kids logo, and related trade dress are trademarks or registered trademarks of Kidware Software LLC. Philip Conrod & Lou Tylee have co-authored dozens of books and tutorials for beginning Microsoft Basic, Small Basic, Visual Basic, and Visual C# developers of all ages for over 25 years.

