How to Boot an Operating System Using a VHD in Windows 7
**Overview
**Booting a system using a VHD in Windows 7
Concept
Our test environment are better now with the new VHD features on Windows 7 and Windows Server 2008 R2. If you have a VHD (Virtual Hard Disk) with Windows 7 or Windows Server 2008 R2 is now possible to boot this VHD by the physical system. For example, you can create a dual-boot with Windows 7 at the first HD and Windows Server 2008 on the second HD and vice versa, one of which is a physical disk and the other is a VHD.
In this article you will see how to boot a system with a Windows 7 VHD.
Procedure for creating a dual-boot a VHD
1 - To begin you must have a VHD with a system like Windows Vista, Windows 7, Windows Server 2008 or Windows Server 2008 R2. The file can be on any disk volume. You can use Virtual PC, Virtual Server or Hyper-V to create the VHD to a virtual system.

Figure 1 – VHD File with an operating system installed
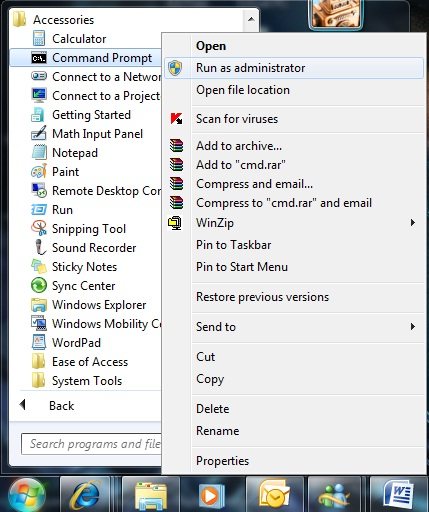
2 - After you copy or create the virtual disk, click on Start> All Programs> Accessories and then right-click Command Prompt, and then click Run as Administrator.

Figure 2 - Opening a command prompt as administrator
3 - We need to create a new boot command line with the bcdedit (old method used in Windows 2000 and 2003 by the boot.ini). Enter the command bcdedit /copy {current} /d “Windows Server Core 2008 R2”. **** The name in double quotes will appear in the boot options.

Figure 3 - Command to create a new entry in the boot of Windows 7
4 - After you run the above command is generated identification number “The entry was successfully copied to {880c5d1f-3b47-9d7f-11from-001636ead0ad} ". Copy this ID, because it will be used in the next commands.
5 - After the ID is generated, execute the following commands to add the VHD at system boot:
Bcdedit /set “id” device vhd=[volumeletter]\file.vhd
Bcdedit /set “id” device vhd=[ volumeletter]\file.vhd
bcdedit /set “id” detecthal on
NOTE: Where "id" is the string generated in step 3 of the command without the quotes and volumeletter is the drive where the file is.

Figure 4 - Example of command bcdedit
6 - To view the boot options, run the command bcdedit / v
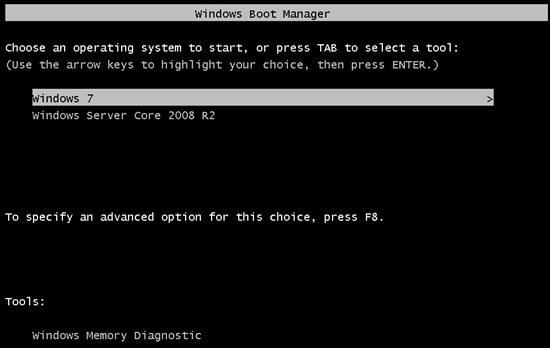
7 - Then just restart the computer and check that the boot option is already available.

Figure 5 - Boot option
8 - If you need to remove the entry described above you just have to run the following command:***
bcdedit /delete “id” /cleanup***

Figure 6 - Removing the option from the boot through bcdedit
Conclusion
This article discussed the method of booting a physical machine by using a virtual disk.
**Leandro Carvalho
**MCSA+S+M| MCSE+S | MCTS | MCITP | MCBMSS | MCT | MVP Virtual Machine
MSVirtualization | Wordpress | Winsec.org | ITCentral | LinhadeCodigo
Twitter: LeandroEduardo