Note
Access to this page requires authorization. You can try signing in or changing directories.
Access to this page requires authorization. You can try changing directories.
Source References
This article is based on the introduction of : http://msdn.microsoft.com/en-us/library/windowsazure/hh949811.aspx
The blue print fo the business scenario is taken from: http://msdn.microsoft.com/en-us/library/windowsazure/hh949811.aspx
Introduction
"This tutorial provides directions on" the way to tack a* "BizTalk Services"* resolution "that receives a" XML* "message, processes it through a XML bridge deployed"* below "the BizTalk Services subscription on Microsoft Azure, and" so "inserts the message into an Azure SQL Server database". [MSDN]
Business Scenario
"Fabrikam and Contoso are two business partners. Fabrikam (the retailer) sends sales order messages to Contoso (the supplier). Contoso maintains all the sales order data in a table called SalesOrders, which is hosted on Azure SQL Server database. Fabrikam sends XML messages to Contoso. Hence, Contoso has to implement a solution on Microsoft Azure, which enables the following:
- Contoso must pull the XML messages at which Fabrikam drops the sales order messages.
- Contoso must process the message received from Fabrikam and map it to the message for inserting the sales order in its SQL Server database
To enable this scenario, Contoso does the following:
- Generates the schema of the XML message that it will receive from Fabrikam.
- Configures an XML One-Way Bridge as part of the BizTalk Service project to enable message validation and transformation. This bridge takes a XML message, validates it against the schema generated earlier, and then transforms it to the schema required to enter a message into the SQL Server database.
- *Uses BizTalk Adapter Service to connect to the Azure SQL Server database from the XML One-Way Bridge deployed under the BizTalk Services subscription." * [MSDN]
Step by Step
The following steps describe how to build the described business scenario:
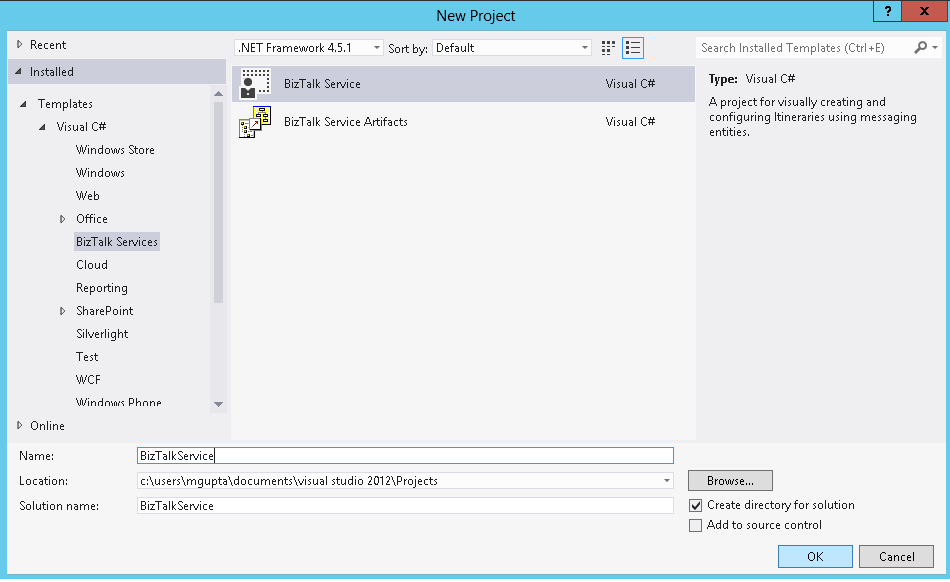
- Create a BizTalk Service project.
Figure 1 - New BizTalk Service Project.
- Create XML schema that will parse the XML send by fabrikam.
Figure 2 - Schema Editor.
- Create Table on Azure SQL Database where the sales order data will be inserted.
Figure 3 - Specify the database settings for a Azure SQL Database.
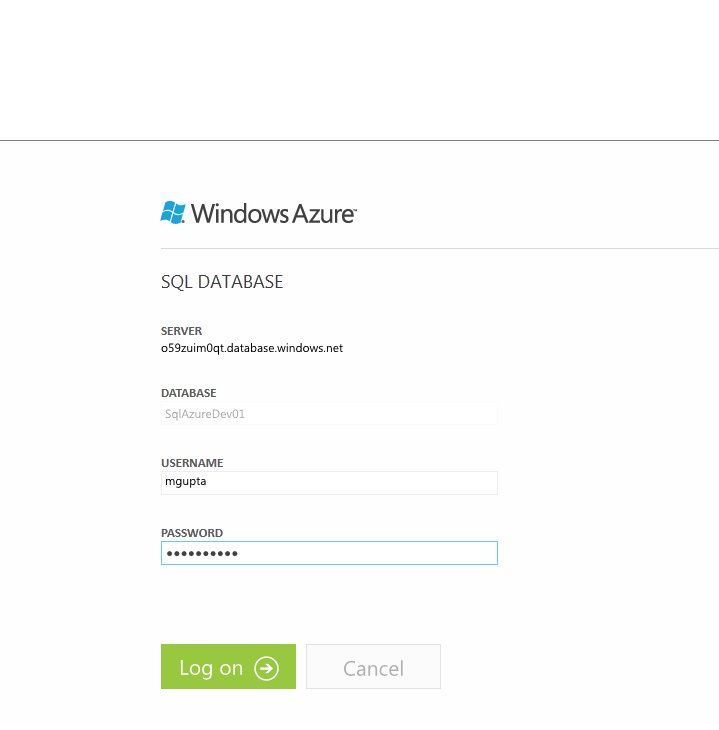
- Login to Azure Sql Portal
Figure 4 - Login to Azure SQL Azure Database.
- Execute the script in the new query.
CREATE TABLE SalesOrder(
 CompanyCode nvarchar(50),
 PartID nvarchar(50),
 Quantity nvarchar(50),
 AskPrice nvarchar(50),
 RequestShipmentDate dateTime,
 AddressLine1 nvarchar(100),
 AddressLine2 nvarchar(100),
 AddressCity nvarchar(100),
 State nvarchar(100),
 Country nvarchar(100),
 Zipcode nvarchar(100),
 Contact nvarchar(100),
 Firstname nvarchar(100),
 Lastname nvarchar(100),
 Comments nvarchar(500),
 PlacedDate DateTime)

 CREATE CLUSTERED INDEX SalesOrder_CC ON SalesOrder(CompanyCode)
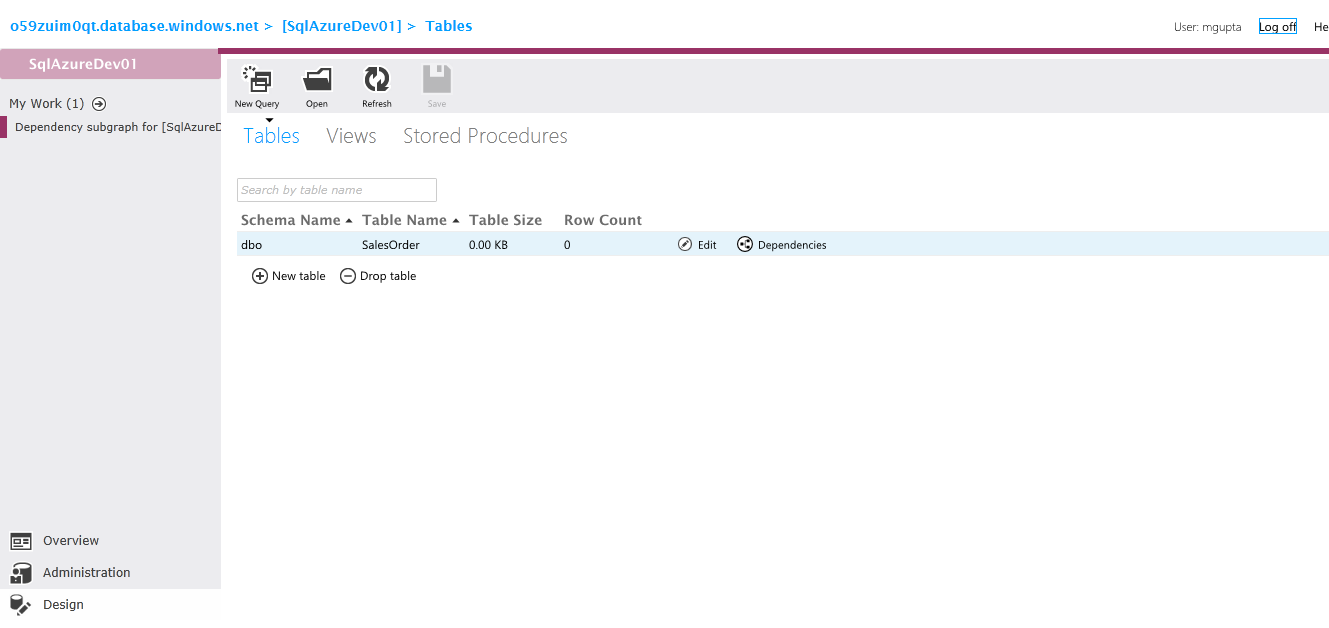
- A sales order table will be created
Figure 5 - SalesOrder table.
- Create an LOB Relay and an LOB Target for the Insert operation on the SalesOrder table.
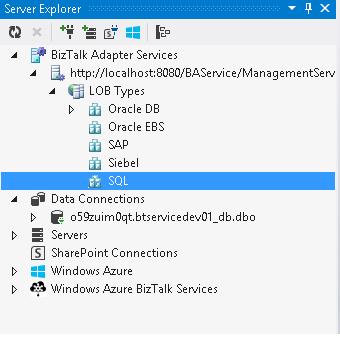
- Go to server explorer and BizTalk Adapter services.
Figure 6 - BizTalk Adapter Service LOB Types.
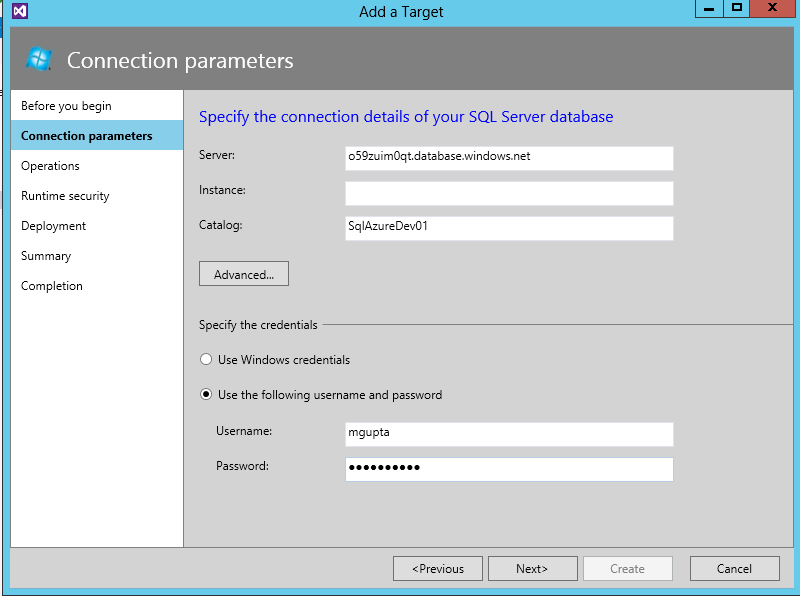
- Click on Add Sql Target; specify the connection properties for Azure Sql database.
Figure 7 - Specify connection parameters for SQL LOB Target.
- Next step is to specify the operation on the SalesOrder table.
Figure 8 - Specifying the operation for SalesOrder table.
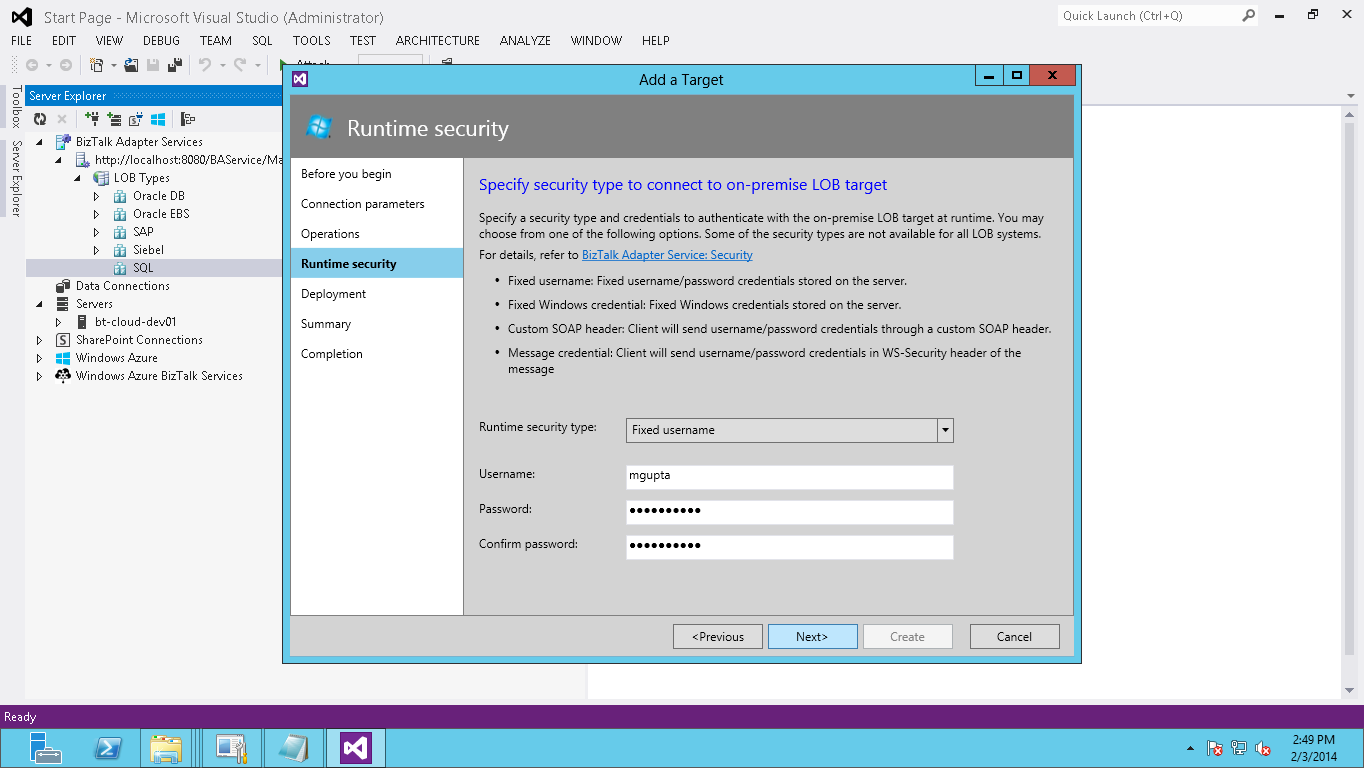
- Subsequently you specify the run time security settings for SQL LOB Target.
Figure 9 - Specify the run time security settings to determine the access to the SQL Azure Database.
- Define the service bus configuration where relay will be deployed.
Figure 10 - Deployment setting specification for the LOB Relay.
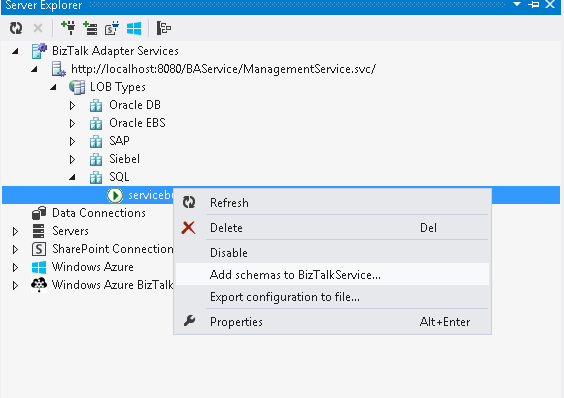
- Generate target schema and add to BizTalk service project.
Figure 11 - Add LOB Target Schemas to the BizTalk Service solution.
- LOB schema added to project
Figure 12 - BizTalk Service LOB Target Schemas.
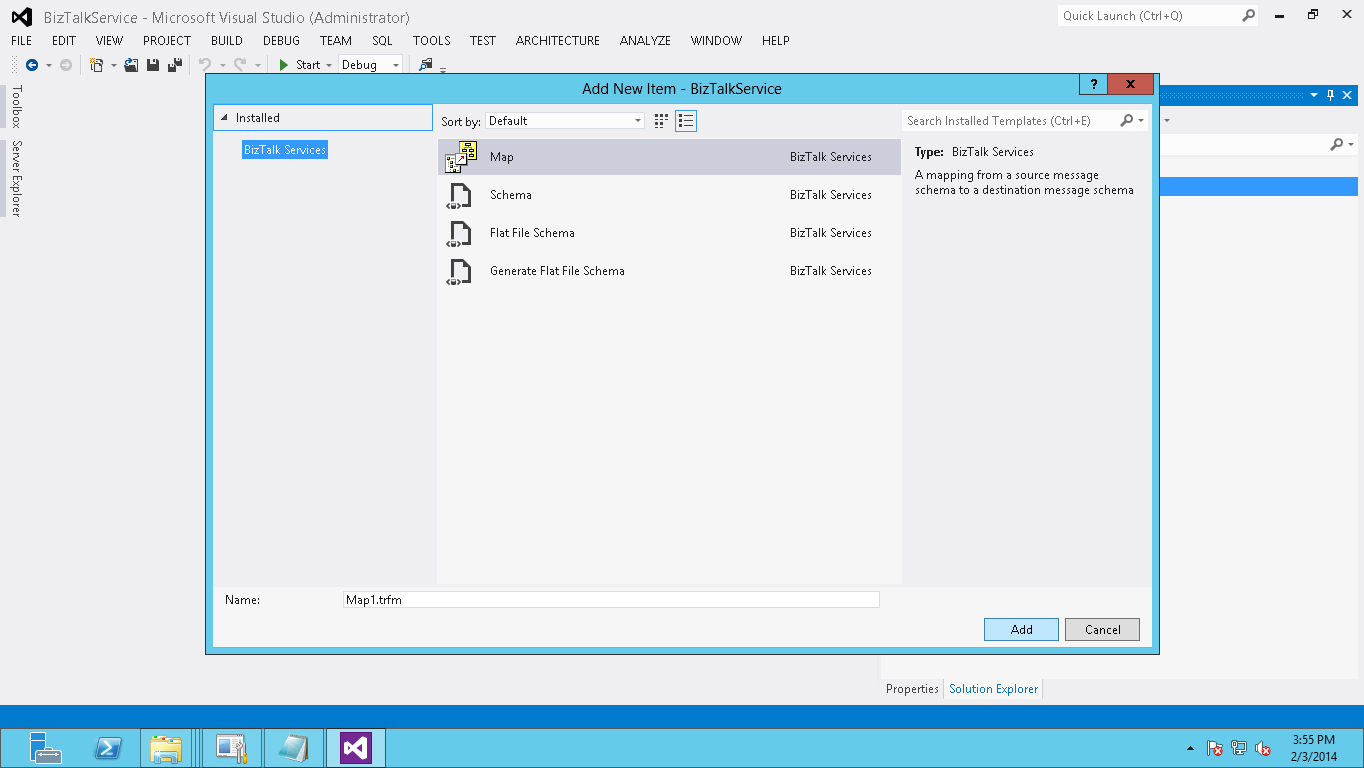
- Create Map that transformed SalesOrder XML
Figure 13 - BizTalk Service Map.
- Create the mapping between SalesOrder schema and LOB Target Schema supporting the operation in the Azure SQL Azure Database.
Figure 14 - Mapping of SalesOrder Message and Operation Message.
- Drag and drop an XML One-Way Bridge from toolbox to the Bridge Configuration surface.
- Drag and drop the relay created in previous steps from BizTalk Adapter Services.
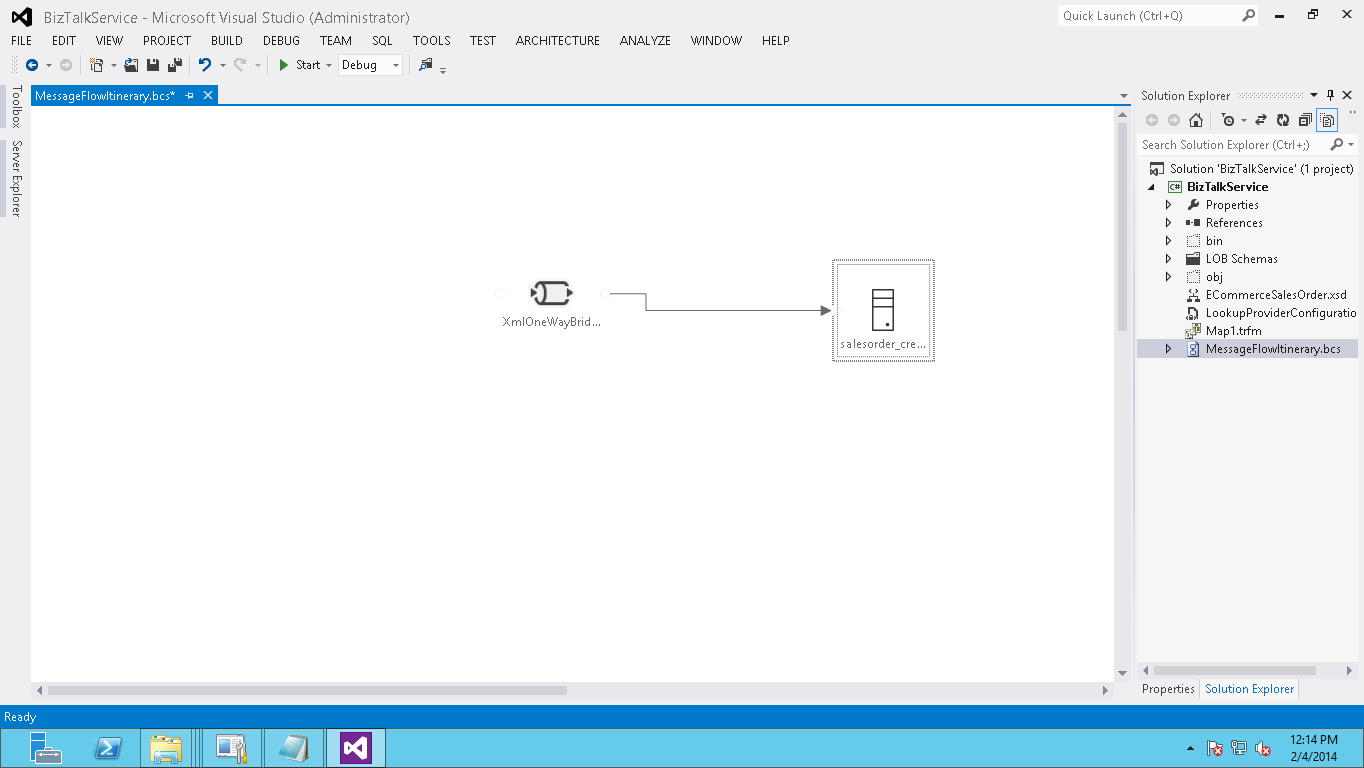
- Connect Bridge to LOB relay.
Figure 15 - Bridge design.
- Set the Route action so that the outgoing message to the LOB application has a SOAP action header.
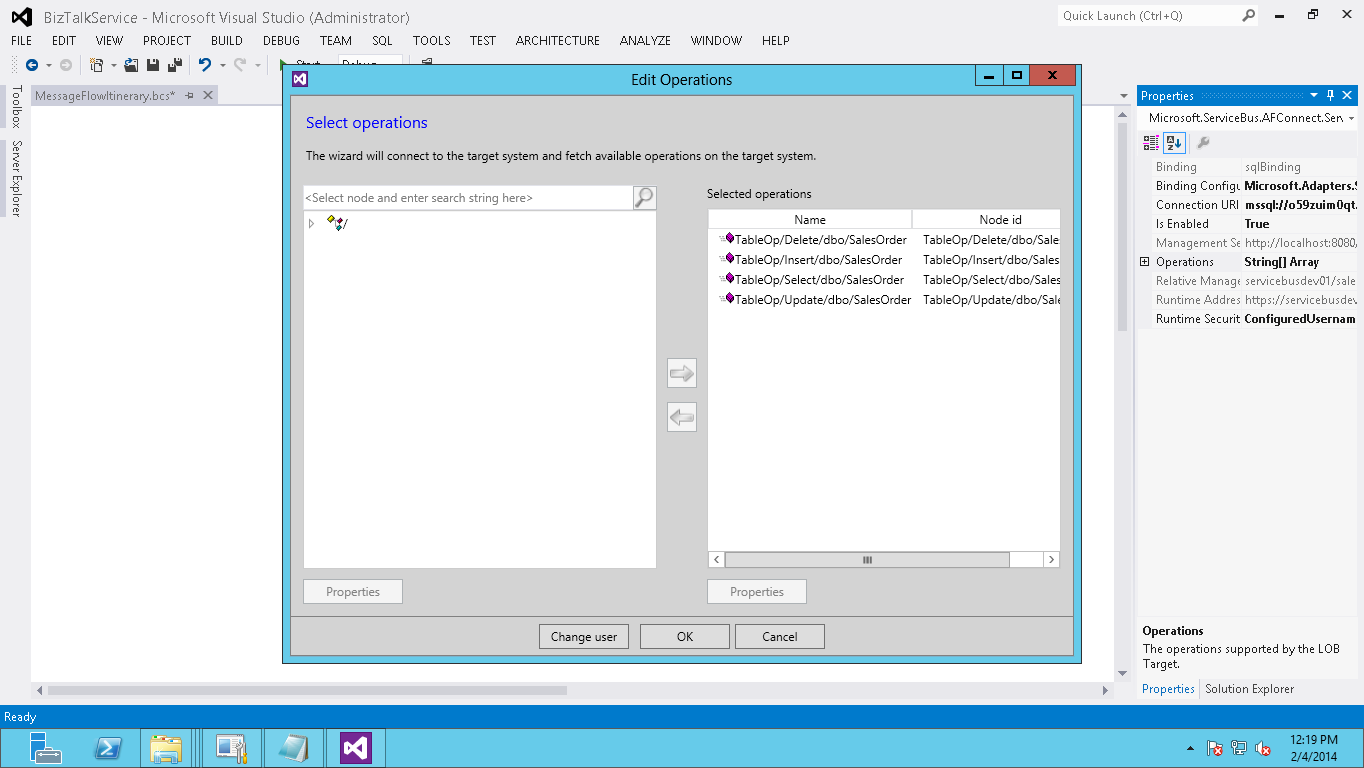
- Open Server Explorer and navigate to the SQL Server LOB Relay we created earlier. Right click the relay, click Properties, and for the Operations property, copy the value of the first operation.
Figure 16 - Edit the operations.
- In the Route Actions dialog box, click Add to open the Add Route Action dialog box. In the Add Route Action dialog box.
Figure 17 - Specify the route actions.
Configure the XML Bridge
The following steps describe the configuration of the XML Bridge.
- Double click the bridge and set message type to Salesorder schema.
- In the transform stage select the map.
Figure 18 - Bridge configuration.
Test the solution
The following steps describe the way the solution can be tested:
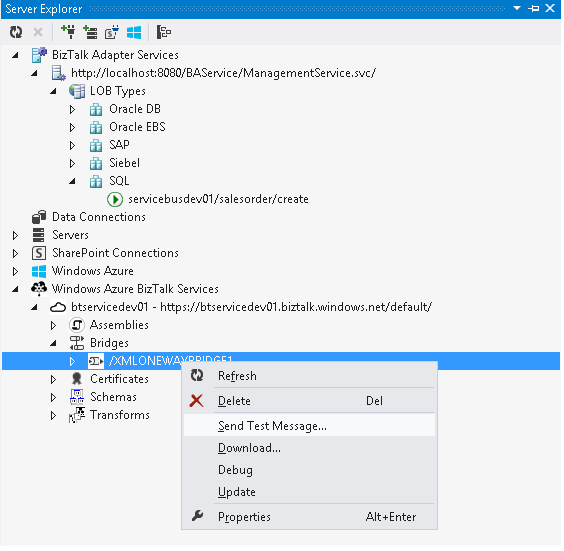
- Use Azure BizTalk Services Explorer to send test message to XML Bridge.
Figure 19 - BizTalk Service Explorer.
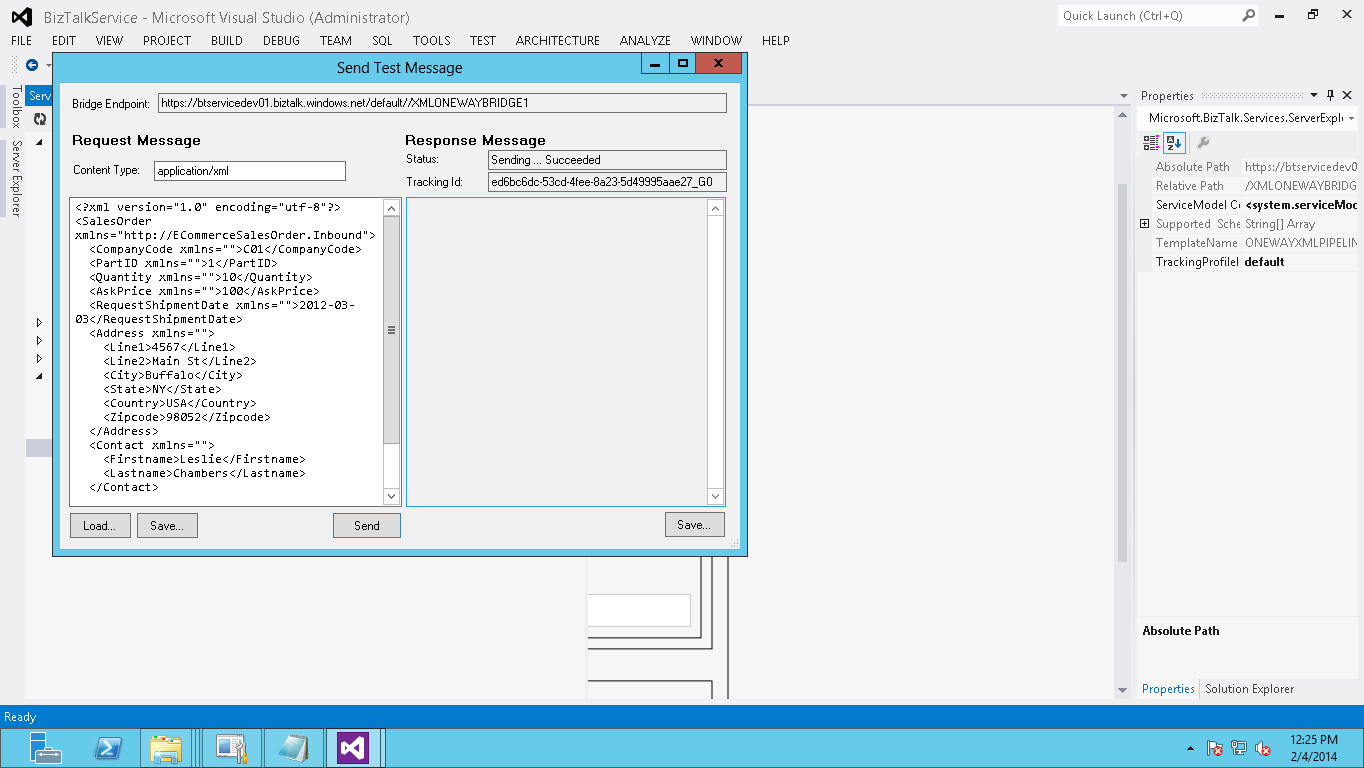
- Load the test file and send.
Figure 20 - BizTalk Service Explorer sending a test message.
- Check the data on portal.
Figure 21 - Azure SQL Database Portal SalesOrder Table.
Reference
Tutorial: Using BizTalk Bridges to Insert Flat File Messages into an On-premises SQL Server
See Also
For documentation on BizTalk Services see Azure BizTalk Services documentation.
Another important place to find a huge amount of Azure BizTalk Services related articles is the TechNet Wiki itself. The best entry point is Azure BizTalk Services resources on the TechNet Wiki.
If you are also looking for BizTalk Server related articles, the best entry point is BizTalk Server Resources on the TechNet Wiki.
