Troubleshoot Azure VM by attaching OS disk to another Azure VM
If you are unable to administer an Azure VM because of RDP or SSH failures, you can troubleshoot the VM by attaching the OS disk as a data disk to a different Azure VM.
Using this approach allows you to edit the registry, view log files, and perform other tasks that work with file-system only access to the offline VHD. This allows you to troubleshoot the VM in Azure without downloading the VHD on-premises.
This example shows how to edit the registry, using the example of disabling Network Location Awareness (NLA), which lets you see the logon screen when attempting to do an RDP logon so you can reset an expired password. But the same process would allow you to disable the guest firewall if you inadvertently blocked RDP or SSH. And more generally you can view the event logs to investigate a possible no-boot or hang issue.
First make sure you have a working VM in the same location (region) that you can use to attach the OS disk of the problem VM. If you don’t have one in the same region, you can create one temporarily.
To verify the location, click Virtual Machines and look at the Location column. As long as the second VM has the same location, whether in parenthesis or not (i.e. East US or <affinity group> (East US)), you can use it for this process.
After creating a new VM in the same location or confirming a second VM already exists in that location, select Virtual Machines on the left, click the problem VM on the right, then click Dashboard.
Make note of the OS disk name in the Disks section at the bottom of the dashboard, since you will be using it later to redeploy the VM. The disk name is under the Disk column on the far left.
Click Delete at the bottom right of the page to delete the VM. This is necessary so the OS disk is not in use and can be attached to another VM.
Note Deleting the VM does not delete the VHD file. The VHD remains as-is in your storage account.
Click Virtual Machines on the left, and click the Disks tab at the top right.
Find the disk name from Step 2, and wait for the Attached To column to be blank. This can take up to 5 minutes after deleting the VM.
Click Virtual Machines on the left, and select the second VM that you will use to attach the OS disk of the problem VM, select Dashboard, then select Attach and then Attach Disk at the bottom of the dashboard.
In the Attach a disk to the virtual machine dialog, select Available Disks and choose the disk from the problem VM (you made note of the disk name in Step 2). Leave the Host Cache Preference on the default setting of None, and click OK.
If you do not see the disk here, either this second VM is in a different location than the problem VM (i.e. in West US and the problem VM is in East US), or the disk has not yet been freed up for reuse and the Attached To column still shows the problem VM name instead of being blank.
When the disk is attached to the second VM you will see a message in the portal Successfully attached disk <disk name> to virtual machine <name of second VM>.
Click Connect to make an RDP connection to the second VM (or use SSH in the case of a Linux VM).
In the second VM, go to Start, Search, type diskmgmt.msc <enter> to bring up the Disk Management tool.
The disk you just added should show up as Offline, so right-click it and select Online.
Go to Start, Search, type regedit <enter> to bring up the Regedit tool.
Select HKEY_LOCAL_MACHINE in the left pane of Regedit, then click the File, Load Hive, and browse to the \Windows\System32\Config folder on the drive from the problem VM. For example, if the second VM only has its OS disk attached plus the drive from the problem VM, the path will likely be F:\Windows\System32\Config.
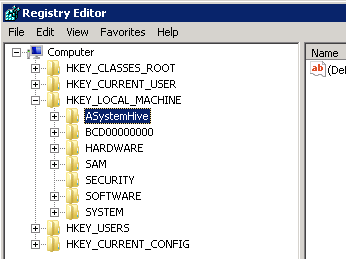
Select the file named SYSTEM in the Config folder. This is the HKEY_LOCAL_MACHINE\System hive from the problem VM’s registry. Give it a key name such as ASystemHive (this is only a temporary name used while the hive is loaded), and click OK.
Look at the Select key under ASystemHive (or whatever you called the loaded hive) and check the Current value. If Current is 1, make your changes in ControlSet001, if it is 2, make them in ControlSet002, etc.
Browse to the RDP-Tcp key and change the following values to 0 to disable NLA.
SecurityLayer
**
UserAuthenticationfAllowSecProtocolNegotiation**
Example path:
HKLM\ASystemDrive\ControlSet001\Control\Terminal Server\WinStations\RDP-Tcp
****
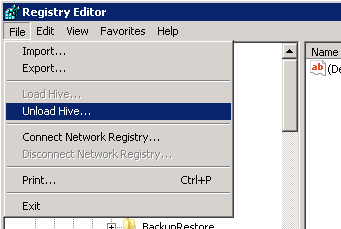
Select ASystemDrive on the left, then select File, Unload Hive.
Back in Disk Management, right-click the disk from the problem VM and select Offline.
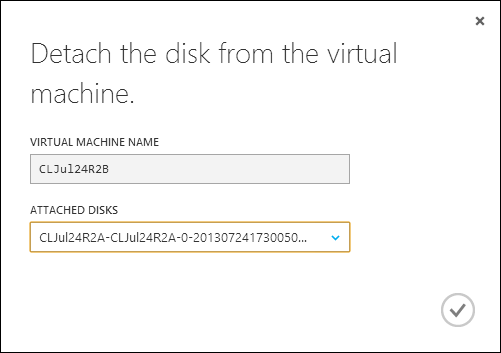
Back in the portal, on the dashboard for the second VM, select Detach to detach the disk from the problem VM.
[

](resources/1067.OfflineVHD16.PNG)
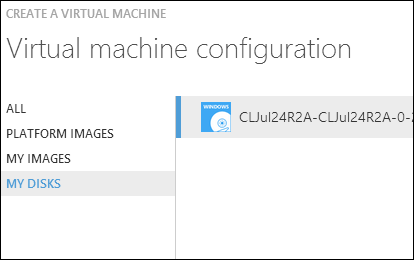
New redeploy the problem VM by clicking New at the bottom left of the portal, and selecting Compute, Virtual Machine, then From Gallery.
Select My Disks on the left, and select the disk for the problem VM. This will be the same disk from Step 2, and the same disk you just had attached to the second VM. Continue through the rest of the wizard to create the VM. Make sure to deploy it back into the same virtual network if it was in a virtual network before.
Once the VM is Running, you can connect to the VM to see the results of the changes you made.


