Connect Microsoft Excel to Windows Azure SQL Database
If you have existing applications in Microsoft Excel that need access to online data or your users are familiar with Excel, you can connect to Windows Azure SQL Database to populate Excel spreadsheets. This article will go through the step by step instructions for connection Microsoft Excel 2010 to a SQL Database. In the example we will be connecting to the lightweight version of the sample Adventure Works database (found here) that I have moved to SQL Database.
Here are the steps for connecting:
1) Open Microsoft Excel 2010.
2) Click on the Data Tab.
3) Then the From Other Sources Button from the Data ribbon.
4) Then From SQL Server.

5) This will open the Data Connection Wizard

6) Enter in your Server name, user name and password. You can get these from the Windows Azure Platform Management portal. Click Next
7) Still in the Data Connection Wizard, choose the database (in this case it is the AdventureWorksLTAZ2008R2 database) and the tables that you want to connect to. I am going to connect to the customer table.

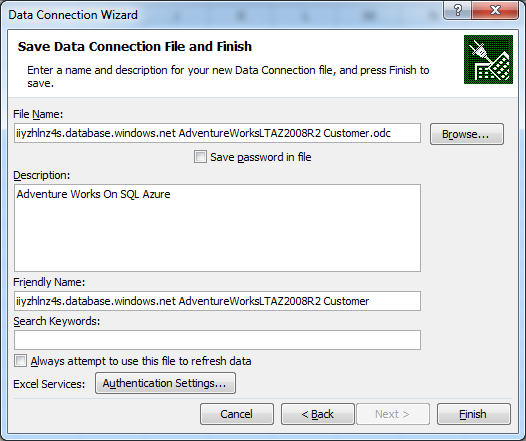
8) On the last page of the Data Connection Wizard, enter in a description for your connection string and press Finish.

9) Now Excel is going to import the customer table into your work sheet. I just want to bring back the data as a table. Click OK.

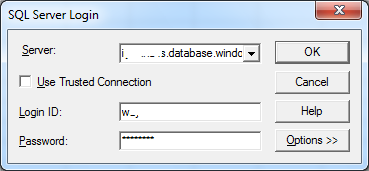
10) Your credentials are asked for again to gain access to the SQL Database, these are the credentials from the Windows Azure Platform Management portal, enter them, and then click OK.

Excel Imports that data and nicely formats it for you, looking like this:

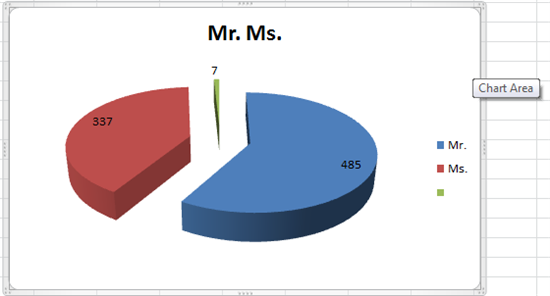
That is all there is too it. Now you can use your SQL Database to build integrated graphs, charts and spreadsheets. Below I have aggregated the Title column that we have imported from the customer table and charted the results to get visibility into the customer’s gender.

Anytime you need updated database, you can Refresh from the Data table and any updates from SQL Database will be imported.