SharePoint 2013 – Navigation using Managed Metadata
Overview
SharePoint 2013 introduces managed metadata based navigation. It provides the ability to apply friendly URLs to pages. The Navigation items can be managed using the term store or Managed Metadata. It allows you to create and update navigation for all sites in the farm using the Managed Metadata Service Application.
There are two different locations to manage your Managed Metadata Navigation: Site Settings and Central Administration.
Architecture
Managed Metadata Service will be used for creating Termsets which can be applied to navigation of Site Collection.
Steps for Configuring Metadata based Navigation
1.Enable the Publishing Feature by navigating to the site Settings à Manage Site Features
2.Click on Site Settings from the top right navigation as shown in the below figure
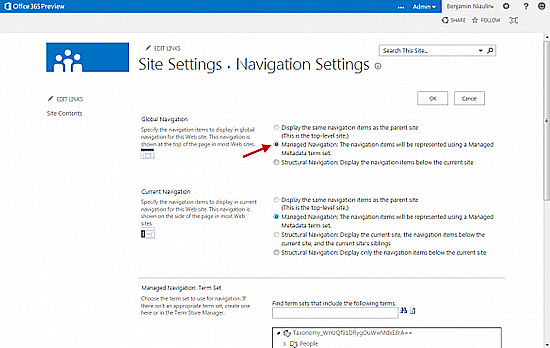
3. Next, click on Navigation under “Look and Feel” usually on the top right
4. Click on the Managed Navigation option.
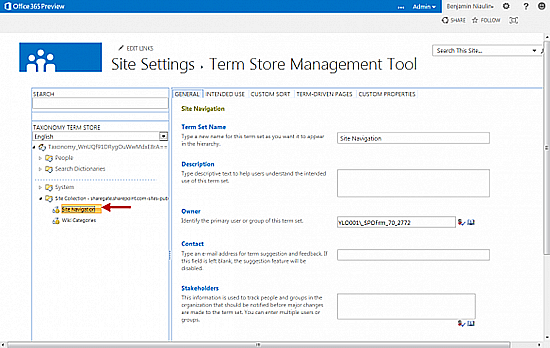
5. Create Navigation items in the Term Store. Lower in the page you will find an option to Open the “Term Store Management Tool”.
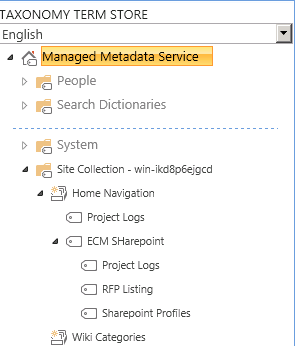
6. In the Term Store Management Tool, use the left pane to navigate to the Term Set you want to use for the navigation.
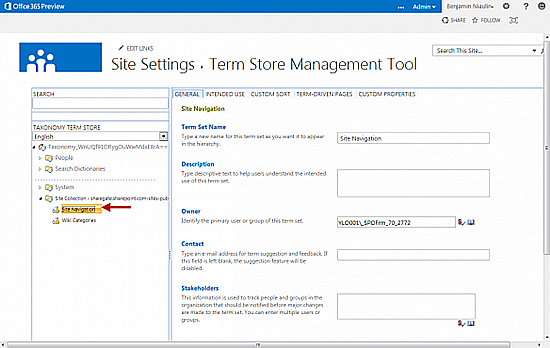
7. Using the little drop down arrow on the Term Set, Create Terms to reflect your desired navigation.

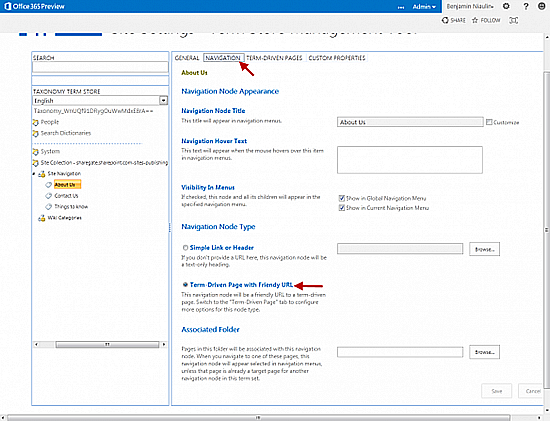
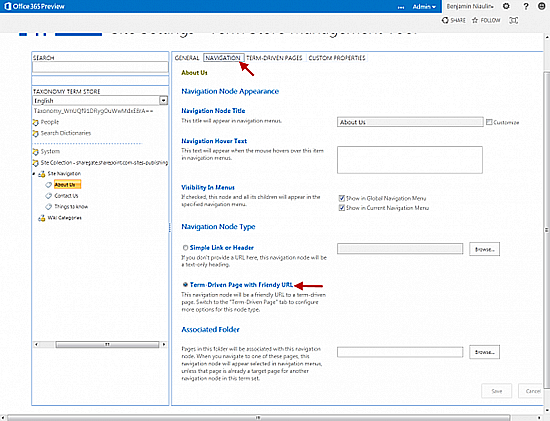
8. Use the tabs at the top to manage “Navigation” and “Term-Driven Pages”.
Choose between two Navigation Node Types:
- Simple Link or Header
- Term-Driven Page with Friendly URLThe Simple Link or Header is the more traditional hyperlink to an item or create a heading to group links.
The Term-Driven is a little more powerful as it allows for friendly urls.
9. Set the Friendly URL by moving to the next tab for the term, Term-Driven Pages.
Click on save when done
Reference Link: http://msdn.microsoft.com/en-us/library/jj163978.aspx


