SharePoint 2010: How to Install and Configure ADFS 2.0 on Windows Server 2008 R2 for SharePoint 2010
1 Overview
Active Directory Federation Services 2.0 helps IT enable users to collaborate across organizational boundaries and easily access applications on-premises and in the cloud, while maintaining application security. Through a claims-based infrastructure, IT can enable a single sign-on experience for end-users to applications without requiring a separate account or password, whether applications are located in partner organizations or hosted in the cloud.
2 System requirements
Supported operating systems: Windows Server 2008 Datacenter, Windows Server 2008 Enterprise, Windows Server 2008 R2, Windows Server 2008 R2 Datacenter, Windows Server 2008 R2 Enterprise, Windows Server 2008 R2 Foundation, Windows Server 2008 R2 Standard, Windows Server 2008 Service Pack 2, Windows Server 2008 Standard, Windows Small Business Server 2008 Premium, Windows Small Business Server 2008 Standard
- Internet Information Services (IIS) 7 or 7.5
- .NET Framework 3.5 SP1
- SQL Server 2005 (Express, Standard, Enterprise), SQL Server 2008 (Express, Standard, Enterprise)
- See AD FS 2.0 home page for further details on system requirements
3 Additional information
- See AD FS 2.0 Content Map for a list of AD FS 2.0 content that is most applicable to your AD FS 2.0 documentation needs.
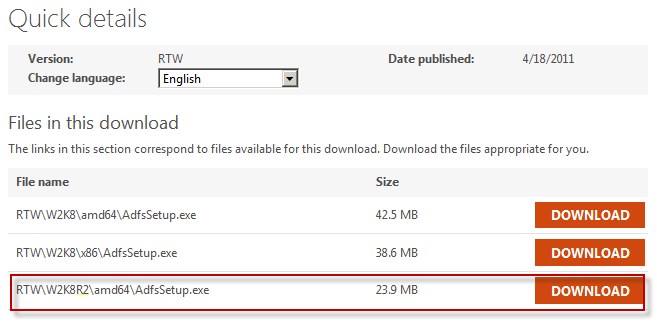
4 Download Center
5 Install ADFS 2.0 on Windows Server 2008R2 ( DC side )
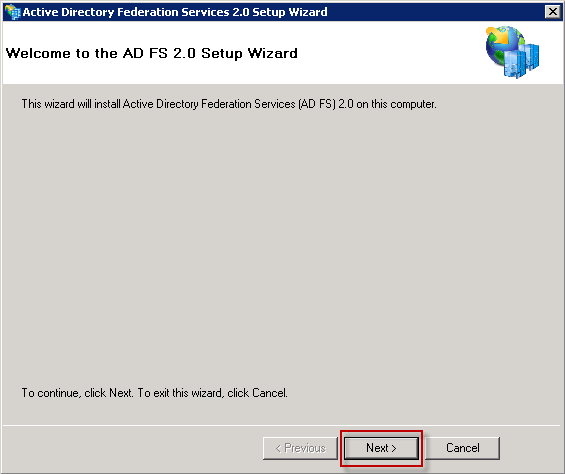
Download AdfsSetup.exe and install it.
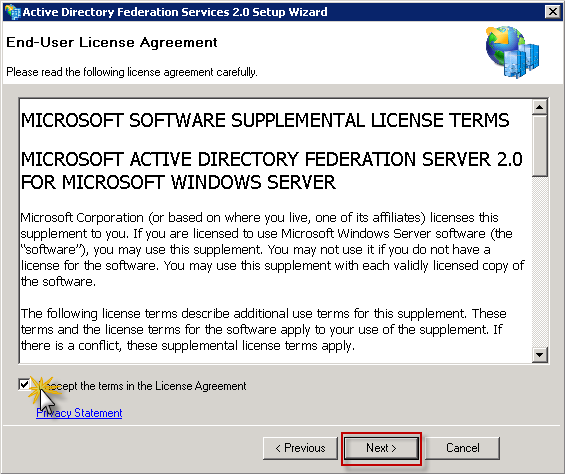
Accept the terms and click Next
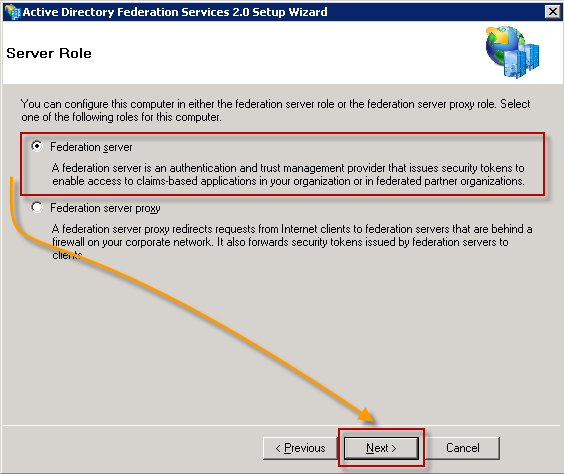
Select Federation Server and Next
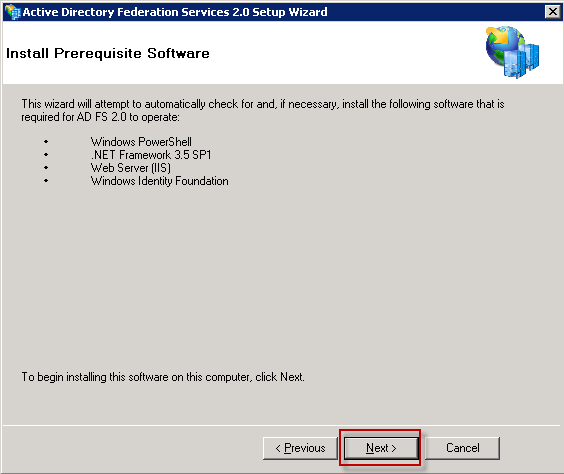
Install Prerequisite Software: just Next
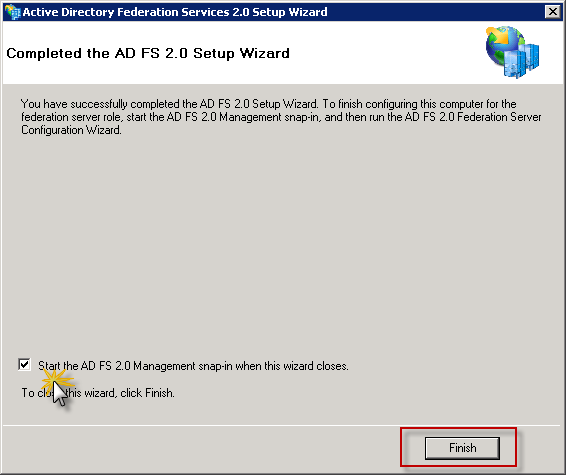
And you can start with AD FS
6 Configure ADFS 2.0 for SharePoint 2010
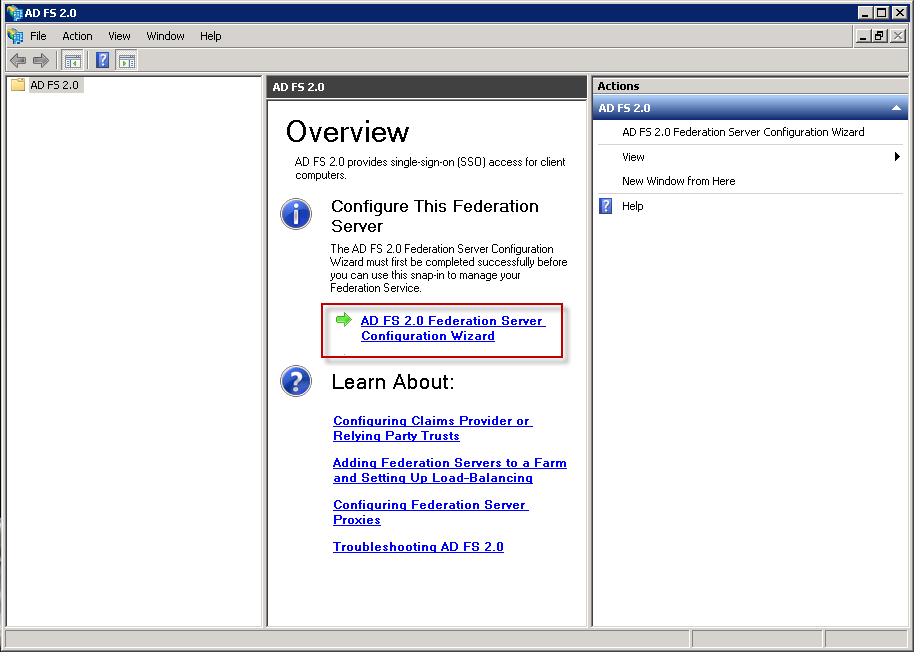
When the install finishs, you will receive this screen. clik on AD FS 2.0 Federation Server Configuration Wizard
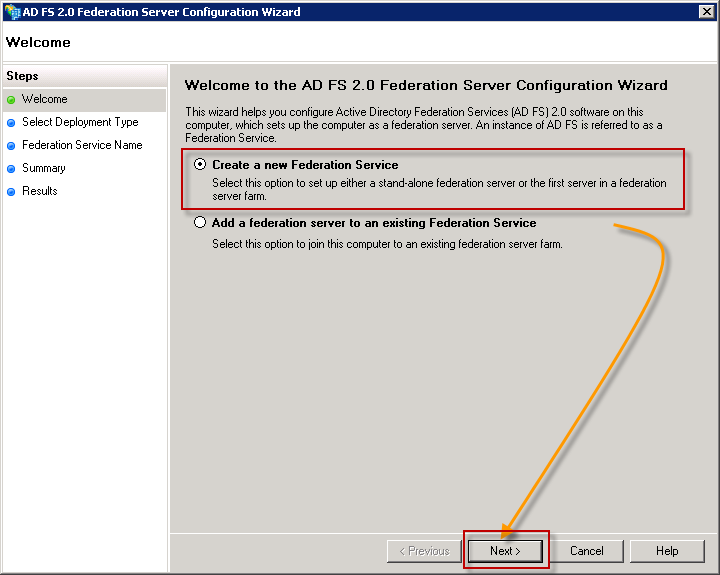
Select Create a new Federation Service
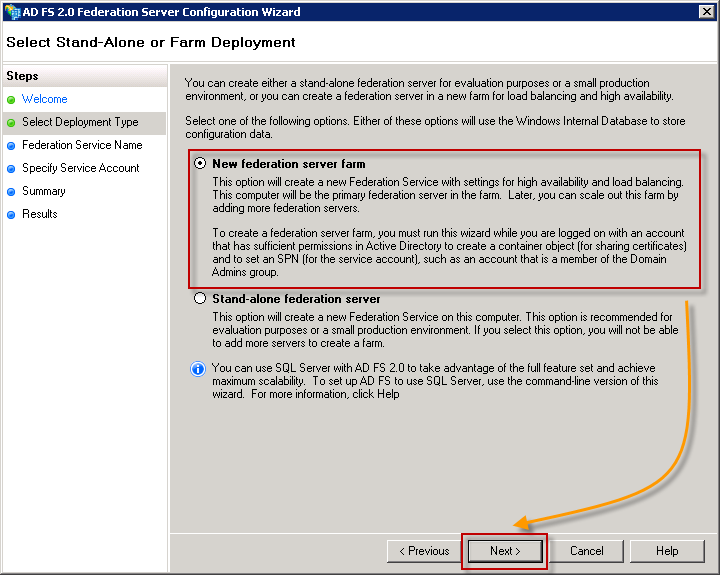
Choose New Federation Server Farm
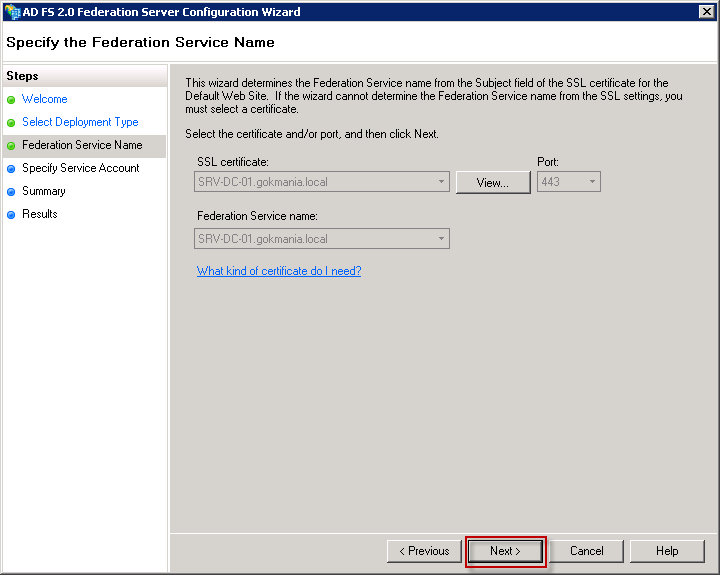
Select your certificate and clik Next. I had "1" certificate so it was gray.
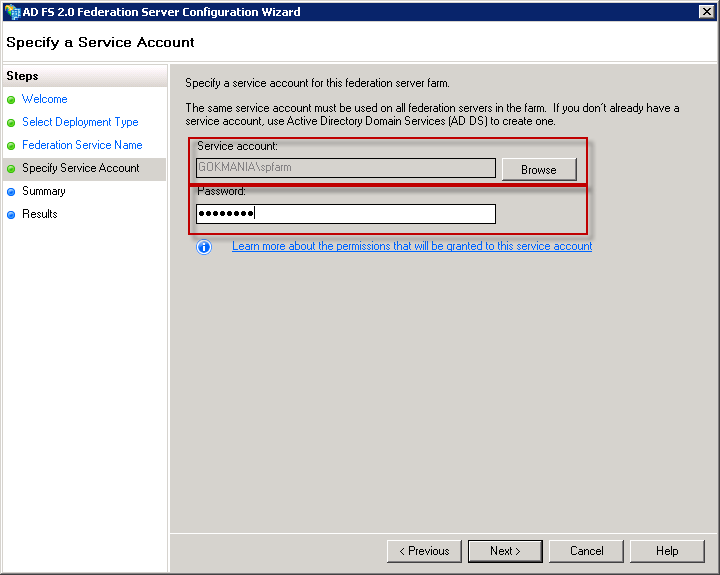
Use a Service Account for running ADFS. Please do not use Administrator, but a Service Account Like:
- domain\svcADFS_sp
- domain\servicesp_ADFS
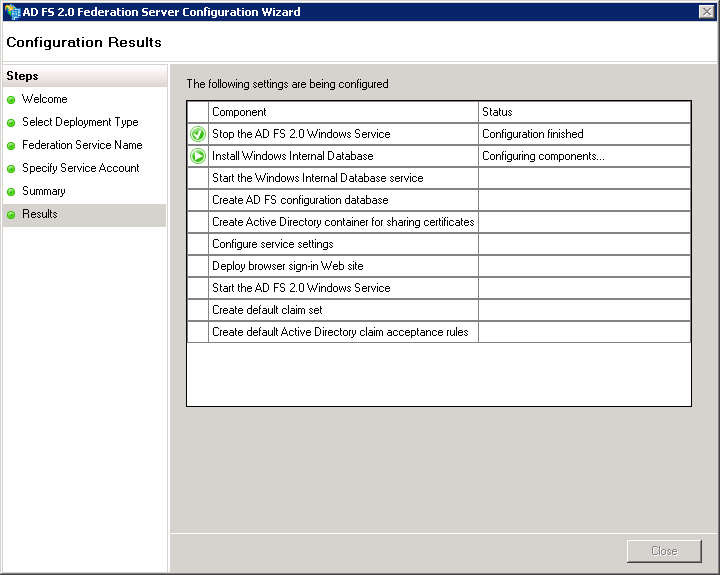
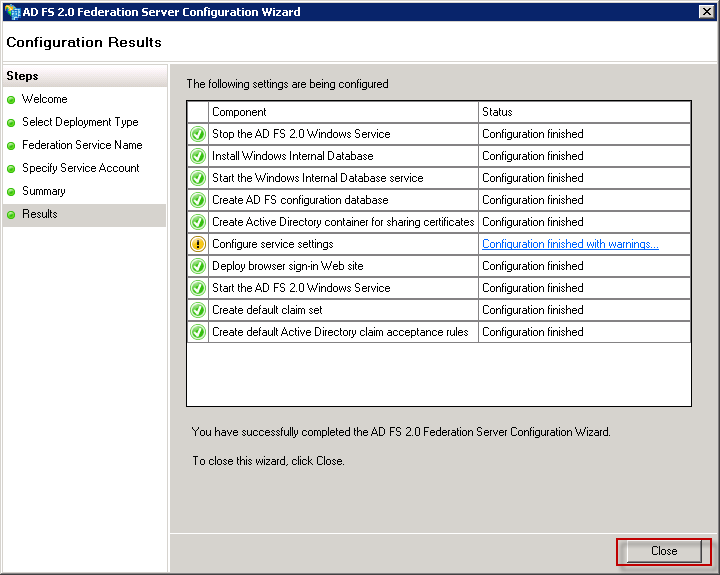
It will configure some settings
If there are no errors you can close this screen.
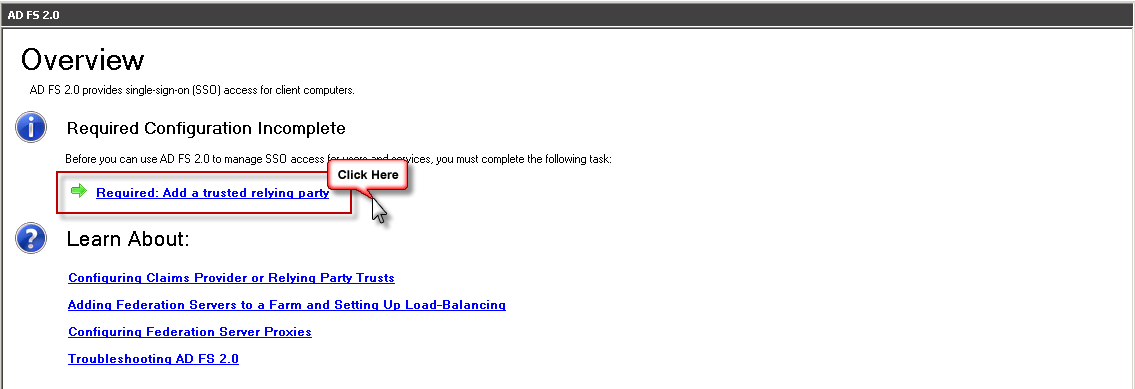
now, on this screen again, we have to Add a trusted relying party
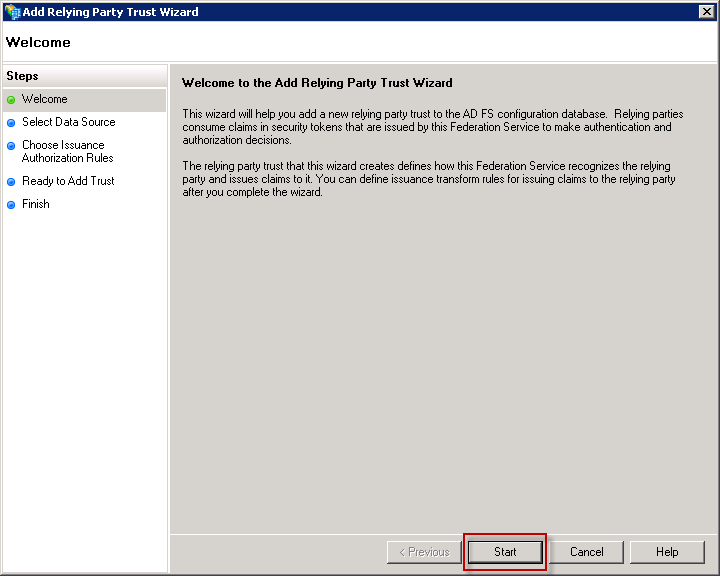
To begin clik Start
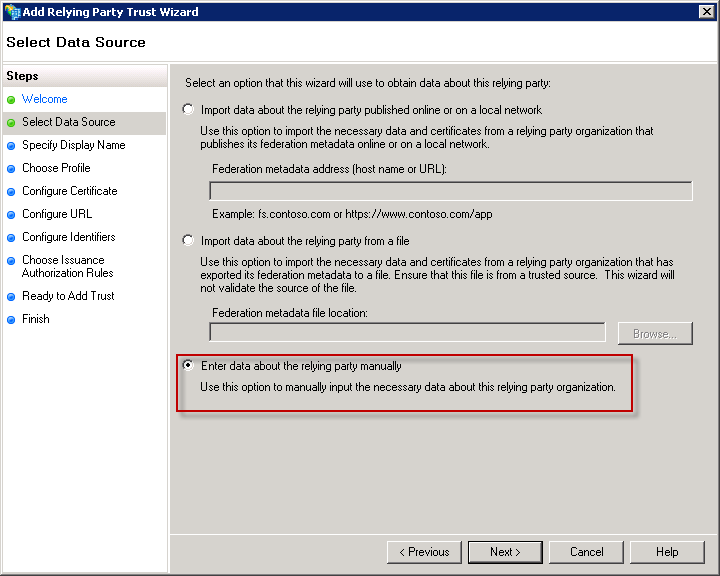
Select the 3 choises: Enter data about the relying party manually
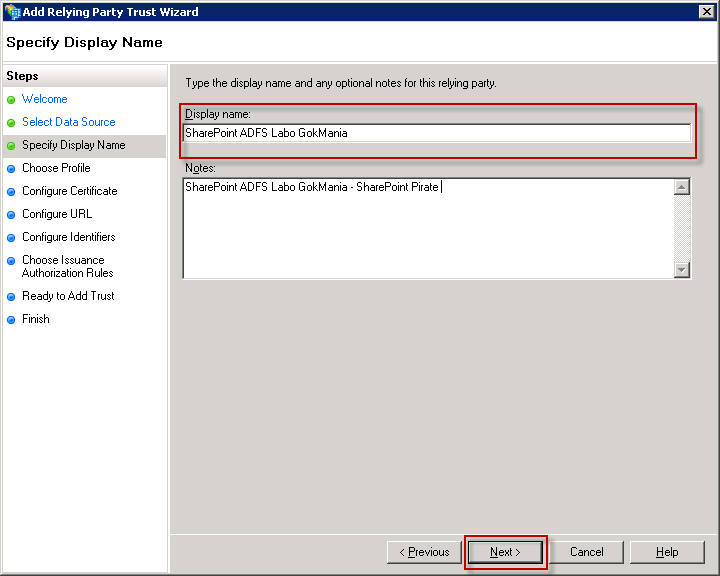
Give a friendly Display name
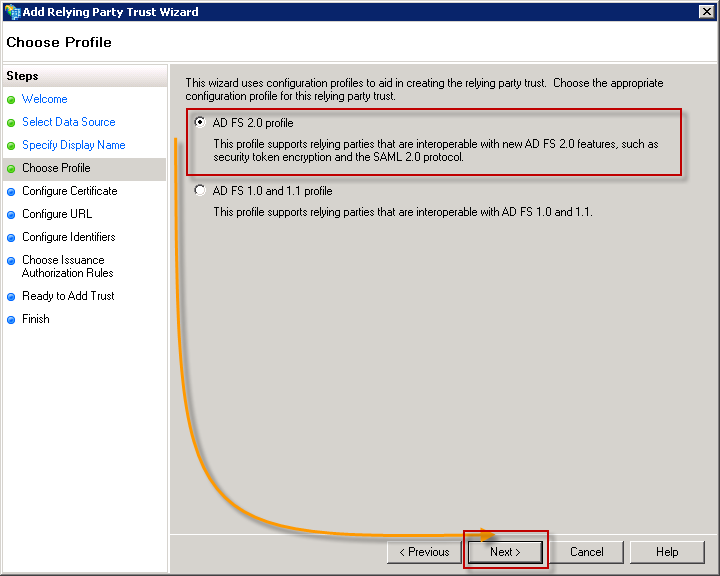
Choose for AD FS 2.0 Profile
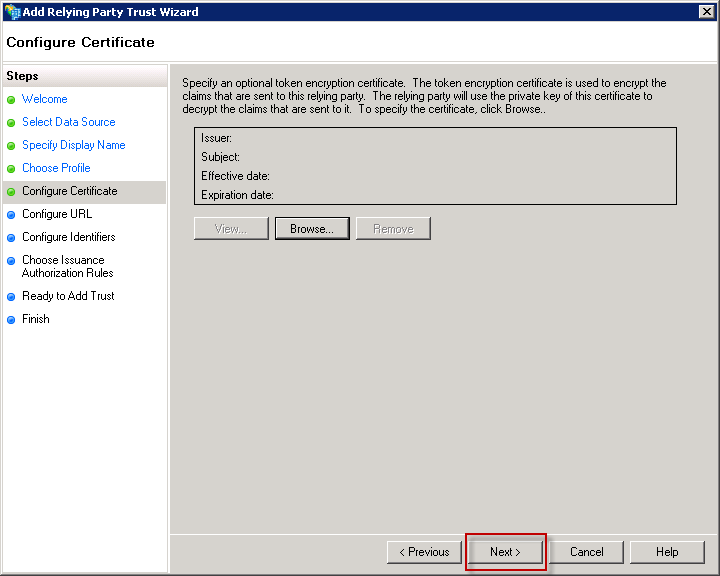
You can select a certificate to encrypt the SAML token itself. This isn’t done frequently because ADFS will require our connection to SharePoint be made over SSL, so the channel the token is sent over is encrypted already.Click just Next
**
**
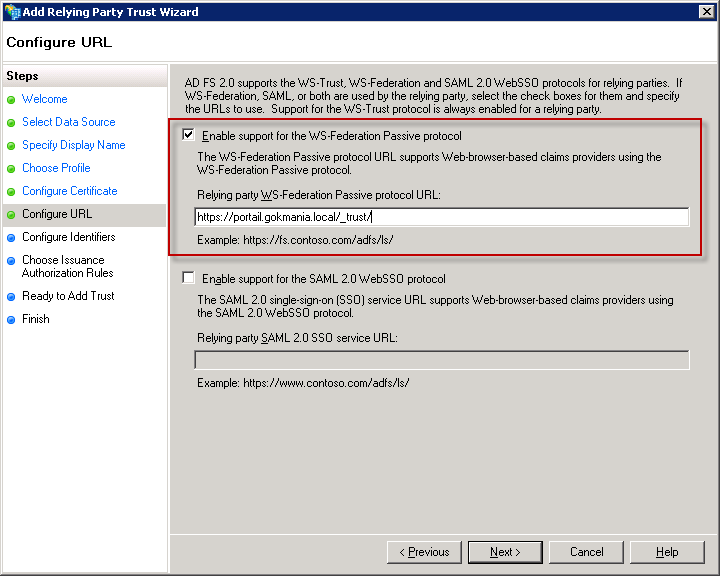
Check the box to Enable support for the WS-Federation Passive protocol. For the protocol URL you need to enter the Url for the SharePoint web applictation’s root site, and include the “_trust” subdirectory. In this example, the Url to my SharePoint web application is https://portail.gokmania.local, so the WS-Federation Passive protocol Url is https://portail.gokmania.local/\_trust/. After entering your Url click the Next button.
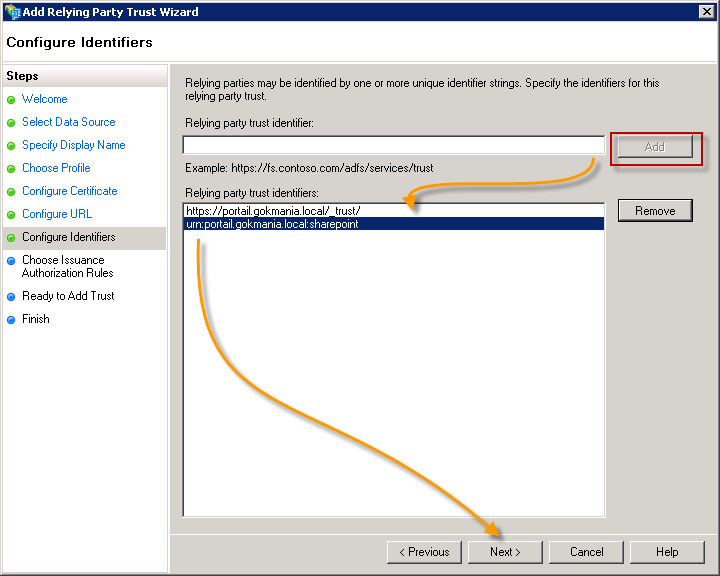
For the relying party trust identifier you need to enter a realm that your web application will pass to ADFS when users log into the web application. The realm is generally created in the format of urn:foo:bar. So in this case, I’ve entered a realm of urn:portail.gokmania.local:sharepoint.
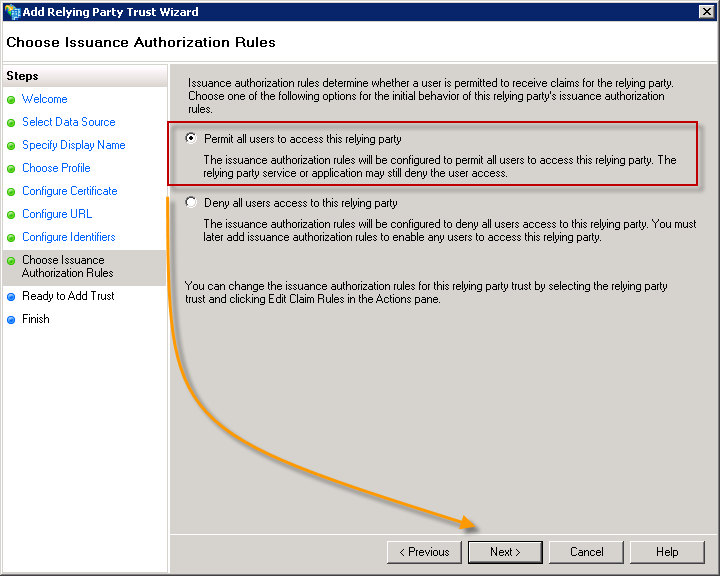
In most cases you will want all of your users to be able to use this relying party. We’ll assume that’s the case for this scenario so just accept the default choice and click the Next button.
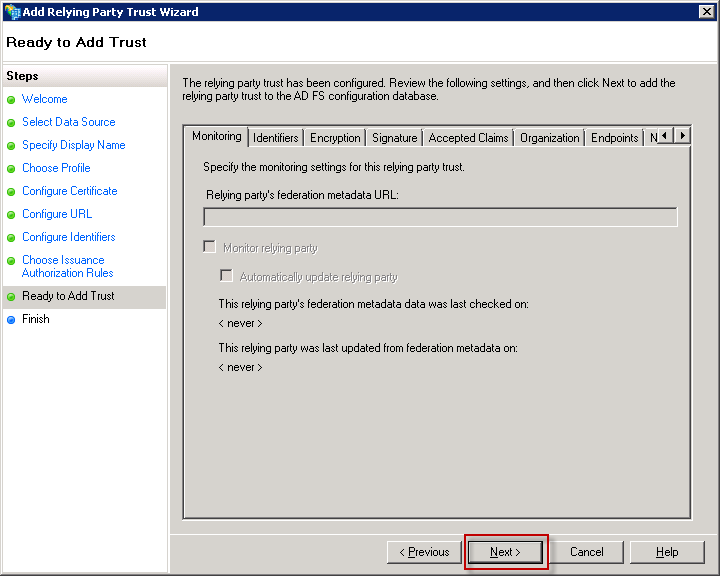
If you needed to make any other configuration changes at this time to the relying party trust you could do it here. For this scenario we don’t need to so just click the Next button to continue.
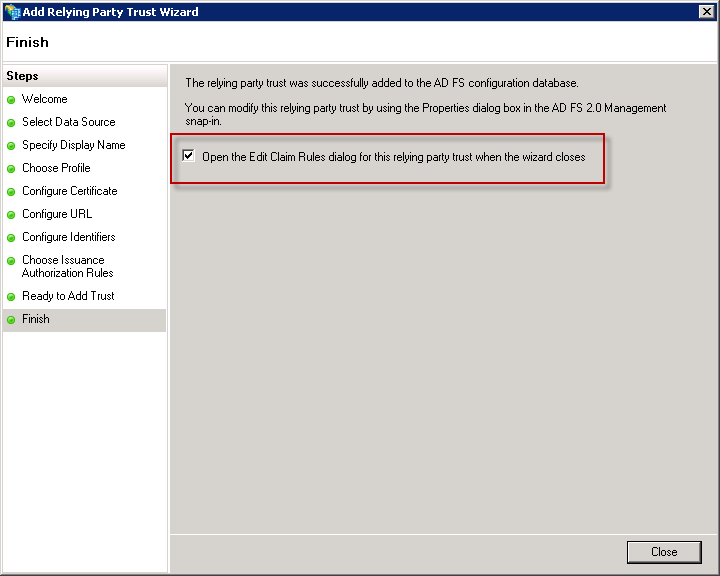
We’re done configuring the relying party trust but we still need to create a claim rule to tell ADFS what claims to send back to SharePoint. So leave the box checked to Open the Edit Claim Rules dialog and click the Close button.
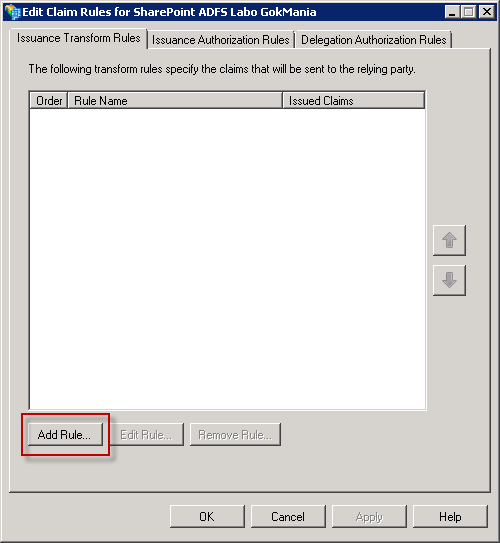
Now we are going to create a new rule, so click the Add Rule button.
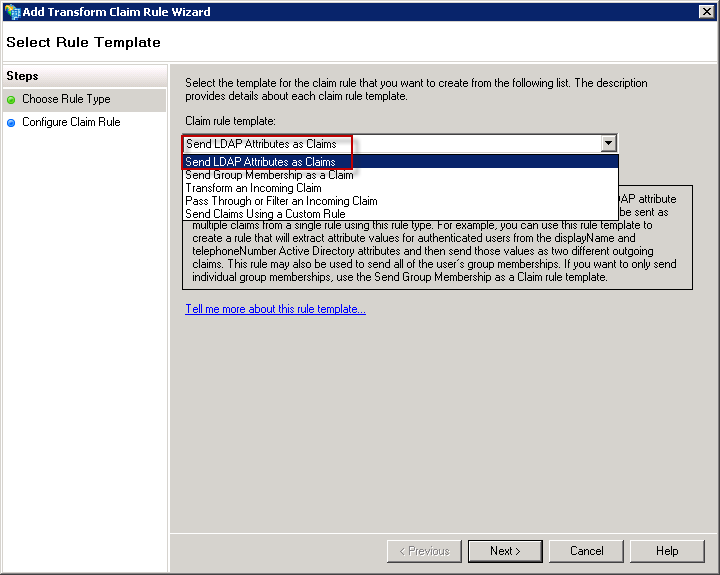
We are going to send LDAP attributes as claims because we are getting information from Active Directory in this case, meaning we will authenticate at ADFS and ADFS is going to use the corporate Active Directory to authenticate us and determine what our attributes are. So leave the default value selected and click the Next button to continue.
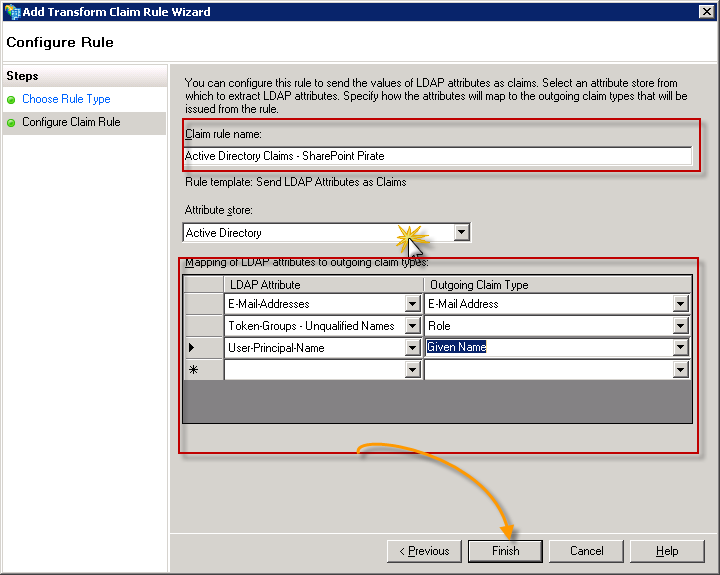
Select all these attributes
7 Configure SharePoint 2010 for AD FS 2.0 ( Application Server Side )
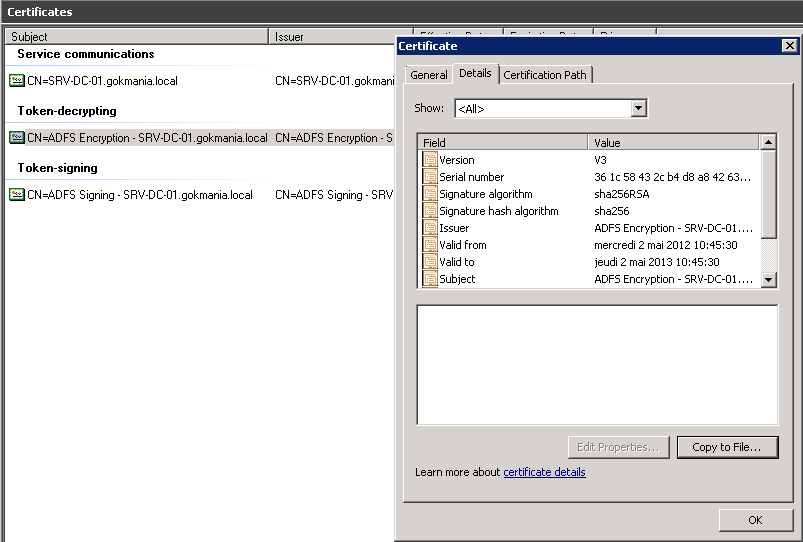
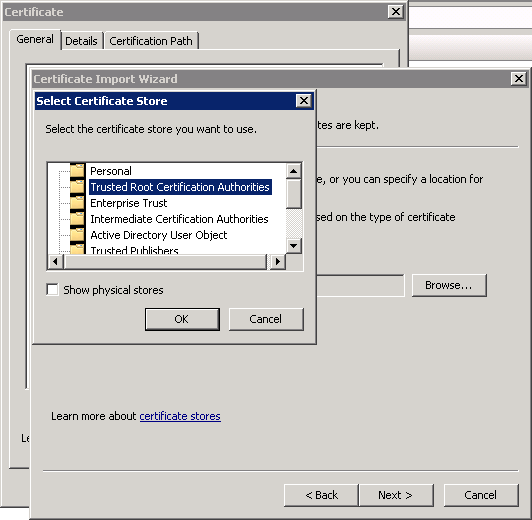
Now under AD FS 2.0 you can see different certificates, made an export ( DC ) of Token-decryting and put it under the C:\ of the SharePoint Server and install it to the Trusted Root Certification Authorities ( or do it with code )
I renamed my certificate "gokmaniaadfs.cer"
So now on my SharePoint server I have my certificate:
- C:\GokManiaAdfs.cer, which is the token signing certificate I copied from my ADFS server
Now that I have my certificate, I need to add them to my list of trusted root authorities. I’m going to do that in PowerShell with this script:
$cert = New-Object System.Security.Cryptography.X509Certificates.X509Certificate2("C:\GokManiaAdfs.cer ") New-SPTrustedRootAuthority -Name "Token Signing Cert" -Certificate $cert |
Next I’m going to create the claim mappings that SharePoint is going to use
$map = New-SPClaimTypeMapping -IncomingClaimType "http://schemas.xmlsoap.org/ws/2005/05/identity/claims/emailaddress" -IncomingClaimTypeDisplayName "EmailAddress" -SameAsIncoming $map2 = New-SPClaimTypeMapping -IncomingClaimType "http://schemas.microsoft.com/ws/2008/06/identity/claims/role" -IncomingClaimTypeDisplayName "Role" -SameAsIncoming |
Next I’m going to create a variable for the realm that I want SharePoint to use. For this scenario I said I was going to use the realm urn:seo:sharepoint. Here’s the PowerShell to create my realm variable:
| $realm = "urn:portail.gokmania.local:sharepoint" |
Now I’m ready to create my SPTrustedIdentityTokenIssuer. This is where I tie together all of the configuration information so SharePoint knows how to connect and work. I’ll show the PowerShell here and then explain the important parts:
| $ap = New-SPTrustedIdentityTokenIssuer -Name "SAML Provider" -Description "SharePoint secured by SAML" -realm $realm -ImportTrustCertificate $cert -ClaimsMappings $map,$map2 -SignInUrl "https://adfs.gokmania.local/adfs/ls" -IdentifierClaim "http://schemas.xmlsoap.org/ws/2005/05/identity/claims/emailaddress" |
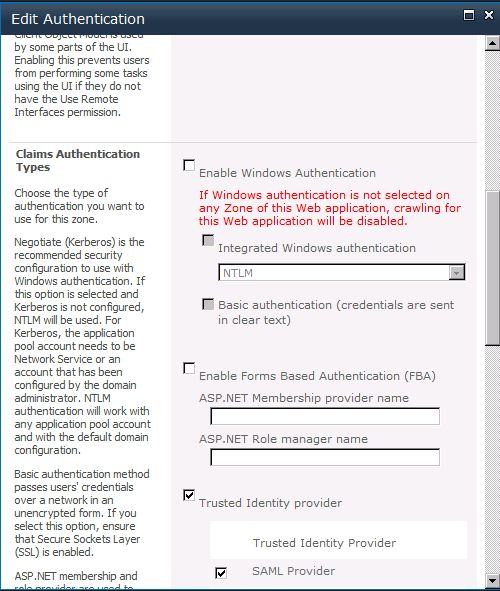
So now we’ll open up the browser and navigate to Central Administration. Click on the Manage Web Applications link, then click on the web application in the list that’s going to use ADFS to authenticate, then click the Authentication Providers button in the ribbon. Click the link in the dialog that corresponds to the zone in which you are going to use ADFS to authenticate. Scroll down to the Authentication Types section. You can now de-select NTLM, and you should see a new provider called “SAML Provider” in the list of trusted providers.
8 Some tests
Search for User
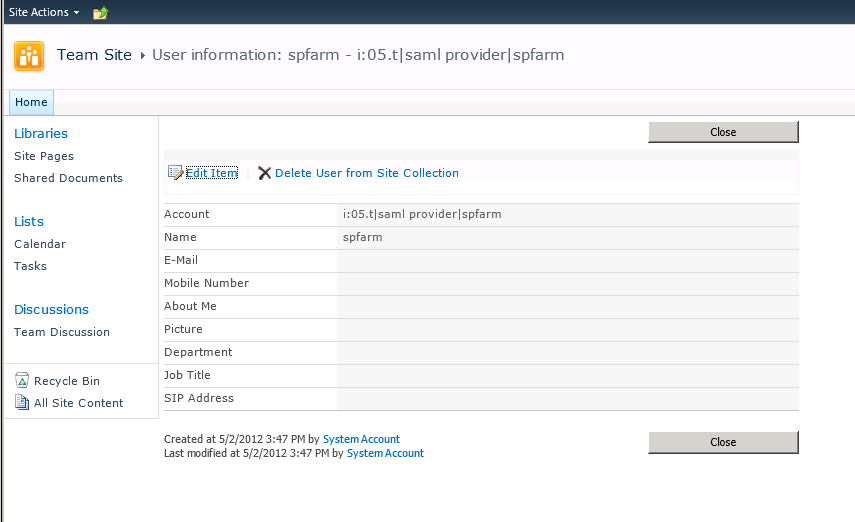
User Information
9 Install ADFS on Windows Server 2008R2
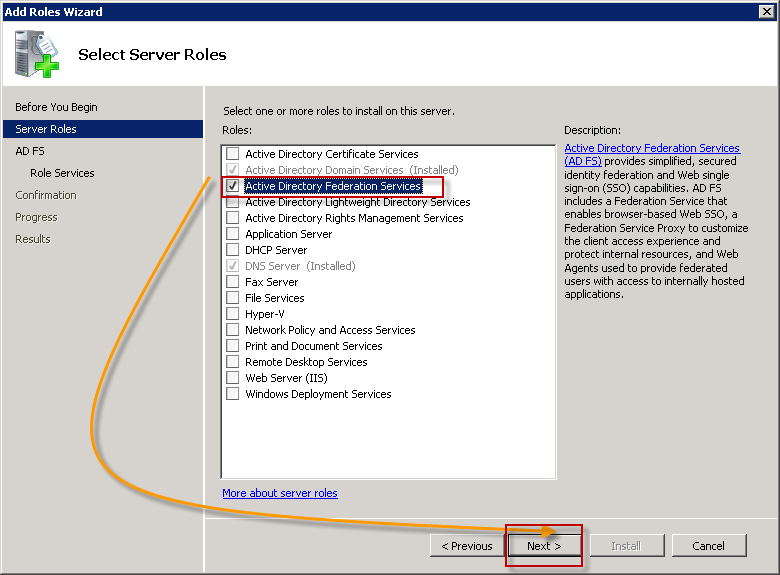
Under Server Roles, Select Active Directory Federation Services and click Next
Some information, click again Next
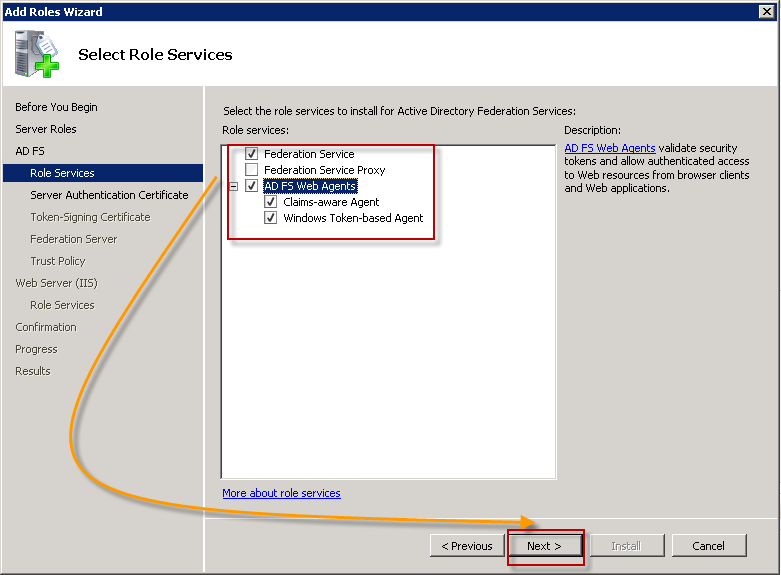
Select the roles that you want. I my case, the important thing is to select "Federation Service"
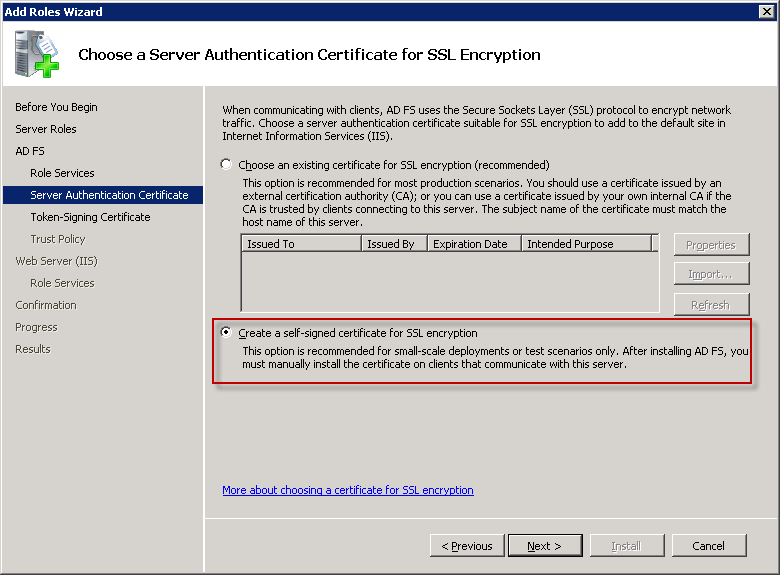
Choose here for the second Option: Create a self-signed certificate for SSL encryption
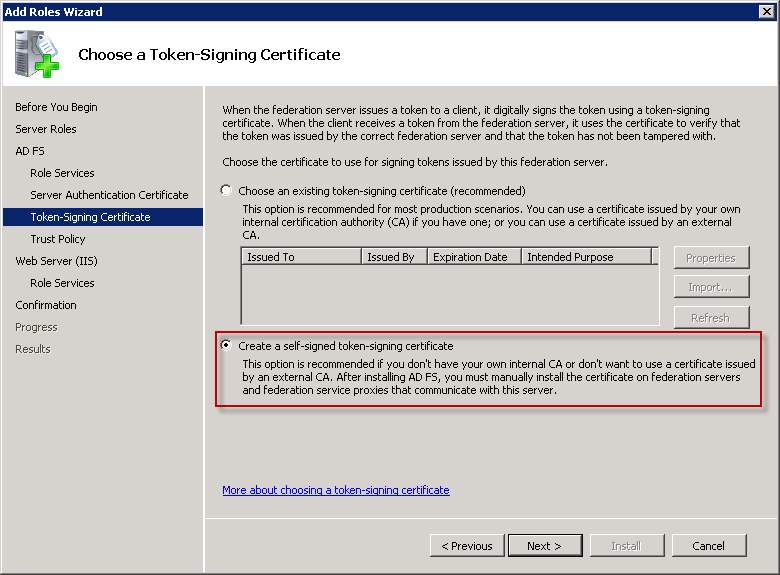
Again the same, the second option and click next
Create a new Trust Policy and Next
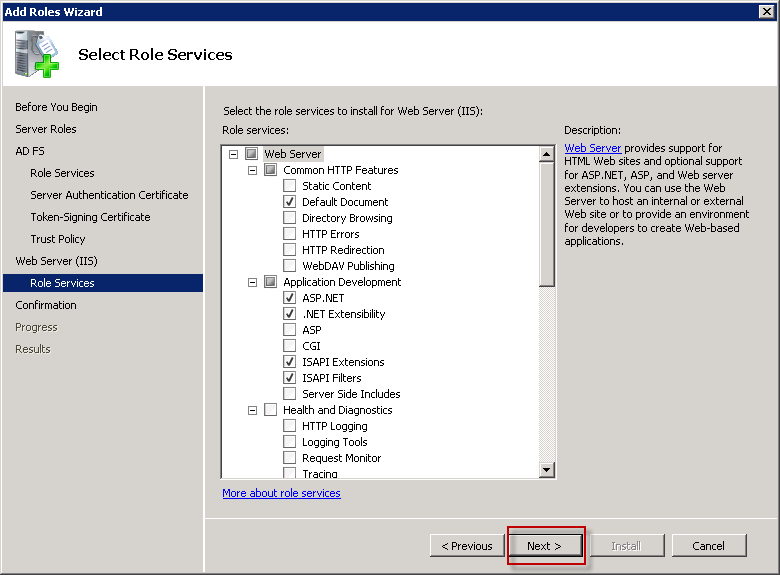
Select additional role services, but I left the default values
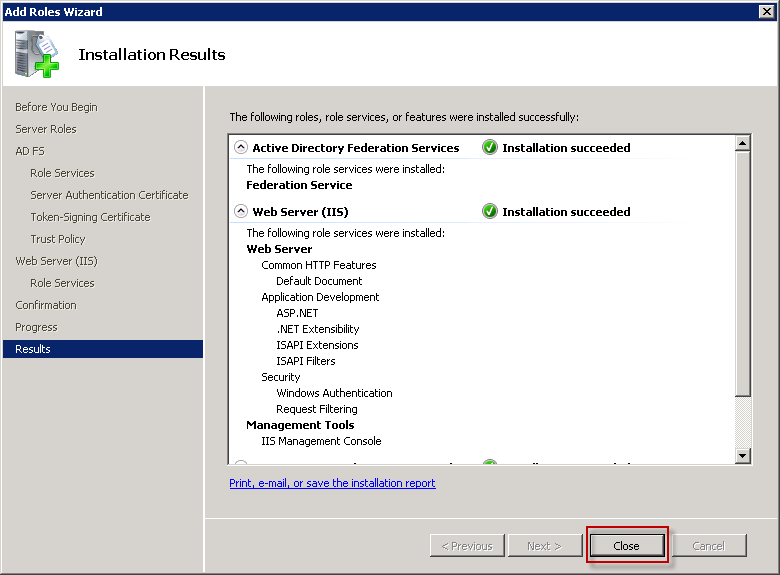
The install will begin, and when finished run ADFS
10 Resources
| http://shannonbray.wordpress.com/2010/05/29/configuring-claims-based-authentication-for-sharepoint-with-ad-fs-2-0/ |
| http://blogs.msdn.com/b/ekraus/archive/2010/03/22/sharepoint-2010-claims-based-auth-with-adfs-v2.aspx |
| http://blogs.msdn.com/b/sharepoint_fr/archive/2010/11/24/configuration-de-sharepoint-2010-et-d-adfs-v2-de-bout-en-bout.aspx |
| http://blogs.technet.com/b/speschka/archive/2010/07/30/configuring-sharepoint-2010-and-adfs-v2-end-to-end.aspx ( !! thanks for all the good information ) |
