Cel Shading
Charles Petzold has been experimenting with cel shading on his blog at the request of Chris Cavanagh (whom has updated his 3D physics XBAP btw). Though we do use shaders internally, WPF3D's API is fixed function so you have to dig out the ol' fixed function playbook to achieve fancier effects. The plays usually boil down to abusing textures :)
First, make a small, one dimensional texture containing the colors you want. Here are a couple of examples I've zoomed in on and highlighted the pixels to make things clearer. Why I'm using grayscale will make sense in a minute:
Next, we need a function that maps to [0, 1] and takes into account the light position relative to a vertex. How about the cosine of the angle to the light? Turns out we can compute that fairly quickly because it's equal to the dot product of the normal and the vector to the light divided by their lengths.
     Int32Collection idxs = mesh.TriangleIndices;
    Point3DCollection pts = mesh.Positions;
    Vector3DCollection nrms = mesh.Normals;
    PointCollection txs = mesh.TextureCoordinates;
    mesh.TextureCoordinates = null;
    for (int i = 0, count = idxs.Count; i < count; ++i)
    {
        int idx = idxs[i];
        Vector3D toLight = lightPos - pts[idx];
        toLight.Normalize();

        // The normals are pre-normalized, no need to do it again
        double dp = Vector3D.DotProduct(toLight, nrms[idx]);

        // A negative dot product means the vertex is facing away
        // from the light so let's set that to the darkest color
        if (dp < 0)
        {
            dp = 0;
        }

        txs[idx] = new Point(dp, 0);
    }
    mesh.TextureCoordinates = txs;
Naturally, you're going to need to redo this calculation any time the relationship between the light and the mesh changes so it needs to be fast. This is why I go through all of that collection nonsense (read this).
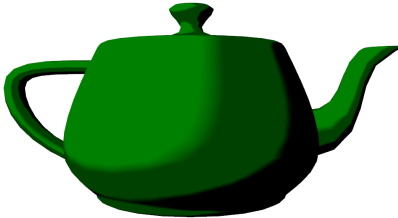
So why did I use a grayscale texture? If I baked the color in, I'd have to make a new texture any time I wanted to change the color. Instead, I can use the color knobs to set the color and use the grayscale texture like a mask. In these photos, I have a single AmbientLight with a DiffuseMaterial with AmbientColor="green" and Brush equal to the one dimensional texture. I don't actually have a real point light in the scene which helps performance.


Being that it's per-vertex, more vertices means a higher quality image and you're going to see some popping when it's animated. The teapot doesn't have too many vertices so the spout and black line on the body don't look great. On the highly tesselated torus, those issues are gone but it's still hard to get a clean, crisp edge because of the linear interpolation of the texture.
-- Jordan
P.S. If you use a texture with two colors and instead dot the normal with the direction to the camera, you'll get silhouette edges but they could look really bad because of the per-vertex nature again.
Comments
Anonymous
May 31, 2009
PingBack from http://outdoorceilingfansite.info/story.php?id=21151Anonymous
August 27, 2013
Any chance you could post your code for rendering the teapot? After reading your article it isn't clear to me where or how I should be calling that function

