Set up a CI/CD pipeline to run automated tests efficiently
Are you planning to implement automated testing in your pipeline? You probably have a few questions, such as:
- How does automated testing fit into DevOps?
- What are some different types of pipeline configurations?
- What key principles should you keep in mind?
This post aims to answer these questions and talk about the automation of tests.
How does automated testing fit into DevOps?
”DevOps is the union of people, process, and products to enable continuous delivery of value to our end users.” – Donovan Brown
Automated testing is a key part of any DevOps pipeline, allowing you to consistently and reliably test and release your solution on much shorter cycles. We use testing to validate quality, feature and infrastructure changes, and ensuring that every checkin is production ready. For guidance, read unit , continuous, and load testing, and testing a Team Services extension and tracking code coverage.
What are some of the different types of pipeline configurations?
Integrating automated testing into DevOps is a project specific design. Here are three (of many) design patterns for you to consider.
One build in Visual Studio Team Services (VSTS) or Team Foundation Server (TFS)
In this simple scenario, we integrate the automated testing into a continuous integration (CI) build. The pipeline builds the code, runs unit tests, deploys the code, runs functional tests, and deploys to production.
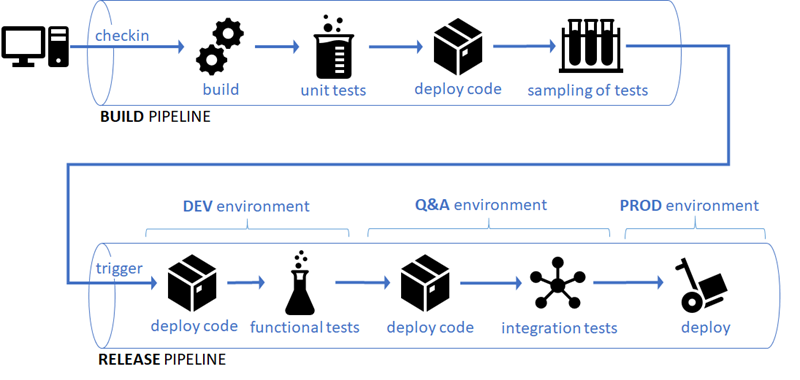
Multiple levels of testing
We include unit testing in the CI build part of the pipeline, which triggers the release part of the pipeline when a new artifact version is available.
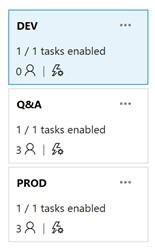
 Release Management can then be used to validate the release in multiple environments, for example development (DEV), quality assurance (Q&A), and production (PROD).
You can test every build, or enable batching and pick only the latest build.
Separate Microservice pipelines
With microservices you can even go further by treating the user interface (UI) and the back end service as separate microservices.
The user interface and the back-end are build and validated against mocked dependencies independently. Once both are validated, the environments can be integrated and validated together.
Key principles
- Think of every checkin as production ready!
Remove the idea of hot fixing and associated complexities. We like to think of this as “fix forward thinking”. - Keep first level of testing fast and efficient!
Ensure that your developers never end up waiting. There are different approaches for optimizing your tests- Run tests in parallel
- Throw more hardware at it
- Keep tests light-weight and avoid dependencies on external service
- Use mocks (for guidance, read using stubs to isolate parts of your application from each other for unit testing)
- Move long-running tests to a second level of testing!
Ensure that your pipeline is not blocked by long-running and time-consuming tests. One way to do this is to setup multiple parallel environments in Release Management, which are triggered when a CI build completes. - Test in production!
This can be accomplished in a few ways:- Feature flagging or flighting allows you to control which users have access to new features.
- Azure staging environments allow you to send a percentage of users into a staging site to expose new features.
- Application Insights includes “synthetic monitoring” to run predictable tests and compare results from release to release. Read what is monitoring for details.
References
Considerations on using Deployment Slots in your DevOps Pipeline Enabling DevOps on the Microsoft Stack Flighting deployment (beta testing) in Azure App Service How to implement feature flags and A|B testing Set up staging environments in Azure App Service What are Microservices What is DevOps What is Monitoring


