Part 22 of 31 - Using your own SQL Server in Windows Azure - 31 Days of IaaS
First, make sure and get a Windows Azure 90-Day free subscription at: https://aka.ms/try-azure to begin working with SQL Server in the cloud.
In this article, you can create a new VM and learn how to install SQL Server. You can then add disk images to the existing VM in order to split the data from the logs generated by SQL Server.
First, you will need to create a new VM using the Windows Azure portal -
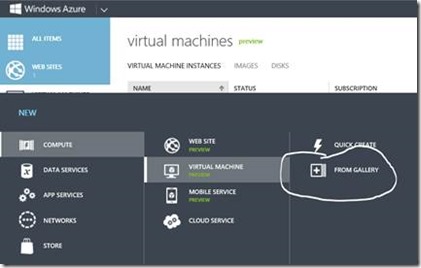
1. In the menu located at the bottom, select New | Compute | Virtual Machine | From Gallery to start creating a new virtual machine.
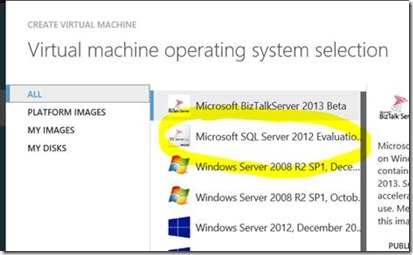
2. In the VM OS Selection page, click Platform Images on the left menu and select the Microsoft SQL Server 2012 image from the list. (Use will still need a license for SQL Server as this is a evaluation copy) Click the arrow to continue.
3. In the VM Configuration page, enter the Virtual Machine Name (i.e. "sqlvm1"), the administrator user's Password and the Size. Click the right arrow to continue.
4. On the VM Mode page, select “Standalone Virtual Machine” and a VM you created from the drop down list and either create a new storage account of use your existing storage account. Click the right arrow to continue.
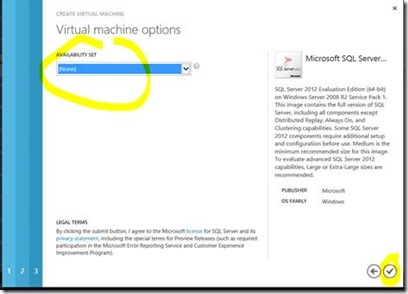
5. In the VM Options page, leave the default values and click the button to create a new VM.
6. In the Virtual Machines section, you will see the VM you created with a provisioning status. Wait until it changes to Running in order to continue with the following step.
Note: It will take from 8 to 10 minutes for the Virtual Machine to complete the provisioning process.
Attaching Empty Disk Imagesby Blain Barton and Keith Mayer
Next, you will create two empty data disks and attach them to an existing VM using the Windows Azure Management Portal. You will use these data disks to split SQL Server Data and Logs.
1. Now, you will create and attach empty data disks to store the SQL Server logs and data files, and you will also add an endpoint.
2. To do this, in the Virtual Machines section, select the SQL Server VM you created in the previous task.
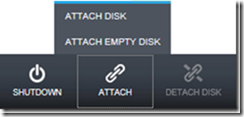
3. In the VM's Dashboard, click Attach in the menu at the bottom of the page and select Attach Empty Disk.
Attach Empty Disk
4. In the Attach Empty Disk page, set the Size to 50 GB and create the Disk.
5. Wait until the process to attach the disk finishes. Repeat the steps 1 to 3 to create a second disk.
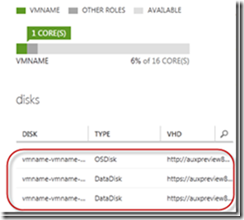
6. Open the VM's Dashboard. You will see three disks: one for the OS and other two for Data and Logs.
Note: It might take a few minutes until the data disks appear in the VM's dashboard within the Azure Portal.
Attached Data Disks
7. Finally, you need to format the disks in order to access them from the Virtual Machine. To do this, click Connect to connect to the VM using Remote Desktop connection.
8. It will ask you to download the remote desktop settings file. Click Open and log on using the Admin credentials you defined when creating the VM.
9. In the Virtual Machine, open Server Manager from Start | All Programs | Administrative Tools.
10. Expand Storage node and select Disk Management option.
Disks Management
11. The Initialize Disk dialog will appear. Leave the default values and click OK.
12. Right-click the first disk unallocated space and select New Simple Volume.
Disks Management
13. Follow the New Simple Volume Wizard. When asked for the Volume Label use SQLData.
14. Wait until the process for the first disk is completed. Repeat the steps 11 to 12 but this time using the second disk. Set the Volume Label to SQLLogs.
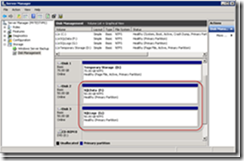
15. The Disk Management list of available disks should now show the SQLData and SQLLogs disks like in the following figure:
Disk Management
Note: Do not close the Remote Desktop Connection. You will use it in the following task.
Task 2.3 - Configuring SQL Server in the VM
In this task, you will configure SQL Server 2012. You will create the database that will be used by the web application and add Full-Text Search capabilities to it. Additionally, you will create a SQL Server user for the website.
1. Open Windows Explorer and create the following folders: F:\Data, G:\Logs and G:\Backups.
2. Open the SQL Server Management Studio from Start | All Programs | Microsoft SQL Server 2012 | SQL Server Management Studio.
3. Connect to the SQL Server 2012 default instance using your Windows Account.
4. Now, you will update the database's default locations in order to split the DATA from the LOGS. To do this, right click on your SQL Server instance and select Properties.
5. Select Database Settings from the left side pane.
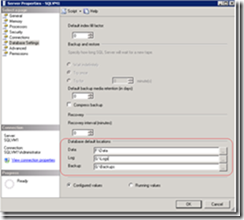
6. Locate the Database default locations section and update the default values to point to the disks you attached in the previous task and then click "Ok".
Setting Database Default Locations
7. Now, a service restart is necessary for the changes to take effect. In order to restart the service, right click on your SQL Server instance and select Restart from the context menu.
8. Restart SQL Server. In the Object Explorer, right-click on the server node and select Restart.
9. In order to enable downloads from Internet Explorer you will need to update Internet Explorer Enhanced Security Configuration. In the Azure VM, open Server Manager from Start | All Programs | Administrative Tools.
10. In the Server Manager, click Configure IE ESC within Security Information section.
Configuring IE ESC
11. In the Internet explorer Enhanced Security configuration, turn off the enhanced security for Administrators and click OK.
Internet Explorer Enhanced Security
Note: Modifying Internet Explorer Enhanced Security configurations is not good practice and is only for the purpose of this particular step-by-step guide. The correct approach should be to download the files locally and then copy them to a shared folder or directly to the VM.
12. This guide uses the AdventureWorks database. Open an Internet Explorer browser and go to https://msftdbprodsamples.codeplex.com/ to download the SQL Server 2012 sample databases. Once on the page click SQL Server 2012 DW and then download Adventure Works 2012 Data File. Download the file to F:\Data.
Note: The AdventureWorks database can also be downloaded as a .zip file. If you choose this format, right-click the file to open its properties window and then click Unblock. Then, extract the database to F:\Data.
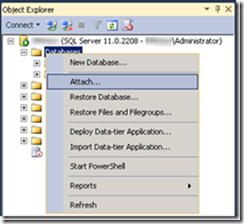
13. Add the AdventureWorks sample database to your SQL Server. To do this, in the SQL Server Management Studio, locate your SQL Server instance node and expand it. Right click the Databases folder and select Attach.
Attaching the database
14. In the Attach Databases dialog, press Add. Browse to the data disk and select the Adventure Works data file.
15. Select the AdventureWorks2012 Log entry and click Remove.
Removing AdventureWorks2012 Log entry
16. Press OK to add the database.
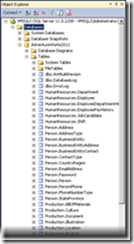
17. In the Databases folder, locate the new AdventureWorks2012 database and explore its tables.
AdventureWorks Sample Database
18. Expand Storage node within AdventureWorks database, right-click Full Text Catalogs folder and select New Full-Text Catalog.
Note: You are creating a Full Text Catalog for the database that will be used later by the web application.
Create New Full-Text Catalog
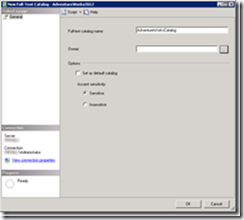
19. In the New Full-Text Catalog dialog, set the Name value to AdventureWorksCatalog and press OK.
Create New Full-Text Catalog
20. Check that the Full-Text Catalog you created appears in the Full-Text Catalogs folder.
Create New Full-Text Catalog
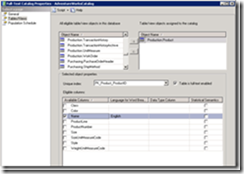
21. Right-click AdventureWorksCatalog and select Properties. In the Full-Text Catalog Properties dialog, switch to Tables/Views page.
22. Add the Production.Product table to the Table/View objects assigned to the Catalog list. Then, check the Name column and click OK.
Create New Full-Text Catalog
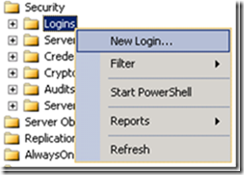
23. Add a new user for the web application you will deploy in the following exercise. To do this, expand Security folder within the SQL Server instance. Right-click Logins folder and select New Login.
Creating a New Login
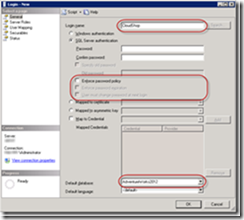
24. In the General section, set the Login name to CloudShop. Select SQL Server authentication option and set the Password to Azure$123.
Note: If you enter a different username or password than those suggested in this step, do not forget in the next exercise to update the web.config file of the web application to match those values.
25. Unselect Enforce password policy checkbox to avoid having to change the password the first time you log on, and set the Default database to AdventureWorks.
Creating a New Login
26. Click User Mapping on the left pane. Select the map checkbox in the AdventureWorks database row and click OK.
Mapping the new User to the AdventureWorks Database
27. Expand AdventureWorks database within Databases folder. In the Security/Users folder, double-click CloudShop user.
28. Select the Membership page, and select the db_owner role checkbox for the CloudShop user and click OK.
Adding Database role membership to CloudShop user
Note: The application you will deploy in the next exercise uses Universal Providers to manage sessions. The first time the application runs, the provider will create the Sessions table within the database. For that reason, you are assigning a db_owner role to the CloudShop user. Once you run the application for the first time, you can remove this role as these permissions will not be needed.
29. Now, enable Mixed Mode Authentication to the SQL Server instance. To do this, in the SQL Server Management Studio, right-click the server instance and click Properties.
30. Click Security in the left side pane and then select SQL Server and Windows Authentication mode under Server Authentication section. Click OK to save changes.
31. Restart the SQL Server instance. To do this, right-click the SQL Server instance and click Restart.
32. Close the SQL Server Management Studio.
33. In order to allow the web application access the SQL Server database you will need to add an Inbound Rule for the SQL Server requests in the Windows Firewall. To do this, open Windows Firewall with Advanced Security from Start | All Programs | Administrative Tools.
34. Select Inbound Rules node, right-click it and select New Rule to open the New Inbound Rule Wizard.
Creating an Inbound Rule
35. In the Rule Type page, select Port and click Next.
New Inbound Rule Wizard
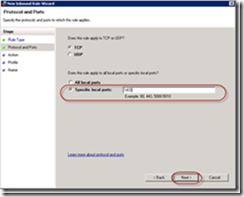
36. In Protocols and Ports page, leave TCP selected, select Specific local ports, and set its value to 1433. Click Next to continue.
New Inbound Rule Wizard
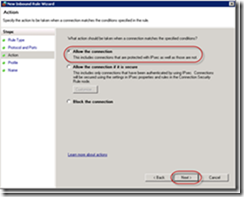
37. In the Action page, make sure that Allow the connection is selected and click Next.
New Inbound Rule Wizard
38. In the Profile page, leave the default values and click Next.
39. In the Name page, set the Inbound Rule's Name to SQLServerRule and click Finish
New Inbound Rule Wizard
40. Close Windows Firewall with Advanced Security window.
Note: Make sure the Named Pipes and TCP/IP protocols are enabled for the Server Instance. You can verify this by going to the SQL Server Configuration Manager and within SQL Server Network Configuration node check that these protocols' status are set to enable.
Remember to restart the SQL Server instance after enabling a protocol.
Close the Remote Desktop Connection.
I would like to thank Keith Mayer for assisting on the attaching the disks and log files information, thanks for your support for - Day 22 of 31 - Using your own SQL Server in Windows Azure.
Try Windows Azure https://aka.ms/try-azure Get Started Now – (Free account requires a credit card but not charged)
Get your Microsoft Trial Products at https://aka.ms/msproducts
In case you missed any of the series here is a list to all of the articles: https://aka.ms/31azure
