Enabling Hyper-V Remote Management - Configuring Constrained Delegation For SMB and Highly Available SMB
 Windows Server 8 brings support for storing and running Hyper-V virtual machines on SMB2.2 file shares, which is pretty handy, especially with the new Scale-Out/Continuously Available file server features in Windows Server 8. However it does bring one challenge to the table – if you want to remotely manage your Hyper-V servers and use SMB then Kerberos's single hop tickets become a problem.
The basic issue is that when you login to a domain and want to access a remote machine the domain issues a security token which is presented to the remote server to saying who you are and what not – however just like a concert ticket once it’s scanned at the door it’s no good. This means that in the case of Hyper-V remote management your token is only valid between the computer running the UI and the Hyper-V server so if/when you try to configure a virtual machine to use resources on a third computer there is no longer a valid token to ensure that you, the person configuring that virtual machine, should have access to the resources on the third machine. Now once the VM has been configured the remote resources are accessed in the context of the Hyper-V servers computer account but during virtual machine creation or when attaching VHDs/ISOs to the VM we have to ensure that the user that’s performing that operation also has access to those resource and isn’t just piggy backing on the Hyper-V servers rights to access those files.
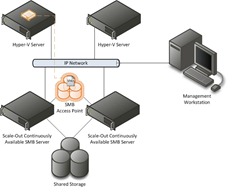 In order to solve this challenge we need to enable constrained delegation which tells active directory that between two computers, in this case the Hyper-V server and the SMB server, and for specific services, in this case CIFS/SMB, its allowed to effectively re-issue the token for the user – kind of like a re-admission stamp. For the examples below let’s take an environment similar to this – we have a two node Windows Server 8 Scale-Out file server cluster, two standalone Hyper-V Servers and a remote management workstation. In this environment we want to create an SMB share and then create a new VM on that share. If we just create the SMB share and try to create a virtual machine on that share creating the VM will fail with access denied or the operation has failed errors – so we have to configure the security and delegation.
Please be aware that Hyper-V on Windows Server 2008 or R2 does not support virtual machines using SMB or any NAS storage – this is a new feature for Windows Server 8 and requires that the the SMB server support SMB 2.2. See https://technet.microsoft.com/en-us/library/dd183729.aspx for more details.
Overview Of Process
- Create Active Directory Groups For Hyper-V Server and Hyper-V Administrative Users (optional)
- Configure Constrained Delegation Between Hyper-V Servers and SMB Server
- Create SMB Share For Virtual Machines
- Create Virtual Machines
Create Active Directory Groups For Hyper-V Server and Hyper-V Administrative Users (optional)
This is an optional step – you can chose to specify all of the computer and user accounts specifically during section 3 “Create SMB Share For Virtual Machines” steps 7.2, 7.3, 8.2, 8.3. I like utilizing security groups as it ensures that as I change or grow an environment that new servers and users get access to resources in a uniform way.
- Create A New Security Group Which Will Contain All Hyper-V Servers That Will Host VMs On The SMB Share (hv-hosts in my example)

- Add The Computer Accounts Of All Hyper-V Servers To The Security Group (37-4611K2615L and 37-4611K2617L in my example)
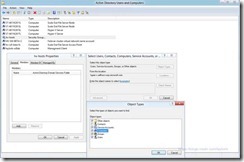
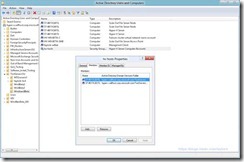
- Create A New Security Group Which Will Contain All Users Accounts Of Admins That Will Create VMs On The SMB Share (hv-admins in my example)
- Add The User Accounts of The Admins To The Security Group
Configure Constrained Delegation Between Hyper-V Servers and SMB Server
For Each Hyper-V Server…
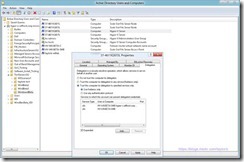
- Using The Active Directory Users and Computers Dialog Open The Properties Dialog On The Computer Account and Select The Delegation Tab
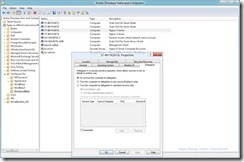
- Select “Trust this computer for deliberation to the specified services only” Correction Use Kerberos only works
and “Use any authentication protocol”

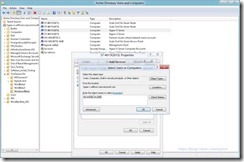
- Select “Add” and Provide the Name Of The SMB Server (or Cluster Access Point for Scale Out of Highly Available Shares) (hv-w8-beta-smb in my example)
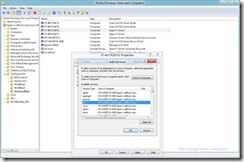
- Select The “cifs” Service – CIFS Is Another Name For SMB
Create SMB Share For Virtual Machines
These steps are specific to Windows 8 Consumer Preview (Beta) – if you are using a different OS the pertinent steps are 7.2, 7.3, 8.2, 8.3
- Using Server Manager Select the “File and Storage Services” Tab On the Left Side Then “Shares” From The Pop Out Menu
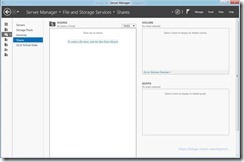
- Select The Link To Create a New Share or From Tasks Select “Create a new share”
- Select the “SMB Share – Server Application” From The Profile List (this will give you the correct options in the wizard)

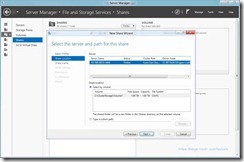
- Select the Server and Volume (or path) Where You Want To Create the Share (hv-w8-beta-smb and c:\clusterstorage\volume1 in my example)
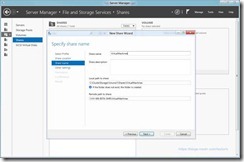
- Provide a Name For the Share (VirtualMachines in my example)
- Ensure That “Enable Continuous availability” Is Selected
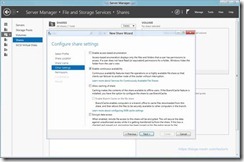
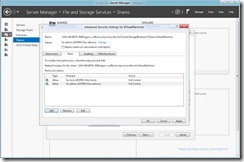
- On The Permissions Tab Select Customize Permissions
- The Following Few Steps are Optional – I Personally Don’t Like Inherited Permissions or Local Groups Because They Reduce My Control Over Access
- Select “Disable Inheritance” and “Convert inherited permissions into explicit permissions on this object”
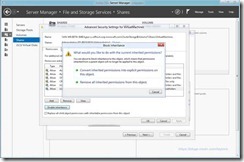
- Remove The Following Permissions: Users (Special), Users (Read & Execute), Administrators (Full Control/This Folder), Administrators (Full Control/Subfolders)
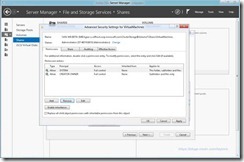
- Change The Owner From Administrators To The Active Directory Group Created Earlier Containing The Hyper-V Administrators, or another group as desired (hv-admins in my example)
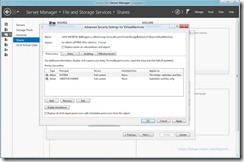
- Select “Disable Inheritance” and “Convert inherited permissions into explicit permissions on this object”
- Add Full Control Permissions For The Hyper-V Administrators Using The Active Directory Group Created Earlier (hv-admins in my example)

- Add Full Control Permissions For The Hyper-V Servers Using The Active Directory Group Created Earlier (hv-hosts in my example)
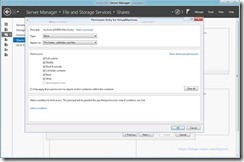
- The Following Few Steps are Optional – I Personally Don’t Like Inherited Permissions or Local Groups Because They Reduce My Control Over Access
- On The Share Tab
- Verify Your Settings and Create the Share
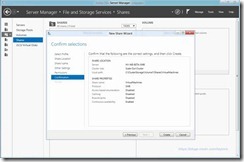
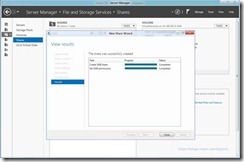
Create Virtual Machines
- Using Hyper-V Manager Open The New Virtual Machine Wizard
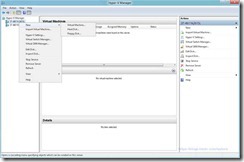
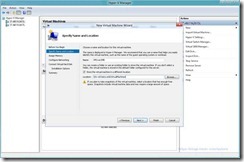
- Specify a Name For the Virtual Machine and The Location as Being On The SMB Share Previously Created (this is the location that will contain the configuration, smart paging and save state files for the virtual machine)
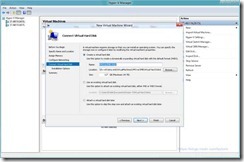
- Similarly Specify A VHD (VHDx) Location On The SMB Share For the Virtual Machine
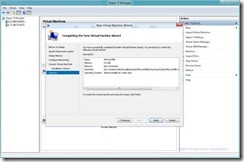
- Complete The Wizard And You’ve Got a VM Created on SMB All Done Via Remote Management
Done…
I would like to thank Jose Barreto – his blog post Using Constrained Delegation to remotely manage a server running Hyper-V that uses CIFS/SMB file shares gives a great overview of this process as well.
Taylor Brown
Hyper-V Enterprise Deployment Team
taylorb@microsoft.com
https://blogs.msdn.com/taylorb

Comments
Anonymous
November 06, 2012
See my new post blogs.msdn.com/.../remote-administration-without-constrained-delegation-using-principalsallowedtodelegatetoaccount.aspxAnonymous
December 05, 2012
Does these work on Windows 2012?Anonymous
December 29, 2013
yes it workes on 2012 and 2012 r2Anonymous
August 12, 2015
do I need to be 2012 a forest to running failover cluster? sorry I have more dumb questions to ask ? do I need to be 2012 a forest to running failover cluster? I just run Install-WindowsFeature RSAT-AD-PowerShell. Enable-SmbDelegation –SmbServer FileServer1(SOFS1) –SmbClient HV1 and get thie error: SMB Delegation CMD Lets Require the AD forest to be in windows Server 2012. Forest Functional level. thank you more about the scenario social.technet.microsoft.com/.../hyper-v-over-smb3-access-denied
