Note
Access to this page requires authorization. You can try signing in or changing directories.
Access to this page requires authorization. You can try changing directories.
This article is the second one about a solution we have built with my friend Hervé Leclerc (Alter Way CTO) in order to automate a Kubernetes Cluster deployment on Azure:
· Kubernetes and Microsoft Azure
· Programmatic scripting of Kubernetes deployment
· Provisioning the Azure Kubernetes infrastructure with a declarative template
· Configuring the Azure Kubernetes infrastructure with Bash scripts and Ansible tasks
· Automating the Kubernetes UI dashboard configuration
· Using Kubernetes…
So let’s explain different ways of automating Kubernetes deployment through scripting technologies (Azure CLI and PowerShell).
Overview of the solution
Provisioning of a Kubernetes cluster built upon a configurable number of etcd nodes and Kubernetes nodes (master and minions) is implemented with Azure CLI (init-static/init-script.sh) and PowerShell (AzureKubernetes/Scripts/Deploy-VM-Cluster-PowerShell.ps1).
Configuration of cluster CoreOS nodes is achieved through declaration in cloud-config file of various OS-level items (network configuration, user accounts, systemd units) that will be used by coreos-cloudinit program to configures the OS after startup or during runtime (https://coreos.com/os/docs/latest/cloud-config.html).
The whole deployment is achieved within about 20 minutes.
Cloud-config file
The implemented Azure CLI generates a cloud-config files depending on the configuration. The PowerShell script implementation goes a bit less far. It simply reuses yml files generated by Azure CLI (“init-static\custom-data\kubernetes-cluster-etcd-nodes.yml” for etc nodes and “init-static\custom-data\kubernetes-cluster-main-nodes-template.yml" for master and minion nodes) in order to apply the targeted nodes configuration.
For both cloud-config files (“kubernetes-cluster-etcd-nodes.yml” and “kubernetes-cluster-main-nodes-template.yml”), the file uses the YAML file format, which uses whitespace and new-lines to delimit lists, associative arrays, and values. It contains a “#cloud-config” header followed by an associative array “coreos” and “write_files” keys:
· The coreos.update.* parameters manipulate settings related to how CoreOS instances are updated. These fields will be written out to and replace “/etc/coreos/update.conf”. The “coreos.units.*” parameters define a list of arbitrary systemd units to start after booting. This feature is intended to start essential services required to mount storage and configure networking. Each item is an object with the following fields: name (unit’s name), content (unit file), command (command to execute on unit: start, stop, reload, restart,...).
· The write_files directive defines a set of files to create on the local filesystem. Each item in the list may have the following keys: path (absolute location on disk where contents should be written, content (data to write at the provided path), permissions, owner….
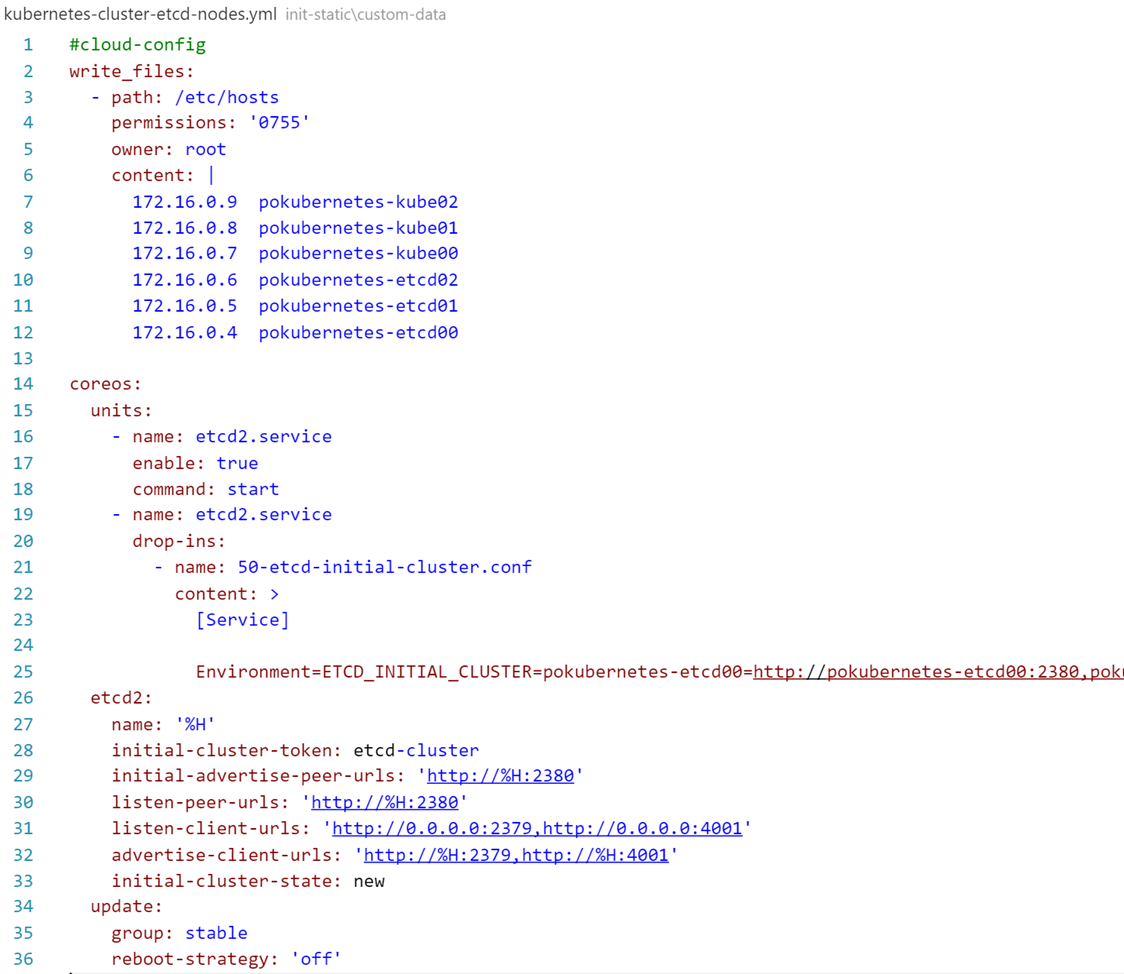
The following “kubernetes-cluster-etcd-nodes.yml” file is the cloud-config file for the etcd node. It’s a very short one, because the etcd role is quite simple to configure.
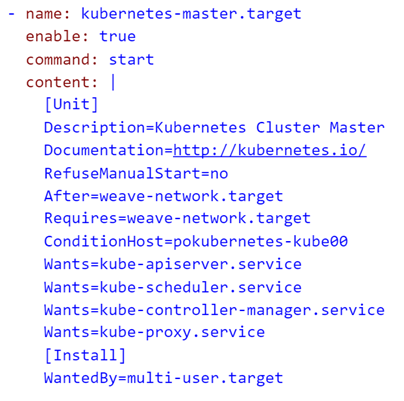 The “kubernetes-cluster-main-nodes-template.yml” file is quite bigger. It declares for each role, the different required services. For example, in the master node, the unit name “kubernetes-master” requires “weave network” and will be configured with “kube-apiserver”, “kube-scheduler”, “kube-controller-manager” and “kube-proxy” services, as described on Kubernetes cluster deployment topology.
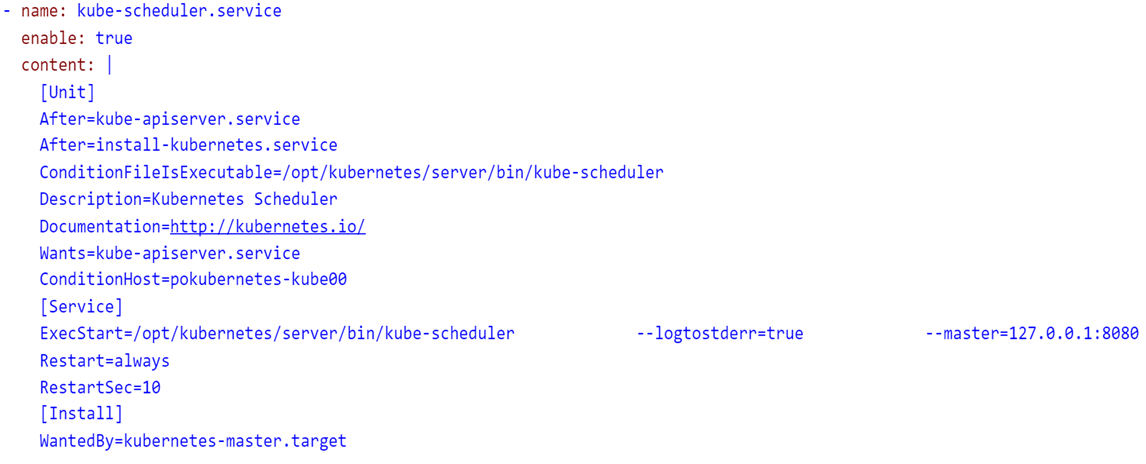
The launch of the corresponding service will be done by bash script inside “ExecStartPre” or “ExecStart” commands. For example, the installation of the “kube-scheduler” service is the following:
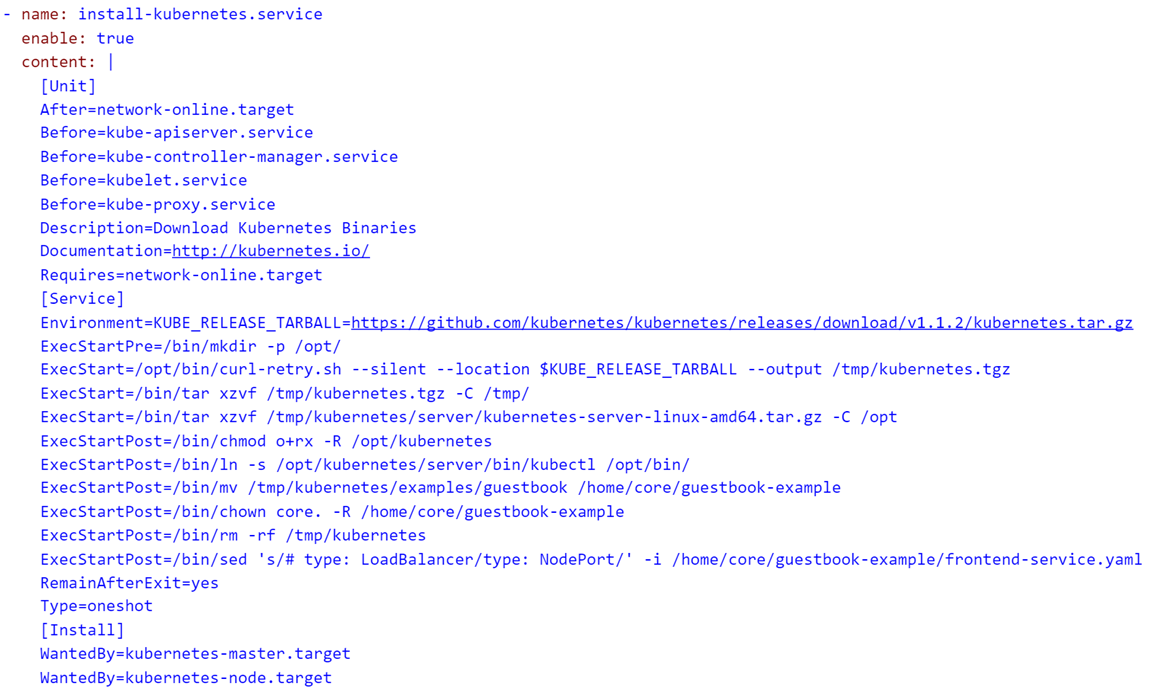
These services may themselves be dependent on other ones. For example, all Kubernetes services require first the installation of Kubernetes, which is done in the following way:
Once the cloud-config files are ready, you just have to inject them with the “CustomData” option which is available for both Azure CLI and PowerShell.
In PowerShell, the corresponding parameter is “-CustomData”:
$vm = Set-AzureRmVMOperatingSystem -VM $vm -Linux -ComputerName $vmName `
-Credential $credential -CustomData $customData
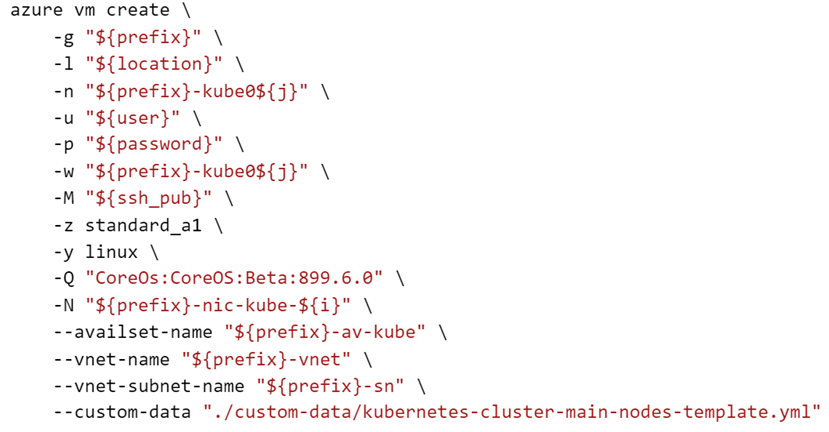
In Azure CLI, the corresponding parameter is “--custom-data”:
And that’s it for the programmatic deployment of a Kubernetes cluster.
Stay tune for the next article. We will speak about a declarative way to reach the same objective.
