Using the Azure ARM REST API – Get Access Token
This week I’ve been busy with trying to figure out how you can ‘directly’ talk to the Azure ARM REST API instead of using PowerShell or the Azure CLI. Because I could not find a lot of information about this topic online I thought it would nice to share some of learnings.
But why would you even want to directly talk to the Azure ARM REST API? Good question ![]() Most of the time I would recommend using tools like PowerShell or the Azure CLI to communicate with the Azure ARM REST API because that’s often way easier. In this case the customer wanted to have all the workflow logic centralized in the tooling which was used for the deployment of the Azure Resources. The deployment tooling could deploy an ARM Template but for the complete configuration of the Azure Resource (WebApp) there was also a need for some pre- and post-activities like configuration of the Diagnostic Logging which preferably should be done using ‘simple’ web service calls to the Azure ARM REST API.
Most of the time I would recommend using tools like PowerShell or the Azure CLI to communicate with the Azure ARM REST API because that’s often way easier. In this case the customer wanted to have all the workflow logic centralized in the tooling which was used for the deployment of the Azure Resources. The deployment tooling could deploy an ARM Template but for the complete configuration of the Azure Resource (WebApp) there was also a need for some pre- and post-activities like configuration of the Diagnostic Logging which preferably should be done using ‘simple’ web service calls to the Azure ARM REST API.
In this firs blog post I’m going to describe how you could get the AccessToken needed for the further Authentication against the Azure ARM REST API.
Azure ARM REST API
Azure Resource Manager provides a new way for you to deploy and manage the services that make up your applications. For an introduction to deploying and managing resources with Resource Manager, see Azure Resource Manager Overview. Most, but not all, services support Resource Manager, and some services support Resource Manager only partially. Microsoft will enable Resource Manager for every service that is important for future solutions, but until the support is consistent, you need to know the current status for each service. For information about the available services and how to work with them, see Resource Manager providers, regions, API versions and schemas. [*from Azure Resource Manager REST API Reference]
Authentication
So how does the authentication work when you want to to do a web request call against the Azure ARM REST API? You need to supply a bearer Access Token in the request Header of the web request. But how do you get that AccessToken? You can retrieve the AccessToken by creating an Active Directory application and service principal and use a ClientID and ClientSecret to retrieve the AccessToken. We will use PowerShell to create the Service Principal to access resources in Azure.
Create a service principal to access resources
- Create the AD application with a password
- Create the service principal
- Assign the Contributor role to the service principal
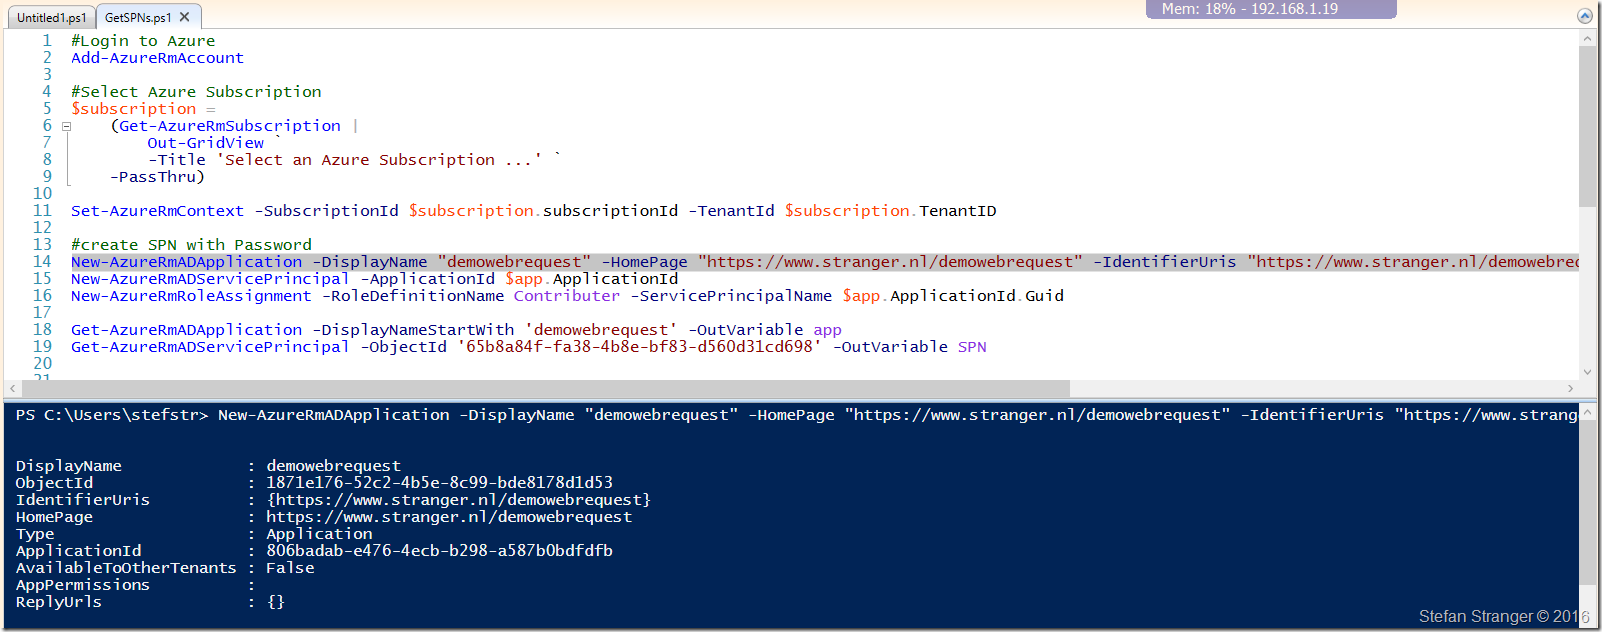
I used the following PowerShell code:
 [sourcecode language='powershell'  padlinenumbers='true']
#Login to Azure
Add-AzureRmAccount

#Select Azure Subscription
$subscription =
    (Get-AzureRmSubscription |
        Out-GridView `
        -Title 'Select an Azure Subscription ...' `
    -PassThru)

Set-AzureRmContext -SubscriptionId $subscription.subscriptionId -TenantId $subscription.TenantID

#create SPN with Password
New-AzureRmADApplication -DisplayName "demowebrequest" -HomePage "https://www.stranger.nl/demowebrequest" -IdentifierUris "https://www.stranger.nl/demowebrequest" -Password "P@ssw0rd!" -OutVariable app
New-AzureRmADServicePrincipal -ApplicationId $app.ApplicationId
New-AzureRmRoleAssignment -RoleDefinitionName Contributor -ServicePrincipalName $app.ApplicationId.Guid

Get-AzureRmADApplication -DisplayNameStartWith 'demowebrequest' -OutVariable app
Get-AzureRmADServicePrincipal -ServicePrincipalName $app.ApplicationId.Guid -OutVariable SPN
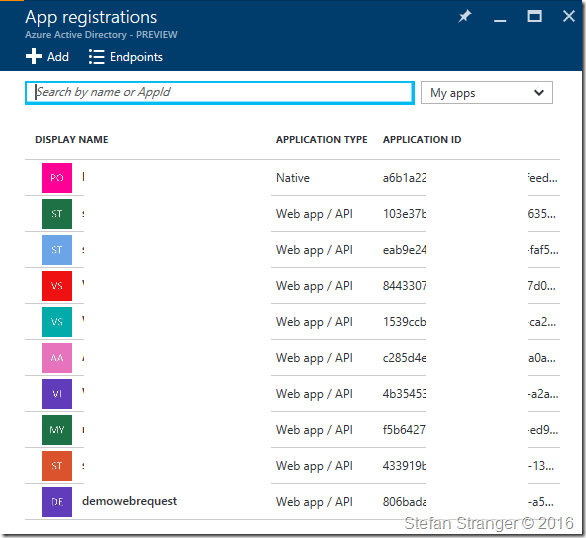
If you now go to App Registrations in the Azure Portal you see the demowebrequest application being created.
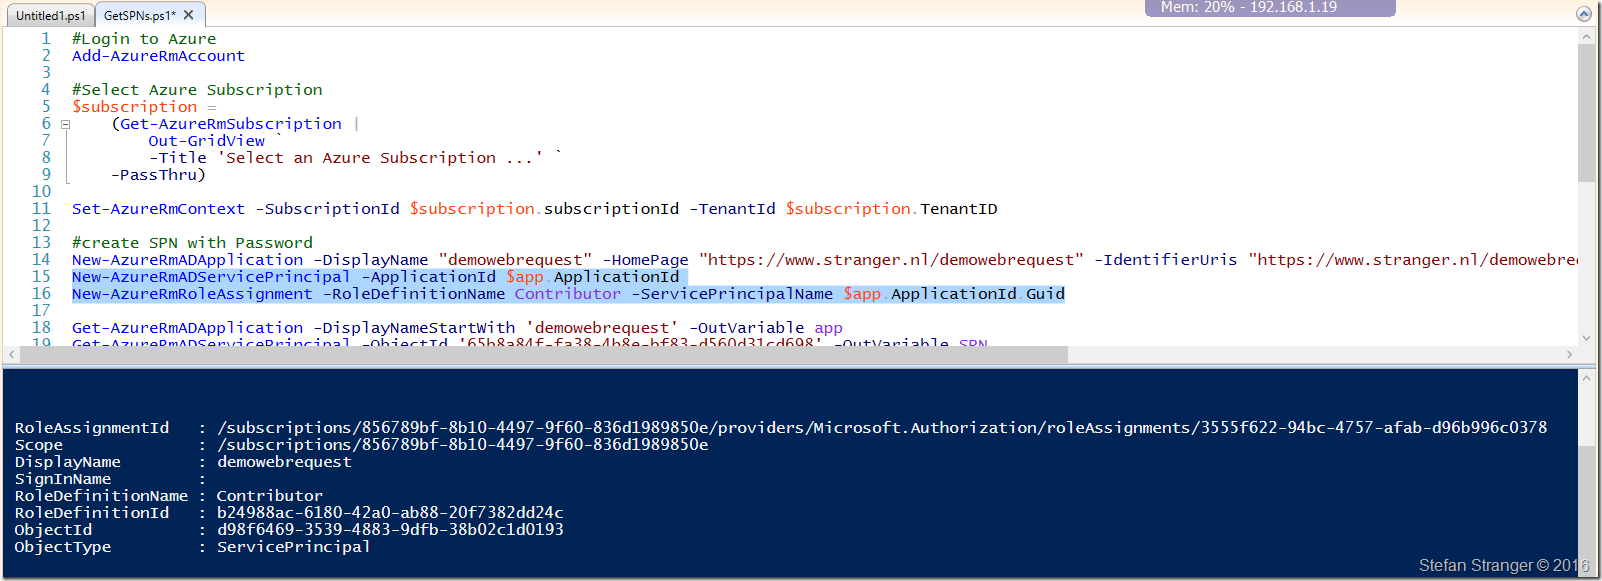
We now need to create a new Service Principal Name and assign the correct Contributor Role.
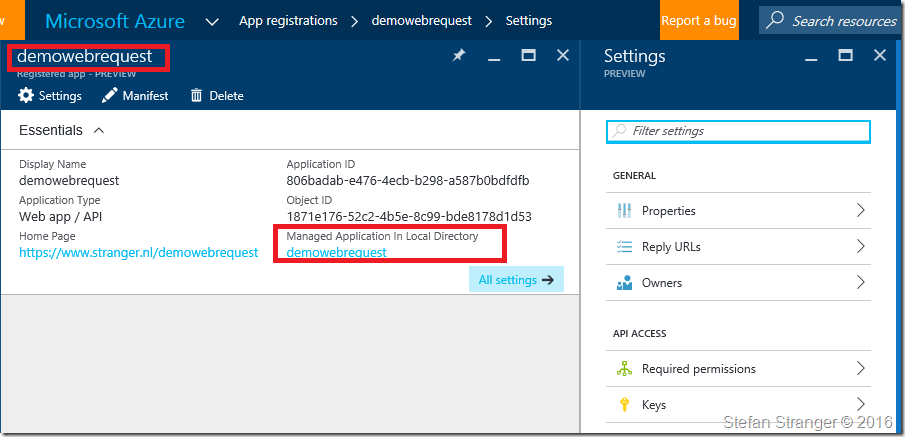
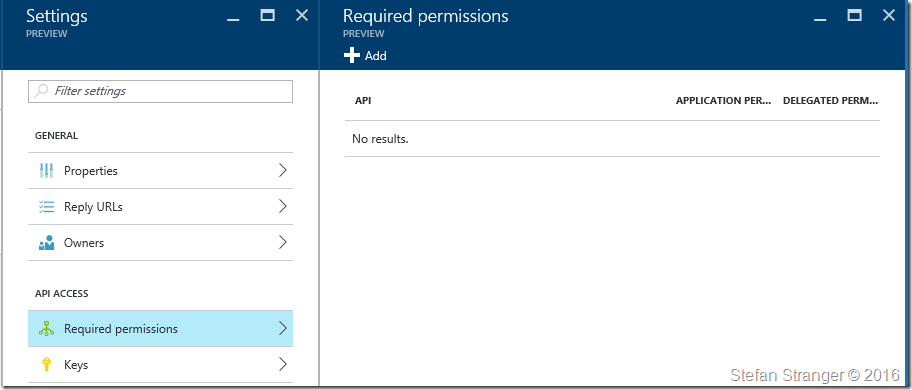
If everything goes ok you see the following in the Azure Portal under App Registrations –> demorequest –> Settings.
Next we need to set the correct Required permissions and create a Key.
Set required permissions. Go to Required Permissions and click on Add.
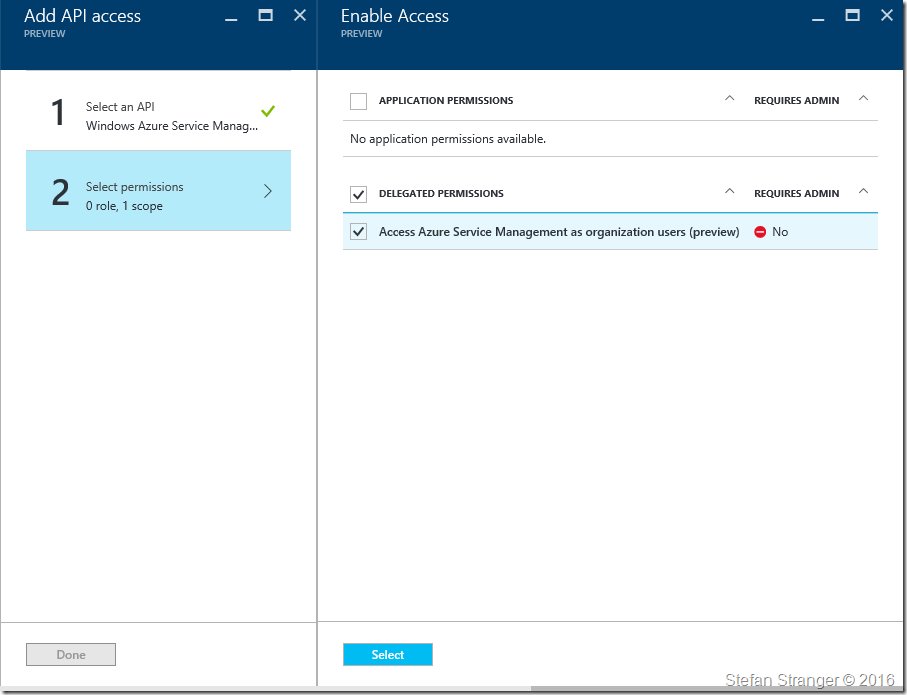
Select the Access Azure Service Management as organization users (preview) API
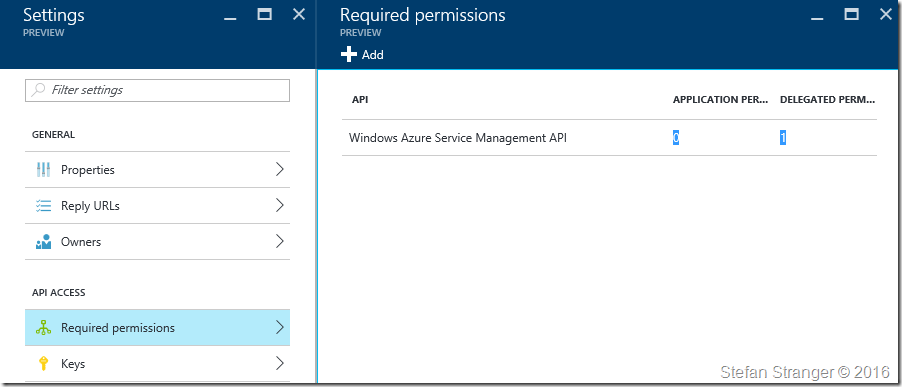
And finally select the following permissions.
We have now configured the correct permissions for the application..
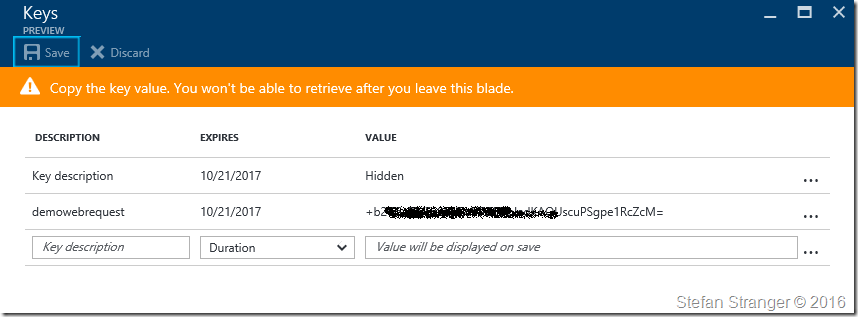
The last step in this process is to create a new Key.
Select Keys under App registrations –> [appname] –> Settings pane in the Azure Portal and create a new key.
Enter a Key description and save the value on save.
We now have the following information available to get an AccessToken:
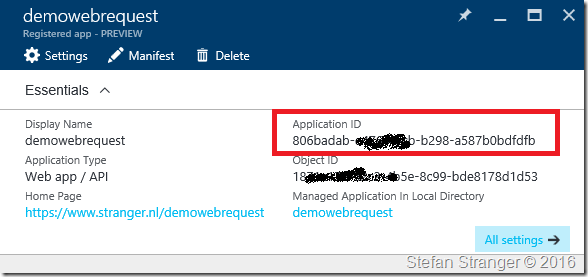
- ClientId: this is application id which can be found in the Azure Portal
- ClientSecret: this is the key value which we created earlier.
Use ClientId and ClientSecret to retrieve AccessToken
Now we have the ClientID and ClientSecret we can do web call to receive an AccessToken which can be used for authentication against the Azure ARM REST API.
Let’s use CURL to retrieve the AccessToken. You also need to enter the tennantid in the request url. You can find the tennantid if you have use the PowerShell script I showed earlier by returning the $subscription.tennantid value in PowerShell.
 [sourcecode language='bash' ]
curl --request POST "https://login.windows.net/[tennantid]/oauth2/token" --data-urlencode "resource=https://management.core.windows.net" --data-urlencode "client_id=[clientid]" --data-urlencode "grant_type=client_credentials" --data-urlencode "client_secret=[clientsecret]"
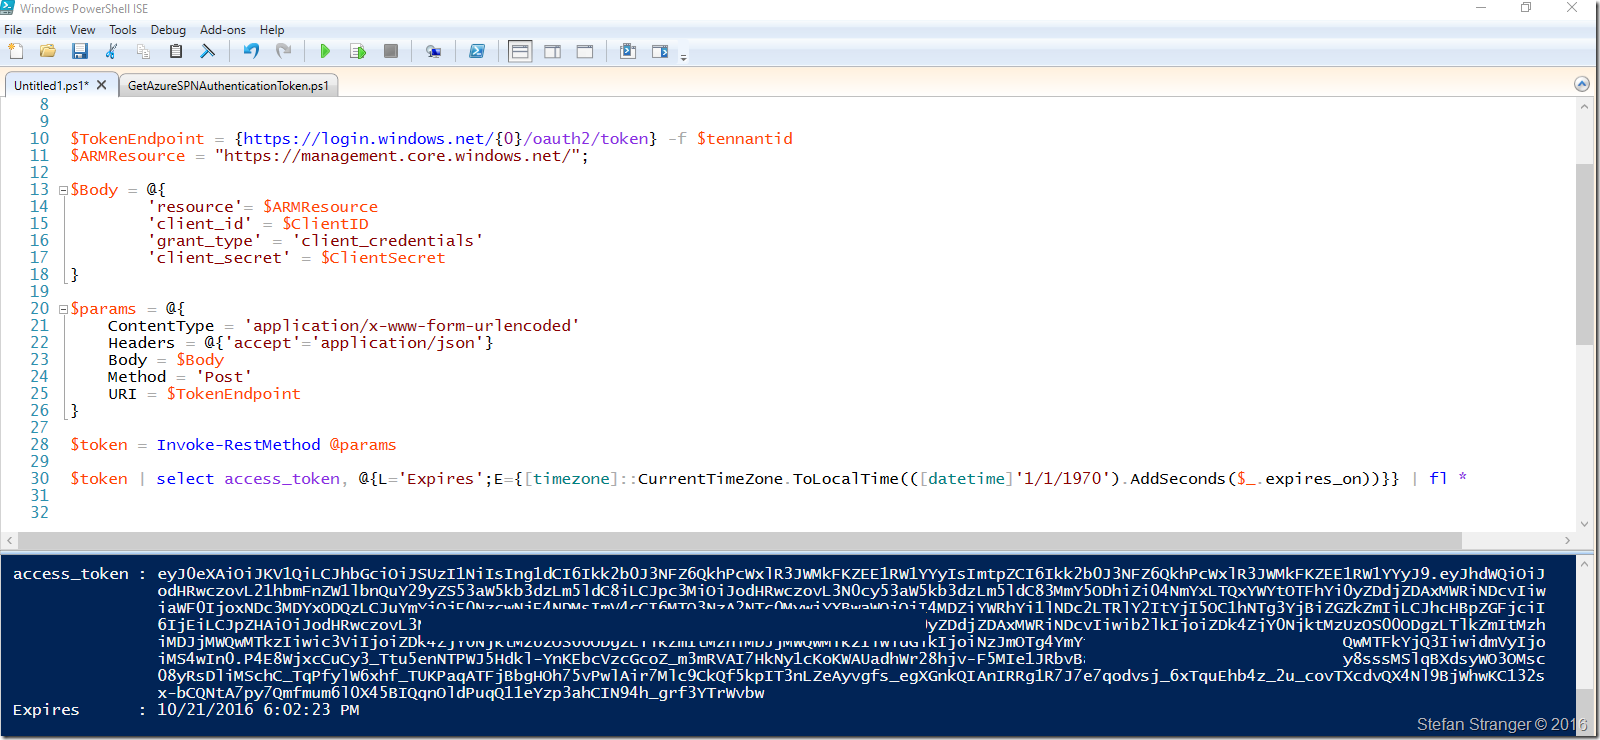
If you would rather use PowerShell to retrieve this AccesToken you can use the following PowerShell code:
 [sourcecode language='powershell' ]
#Azure Authtentication Token

#requires -Version 3
#SPN ClientId and Secret
$ClientID       = "clientid" #ApplicationID
$ClientSecret   = "ClientSecret"  #key from Application
$tennantid      = "TennantID"


$TokenEndpoint = {https://login.windows.net/{0}/oauth2/token} -f $tennantid
$ARMResource = "https://management.core.windows.net/";

$Body = @{
        'resource'= $ARMResource
        'client_id' = $ClientID
        'grant_type' = 'client_credentials'
        'client_secret' = $ClientSecret
}

$params = @{
    ContentType = 'application/x-www-form-urlencoded'
    Headers = @{'accept'='application/json'}
    Body = $Body
    Method = 'Post'
    URI = $TokenEndpoint
}

$token = Invoke-RestMethod @params

$token | select access_token, @{L='Expires';E={[timezone]::CurrentTimeZone.ToLocalTime(([datetime]'1/1/1970').AddSeconds($_.expires_on))}} | fl *
[sourcecode language='powershell' ]
In the next blog post we are going to use this AccessToken to authenticate against the Azure ARM REST API and do some more web requests.
Hope you like it.
References:
- Azure Resource Manager REST API Reference
- Use Azure PowerShell to create a service principal to access resources
Comments
- Anonymous
November 03, 2016
You should take a look at the ARMClient tool from david ebbo.- Anonymous
November 05, 2016
Hi Simon,Thanks for your comment. I know the ARMClient tool and also have used the tool before. But I wanted to show you don't need any tool to communicate with Azure. With the info from my blog I was hoping to demo you don't need any tooling if you don't want that./Stefan
- Anonymous
- Anonymous
November 24, 2016
This is really cool. Thanks for this!One strange thing: I am not able to select the Access Azure Service Management as organization users (preview) API and then select permissions. The select button is grayed out. I am however able to use the 'old' portal. And from then on everything works and I can happily fetch my access token. Any idea?- Anonymous
February 17, 2017
Hi Jacqueline,No I'm sorry I have no idea. I have no resource in the 'old' ASM Azure Portal :-) to test.Regards,Stefan
- Anonymous
- Anonymous
February 16, 2017
Hi Stefan,good blog post, thanks!Just a little note, in the begin you are saying to use the Reader Role, but the examples are setting the Contributor Role. Ciao,Marco - Anonymous
February 16, 2017
Hi Stefan,thank you for this blog post, really useful. A little note: in the beginning you are saying that you want to use the Reader role, but the script examples are using the Contributor role.Ciao,Marco- Anonymous
February 17, 2017
Hi Marco,Thanks for the feedback. You are correct I updated the blog post according to what I used in the script. Regards,Stefan Stranger
- Anonymous
- Anonymous
April 08, 2017
Hi Stefan,Very useful content to get Access Token,but, it will expire in 60 minutes,can you provide the way to use access token for longer time ?- Anonymous
April 10, 2017
Hi Imran,I've not tried to extend the lifetime of the access token yet. But you can have a look here:http://stackoverflow.com/questions/22043128/windows-azure-active-directory-expiration-of-refreshtokenBut why do you want to extend the lifetime of the token?/Stefan- Anonymous
April 10, 2017
Hi Stefan,Thanks for the reply.Actually, i have a scenario where i need to get data from azure rest api to Java web app,i need to reload the data, so it is saying token expired.i have one link, https://docs.microsoft.com/en-us/azure/active-directory/active-directory-configurable-token-lifetimesCan you give some idea about creating Multi-Factor Session Token ?Thanks.
- Anonymous
- Anonymous
