OMS Upgrade Readiness with Configuration Manager
Introduction
Upgrade Readiness is offered as a solution in the Microsoft Operations Management Suite (OMS), a collection of cloud based services for managing on premise and cloud computing environments. If you’re already using OMS, you’ll find Upgrade Readiness in the Solutions Gallery. Click the Upgrade Readiness tile in the gallery and then click Add on the solution’s details page. Upgrade Readiness is now visible in your workspace. If you are not using OMS, go to the Upgrade Readiness page on Microsoft.com and select Sign up to kick off the OMS onboarding process. During the onboarding process, you’ll create an OMS workspace and add the Upgrade Readiness solution to it.
You can use Upgrade Readiness to prioritize and work through application and driver issues, assign and track issue resolution status, and identify computers that are ready to upgrade. Upgrade Readiness enables you to deploy Windows with confidence, knowing that you’ve addressed potential blocking issues.
- Based on telemetry data from user computers, Upgrade Readiness identifies application and driver compatibility issues that may block Windows upgrades, allowing you to make data-driven decisions about your organization’s upgrade readiness.
- Information is refreshed daily so you can monitor upgrade progress. Any changes your team makes, such as assigning application importance and marking applications as ready to upgrade, are reflected 24 hours after you make them.
Prerequisites
- In order to add the connection, your Configuration Manager environment must first configure a service connection point in an online mode. When you add the connection to your environment, it will also install the Microsoft Monitoring Agent on the machine running this site system role.
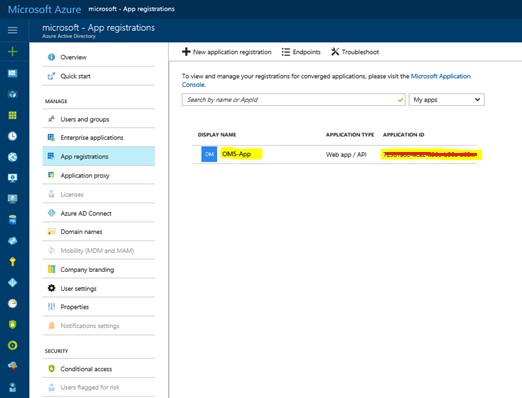
- Register Configuration Manager as a “Web Application and/or Web API” management tool, and get the client ID from this registration.
- Create a client key for the registered management tool in Azure Active Directory.
- In the Azure Management Portal, provide the registered web app with permission to access OMS, as described in Provide Configuration Manager with permissions to OMS.
Environment
| Demo System Roles | Names | OS | Network NICs | Required KBs |
| Domain Controller | DC1 | Windows Server 2016 | Local | |
| Configuration manager | CM1 | Windows Server 2016Configuration Manager 1702 | LocalInternet | |
| Windows 7 SP1 | Win7 | Windows 7 | LocalInternet | KB2952664 KB 3150513 |
| Windows 8.1 | Win8 | Windows 8.1 | LocalInternet | KB 2976978 KB 3150513 |
Integrate Upgrade Readiness with Configuration manager
Create the connection
- In the Configuration Manager console, choose Administration > Cloud Services > Upgrade Readiness Connector > Create Connection to Upgrade Analytics to start the Add Upgrade Analytics Connection Wizard.

2. On the Azure Active Directory screen, provide Tenant, Client ID, and Client secret key, then select Next.


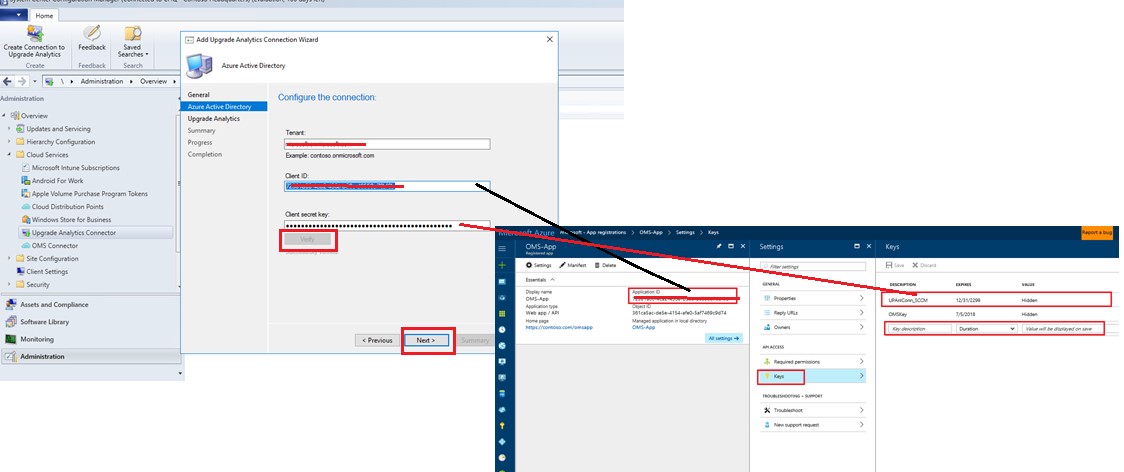
- On the Upgrade Readiness screen, provide your connection settings by filling in your Azure subscription, Azure resource group, and Operations Management Suite workspace.
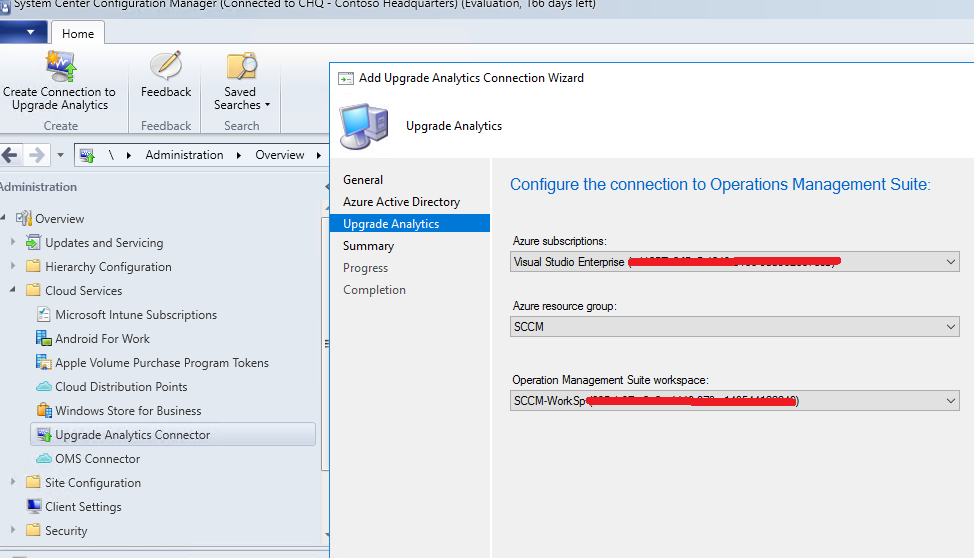
- Verify your connection settings on the Summary screen, then select Next. Note You must connect Upgrade Readiness to the top-tier site in your hierarchy. If you connect Upgrade Readiness to a standalone primary site and then add a central administration site to your environment, you must delete and recreate the OMS connection within the new hierarchy.

Complete Upgrade Readiness tasks
After you've create the connection in Configuration Manager, perform these tasks, as described in Get started with Upgrade Readiness.
- Add the UpgradeReadiness service to the OMS workspace.
- Generate a commercial ID.
- Subscribe to Upgrade Readiness.
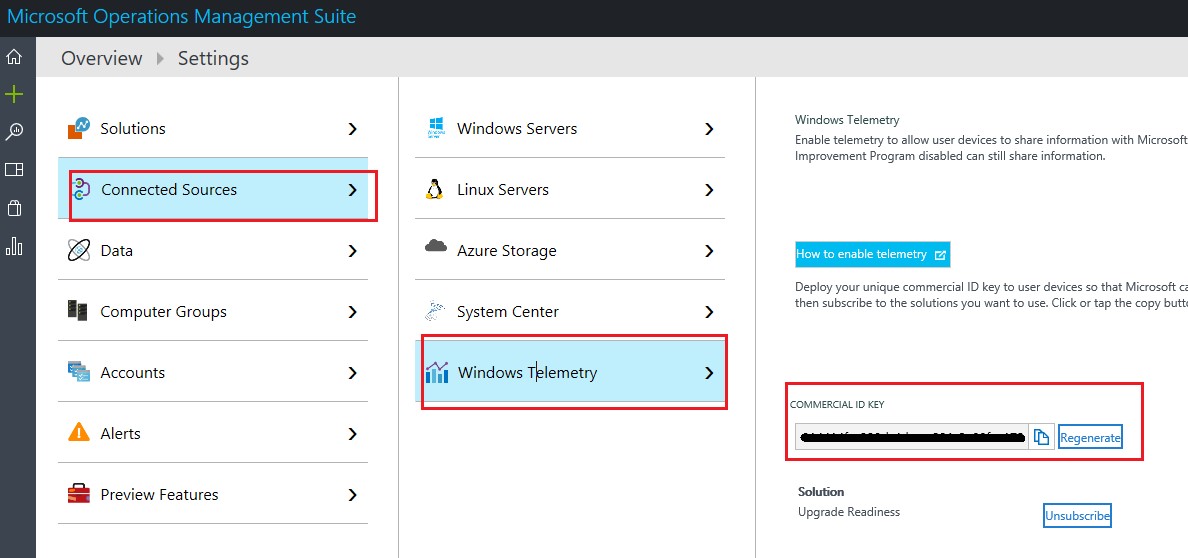
Configure and deploy Upgrade Readiness deployment script.
- Download Upgrade Readiness Deployment Script from below location:
https://www.microsoft.com/en-us/download/details.aspx?id=53327
- Extract the files and modify 'RunConfig.bat' file
Modify values as below:
set logPath=\\cm1\UpgradeReadinessLogs
set commercialIDValue=0144xxx-xxxx-xxxx-a321-xxxxxx7xxx
set logMode=1
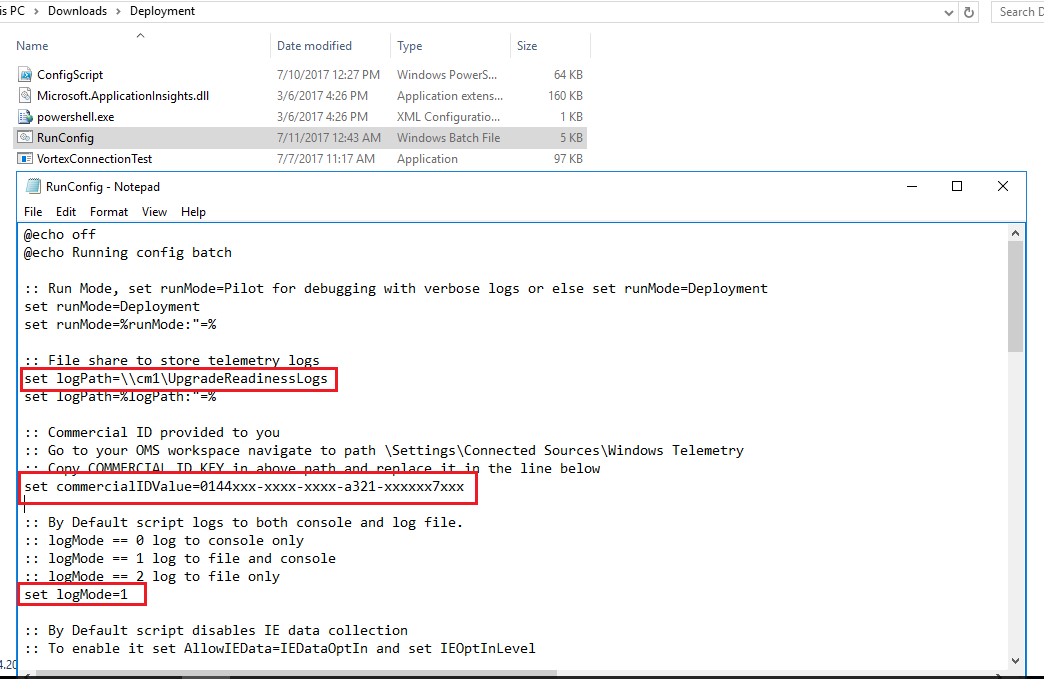

Note: By default, proxy settings are set to ClientProxy=Direct. If Client machines have internet access through proxy server then below 2 extra values need to be updated in 'RunConfig.bat' file

Configure the Windows Registry value: on client computers H KL M "SOFTWA REA, P 01 Co I lection\DisabIeEnterpriseA uthProxy to 0 on client computers '
- Save the file at the location accessible while creating package in Configuration manager
Create Config manager package/Program to deploy Script to client machines
It makes more sense to deploy upgrade readiness script to client machines through Configuration manager if number of clients are large
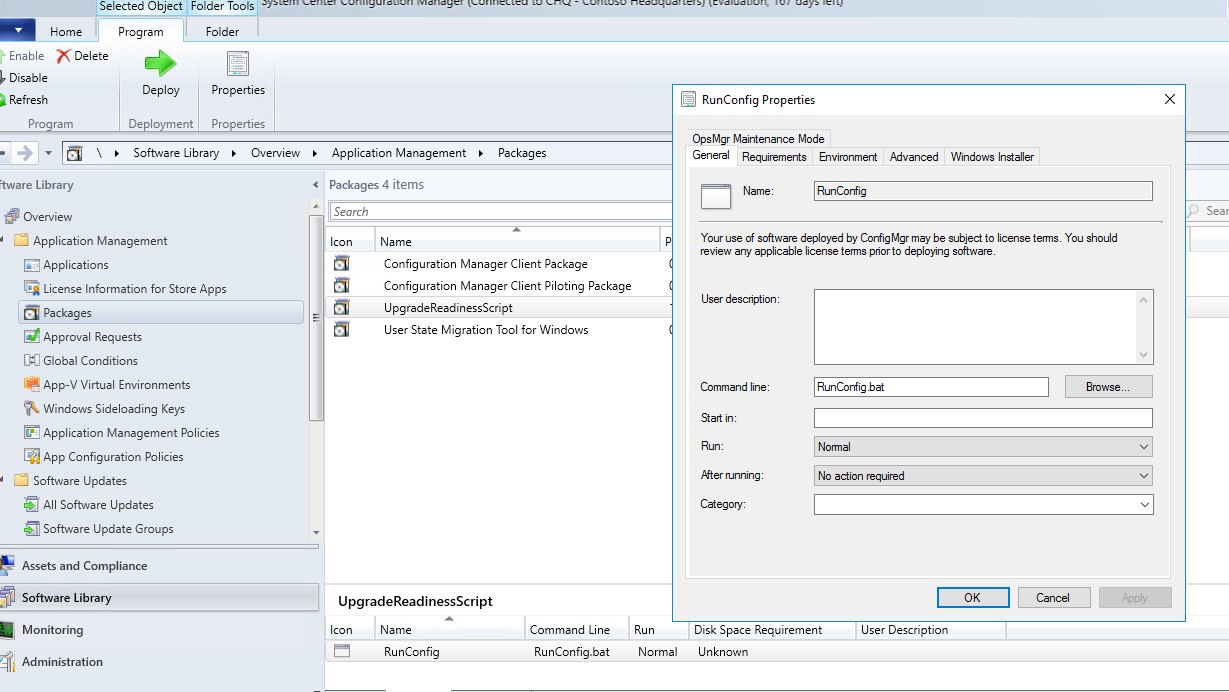
- Create upgrade readiness package and program to deploy script

- Set the command line as 'RunConfig.bat'
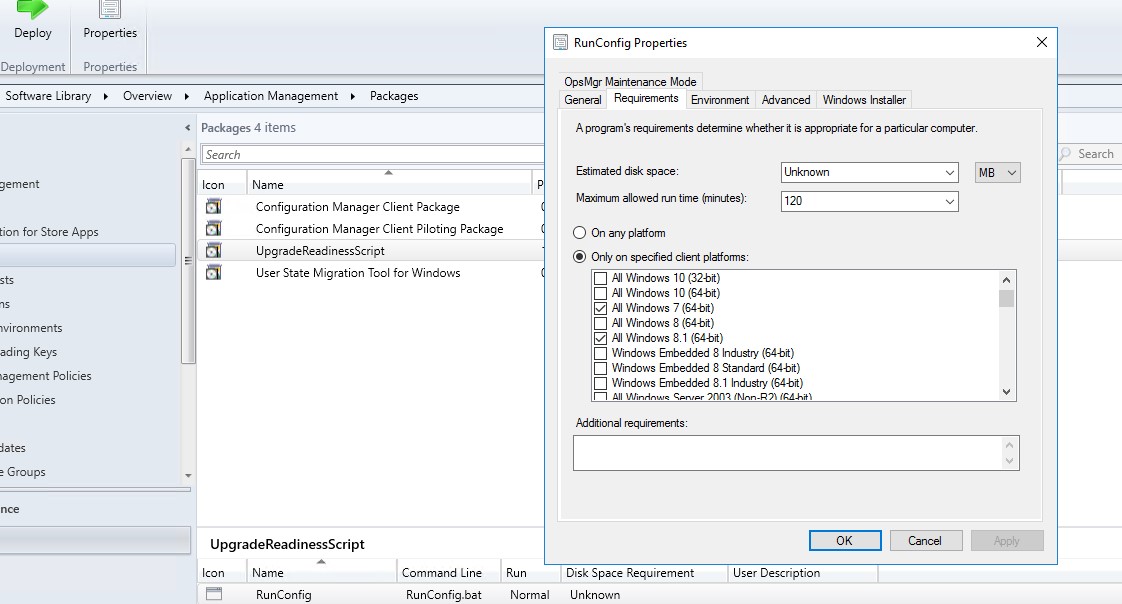
- Set the requirements for preferred platforms. Setting it to Windows 7 and Windows 8.1 64-bit
- Update distribution point
- Create Test collection and move client machines to new collection

- Deploy 'UgradeReadinessScript' to 'Windows Upgrade Readiness' collection
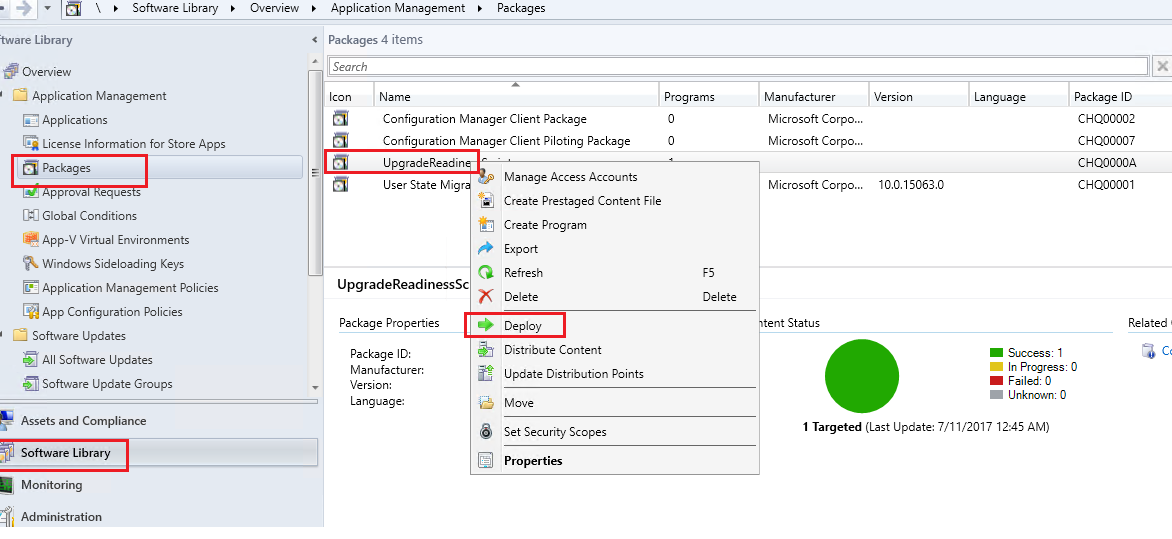
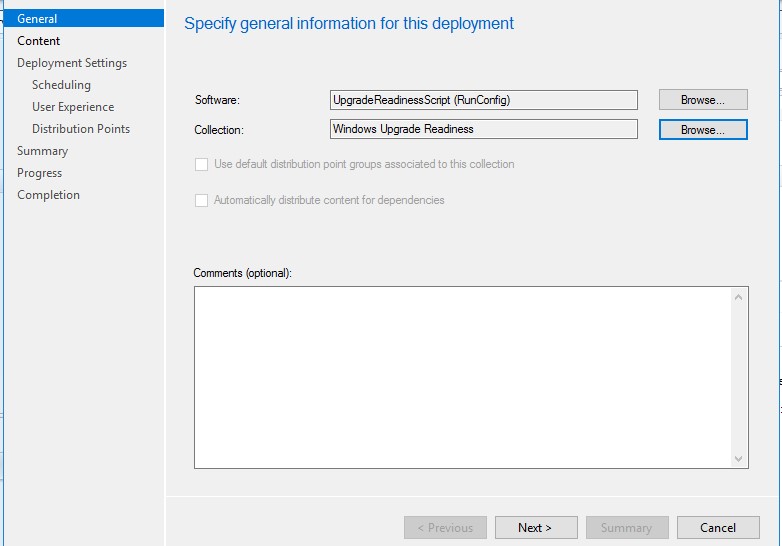
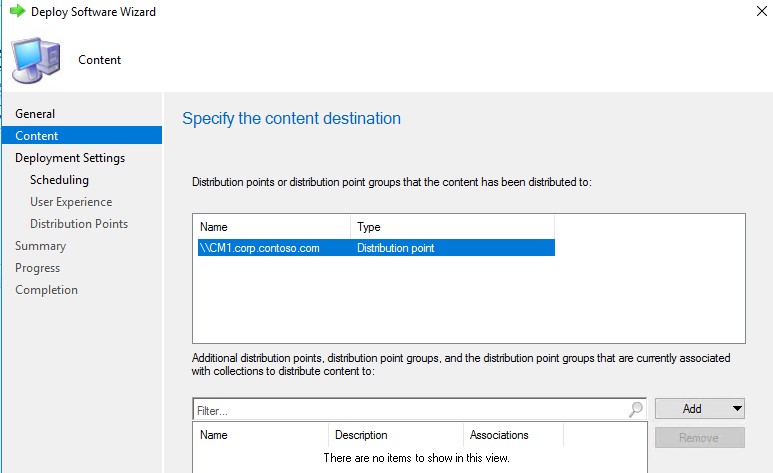

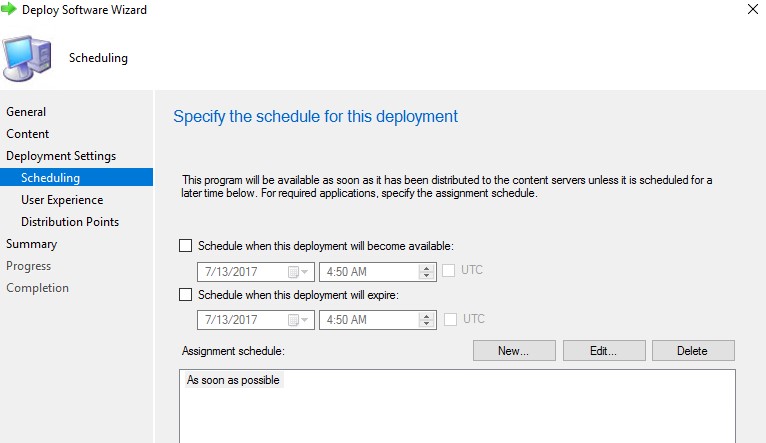
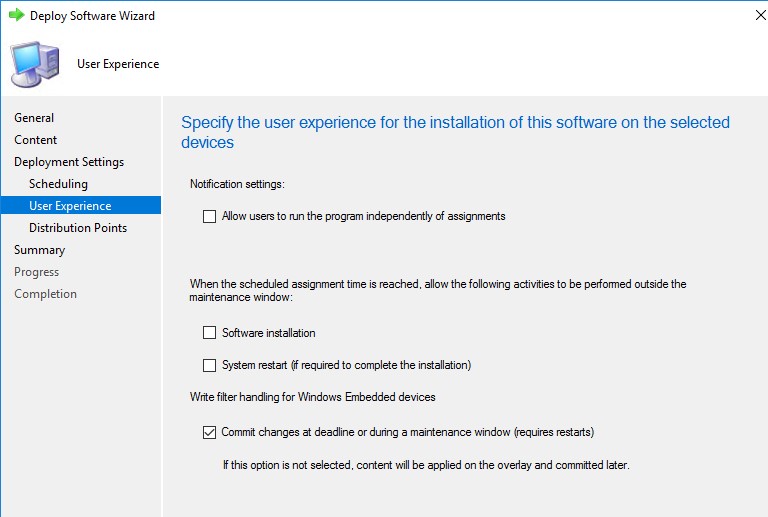

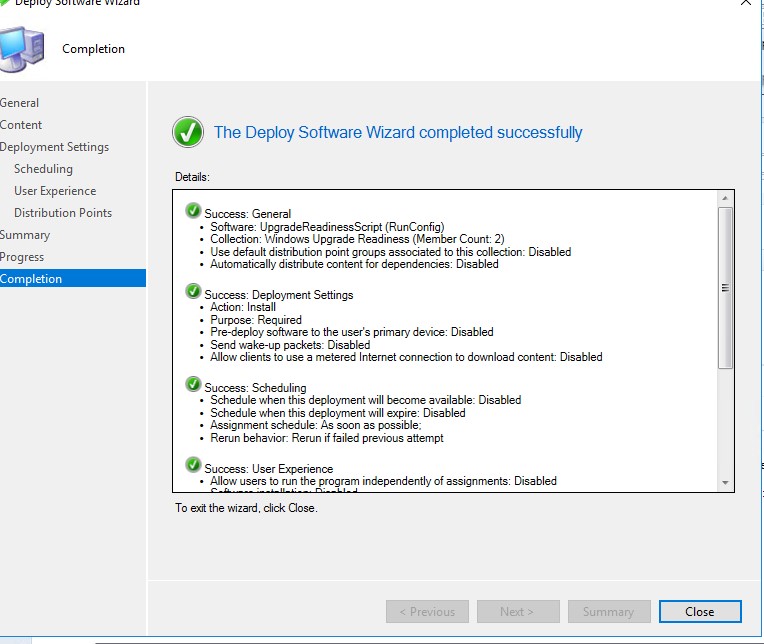
- Refresh Policies on Client machines
- Once client get the policies from Management point, script will get installed
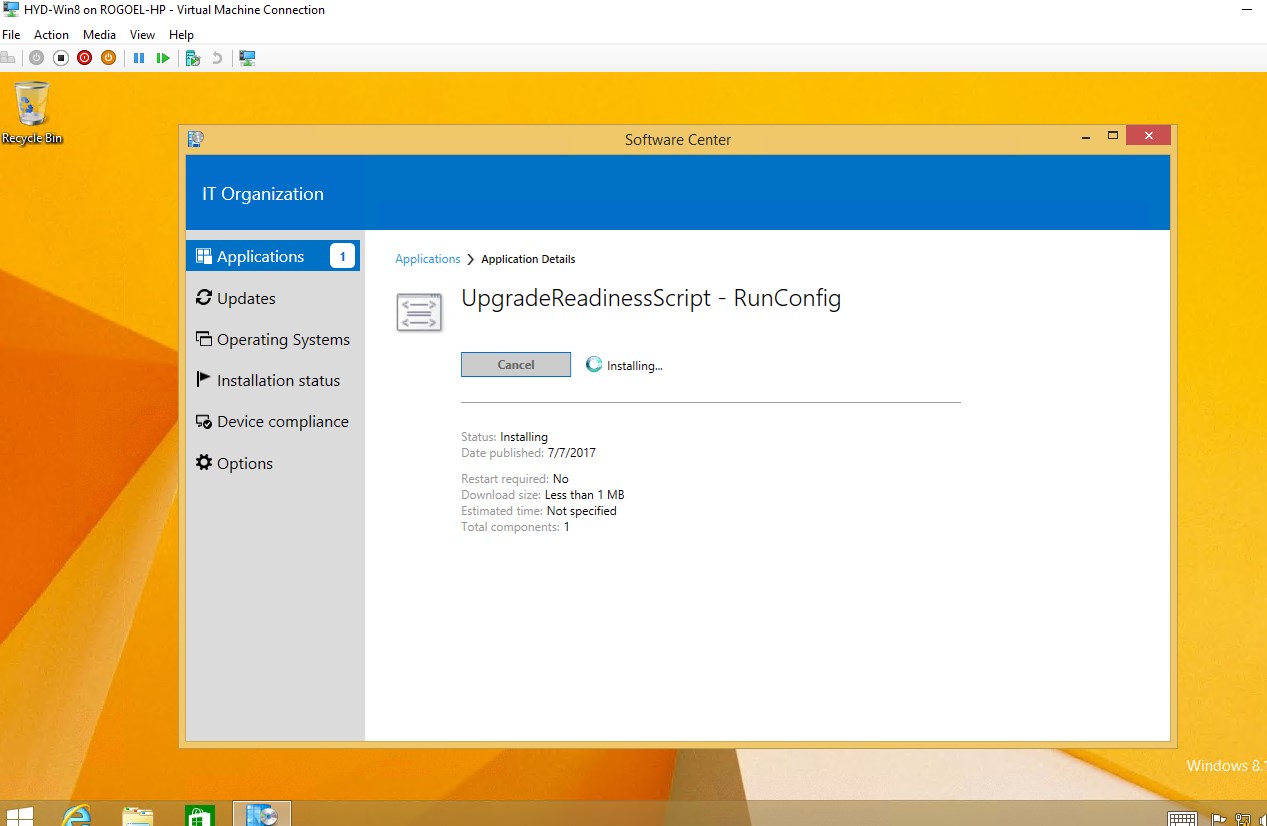
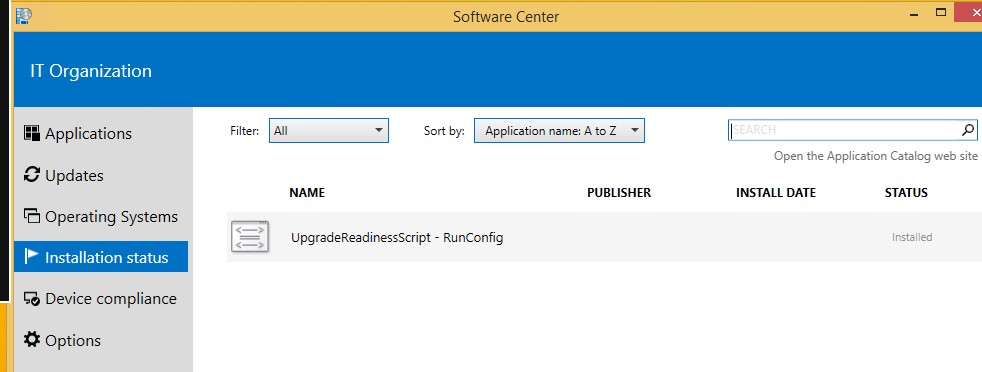
- On Windows machine 7
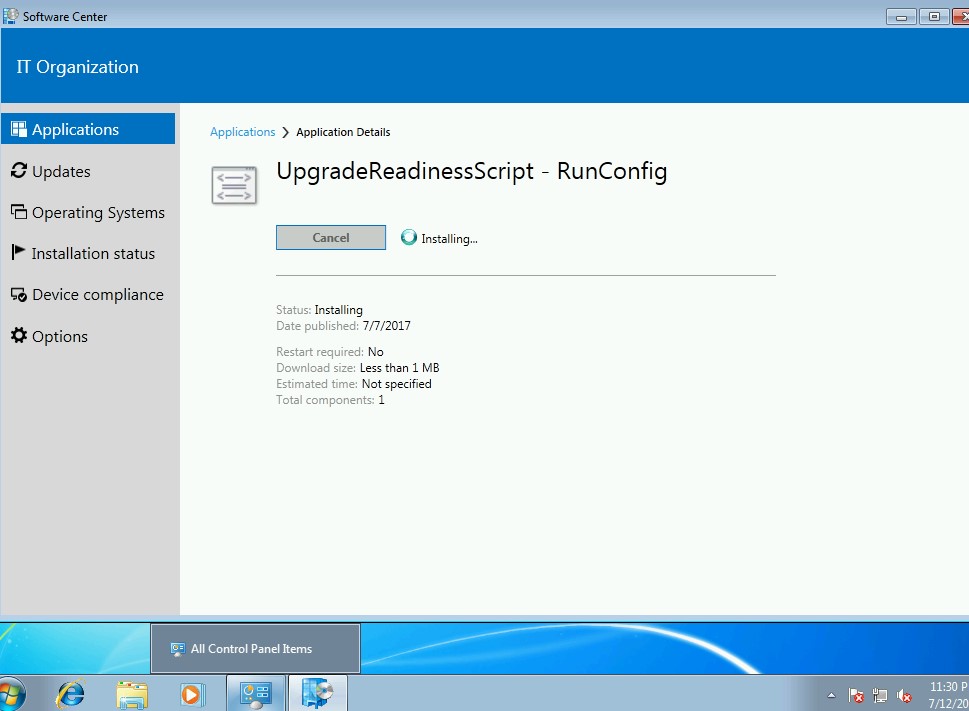
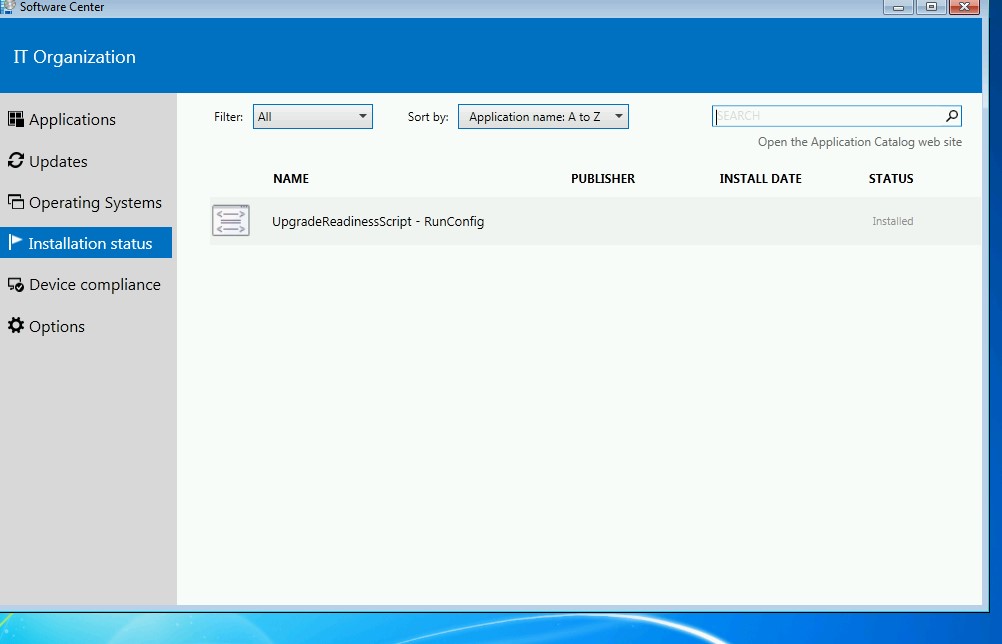
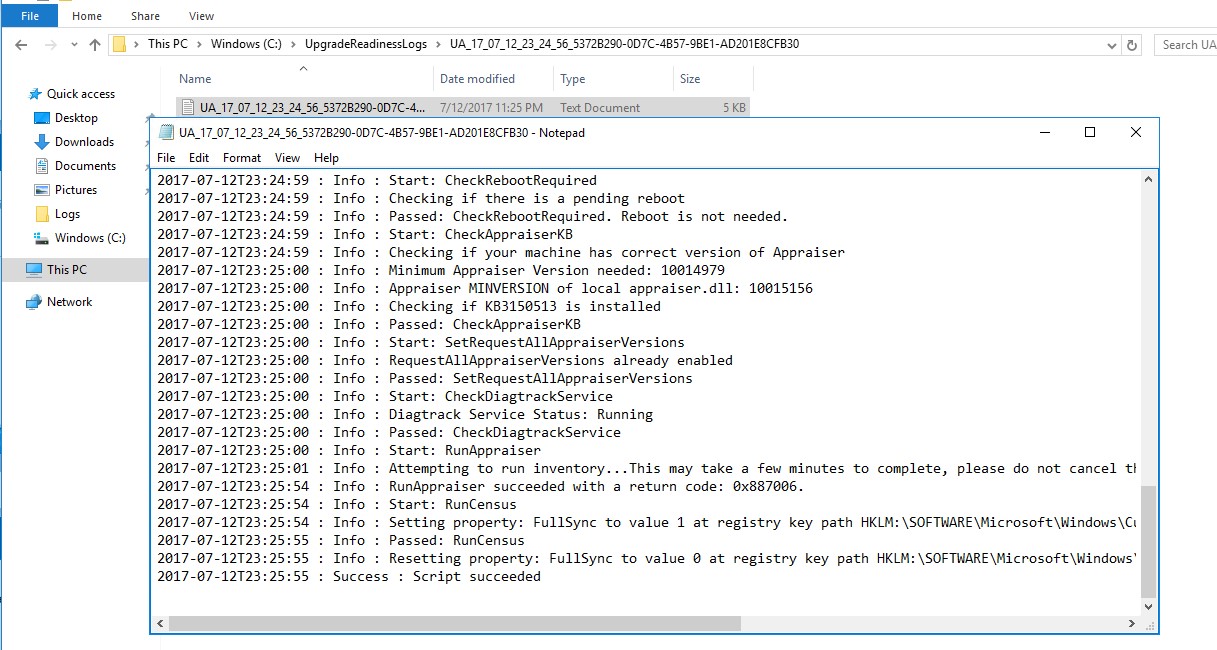
- Check log file for script successfully completion on CM1 Server
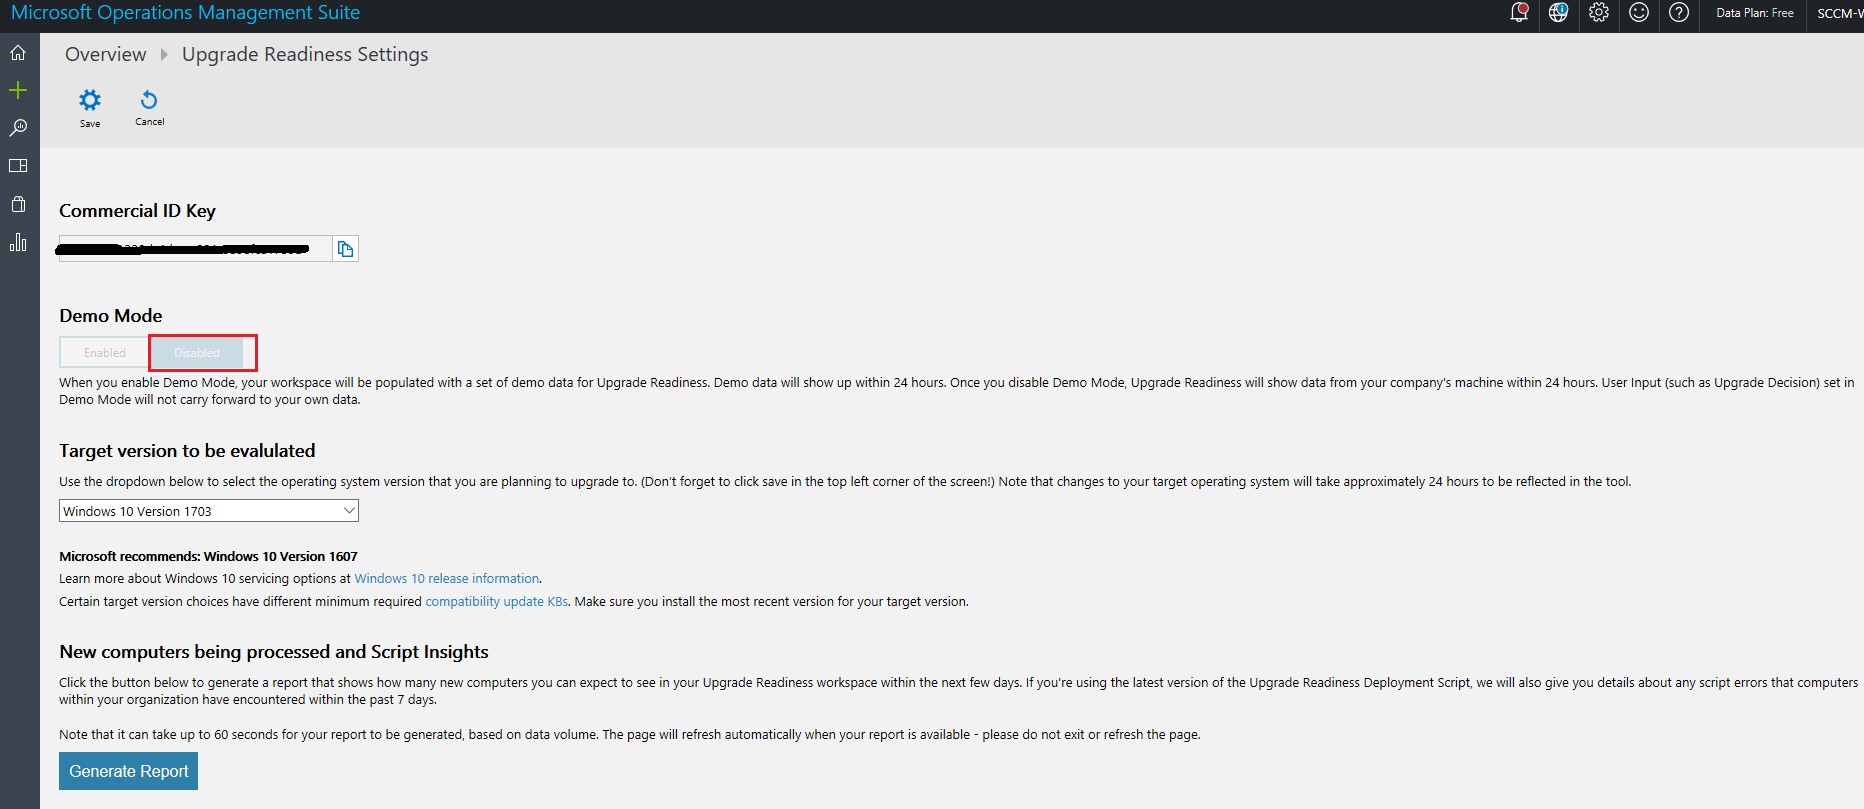
Upgrade Readiness view on Azure
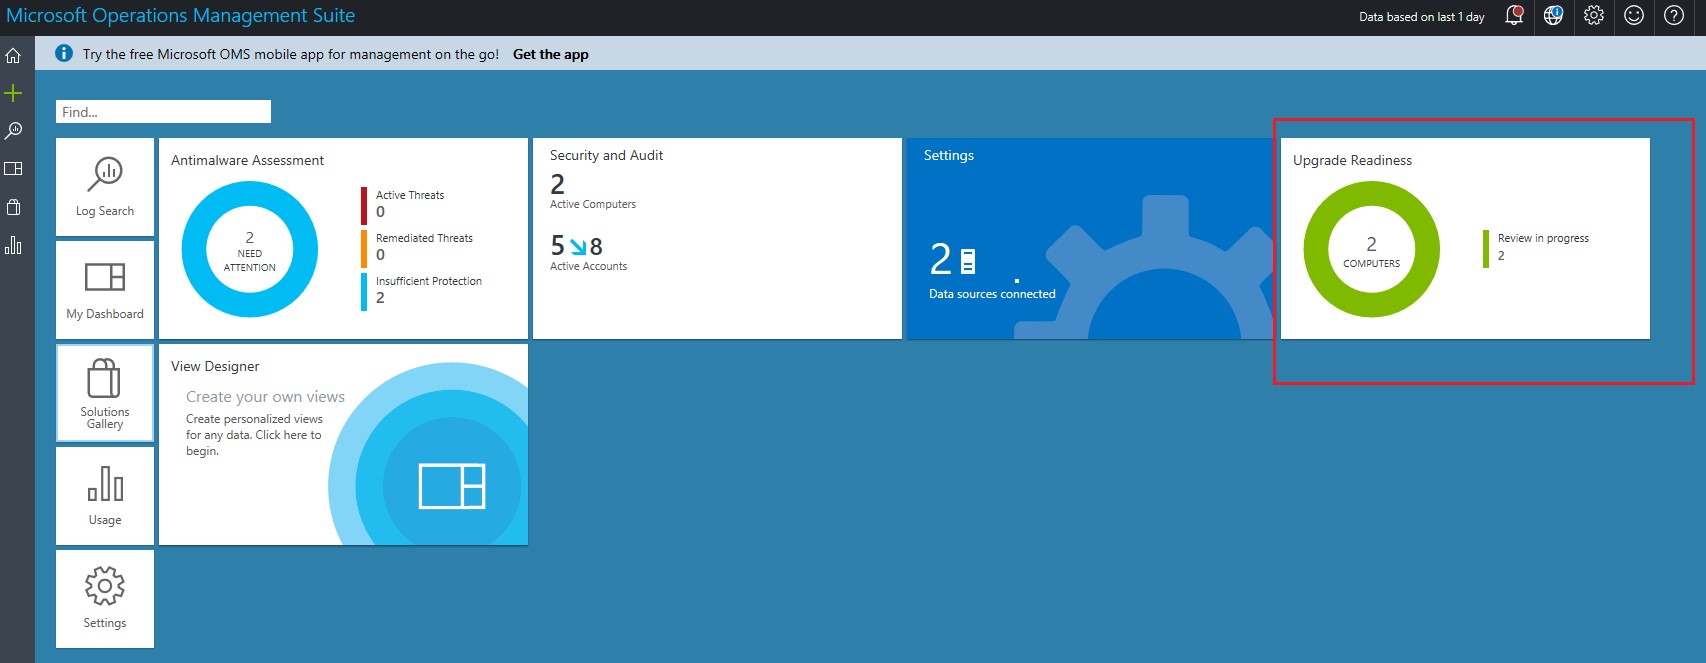
It is important to disable Upgrade readiness demo data in OMS before we could see the actual data coming in. For disabling the Demo mode, Go to ‘Upgrade readiness’ settings and select ‘Disable’ switch for Demo Mode.
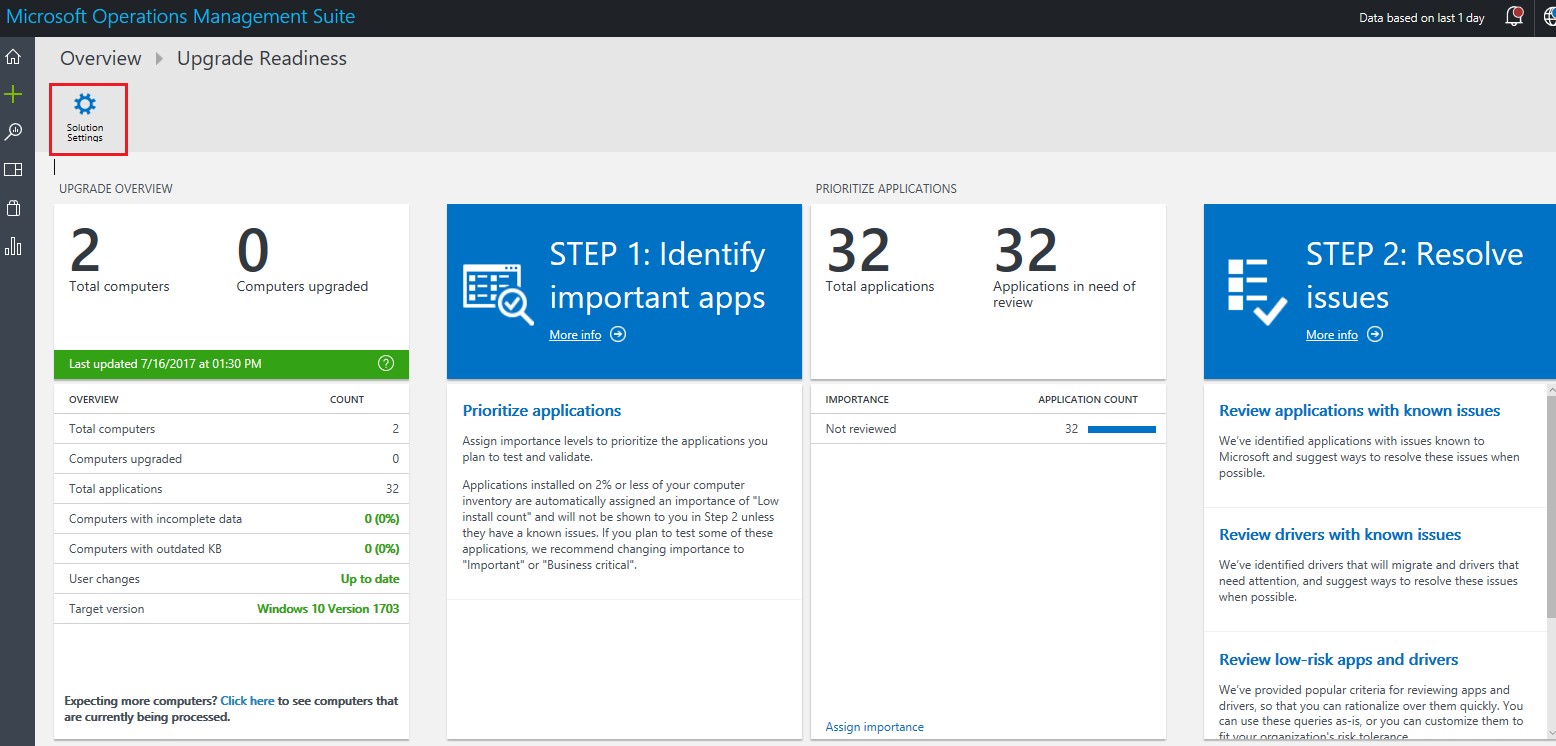
It could take up to 48-72 hours to start seeing the data online.
‘Upgrade Readiness’ portal view once data start populating


Configuration Manager ‘Upgrade Analytics’ data populated through connector in configuration manager | Monitoring | ‘Upgrade Analytics’. This data could also take 48-72 hours to start populating once data is visible on OMS.

Troubleshooting Upgrade Readiness Upgrade Readiness deployment script /en-us/windows/deployment/upgrade/troubleshoot-upgrade-readiness
Comments
- Anonymous
August 01, 2017
Let me suggest something, next time use bigger print screens.- Anonymous
August 27, 2017
Hi Tiago, I have updated the blog again. Thanks for your feedback. Regards,Rohit
- Anonymous
- Anonymous
August 24, 2017
Would have been awesome had we been able to see the screenshots.- Anonymous
August 27, 2017
Hi Hand, I have updated the blog again. Thanks for your feedback. Regards,Rohit
- Anonymous
- Anonymous
January 20, 2018
Thank You rohit.