ATA + OMS
This blog is updated at https://ciberesponce.com
Installing Operational Management Suite (OMS) on top of Advanced Threat Analytics (ATA) is dead simple. It is even more simple if your ATA Center is installed in Azure as deploying the OMS agent on Azure VMs is one click.
OMS continues to gain momentum as it provides a single-pane-of-glass. It's integration into things like Azure Automation allow for very wide and interesting use-cases. Fusion with the Microsoft Security Graph (provided by source from Microsoft and its third parties where we spend over $10M USD/year) makes it all that much powerful.
This blog will build on the previous blogpost on this topic, located here. In this referenced blog, The Scripting Guys discuss in detail on why Syslog is better then both SMTP and the Windows Event Log route. Note that we aren't saying turn off Windows Event Log/Windows Event Forwarding into ATA Center, this is specific to getting events out of the ATA Center.
Let's get started.
Configure ATA
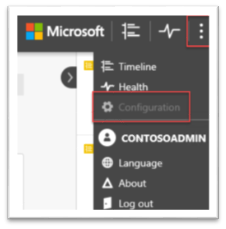
Once you get ATA installed (whether on-prem or in Azure, as long as it's up and running and has Gateways), we need to configure it's syslog. From the ATA Console, on the top right, select the options button, then "Configuration" button.
In the Syslog navigation pane, use the following settings:
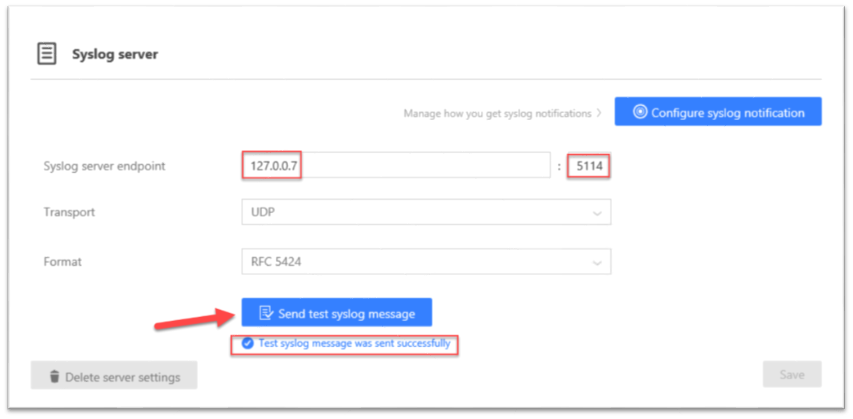
The "Syslog server endpoint" should be 127.0.0.7 with the port 5114. Note that 127.0.0.7 is not a typo, this is another dedicated IP for localhost. Once we insert these values, press the blue button at the bottom, "Send test syslog message".
That is literally all that is needed to be configured with ATA. The OMS installation is just as easy…
Create OMS Workspace (if needed)
From the Azure Portal, if you already have an existing OMS/Log Analytics Portal, great, use that one. If not, select the Log Analytics Button:

Then, let's go ahead and select "Add" and fill out the respective data.
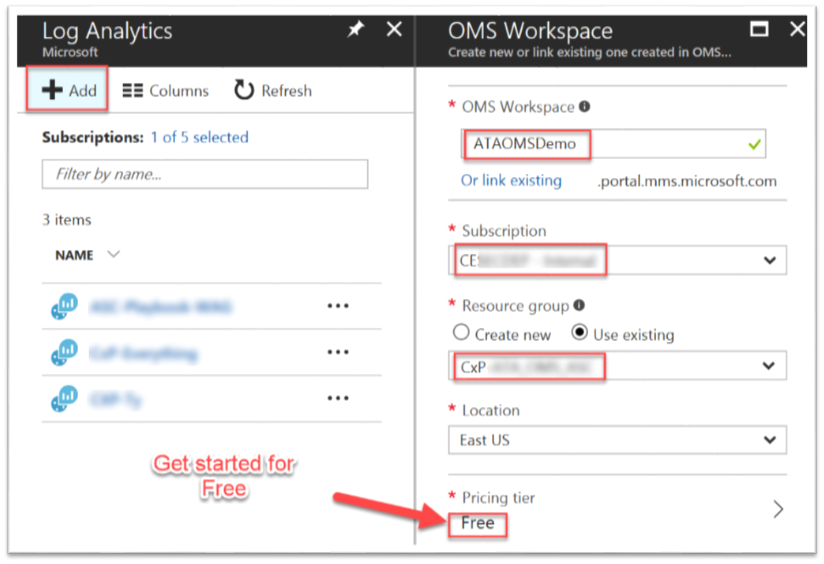
Great, we are almost done.
Connect ATA Center to OMS Workspace
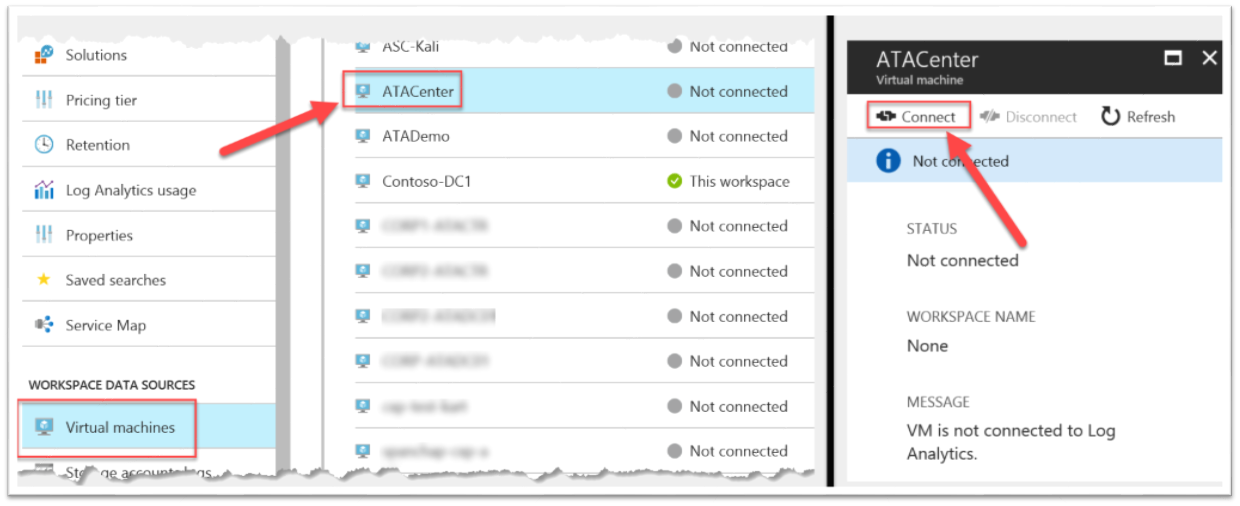
If you decided to install the ATA Center in Azure, you are a few clicks away from connecting the VM to your workspace.
Under the "Workspace data sources" section, select "Virtual Machines" and find your ATA Center VM in the list. Then press the "Connect" button. That's it!
If you decided to install ATA Center on-prem, no worries, your install is almost just as easy. Follow this guide here: /en-us/azure/log-analytics/log-analytics-windows-agents#download-the-agent-setup-file-from-oms
Test the connection
Once you see the connection successful, let's get bits on the wire and see them show up. The quickest way is to run the very first attack we introduce in the ATA Playbook. Attempting to do a Zone Transfer from a machine against the Domain/DNS-server will trigger an alert.
From any computer, perform the following nslookup command to attempt to dump the contents of the DNS server:
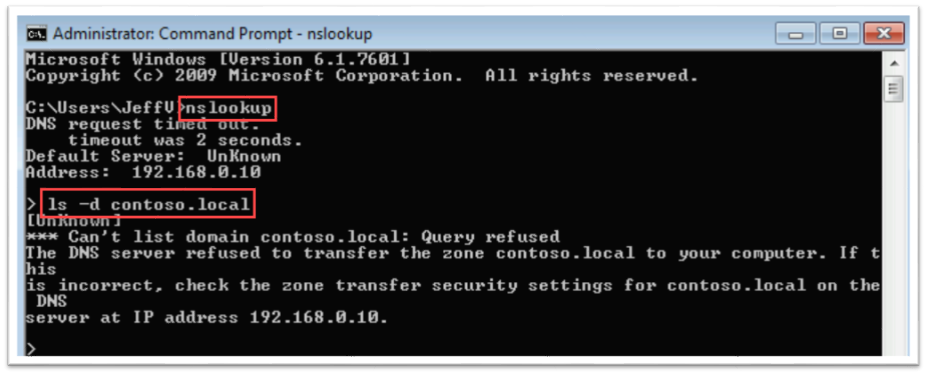
As you see the "Query refused", go back to OMS and wait for it to show up. You won't wait too long. Back in the OMS Portal, in the "Security And Audit" view, we should see the new "SecurityDetection" alert. Clicking on the alert, our Log Search view opens up where we can start doing all sorts of great queries against this and all other OMS data sources!
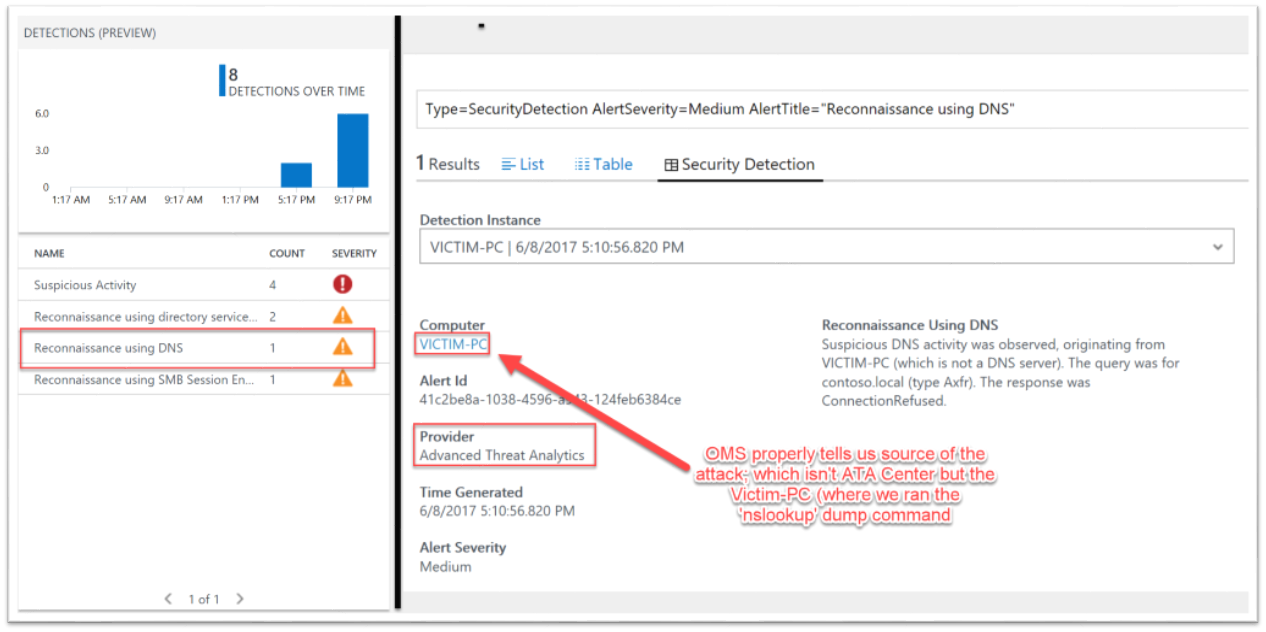
We now OMS integration on our ATA—tested and approved.
Happy hunting!
Andrew