Showing NAV Data in SharePoint using Business Data Catalog – Part 1 of 2
At the conference Directions EMEA 2009, I did a session on Dynamics NAV and SharePoint. In that session I showed a short demo on how you can show Dynamics NAV data in SharePoint, using the Business Data Catalog feature. You can see more about the conference at https://www.directionsemea.com
Here I would like to walk through the steps to do the demo, so you can try this out as well. I think it is a quite simple way to enable SharePoint users to access the data that is in your Dynamics NAV system.
This first part of the walkthrough will show how you build the Web Service and Application Definition File for SharePoint. The second part will show how you can then use this in SharePoint.
Step 1: Creating the NAV 2009 Web Service
The first step is to create a NAV 2009 Web Service to expose the data that you want. In our example we will expose Customer Data.
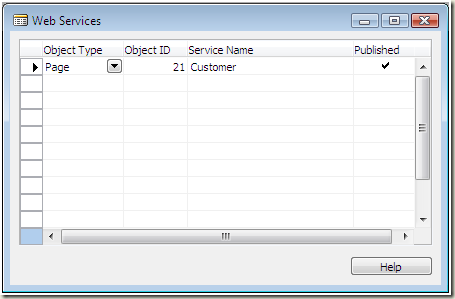
Creating a Web Service in NAV 2009 is really simple. In the Classic Client, open the Web Service Form. It is found under “IT Administration->General Setup->Web Services”
In the Web Services Form, you add a line with Page 21, call the Service “Customer” and set a checkmark in the Published Column. This will create a Web Service, exposing all the Fields on Page 21 “Customer Card”. If you want to expose other fields, you can create a specific Page for that, but for my example I have just used the standard Customer Card Page
Before you can try the new Web Service, you need to make sure that the “Microsoft Dynamics NAV Business Web Services” service is started on the machine. In a default installation this service is not started automatically, so you might want to set the Startup Type to Automatic as well.
Now you can actually try out your new Web Service. The default URL for the Web Service is:
https://localhost:7047/DynamicsNAV/WS/CRONUS_International_Ltd/Page/Customer
If you want to know more about NAV 2009 Web Services, then you can try out some of the Web Services Walkthroughs in the C/SIDE Reference Guide Online Documentation.
Step 2: Creating a new BDC compatible Web Service
The Web Service that you have just created does unfortunately not have the right format for the SharePoint Business Data Catalog, so you need to create a new Web Service that Business Data Catalog understands, and then from that call the NAV 2009 Web Service.
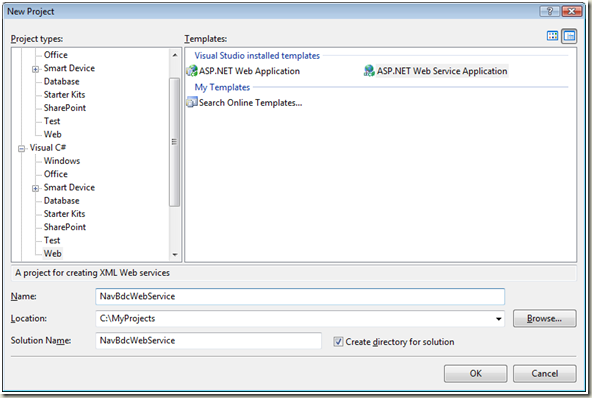
In Visual Studio (I used VS 2005), create a new ASP.NET Web Service Application, called NavBdcWebService
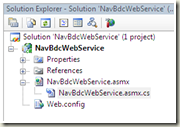
Rename the Service1.asmx file to NavBdcWebService.asmx, and call the Web Service class for NavBdcWebService. Also remember to update the reference in the .asmx file to the new name of the class. To edit that file, right click the NavBdcWebService.asmx file in the Solution Explorer and select “View Markup”
<%@ WebService Language="C#" CodeBehind="NavBdcWebService.asmx.cs" Class="NavBdcWebService.NavBdcWebService" %>
In order to access the NAV 2009 Web Service from your new Web Service, you need to add a Web Reference to the NAV 2009 Web Service.
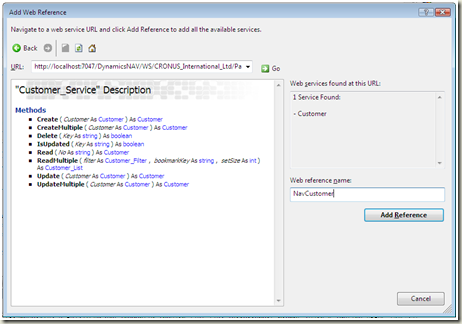
In the menu, select “Project->Add Web Reference…” and specify the URL for the NAV 2009 Web Service called Customer:
https://localhost:7047/DynamicsNAV/WS/CRONUS_International_Ltd/Page/Customer
Give the Web Reference the name “NavCustomer” to avoid conflicts with the Customer Class there, and click “Add Refernce”:
Now replace all the code in NavBdcWebService.asmx.cs file with the following:
using System;
using System.Data;
using System.Web;
using System.Collections;
using System.Web.Services;
using System.Web.Services.Protocols;
using System.ComponentModel;
using System.Collections.Generic;
using NavBdcWebService.NavCustomer;
namespace NavBdcWebService
{
/// <summary>
/// MOSS BDC Compatible Webservice for getting NAV Data
/// </summary>
[WebService(Namespace = https://tempuri.org/)]
[WebServiceBinding(ConformsTo = WsiProfiles.BasicProfile1_1)]
[ToolboxItem(false)]
public class NavBdcWebService : System.Web.Services.WebService
{
/// <summary>
/// Finder method for finding Customers
/// </summary>
/// <param name="no">Filter parameter for the Customer No.</param>
/// <param name="name">Filter parameter for the Customer Name</param>
/// <param name="noOfRecordsToReturn">Number of Customers to return</param>
/// <returns>Array of Customer objects, with all the fields on a Customer</returns>
[WebMethod]
public Customer[] CustomerFinder(string no, string name, int noOfRecordsToReturn)
{
Customer_Service service = new Customer_Service();
service.UseDefaultCredentials = true;
service.Url = https://localhost:7047/DynamicsNAV/WS/CRONUS_International_Ltd/Page/Customer;
List<Customer_Filter> filters = new List<Customer_Filter>();
if (!string.IsNullOrEmpty(no))
{
Customer_Filter filter = new Customer_Filter();
filter.Field = Customer_Fields.No;
filter.Criteria = no;
filters.Add(filter);
}
if (!string.IsNullOrEmpty(name))
{
Customer_Filter filter = new Customer_Filter();
filter.Field = Customer_Fields.Name;
filter.Criteria = name;
filters.Add(filter);
}
return service.ReadMultiple(filters.ToArray(), null, noOfRecordsToReturn);
}
}
}
The code simply adds a Web Method called CustomerFinder. This is the Method that Business Data Catalog will use to get data.
The Method takes two Filter Parameters “no” and “name”. For this example I have chosen only to enable filtering on those two fields, but you can add other fields as well. Business Data Catalog supports up to a total of 30 parameters to the Finder Method.
The third parameter called “noOfRecordsToReturn” is used by Business Data Catalog to limit the number of records to look for within the filter. This protects your service from excessive unfiltered requests from the SharePoint users.
The Method simply adds the two filters to a Filter List, and calls the ReadMultiple Method on the NAV 2009 Web Service, passing the Filter List and the noOfRecordsToReturn parameter.
The Method returns an array of Customer Objects as defined by the NAV 2009 Web Service.
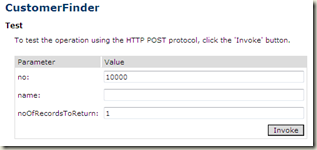
The new Web Service is now done, and you should try it. Simply run the web service from Visual Studio, and invoke the CustomerFinder Method with the parameters no=10000 and noOfRecordsToReturn=1
You should now get an XML document with the Customer data for the Customer 10000 – “The Cannon Group PLC”
You can now deploy the new web service, but for the walkthrough we will just stay with the Service running on the ASP.NET Development Server in Visual Studio. Just make sure that the Web Service is running in Visual Studio. The name of the new Web Service will then be (Your port number might be different):
https://localhost:55241/NavBdcWebService.asmx
Step 3: Creating the BDC Application Definition File
In order to tell BDC (Business Data Catalog) how the Customer Entity is structured, we need to create an Application Definition File. This is an XML file, but creating it manually is not trivial, so we will use the Business Data Catalog Definition Editor that come as part of the SharePoint Server 2007 SDK:
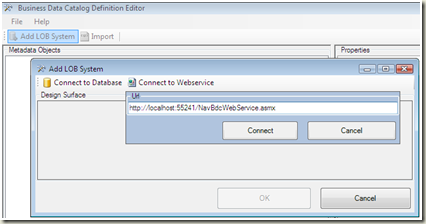
In the Business Data Catalog Definition Editor, Add a new LOB System. We want to connect to a Web Service, so specify the URL for the NavBdcWebService that you just created:
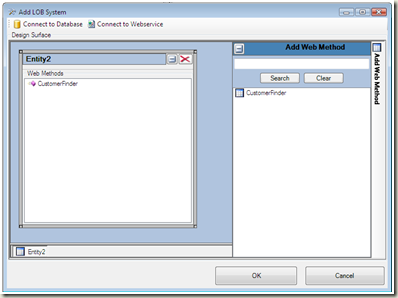
Click Connect, and drag the CustomerFinder Method into the Design Surface
Click OK, and name the System NavLobSystem.
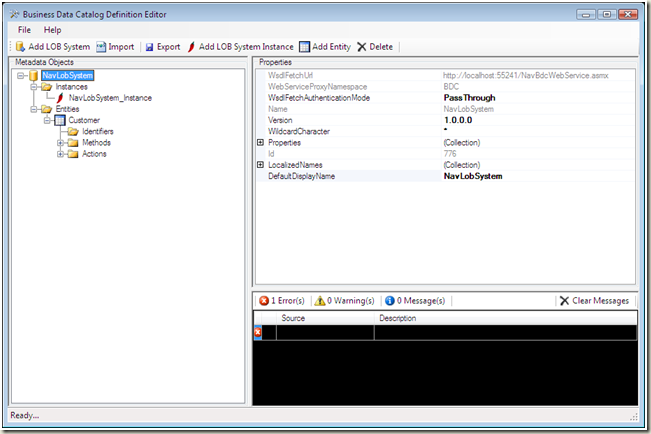
The Business Data Catalog Definition editor has now imported the information from the Web Service, but unfortunately there are a number of manual steps that you need to do to set this up properly. When you have done this for this Entity (Customer) it is pretty easy to do the same for an additional Entity.
Set the Version of NavLobSystem to “1.0.0.0” and WildcardCharacter to “*”
Also rename the Entity to be called “Customer”.
Adding an Identifier for the Customer
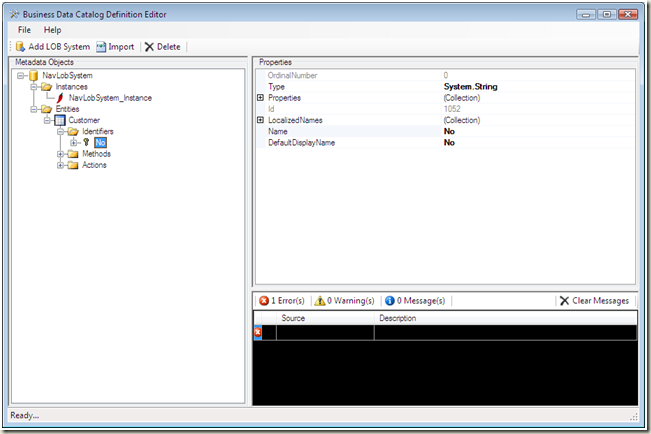
In order to identify an Entity in the Business Data Catalog, you need to add an Identifier. Call the Identifier “No”, and leave the default datatype to System.String:
Defining Filters for the CustomerFinder Method
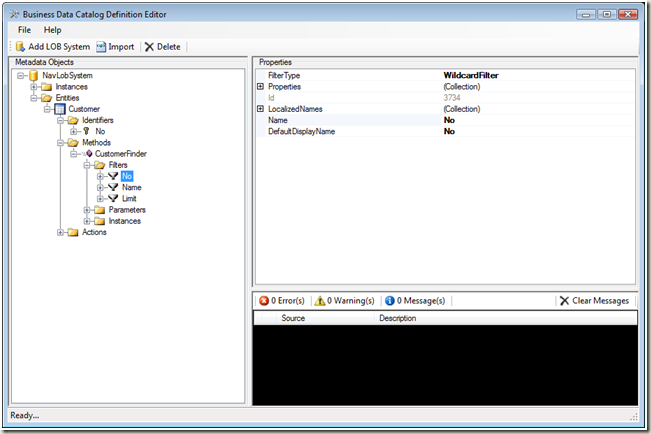
We have already imported most of the data for the CustomerFinder Method, but we need to define the Filters for the two filter parameters No and Name. Create both of them as WildcardFilter
In order to limit the number of records to search for, you should also create a Filter called Limit of type “Limit”:
Defining Parameters for the CustomerFinder Method
We also need to do a little extra work on the parameters of the CustomerFinder Method
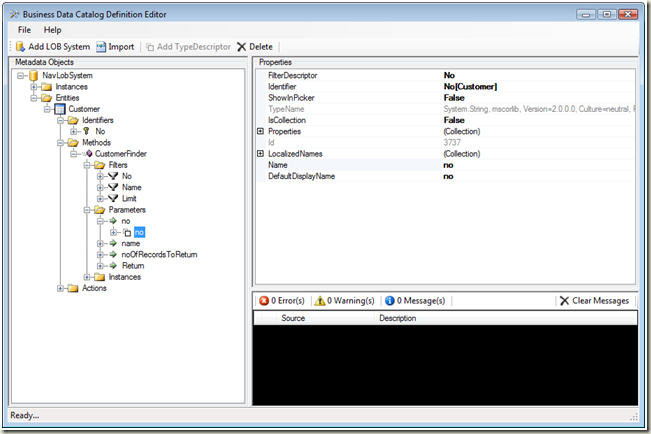
For the parameter called “no”, set FilterDescriptor to the Filter we just created called “No” and Identifier to the identifier we just created: “No[Customer]”
For the parameter called “name”, set FilterDescriptor to “Name” and leave the Identifier blank
For the parameter called noOfRecordsToReturn, set the FilterDescription to “Limit” and leave the Identifier blank.
For the “No” field of the returned Item (CustomerFinder->Parameters->Return->Return->Item->No), also set the Identifier to “No[Customer]”
Defining the Method Instances
In order for the BDC to call the Finder Method, we need to define a number of different Method Instances.
- An Enumerator
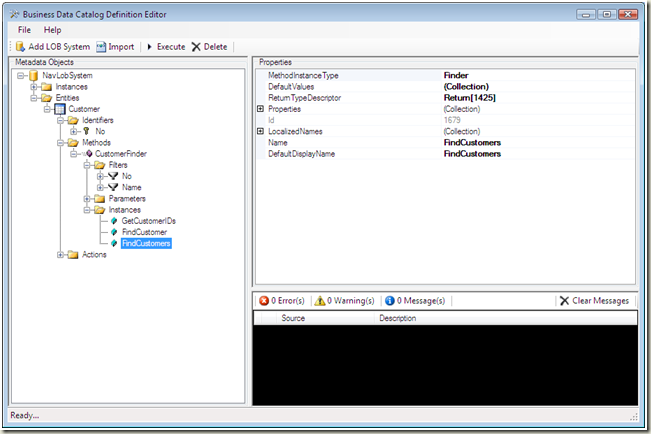
- A Finder
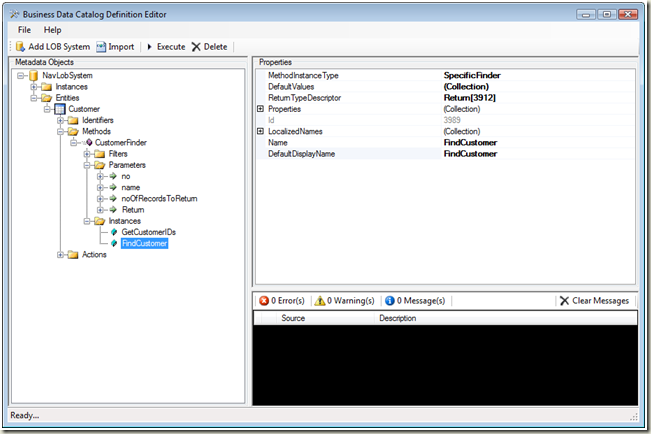
- A Specific Finder
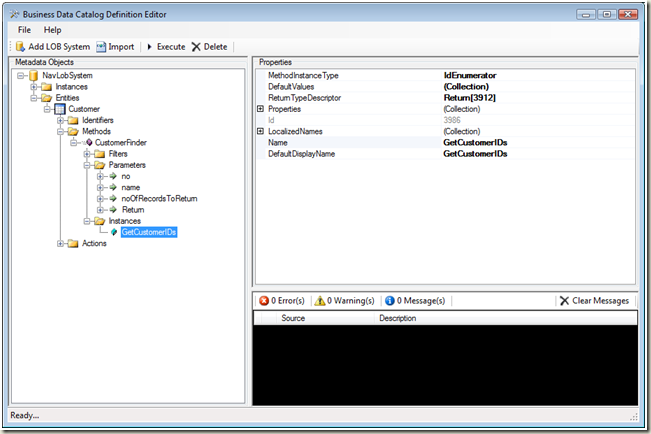
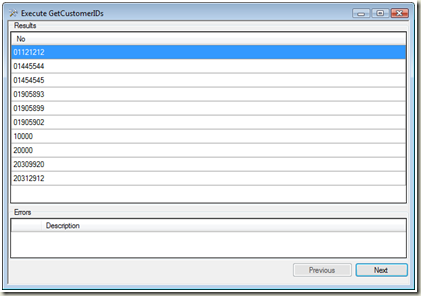
The first one is of type idEnumerator. It can return all the Identifiers for the Customers. Call this Method Instance “GetCustomerIDs”
You can actually try this Method Instance in the Business Data Catalog Definition Editor. Simply click “Execute” and “Next” on the form that opens. You should now get a list of Customer IDs:
The second Method Instance is of type SpecificFinder, and it can find an Entity for a specific Identifier. Call this Method Instance “FindCustomer”
The last Method Instance is of type Finder, and it is used to return multiple Entities. Call this Method Instance “FindCustomers”
You can also test the two other Method Instances directly in the Business Data Catalog Definition Editor. Click Execute on each of them to validate that they work as expected.
- FindCustomer should return a single Customer when specifying a Customer No
- FindCustomers should return a list of Customers within the filter specified
Note: The result page has a lot of fields, so it is difficult to see exactly which Customers is returned. You can expand some of the columns to see more of the content.
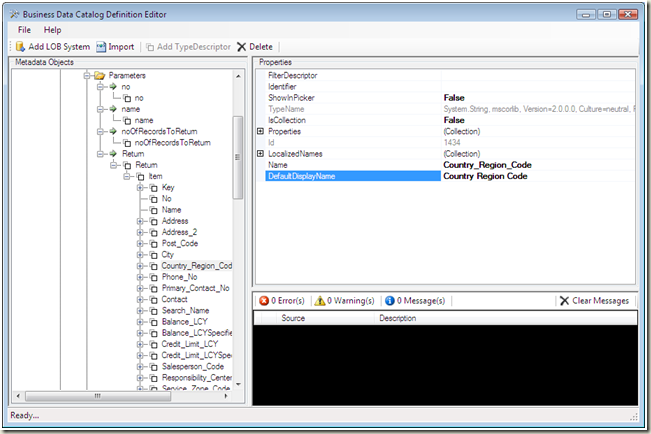
Adding Display Names for the Parameters and returned Fields
By default the display name will be the same as the field name. For some of the fields, this is not nice, because it contains underscores instead of spaces. You can specify a different Display name for each of those, so it looks nicer for the user.
Export the Application Definition File to an XML file
Finally you export the Application Definition File to an XML file that can later be imported into SharePoint Business Data Catalog.
If you later make changes to the Definition File, then remember to increment the Version Number. This will allow BDC to update existing definitions.
To be continued…
This completes the first part of this walkthrough. The second part will show you how you can then use the Web Service and Application Definition File in SharePoint.
Thanks
/Bugsy
Comments
Anonymous
April 14, 2009
PingBack from http://www.codedstyle.com/showing-nav-data-in-sharepoint-using-business-data-catalog-%e2%80%93-part-2-of-2-2/Anonymous
April 16, 2009
This is the second part of the walkthrough, showing how you can show your Dynamics NAV Data in SharePoint.Anonymous
February 15, 2011
The comment has been removed
