SmartArt Diagram Improvements
In Office 2007 we introduced SmartArt diagrams, a tool designed to simplify the process of creating quality graphical layouts. The goal of every SmartArt diagram is to enhance the aesthetic appeal of your document and to use a graphic to convey a message. SmartArt diagrams adjust the size of all of your shapes and text for you as you add or remove content. You may also resize your entire graphic and all of the contents will be resized accordingly.
In the Excel, Outlook, PowerPoint, and Word 2010 desktop applications we have added a series of improvements for SmartArt diagrams. First we looked at the editing experience and did work to simplify the process of creating a diagram that looks just the way you want it to. The second thing that we did was to increase your options when choosing a diagram by adding additional diagrams to our current types and by investing in a few new types as well.
Content Reorder and Image Improvements
One of the first things that we wanted to do was make it easier to see and organize your content. To this end, we added the ability to reorder your content and you can now insert or change your pictures via the text pane. I’ve called out the text pane in the screenshot below. Please note that in Office 2010 the SmartArt Text Pane will not have a bright red outline around it.
The images in the text pane represent images that appear in your SmartArt diagram. You may insert an image by clicking on the image icon either in the Text Pane or in your diagram directly. In the next screenshot you will notice that I have inserted four images with text for each image.
Another great improvement worth pointing out here is that my images did not get squished or stretched when I inserted them into my diagram. In Office 2010 we apply a crop to your image in order to preserve the aspect ratio of the image. After inserting your image, you may select the image, then go to the Picture Tools tab and enter crop mode to adjust your image. For our example, let’s adjust the image of the lighthouse so that we can actually see the lighthouse. I’ll select the image, then go to the Picture Tools tab and click Crop.
Here you can see that while in crop mode I can see the extra portions of the image that are not displayed in my diagram. I’ve clicked and dragged on the image itself to move it around so I can see more of the lighthouse. I’ve also enlarged the image for a zoomed in effect on the lighthouse.
The change is subtle but now we’re not staring at the rocky side of a cliff.
These pictures are nice but I would rather use pictures that are all connected in some way. Let’s create a picture layout with an image for each of the four seasons. I will click on each of the images in turn, and go to the Picture Tools tab. From the Picture Tools tab I will click Change Picture and select a new image for each spot. On a side note, each of the four images that you see below was pulled from the ClipArt gallery. Yep, those are ClipArt images.
Move Up and Move Down
Now that I have changed my images and the text associated with each I want the Fall image to be the large one. First, I’ll select the Fall image and go to the SmartArt Tools: Design tab.
With the Fall image selected, I will click Move Up until the Fall image is the largest on the screen. You will also notice in the above screenshot that in my Text Pane the Fall image is highlighted orange to show that it is selected.
Here is a close up of the left side of the SmartArt Tools: Design tab
Here is my diagram after clicking Move Up 3 times.
My text has moved with my image and you will notice that none of my images have become squished or stretched. Every image has an appropriate crop by default that I can customize if I wish.
It is important to know that Move Up and Move Down refer to the layout in the Text Pane. So for a SmartArt diagram that lays out its text and shape from bottom to top, Move Up will move your text up in the content pane but down on your slide. Here’s an example:
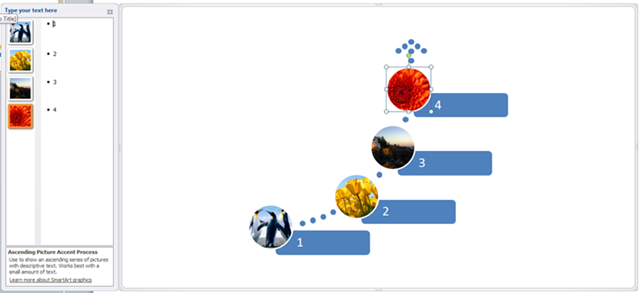
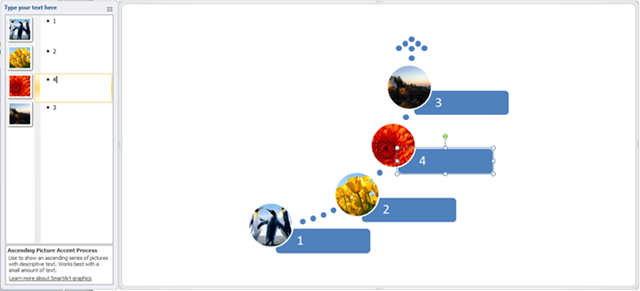
Here is a diagram that illustrates what I was attempting to explain. Notice that in my diagram the penguins are on the bottom while the chrysanthemum is on top. But in the text pane, the penguins are on top and the chrysanthemum is on bottom. With the chrysanthemum selected, I click Move Up and my diagram is reordered as such:
The flower moved down a slot in my diagram, but up one in my text pane.
New Diagrams
Picture Layouts
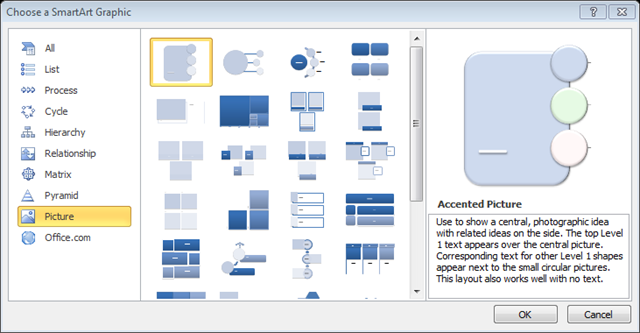
For Office 2010 we have added almost 50 new diagrams bringing our total number of SmartArt diagrams to over 130. We had a couple of goals in mind when making this investment. First, we wanted to round out our offering by addressing additional scenarios that we had not previously addressed. In the Insert SmartArt diagram dialog you will notice the addition of the Picture category.
Office 2010 will ship with over 30 diagrams built specifically to incorporate images into your documents. Some of these Picture Layouts were built to fit into a wide variety of situations while others were built with slightly more specific scenarios in mind. In a later post, I’ll talk about some of the reasoning behind our choices.
Popular Diagrams
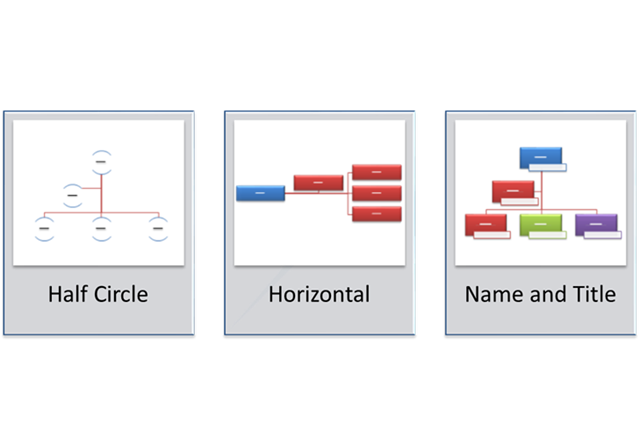
Our second goal in adding more SmartArt diagrams is to give additional choices for our most popular scenarios. One example of this is the Organization Chart, our most popular diagram. In Office 2007 we only shipped one Org Chart. An org chart is a hierarchy diagram that supports assistants. For Office 2010 we have added an additional 3 org charts including one that lays out horizontally.
We hope that by adding to our offering of diagrams that it will be easier for you to find a graphic that does what you need it to. So whether that means telling a story with imagery or creating yet another org chart for the boss, there are lots of diagrams to choose from. And if you need to customize your graphic there’s an option for that too.
Convert to Shapes
While we have done our best to provide you with a wide variety of diagrams sometimes it can be tough to find exactly what you need. In Excel and PowerPoint 2010 we have added Convert to Shapes for SmartArt diagrams.
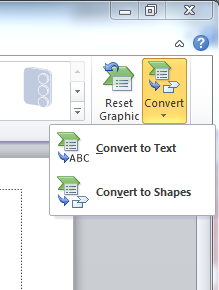
Here I have included a screenshot from PowerPoint 2010. The Convert to Shapes feature turns your SmartArt diagram into a grouped set of shapes that you can now customize. This allows you to move and size your shapes with all the freedom of our current drawing tools. This also makes it easier to apply custom animations to your graphics. It is also worth noting that Convert to Shapes is included with Office 2007 SP2. You can access this by right clicking on the bounding box of your SmartArt diagram and clicking Ungroup.
In the screenshot above you’ll also notice the Convert to Text option. This exists only in PowerPoint 2010 and, as the name implies, will convert your graphic from a SmartArt diagram to a bulleted list of text with just a single click.
With these changes and additions we hope you’ll find SmartArt diagrams easier to use and incorporate into your documents. If you have any questions or want to share your experience using the features mentioned in the post, please let us know. Thanks!
Comments
Anonymous
May 06, 2010
Some great improvements. It would be great that in a future release you add more data structures, such as a Directed Node-graph. Plus an extensibility system to add custom rendering structures for the data.Anonymous
May 07, 2010
I can't wait until we can link text or values inside SmartArt elements to Excel and Word, without having to convert to shapes.Anonymous
May 07, 2010
Thanks a lot! I'm learning to use SmartArt in Outlook 2010. Your post is helpfull to me.Anonymous
May 10, 2010
The comment has been removedAnonymous
June 14, 2010
I loved SmartArt in Office 2007. I can't find it in Publisher. Help!Anonymous
June 18, 2010
Quick Question...how can I edit the smart art after the fact. I just sent an email with smart art. Now when I go back to edit some of the text it is all locked up as a picture. How do I get it back to text so I can edit the letters?


