Deploy ASP NET Core from VSTS
ASP NET CORE framework has been introduced by Microsoft as the open source and cross platform framework to develop web based application. Most of the time it has been a requirement to deploy the ASP NET CORE application to Azure app service through VSTS and configure CI/CD.
Below i am discussing about how you can deploy the asp net core application using VSTS ( earlier VSO).
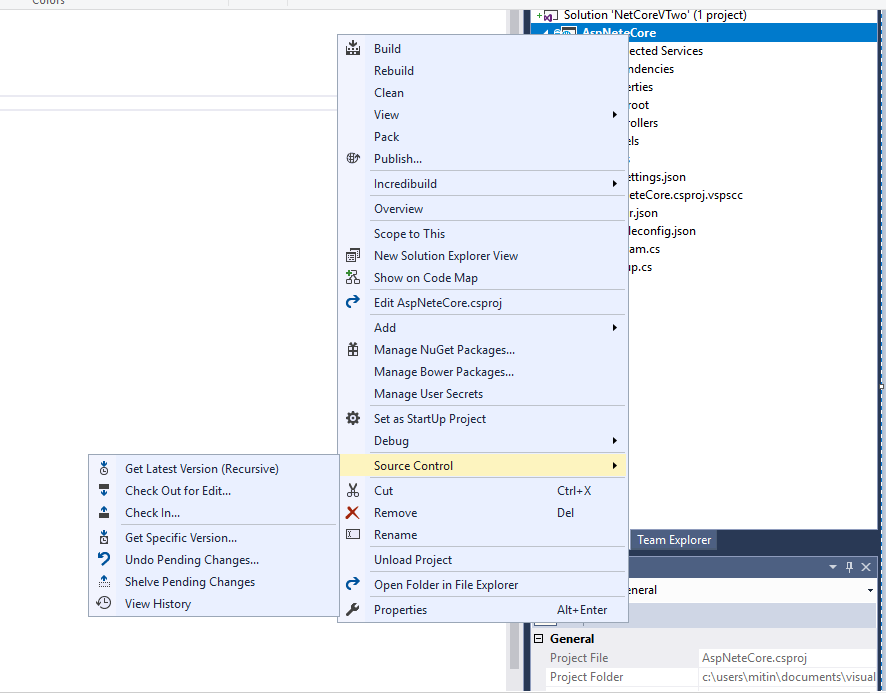
- Create the ASP NET CORE project form Visual Studio and link the project to the source control as shown below

- Open the repository in your VSTS account in the browser and migrate to your repository. Click the build and release tab. Click on New tab to add the new definition.

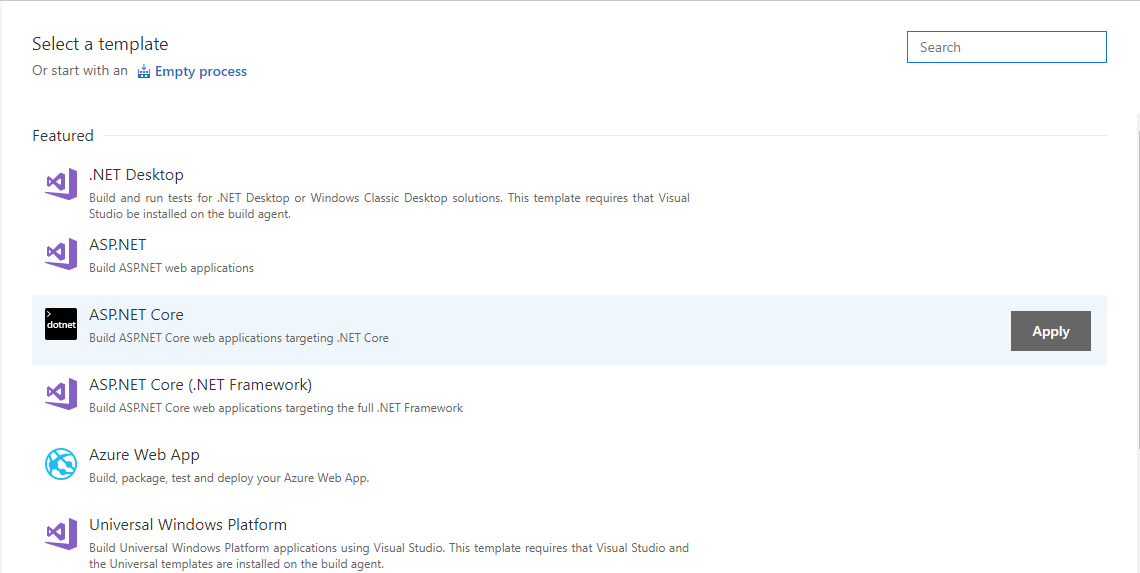
- You will see the list of predefined templates that are available, select the ASP NET Core as shown below and click apply.

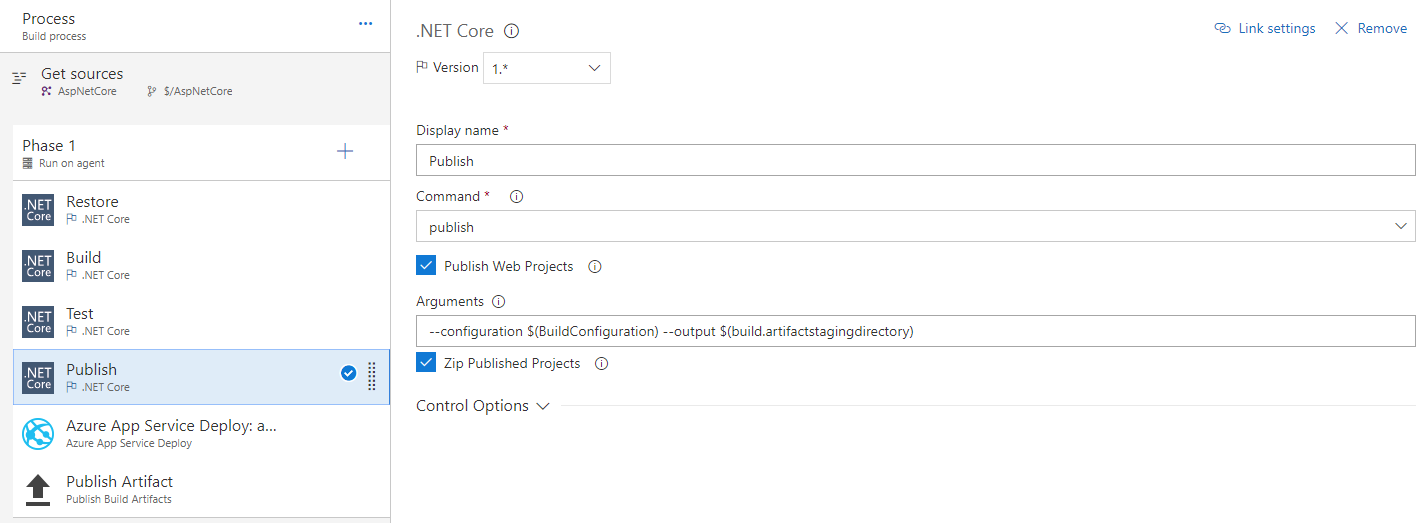
- You will see below default task being added in the definition.
- RESTORE : This task restore all your packages that are mentioned in the .csproj file the project.
- BUILD : It will select the .csproj file in the repository and start building the project using the dotnet executable. Remember since it is the ASP Net Core application it will detect only csproj and not .sln to perform the build operation.
- TEST: If you have any test project or library in the project then it will automatically detect the file and run the test methods in the project.
- PUBLISH: Itcompiles the application, reads through its dependencies specified in the project file, and publishes the resulting set of files to a directory, which will be published to Azure app Service. Check the arguments for the publish task that the output parameter is defined.

- If you have multiple csproj file you can specify the relative path in the publish task by unchecking the Publish Web Project and giving the path to the specific project in the box.
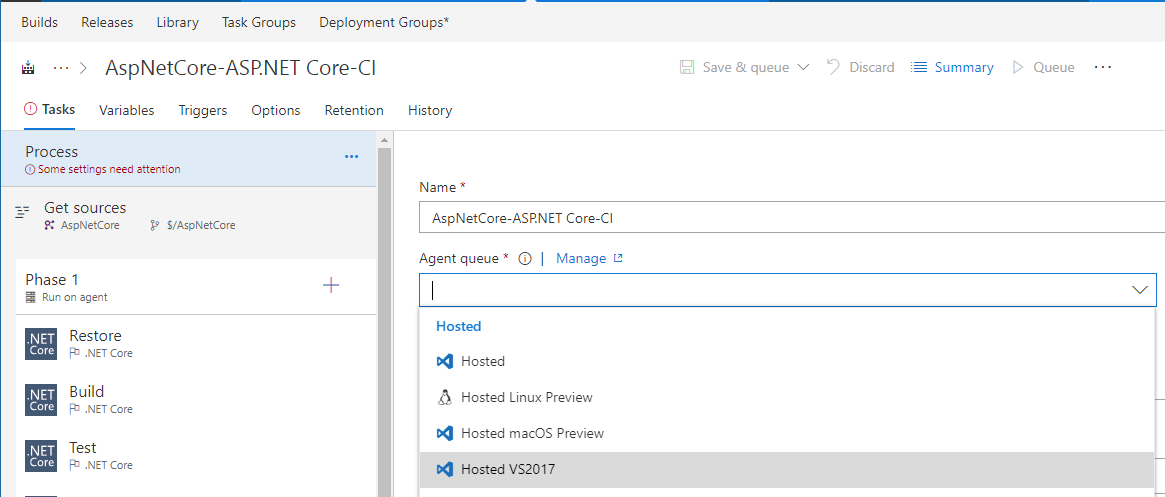
- Important step, you need to make sure that the hosted agent that is running is HOSTED AGENT 2017 in the process tab, otherwise you may get error in the build step that .csproj file is not recognized.

- Once done you need to add the Azure App Service Deploy task in the definition by clicking on plus sign. It should have below configuration and make sure that the Package/Folder value should be $(build.artifactsstagingdirectory)/**/*.zip.

- Once done Save and Queue the build to start the deployment of the application.
Successfully Deployed !!!