iTop (ITSM) in Azure Web App with AAD Authentication
IT Service Management (ITSM) tools help large IT organizations route and handle service issues and requests. iTop is an open source ITSM tool written in PHP. It uses MySQL as the backend database. In this blog, I will walk through the steps of installing iTop in an Azure Web App and configure Azure Active Directory (AAD) authentication. As an extra twist, I will deploy iTop in Azure Government, but use an AAD tenant in Azure Commercial; this is a scenario I have discussed previously. To make this demonstration a bit easier, we will use the in app MySQL feature of the Azure Web App. This may not be the right approach for a production system, but it will suffice for this demo.
Step 1: Download an re-package iTop
Download the latest version of the iTop source code from https://sourceforge.net/projects/itop/. In this example, I downloaded the zip archive iTop-2.4.1-3714.zip. Unzip the contents of that archive an re-zip the contents of folder web/ into a single zip file, e.g., web.zip. This is the package we will deploy to the web app using the Kudu interface (see below).
Step 2: Create a Web App and enable in app MySql
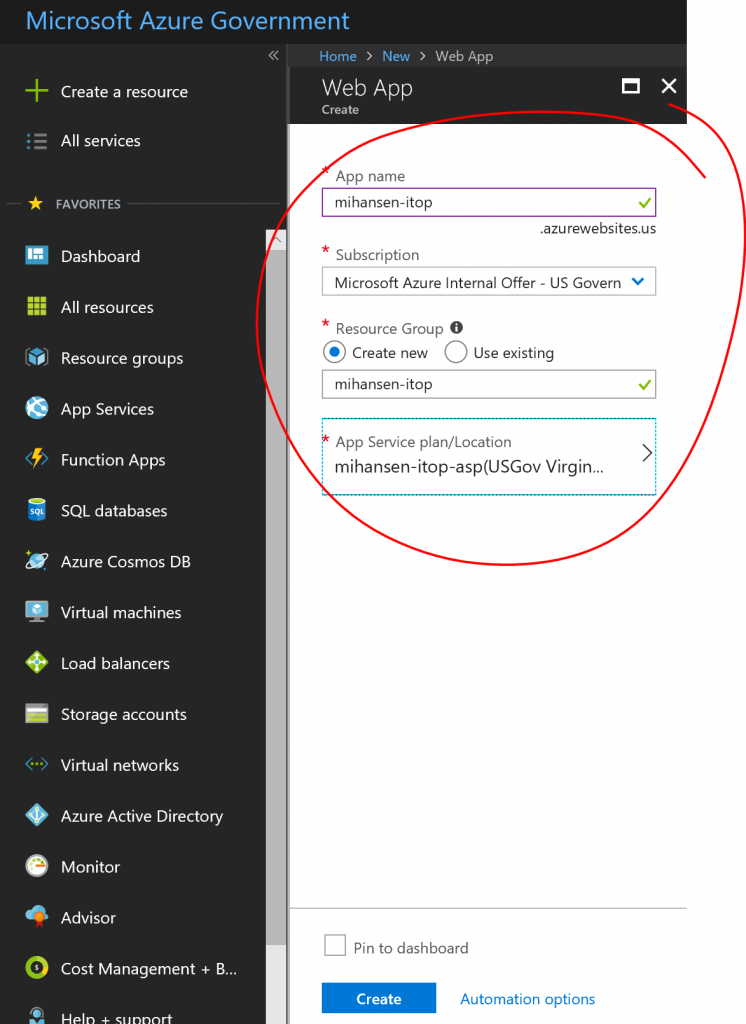
Through the azure portal, create a new web app. You should pick a reasonable size App Service Plan (e.g., Standard 2 or even a premium plan) since you will be hosting both the app and the database using the resources.
Enable the in app MySQL feature:
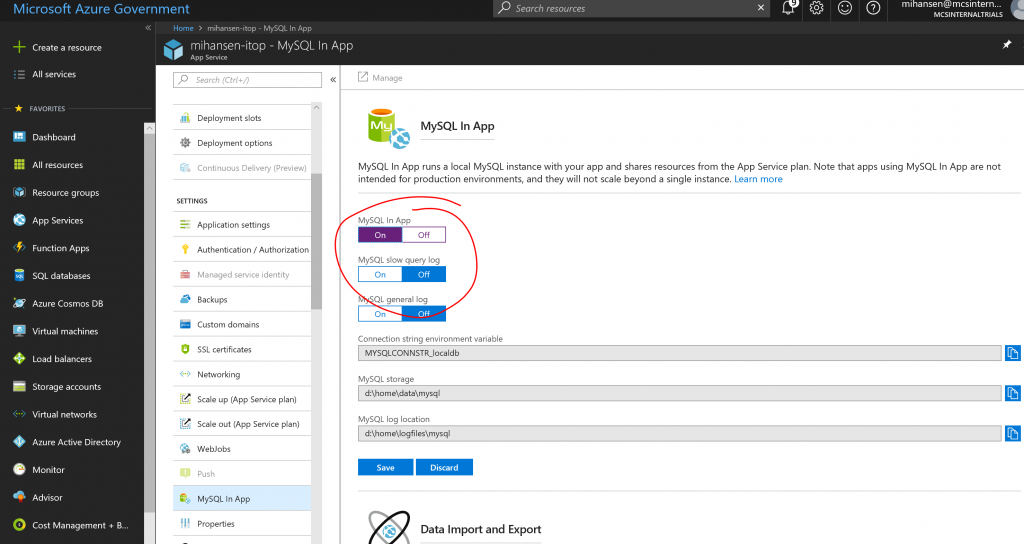
Before proceeding make sure you can access the URL of the web app itself and also try to hit the "manage" link for the MySQL database to access the phpMyAdmin interface to verify that you have access to the database. Finally open the Kudu console and locate the file with the connection string for the database, this is where you will find the username and password for the MySQL database. The connection string file can be found in D:\home\data\mysql:

Make a note of the username, password, and port in the connection string file (open the one with a *.txt extension). If you only see a connection string file with the *.ini extension, try to access both the site itself and the phpMyAdmin site first.
Step 3: Install and configure iTop
Copy the source code package (e.g. web.zip from step 1 above) to the wwwroot/ folder. This can be done in the Kudu console by picking zip deploy from the tools menu and dragging and dropping the zip file into the folder. After the zip file as been expanded, navigate to the website. Make sure you enter the website with HTTPS (not HTTP), since certain settings get populated during the installation with the website name and you will have SSL errors later due to mixed content if you don't get the web site URL set to the HTTPS version. The install wizard should be presented:
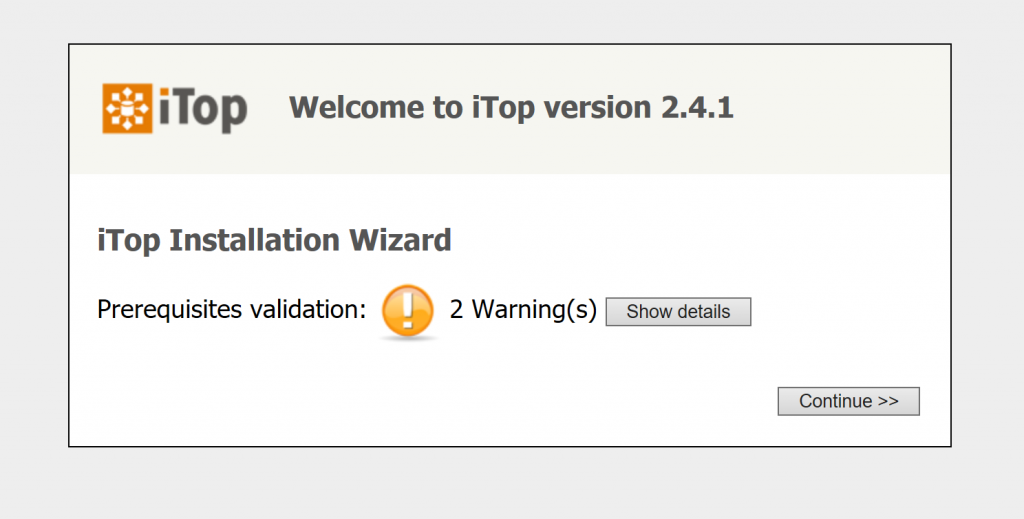
I will not walk through all the options in the wizard. Pick the setup you prefer for your organization or the demo you are trying to create. The most important screen is the database configuration:
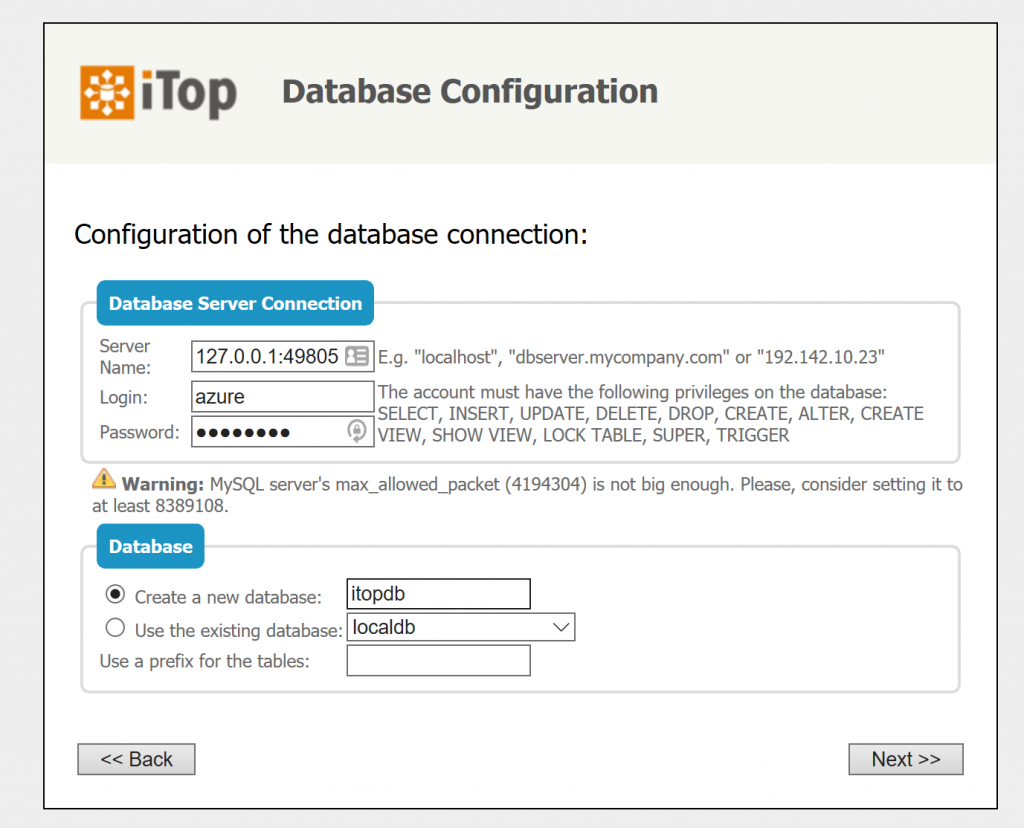
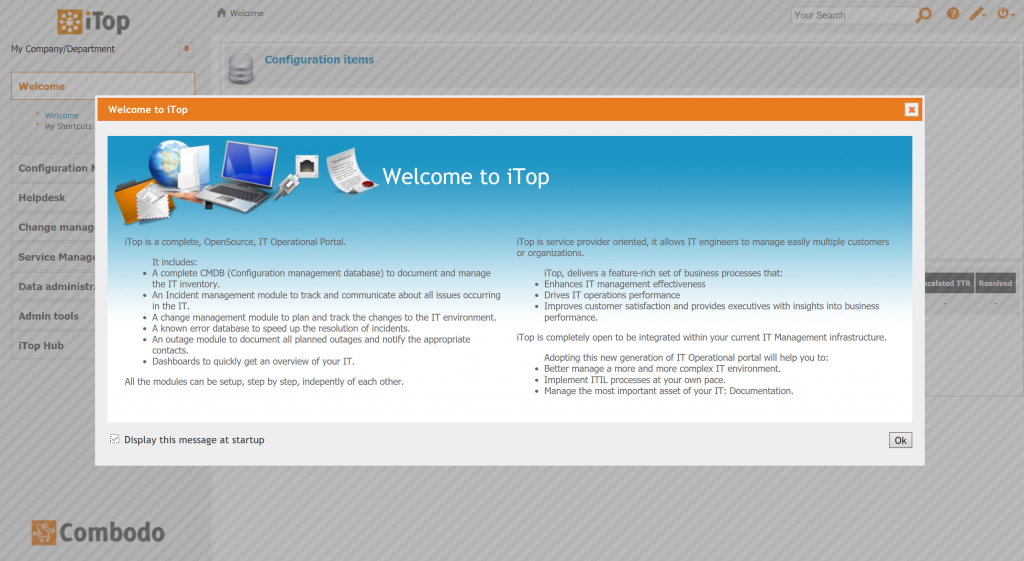
Use the settings from the connection string file mentioned above. After the installation is complete, you can enter iTop and you should see the welcome screen:
Step 4: Create AAD user with administrator privileges
In this demo, I will demonstrate how to leverage your organizations identities stored in Azure Active Directory (AAD). Please consult the iTop manual for details on user authentication options. We will leverage the support for external identities. The way that works is that for each organizational user you would like to grant access to iTop, you create an "external" user account and assign that user account one or more profiles with associated privileges. When the user is authenticated (with AAD easy authentication, see below), the user principal name can be found in the PHP environment variable $_SERVER['REMOTE_USER']. If external authentication is enabled in iTop and iTop finds an external user account with a username corresponding to the REMOTE_USER, it will use that profile.
Before switching on AAD authentication (below), you should create an external user corresponding to your user principal name and assign that user the Administrator profile. This is actually a two step process in iTop, first create a "contact" with name, email address, etc. and then create a "user account" for that contact. First create a new contact:

In Admin tools, hit "User Accounts" and create an external account. Use the contact that you just created and in the "login" field, enter your user principal name, e.g. user@myorg.com.

Under "Profiles", assign the "Administrator" profile to the user:

Save the user, and now you should be ready to switch on AAD authentication.
Step 5: Turn on AAD authentication
In order to enable AAD authentication you need to 1) create an app registration in the AAD tenant that you want to use and 2) add the app registration details to the web app. This can be done manually through the portal or with PowerShell. I have made a couple of PowerShell commands that make it a bit easier. They can be found in my HansenAzurePS module, which you can install with:
[ps]
Install-Module HansenAzurePS
[/ps]
You can read more about this module and using it for AAD authentication in this blog post. Once you have the module installed, first create an app registration:
[ps]
$siteUri = "https://ITOP-SITE-NAME.azurewebsites.us"
$appreg = New-AppRegForAADAuth -SiteUri $siteUri -Environment AzureCloud
[/ps]
Notice that the URL is in Azure Government but we are using Azure Commercial (AzureCloud) environment for the AAD tenant. Having both iTop and AAD tenant in the same cloud is of course possible as well, here I am just illustrating that you can mix and match to fit your environment. You will be prompted for your credentials to the AAD tenant when using this command. Next step is to add this app registration to the web app. Again, you can do this in the portal or use a tool from my PowerShell module:
[ps]
Set-WebAppAADAuth -ResourceGroupName RG-NAME `
-WebAppName WEBAPP-NAME -ClientId $appreg.ClientId `
-ClientSecret $appreg.ClientSecret -IssuerUrl $appreg.IssuerUrl `
-Environment AzureUSGovernment
[/ps]
After this, your web app should be asking for AAD credentials when trying to access your iTop deployment. I recommend opening a new incognito/private browsing window to make sure you don't have any cached credentials and attempt to access the iTop site the first time. Click in the top right corner to verify the credentials that you have signed in with:

Additional steps
This demo used the in-app MySQL database. There are some limitations associated with that. Most notably, you will be constrained by the resources that are available in a single instance of an App Service Plan. For a large enterprise deployment, this may prove inadequate. You should consider a dedicated deployment of MySQL for production. In Azure Commercial, MySQL is available as a managed service.
For every user in your organization that needs access to the iTop system - as users or administrators - you must create an external user profile and assign the appropriate profiles to them. Depending on the scale of your organization, it may make sense to make some custom changes to the source code to have the user accounts automatically created when an authenticated user without an account tries to access the system.
After playing around with the system a bit, you may also want to make a careful plan regarding which features you would like to use and in which configuration and then redo the installation.
Conclusions
This walkthrough demonstrates how to set up iTop ITSM in an Azure Web App. Additionally, it demonstrates that you can enable AAD authentication (Easy Auth) to leverage your organizations identities in the cloud. Let me know if you have questions/comments/suggestions.