New book: Microsoft Silverlight 4 Step by Step
 Russell Jones, editor of this title, here.
Laurence Moroney’s Microsoft Silverlight 4 Step by Step , now available, walks you through the basic procedures you need to know to program in the latest Silverlight release—and you’ll need that Silverlight knowledge to program Microsoft’s new Windows Phone 7. Chapter 11, “Windows Phone Development” shows you how to get the tools you’ll need and how to get started building phone applications. Read an excerpt now!
Chapter 11
Windows Phone Development
After completing this chapter, you will be able to:
· Locate, download, and install development tools for building Windows Phone applications.
· Build a basic Windows Phone application.
· Build a real-world Windows Phone application that retrieves and displays nearly-current stock quote data from a Web service.
Your Silverlight skills aren’t refined to the browser or the desktop. Starting with Windows Phone 7, you can use Silverlight to build rich mobile applications. In this chapter, you will see how to get and use the tools to build your first Windows Phone applications.
You can download the necessary tools from the Windows Phone Developer site, which is located at https://developer.windowsphone.com. This chapter is based on the Community Technical Preview of the tools. If you have a later version of the tools, you may see some differences. If you get stuck, visit the homepage for this book at https://www.microsoft.com/press where you’ll find updates to breaking changes.
Getting Started
In this section, you will download and install the free tools that you need for Windows Phone development. The tools are:
· Visual Studio 2010 Express for Windows Phone This is the main tool that you’ll use for designing, coding, and debugging Windows Phone applications.
· Windows Phone Emulator This is actually a virtual machine that runs the real Windows Phone operating system. Therefore, you can be sure your applications will run on the hardware—even if you don’t have the hardware to test on yet.
· Silverlight for Windows Phone This is a build of Silverlight that works on Windows Phone. It is the same Silverlight as used in the browser and on the desktop, so the skills you have acquired thus far will still apply to Windows Phone development.
· XNA 4.0 Game Studio Games are a huge part of mobile development. This tool is a new version of the popular XNA Game Studio used for Xbox and Zune development. You can use it to build Silverlight-based games for the Windows Phone too! Building games is beyond the scope of this book, but the tools are available for you to explore on your own.
Get the tools:
1. To get started, visit https://developer.windowsphone.com and click the Download The Tools Today link.
2. This will take you to the developer home page, where you can view a demo, read documentation, and download samples. For now, click the Download The Developer Tools link.
3. You’ll see a download page where you can get an installer that will install Visual Studio 2010 Express, Windows Phone Emulator, Silverlight, and XNA Game Studio 4.0.
4. Download and launch the installer using the link at the bottom of the download page and you should see the license agreement. If you agree, click the Accept button to continue.
5. Click the Install button. The installer will download and install each of the components. This may take a few minutes.
6. When the installation completes, you should see the following screen. You’re now ready to begin building your first Windows Phone application.
Write Your First Windows Phone Application
Now that you have the tools, you’re ready to build a Windows Phone application. Here’s a step-by-step example that shows you what’s involved.
Build a basic Windows Phone application:
1. Launch Visual Studio 2010 Express for Windows Phone.
2. From the File Menu, select New Project.
3. Name the new project SbSCh11_1 and press OK.
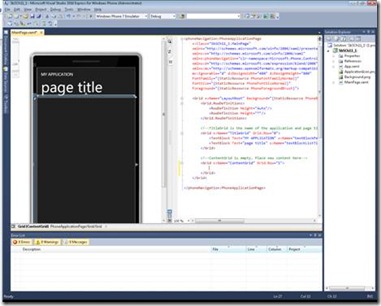
4. Visual Studio will create the solution. The designer window provides a phone “skin” to help you design the look of your application. Note that this is not the emulator—you’ll see the emulator shortly.
5. Open the Toolbox and add a TextBlock, a TextBox, a Button, and another TextBlock. When you’re done, you should see something like this:
6. You can drag the controls around to tweak the layout. You can also use the Properties window to set such properties as Font and FontSize, as well as to change the contents of the controls. Try laying out the controls so the UI looks like this:
7. Notice that there’s a separate Grid for the application and page title. Nonetheless, that’s XAML and you can easily edit it. To do so, you can replace the two TextBlocks that Visual Studio generated or you can just edit the text in the existing TextBlocks. So, for example, you could change the top grid contents using XAML like this:
<!--TitleGrid is the name of the application and page title-->
<Grid x:Name="TitleGrid" Grid.Row="0">
<TextBlock Text="My First Phone Application" x:Name="textBlockPageTitle" Style='{StaticResource PhoneTextPageTitle1Style}'/>
<TextBlock Text="Hello, World!" x:Name="textBlockListTitle" Style='{StaticResource PhoneTextPageTitle2Style}'/>
</Grid>
8. Double-click the Button to create an event handler, which will be called button1_Click. Next, edit this event handler so it contains the following code:
private void button1_Click(object sender, RoutedEventArgs e)
{
textBlock2.Text = "Hello " + textBox1.Text;
}
9. Press F5 to run your application. It may be a little slow the first time you launch it, because the emulator needs to launch and it needs to load the virtual image of the operating system. Remember, this is a full version of the Windows Phone 7 operating system—so this is more than just a simple emulator!
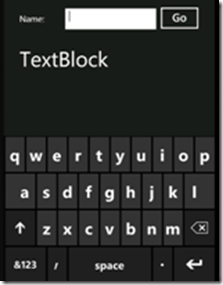
10. When the application is running on the emulator, place your cursor in the text box. The virtual keyboard will appear, giving an exact representation of the behavior you would experience on a real phone.
11. Type your name into the text box and press Go. You’ll see the second TextBlock update to say “Hello” followed by your name.
12. You can also debug your applications as they run on the phone or the emulator. To try this, switch back to Visual Studio while the application is still running in the emulator. Find the following line of code: textBlock2.Text=”Hello” + textBox1.Text and press F9 to put a breakpoint on the line. You’ll see a red dot in the margin and Visual Studio will highlight the code in red.
13. Now switch back to the emulator and press the Go button again. This time, Visual Studio will stop on the line you highlighted in the previous step. As you can see, you have complete access to debugging your applications while they’re running in the emulator.
14. Press F5 to get out of debug mode and continue running the application.
15. The emulator supports both portrait and landscape modes. You can test to see how your application looks in either mode by using the orientation buttons to the right of the emulator. Here you can see how your application looks in landscape mode.
Note: You don’t need to close down your emulator when changing between Visual Studio projects. In fact, if you leave it running in the background, the emulator will respond faster when you deploy new applications to it for testing.
Build a Service Client in Windows Phone
The simple “Hello, World” example is all very well, but it functions in isolation. Modern phones like the Windows Phone are usually connected to some form of data plan to give them Internet access. So here’s a look at building an application that consumes a service—in this case, a stock quote service that provides basic stock quote data.
Create the Solution and Add the Service Proxy
In this section, you’ll see how to build a Silverlight-based Windows Phone client that uses a stock quote Web service. For this task, you can use the Web service available at https://www.webservicex.net/WCF/ServiceDetails.aspx?SID=19. It provides that provides quotes that are delayed by 20 minutes.
Build a connected service:
1. Create a new Windows Phone application and name it SbSCh11_2.
2. In Solution Explorer, add a reference to the System.Xml.Linq namespace.
3. You can automatically create a proxy class to the Web service using Visual Studio if you know the location of the Web Services Definition Language (WSDL) file for the service that you want to consume. Fortunately, the stock quote service’s WSDL is published at https://www.webservicex.net/stockquote.asmx?WSDL .
4. Right-click Service References in Solution Explorer and select Add Service Reference.
5. In the Add Service Reference dialog box, set the address to https://www.webservicex.net/stockquote.asmx?WSDL and click the Go button. Visual Studio will find the StockQuote service. In the Namespace field, give the service the name StockService.
6. Click OK and Visual Studio will create a proxy class for communicating with this service. It will also add the new class to the Service References folder.
7. You now have all the pieces in place to consume the service. In the next section, you’ll build a user interface to interact with the service.


