Groups based upon OU Membership
The Computer Group that I created as part of the initial authoring series grouped together computer objects that were running a specific application. If you haven't read that yet and are new to MP Authoring then I suggest you check out the original article as it runs through the basics of creating a key for sealing the management packs and creating some classes.
This is the Membership Rule got that article - a group of computer objects that are hosting the application "GD.Application.Server":
<MembershipRule>
<MonitoringClass>$MPElement[Name="Windows!Microsoft.Windows.Computer"]$</MonitoringClass>
<RelationshipClass>$MPElement[Name="SC!Microsoft.SystemCenter.ComputerGroupContainsComputer"]$</RelationshipClass>
<Expression>
<Contains>
<MonitoringClass>$MPElement[Name="GD.Application.Server"]$</MonitoringClass>
</Contains>
</Expression>
</MembershipRule>
What happens if you want Computer Groups Based on other criteria? Well, let me know what you want and I’ll do my best to put up some Code Fragments. First in the queue was a request to be able to create a computer group based upon OU. In this case, all computers in OU’s containing the name Prod
Here you’ll see the membership rule is a little more complex and the requirement was to look for all computers in OUs with Prod in the name (“ContainsSubstring”). It can be used for computer group membership based upon any computer object property by changing just the property we are using as our criteria (in this case “OrganizationalUnit”) and the <Pattern>Prod</Pattern>
<MembershipRule>
<MonitoringClass>$MPElement[Name="Windows!Microsoft.Windows.Computer"]$</MonitoringClass>
<RelationshipClass>$MPElement[Name="SC!Microsoft.SystemCenter.ComputerGroupContainsComputer"]$</RelationshipClass>
<Expression>
<RegExExpression>
<ValueExpression>
<Property>$MPElement[Name="Windows!Microsoft.Windows.Computer"]/OrganizationalUnit$</Property>
</ValueExpression>
<Operator>ContainsSubstring</Operator>
<Pattern>Prod</Pattern>
</RegExExpression>
</Expression>
</MembershipRule>
If you are following along with the series, you’re used to me using empty fragments rather than the Visual Studio Wizards.
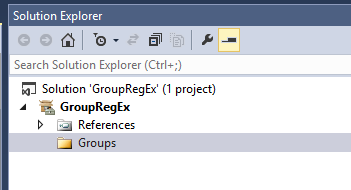
I've already got a project created and I've added a folder called Groups
I then add a new item of type Empty Fragment
And here is the full fragment that you just need to copy and paste between the <ManagementPack> fragment tags.
Also, here for the Health Service Watcher Group - this will nearly always be relatively straight forward. It is essentially the same code each time - just change the class namespace and the computer group that gets referenced.
Build the Management Pack to make sure there are no errors and then make sure you seal it as part of the export - all of this I have covered in previous blogs.
I have included dependency roll up monitors so that the health of the group represents the worst state of any of the group members. This makes it easy to add the group to a State Widget.
Note! Just to be clear about any confusion with the group membership rule. This does not query AD for OU information. This is pulling back properties of the computer that SCOM has discovered. So if you move a computer between OU’s the computer group membership will only update after the next windows computer discovery runs on the agent.
And a second note, if you are just looking to find a specific value rather a substring then you can replace the lines between <Expression> </Expression> with:
<SimpleExpression>
<ValueExpression>
<Property>$MPElement[Name="Windows!Microsoft.Windows.Computer"]/ActiveDirectorySite$</Property>
</ValueExpression>
<Operator>Equal</Operator>
<ValueExpression>
<Value>ABC</Value>
</ValueExpression>
</SimpleExpression>
Disclaimer:
All information on this blog is provided on an as-is basis with no warranties and for informational purposes only. Use at your own risk.
The opinions and views expressed in this blog are those of the author and do not necessarily state or reflect those of my employer.


