Making word clouds (Part 2: how to use it , and clouds from twitter).
Attached to this post is a Zip file containing Twitter.ps1 the PowerShell script I use to get information from Twitter, and since the word cloud work grew out of that it has ended up in the same file. It also contains noise.dat the list of noise words which you can customize.
If you want to use it you will need to have PowerShell V2 installed – if you are on Windows 7 or Server 2008-R2 you have it already, otherwise you need look up KB968929 and you can download WINRM and PowerShell 2.0 for anything back to Windows XP. The code has been tried on the Beta of office 2010 and on office 2007 and should work with PowerPoint from earlier versions but hasn’t been tested.
 The first thing you need to do is to load it , any version of Windows form Vista onwards flags files which have been downloaded from the internet and PowerShell can be a bit fussy about those. I suggest that you when you have downloaded the ZIP file you right click it go to properties and click Unblock on the general page before you extract the files. Once you have extracted the files start PowerShell and you need to enter two commands
CD [folder where you extracted the files]
. .\twitter.ps1
note that is Dot, space, dot backslash twitter.ps1: it won’t work without the dots.
I have included a sample file, Macbeth.txt to get you started, it is the text of… the Scottish play. So you can now type the command
Format-wordCloud Macbeth.txt
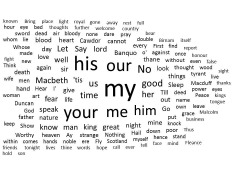
 PowerPoint should start in the background and it will put together your first word cloud. The text for this will be all horizontal, all default colours and fonts and all words and no phrases. The biggest text will be 80 point and the smallest 16 – if your example turns out like the first one of mine you can see that we might want to change the
 –maxfont and –minfont settings or the –howmany parameter to fill the space better. When it finishes the function gives a fill percentage – that is: the total space occupied by the words as a proportion of the slide area. Mine came out at just under 50% , and experience tells me not to expect more than 75% so I might increase the font size to –maxfont 100 –minfont 20 as there are plenty of words - I don't want to fill the space with more words.
It’s not bad for a first attempt , but it has my, our, your,his, me , him , us and No too prominently, these can be taken out with the –extraNoisewords parameter,like this:
Format-wordCloud macbeth.txt -ExtraNoiseWords my, our, your,his, me , him, us, no
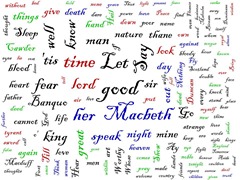
We can introduce some colours – if you enter the this command it will show you what the colour selections are
$RGBSet
The colours numbers are Red + 256 * Green + 65536 * Blue , so the default is 4 black, 1 red, 1 green , 1 blue.
In addition we can make about 25% of the words appear vertical, and use a font which looks right for Shakespeare
Format-wordCloud macbeth.txt -ExtraNoiseWords my, our, your,his, me , him -RandomVertical 0.25 -RgbSet $rgbset -fontName "Blackadder ITC"
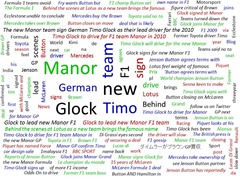
 The final thing to try might be to look something on twitter. It takes several seconds to run a twitter search for the last 1500 posts (that’s the –Deep switch) so it is better to store the result, in case you want to run with a different set of parameters so let’s see what is in showing up in the F1 world today, first get the tweets , the put just their titles into the cloud.
$searchResults = Get-TwitterSearch "F1" –deep
$searchResults | Foreach {$_.title} | Format-wordCloud -phrases -RandomVertical 0.25 -RgbSet $rgbset –uniqueLines –maxfont 60
The -uniqueLines switch is there for something which I have mentioned before – the tendency of people to retweet an identical post many times – you can spot this happening when a long phrase becomes very prominent, which is often the case if a couple of news stories dominate a search, even with this in you can a few stories are repeated in slightly different forms.
I can’t show everything here. Obviously you can do a lot once the slide is created in PowerPoint: one favourite trick is to do select all and set the animation for every bit of text to Appear 0.1 second after previous. I tweaked the colours and layout for the F1 tweets from twitter in PowerPoint as well. I haven’t shown –randomtwist (the value is the maximum angle of twist in degrees), but that needs a lot more fiddling after the layout is done. Nor have I shown -randombold or -randomItalic which work just like random vertical – (phrases are always in italic). No two layouts which use any of the Random parameters will be identical, and sometimes it is worth running the format again with the –useExisting switch(and no filename –text or piped data) to see if you a second one looks better than the first.
You can export $words to a csv file with $words | export.csv –path MyWords.csv , and modify it in excel or use it as a template for your own text. If you do you’ll notice there is a URL column – you can assign links to the text if you want to. Once you have the text you want as a CSV file you can reimport it with $words = import-CSV MyWords.csv and run format-wordcloud with the –useExisting switch
As you can see there’s lots to play with. PowerShell seems quite happy to process very large amounts of text – I got the text of War and Peace and it took a while to process the words but it worked just fine. So try your own text and combinations of settings. But let me stress the disclaimer that covers everything here – it is provided "AS IS" with no warranties, and confers no rights.