How to create UI prototypes with Visio
An important part of design and usability is building UI prototypes so that you can explore different visual models and test the designs with real users. Sometimes the simple process of clicking through screens in a prototype can reveal inefficient visual models or difficult tasks that can be made easier.
For my prototypes, I like to use Visio. Visio makes it easy to rearrange a layout, create a click-through, and the professional version comes with the Windows XP User Interface template which has pre-built shapes for windows, text boxes, scroll bars, buttons, radio buttons, and check boxes.
Here's some quick steps to get you started making UI prototypes in Visio.
Create a new Visio document
If you have Visio Professional, I like to start with the Windows XP User interface template. Otherwise, you can start with Basic Flowchart.
Set the Page Orientation and Title
If the default page size is not already in landscape, you can fix this by Creating a new page from Insert > New Page ... and from the Print Setup tab, select landscape. This will make the page resemble the format of a computer screen.
You will also want to rename the page from "Page-1" to something more descriptive like "Home". If you keep the number, Visio will automatically renumber pages when earlier pages are deleted, which can mess up the click through later on.
Create the Containing Window
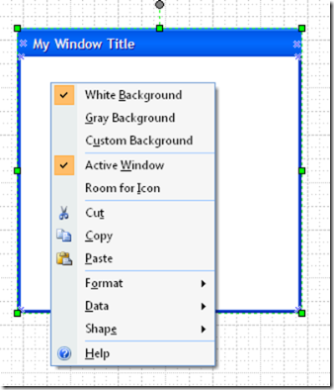
If you are building a client application and are using the Windows XP User interface template, you can drag the Blank form shape (Windows and Dialogs group) onto the page. You can then size it, change the title, and change properties like the background color:

If you are creating a web application, you'll need to do a little more work. You'll start with a screen shot and edit it to look like a blank window. For example, if you want the window to be Internet Explorer, open IE to the desired size on a blank page such as about:Blank. Then, select the window and press alt-PrtSc (the print screen button is usually next to the Pause button on your keyboard in the upper right). Now, open up Paint and ctrl-v to paste the screen shot.
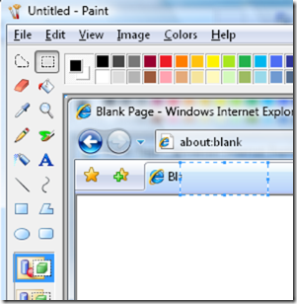
Now you'll want to tidy up the image by deleting the url from the address bar and clearing the text on the tabs. As you'll notice, the tabs have a gradient. An easy way to clear over this is to highlight a part of the gradient with no text, and then drag the handle bars:
Once your image is ready, select it, copy it, and paste it into Visio.
Add shapes
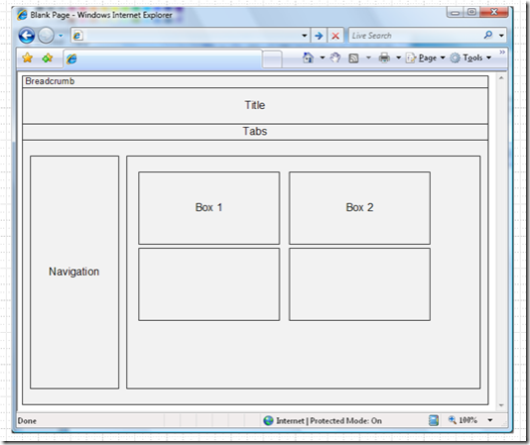
Now you can start your design. In the early stages, you can use simple rectangles to represent the design elements. Once you're more confident about the design, you can use the technique above to reuse elements from screenshots.
Rearrange shapes
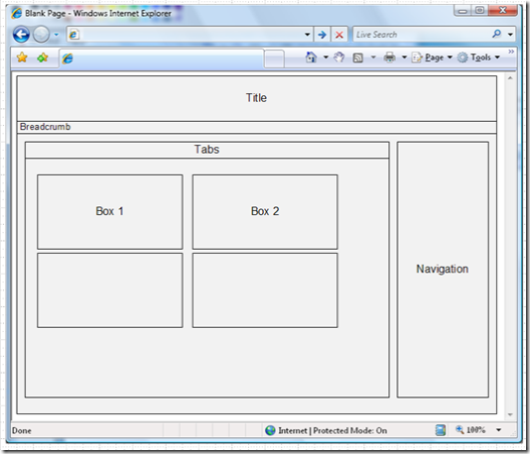
Now you can really start to have fun. drag the items around, try switching vertical elements to horizontal elements, change the order of elements.
If you're having trouble selecting the right elements, try clicking in an area where there are no shapes and drag onto the main area.
Create a new Page
When creating a prototype, we'll need a separate page for each step in the click through, such as opening a menu or browsing to another page.
Create a new page from the Insert > New Page menu, and give it a new name.
Copy shapes from the first page into the new page
Visio will always paste shapes into the center of the screen, so you'll need to make sure that your page is centered before pasting. You can do this from the Zoom menu, or directly add the "Whole Page" button to your toolbar:
Now, ctrl-a, ctrl-c on the first page, and on the second page, zoom to Page, and then ctrl-v.
Now you have two duplicate pages, and you can edit the second page to make the changes for the next step.
Add Clickable areas
Now we can make different shapes clickable by adding hyperlinks. Select the shape and press ctrl-k, or choose Insert > Hyperlink.
In the Sub-address box, type the name of the page that you want to link to, or click on Browse... to choose the page from a list.
The hyperlinks won't work in normal editing mode, but when you go into full screen mode by pressing F5, you can use the hyperlinks.
Save and Export
A lot of the time you'll want to share these prototypes. A good way to do this is to save as a web page:
Happy Prototyping!
Comments
Anonymous
February 28, 2007
But what about expression blend?! ;)Anonymous
June 26, 2007
Hi, I'm trying to create an application.
- When will Vista UI shapes become available?
- How can I edit the container window "blank form" from the XP library? It won't let me ungroup to see how they set up the controls.
- How can I create my own container window for an application that can resize without distorting the header? I've been looking for these answers everywhere. If you have any info, that would be great!
Anonymous
June 26, 2007
To further clarity, I am creating a shape library so that others can prototype using the shapes i create for them.Anonymous
October 17, 2007
Hey, is it possible to import the XP UI Shapes into the Visio Standard 2003 Version or do i have to bye the Professional Version. Thanks for your answer. StephAnonymous
June 23, 2008
I'm also looking for information about Visio Shapes. If you are building a download pack or know when Microsoft will have these, I'd love to hear about it.Anonymous
November 06, 2008
Hi Jackie, Great tutorial: Simple, progressive, and with some great tips. More please! ;)Anonymous
March 16, 2009
Nice use of windows dialogs. But I tend to use powerpoint for prototypes, why? because of masterpages and mouseover and mouseout. Can visio do these?Anonymous
May 21, 2009
Visio uses Background and Foreground layers, much like Powerpoint's masterpages. You can also move a clickable shape into the stencil and use it whenever you need it.


